mini0806 design flaw

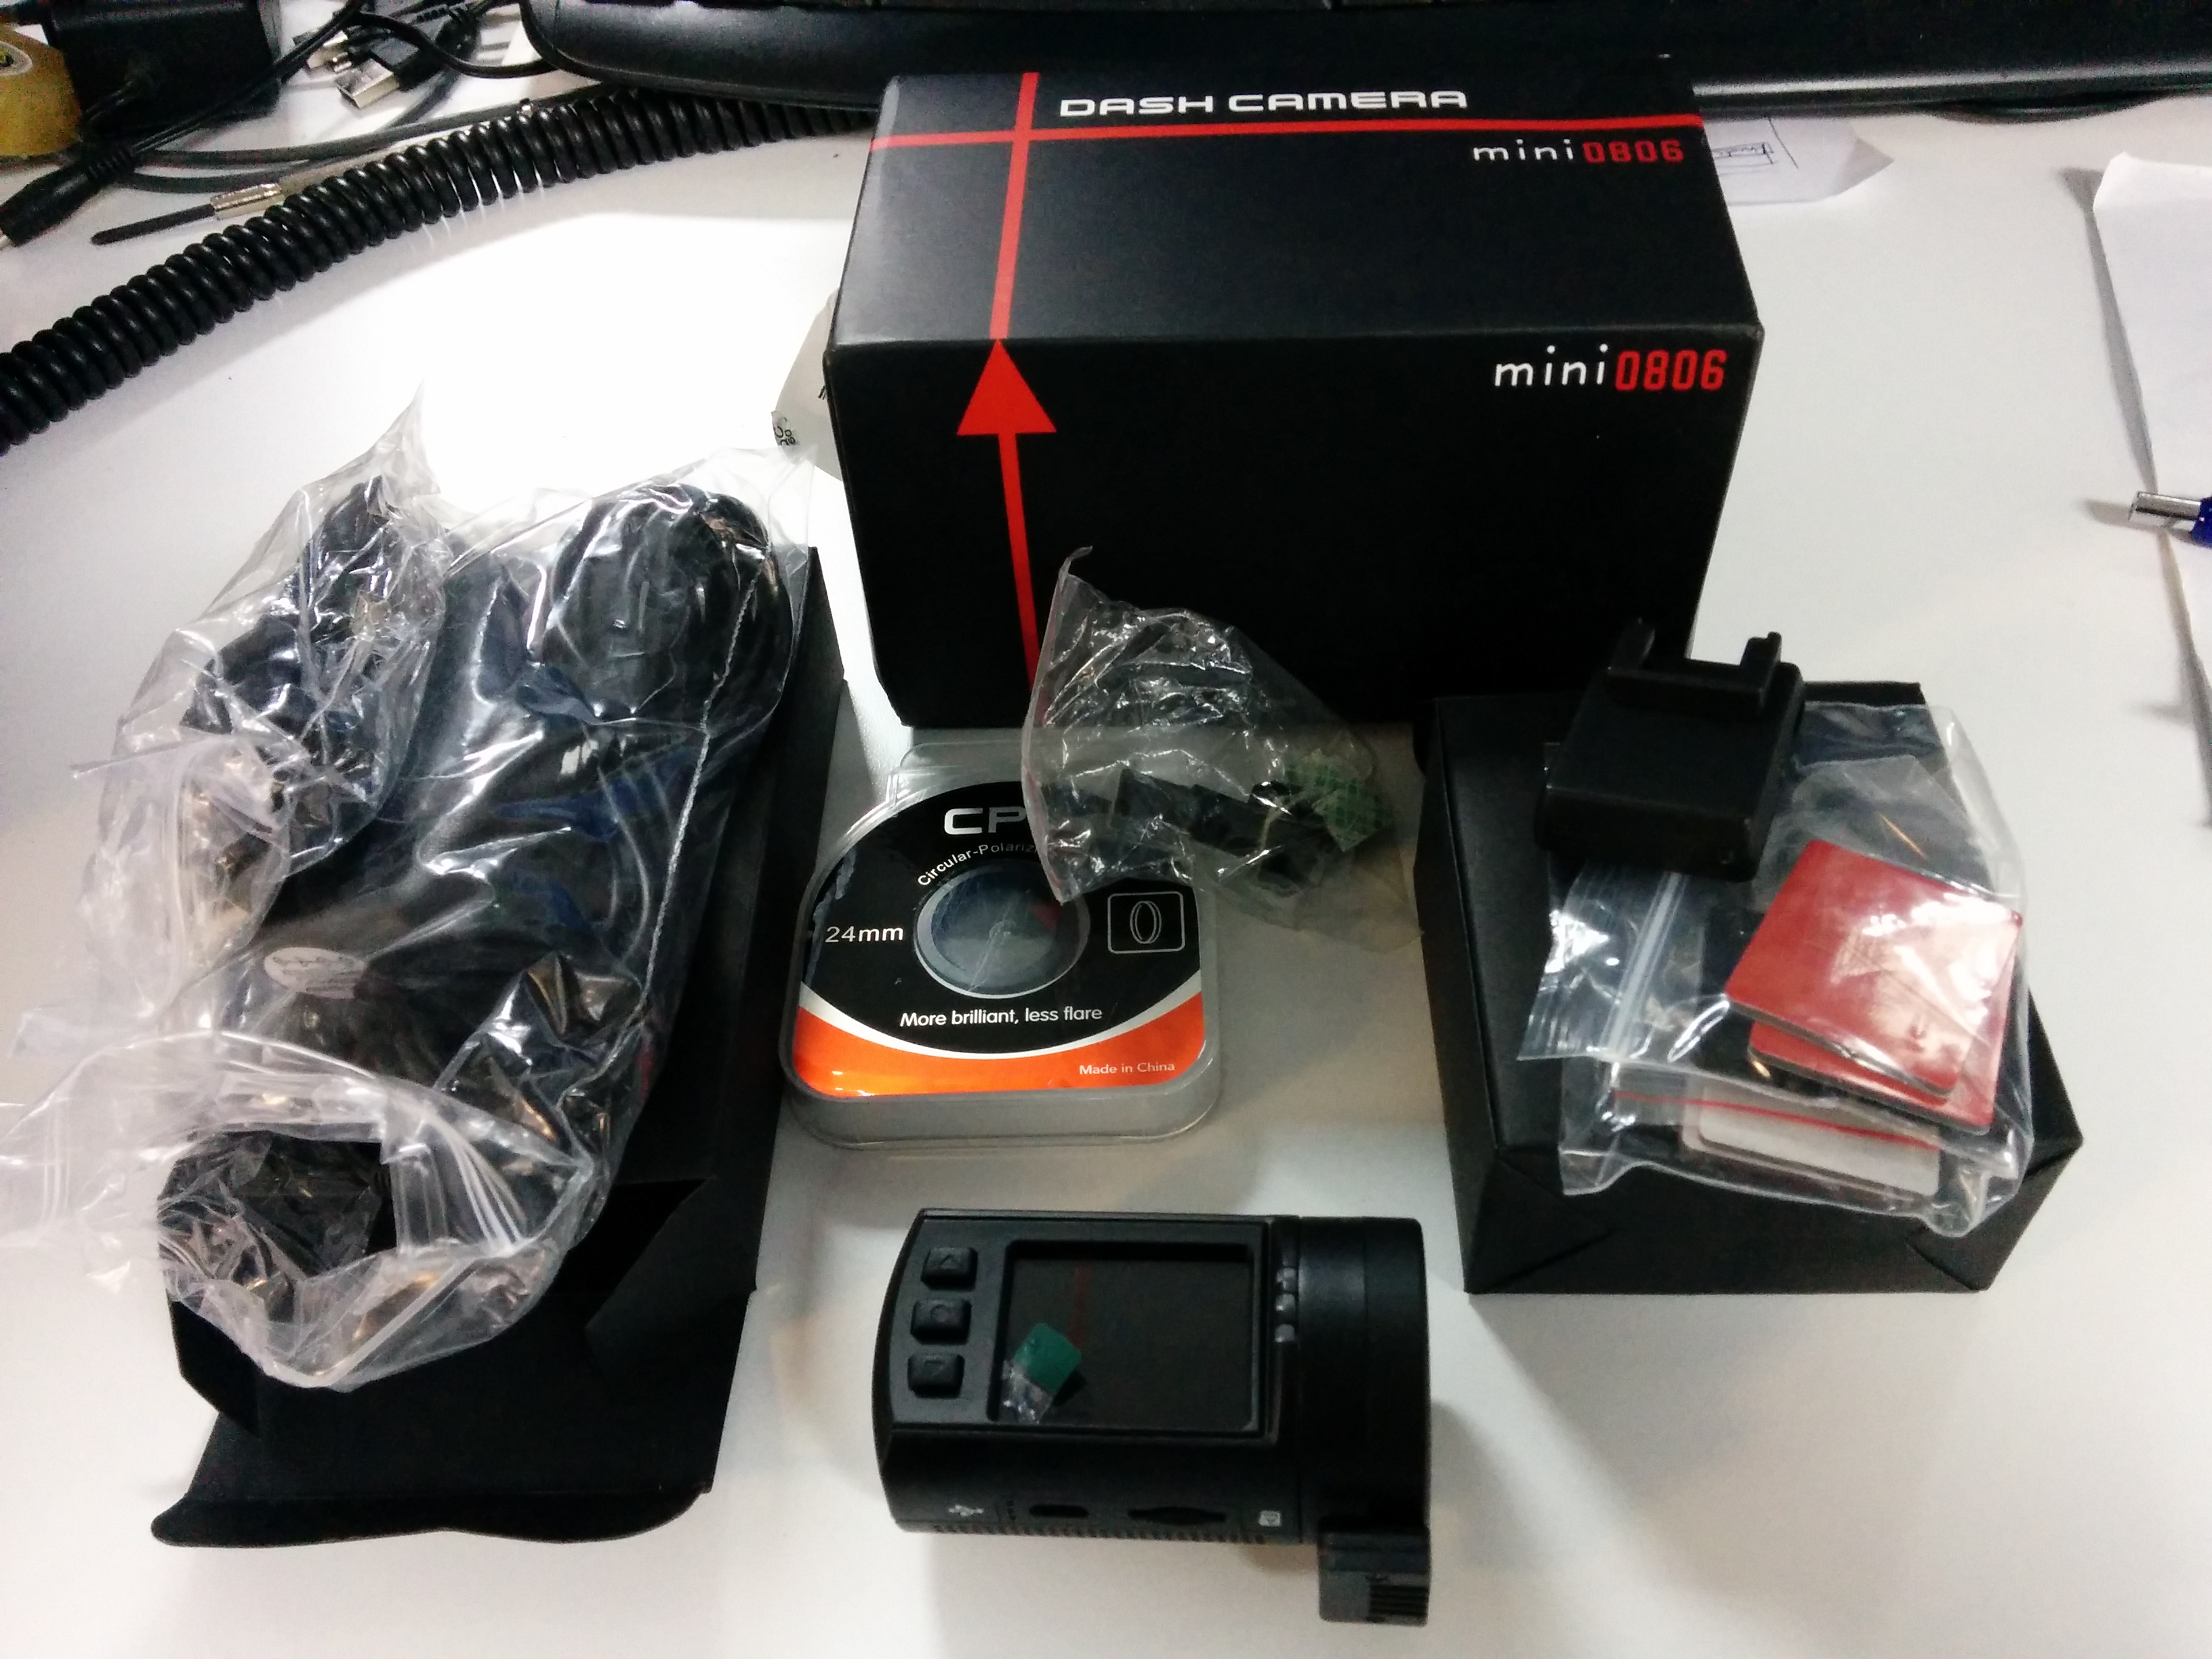
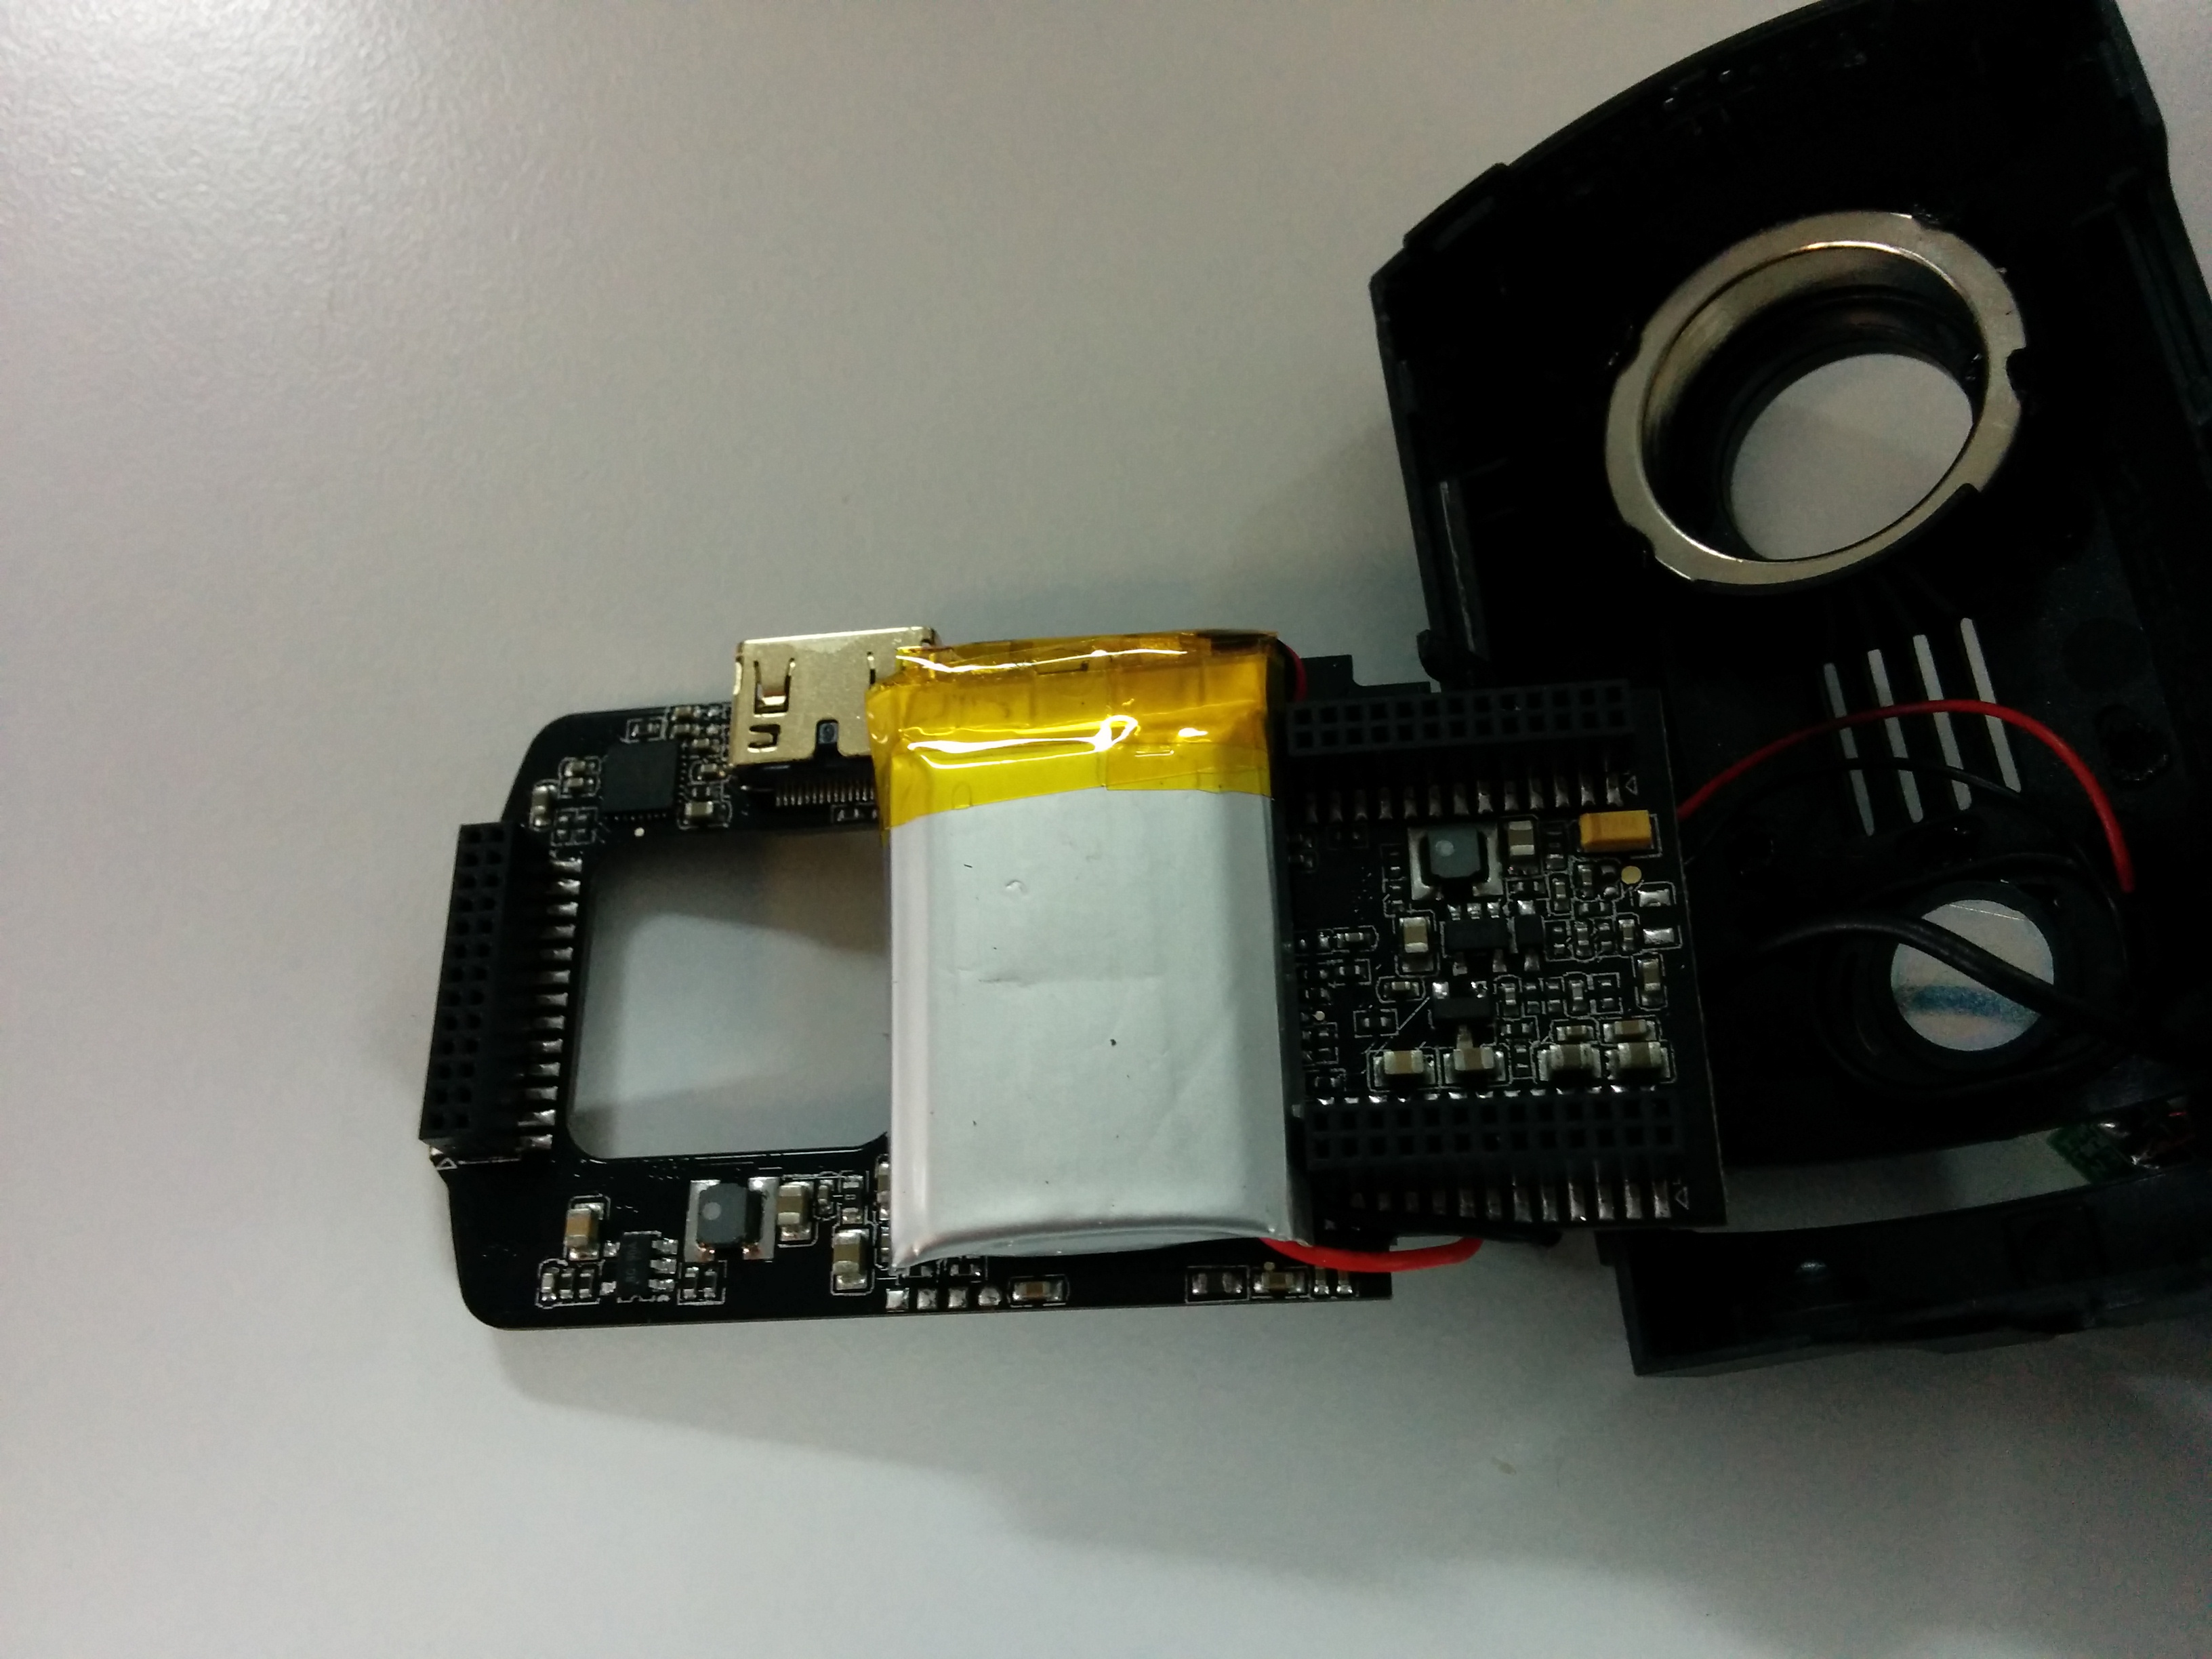
Alternative title: why my mini0806 was crashing and stopped working after a light drop.

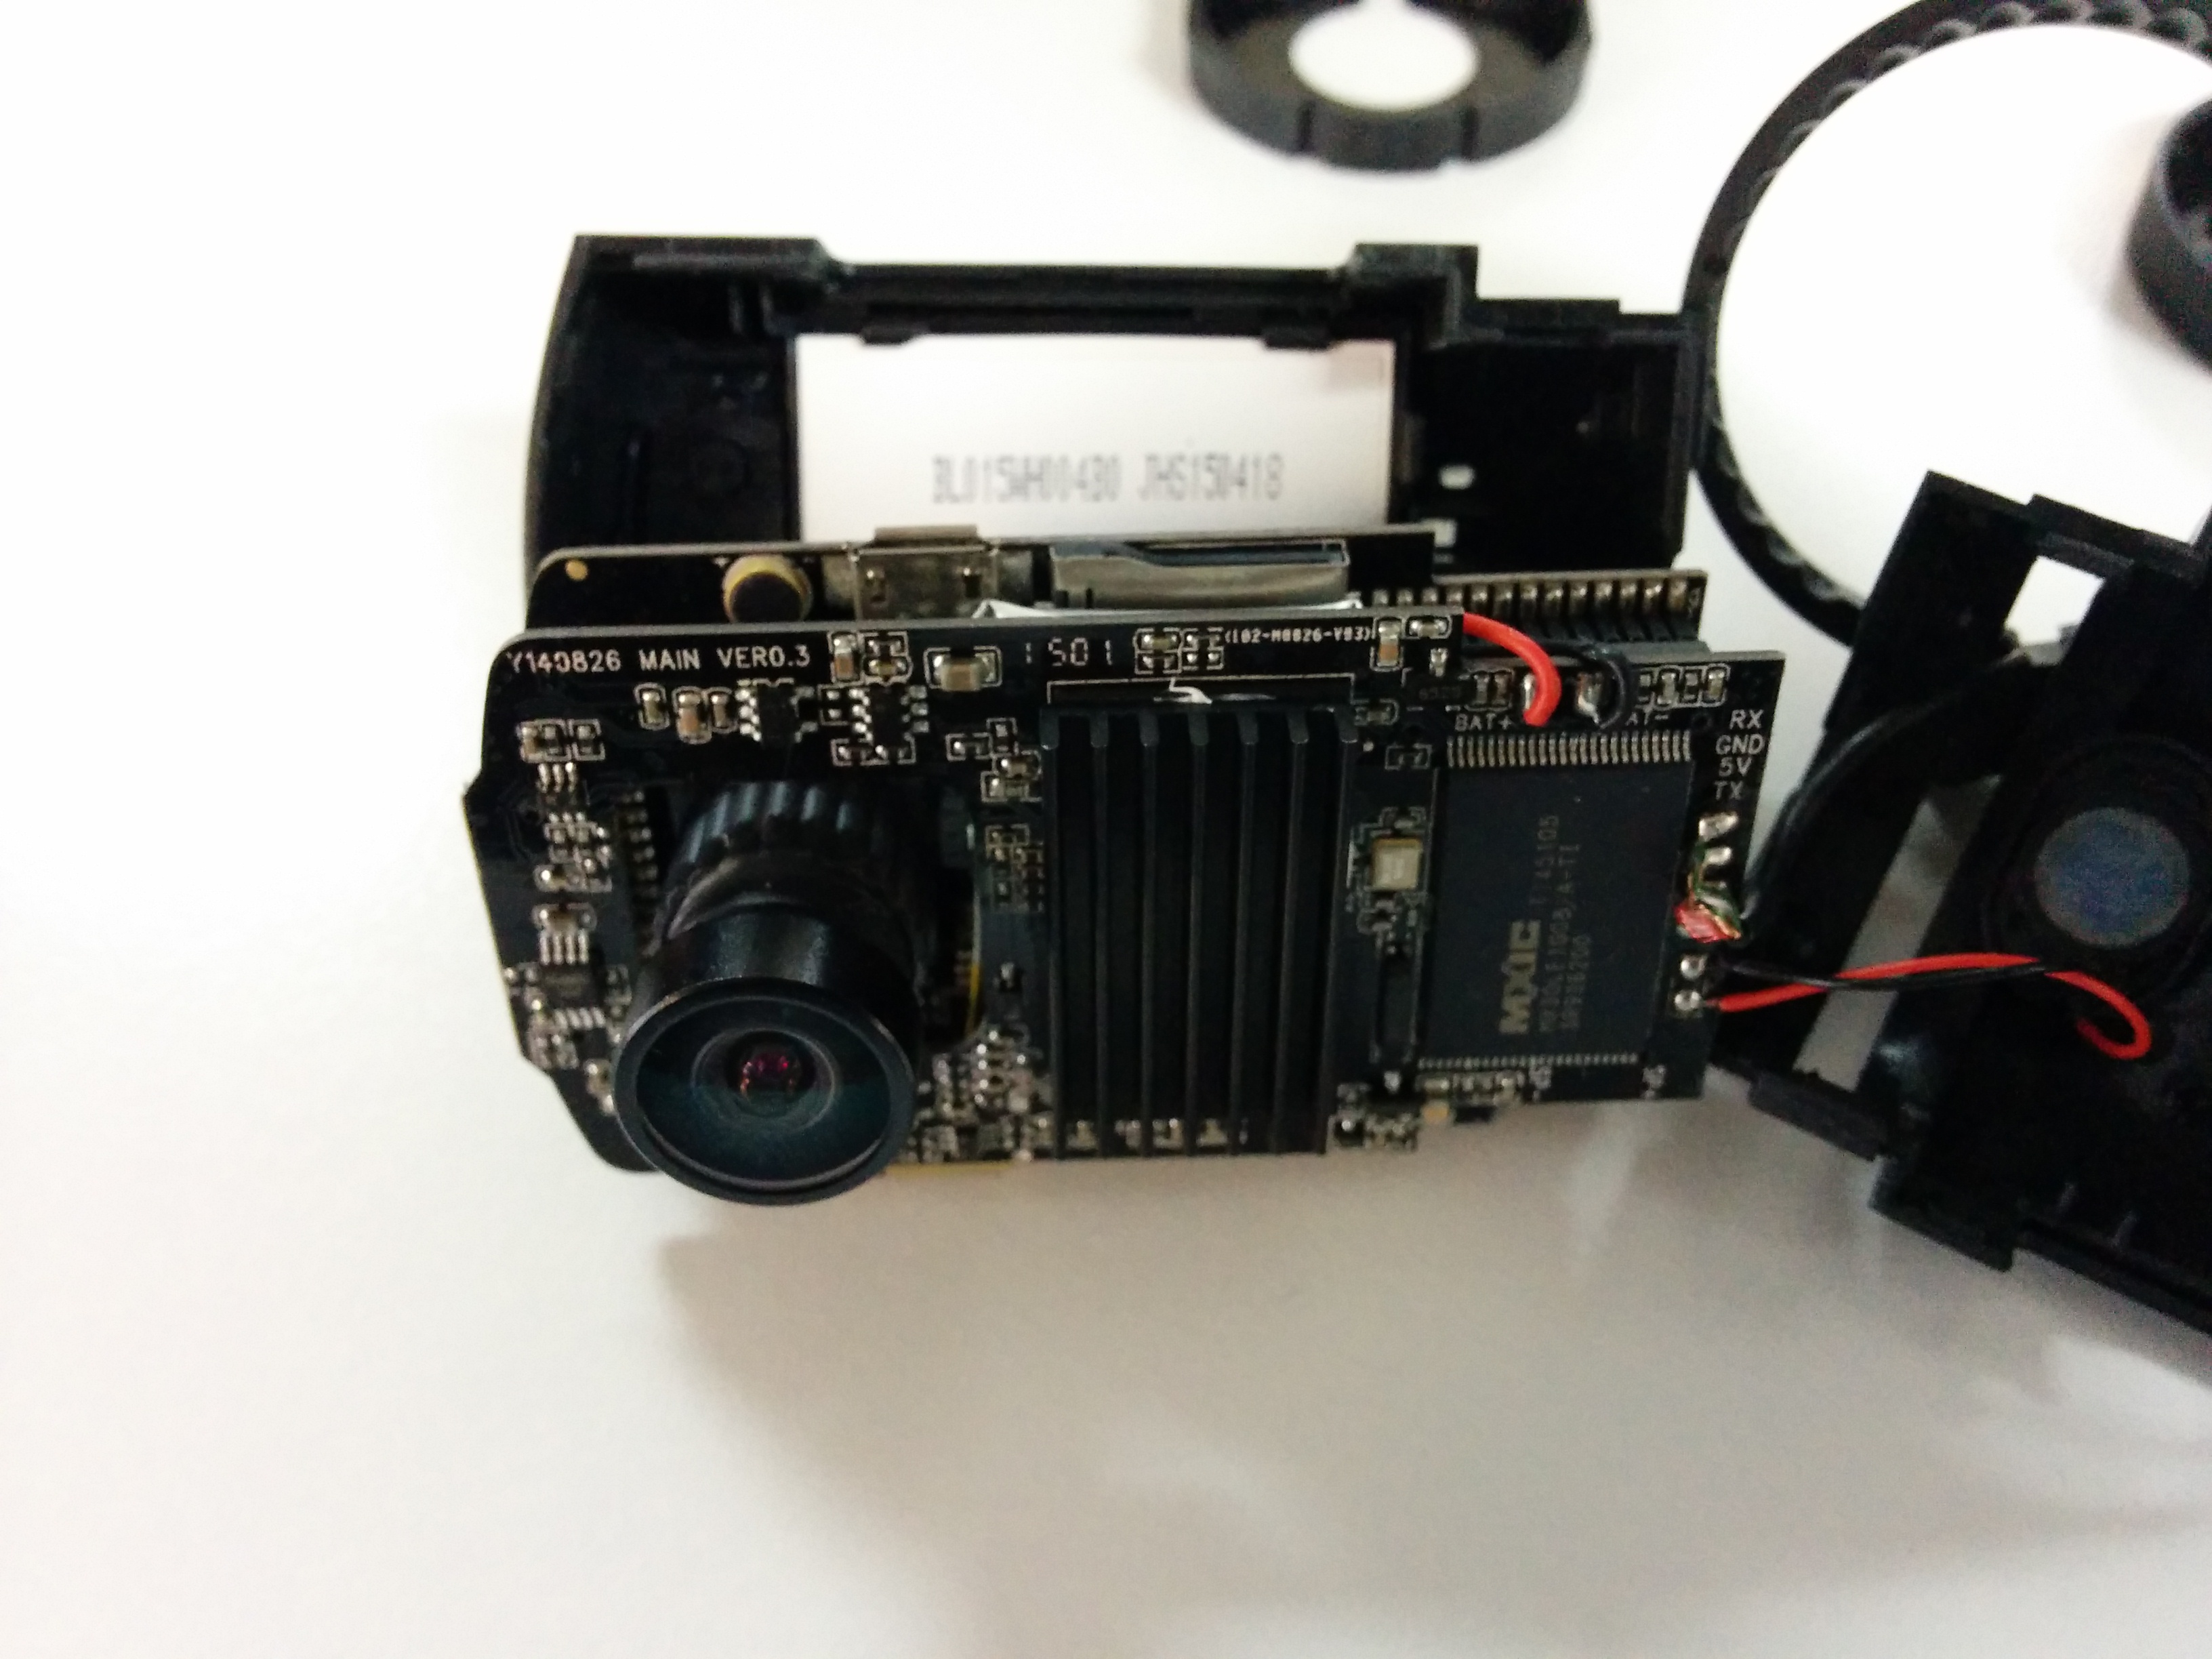
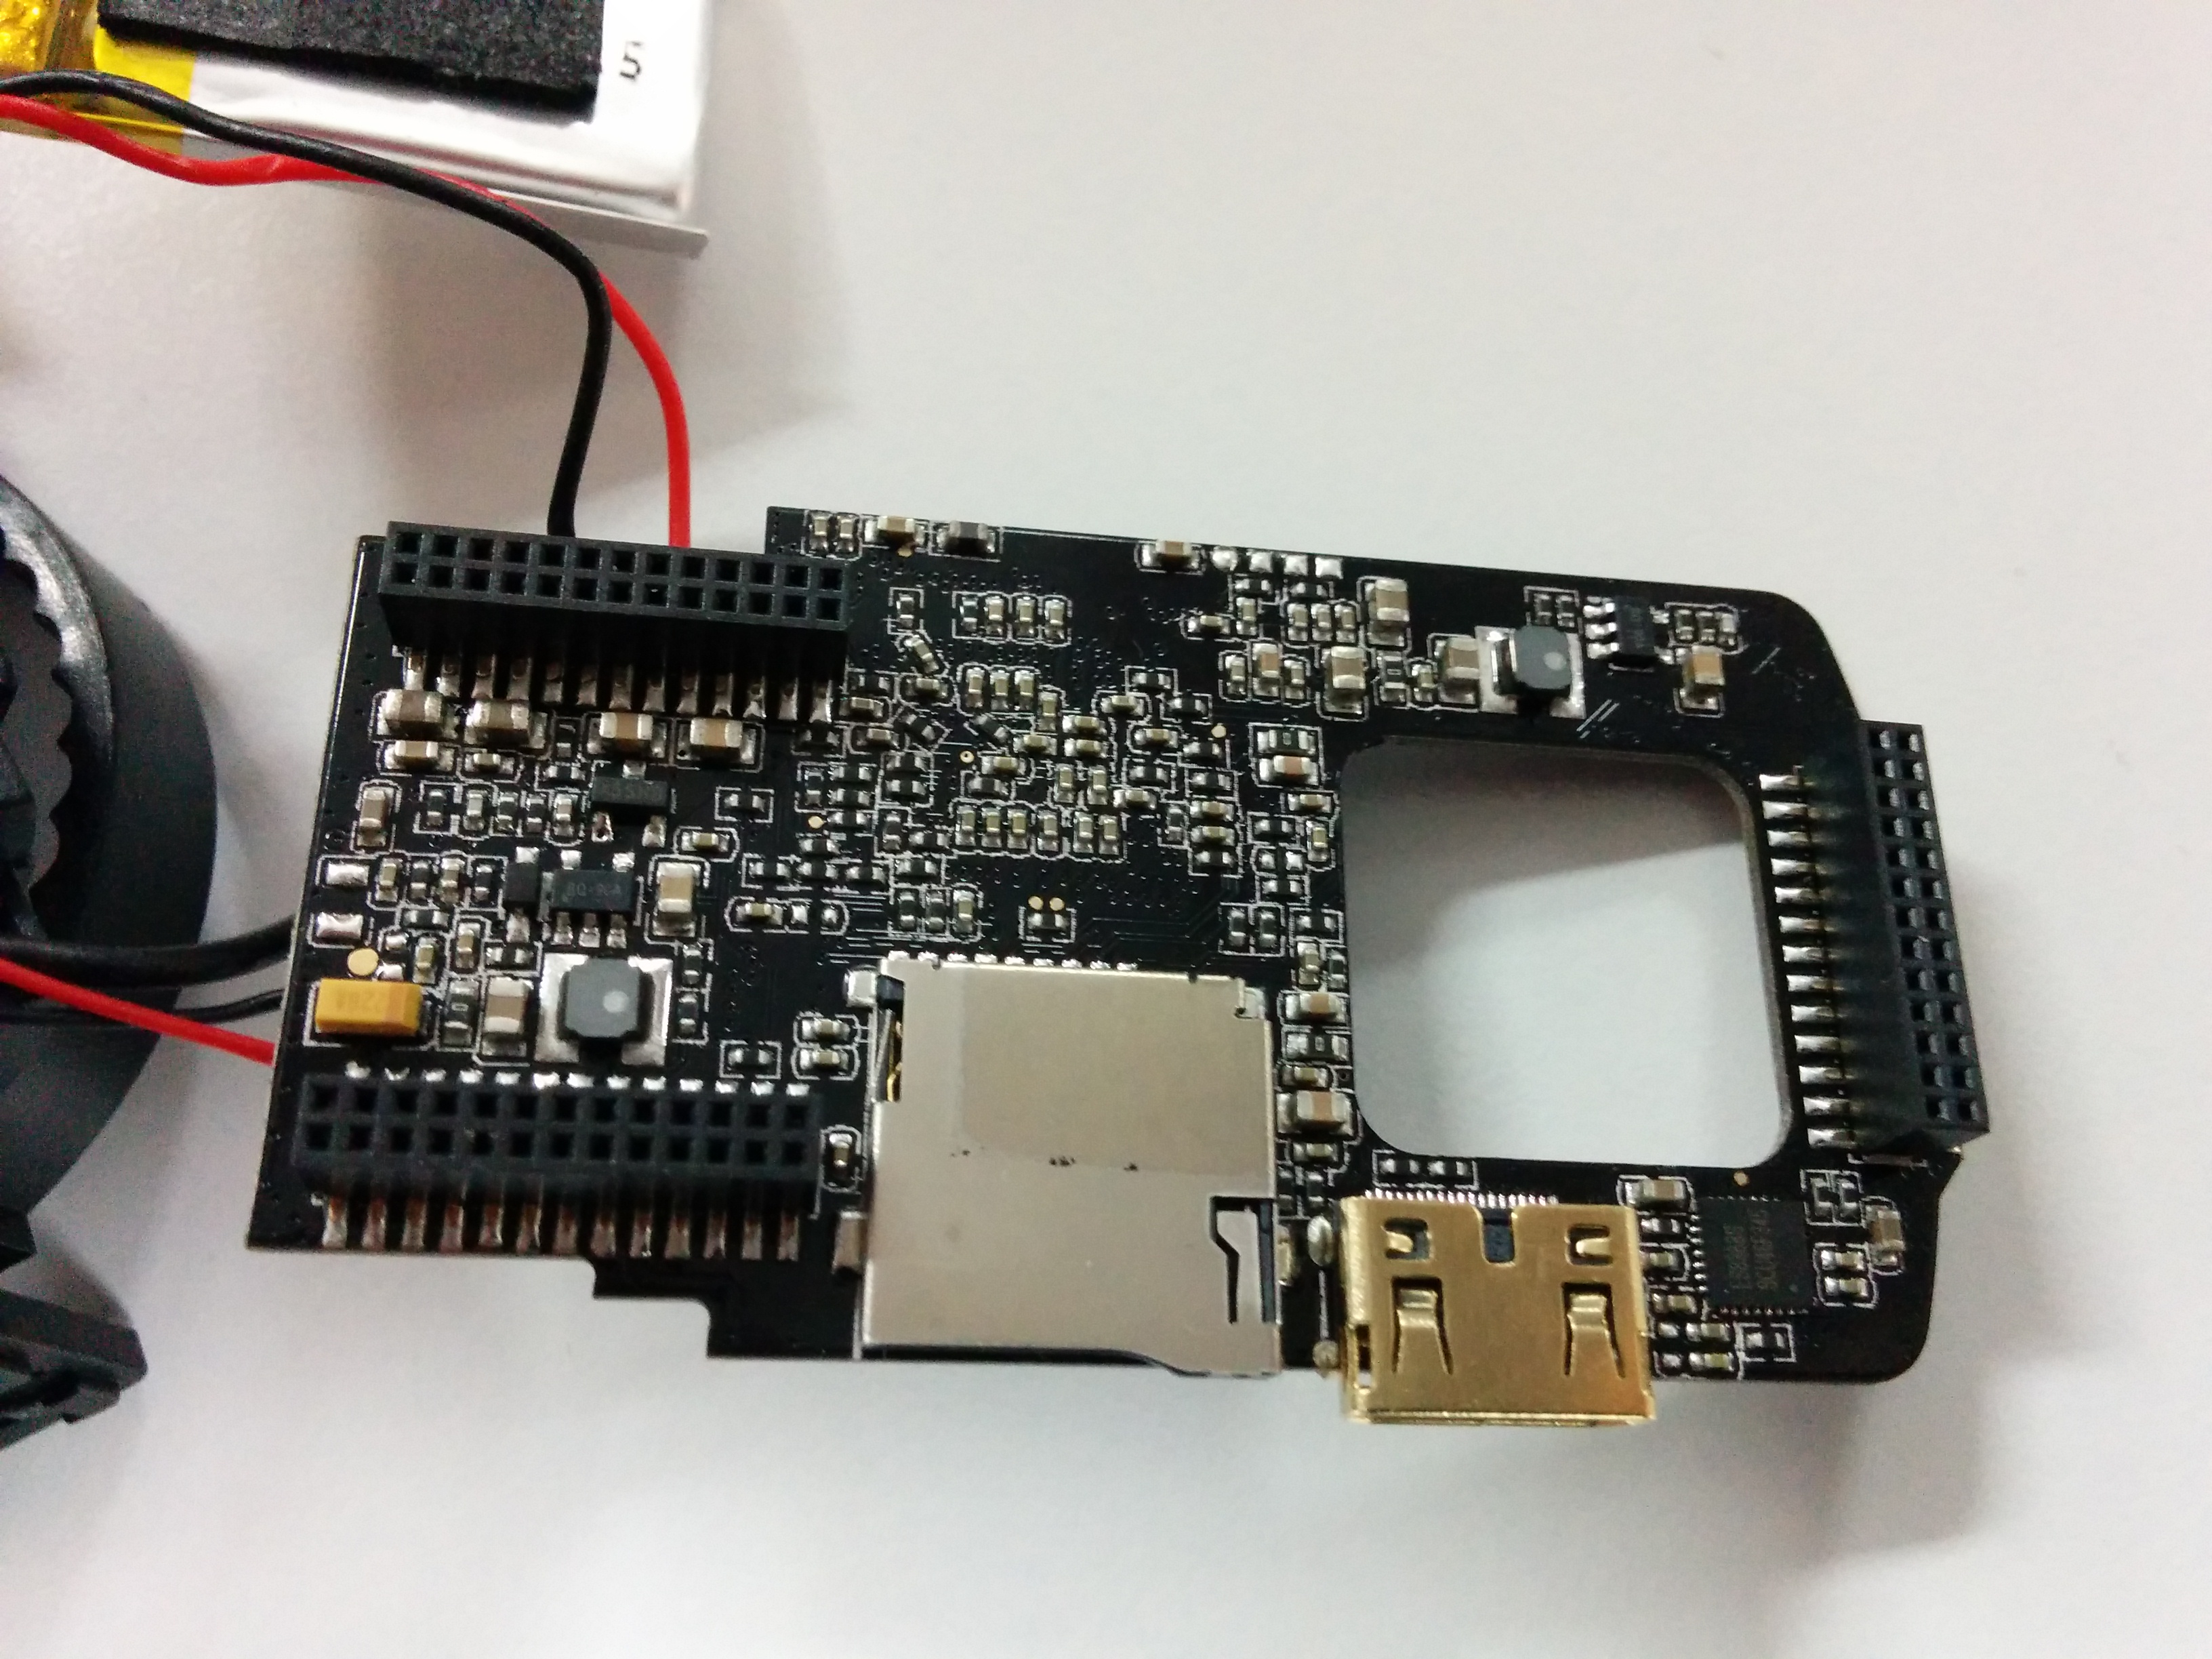
One of the differences between mini0805 and mini0806 is this heat sink:
IMG_20160703_110658

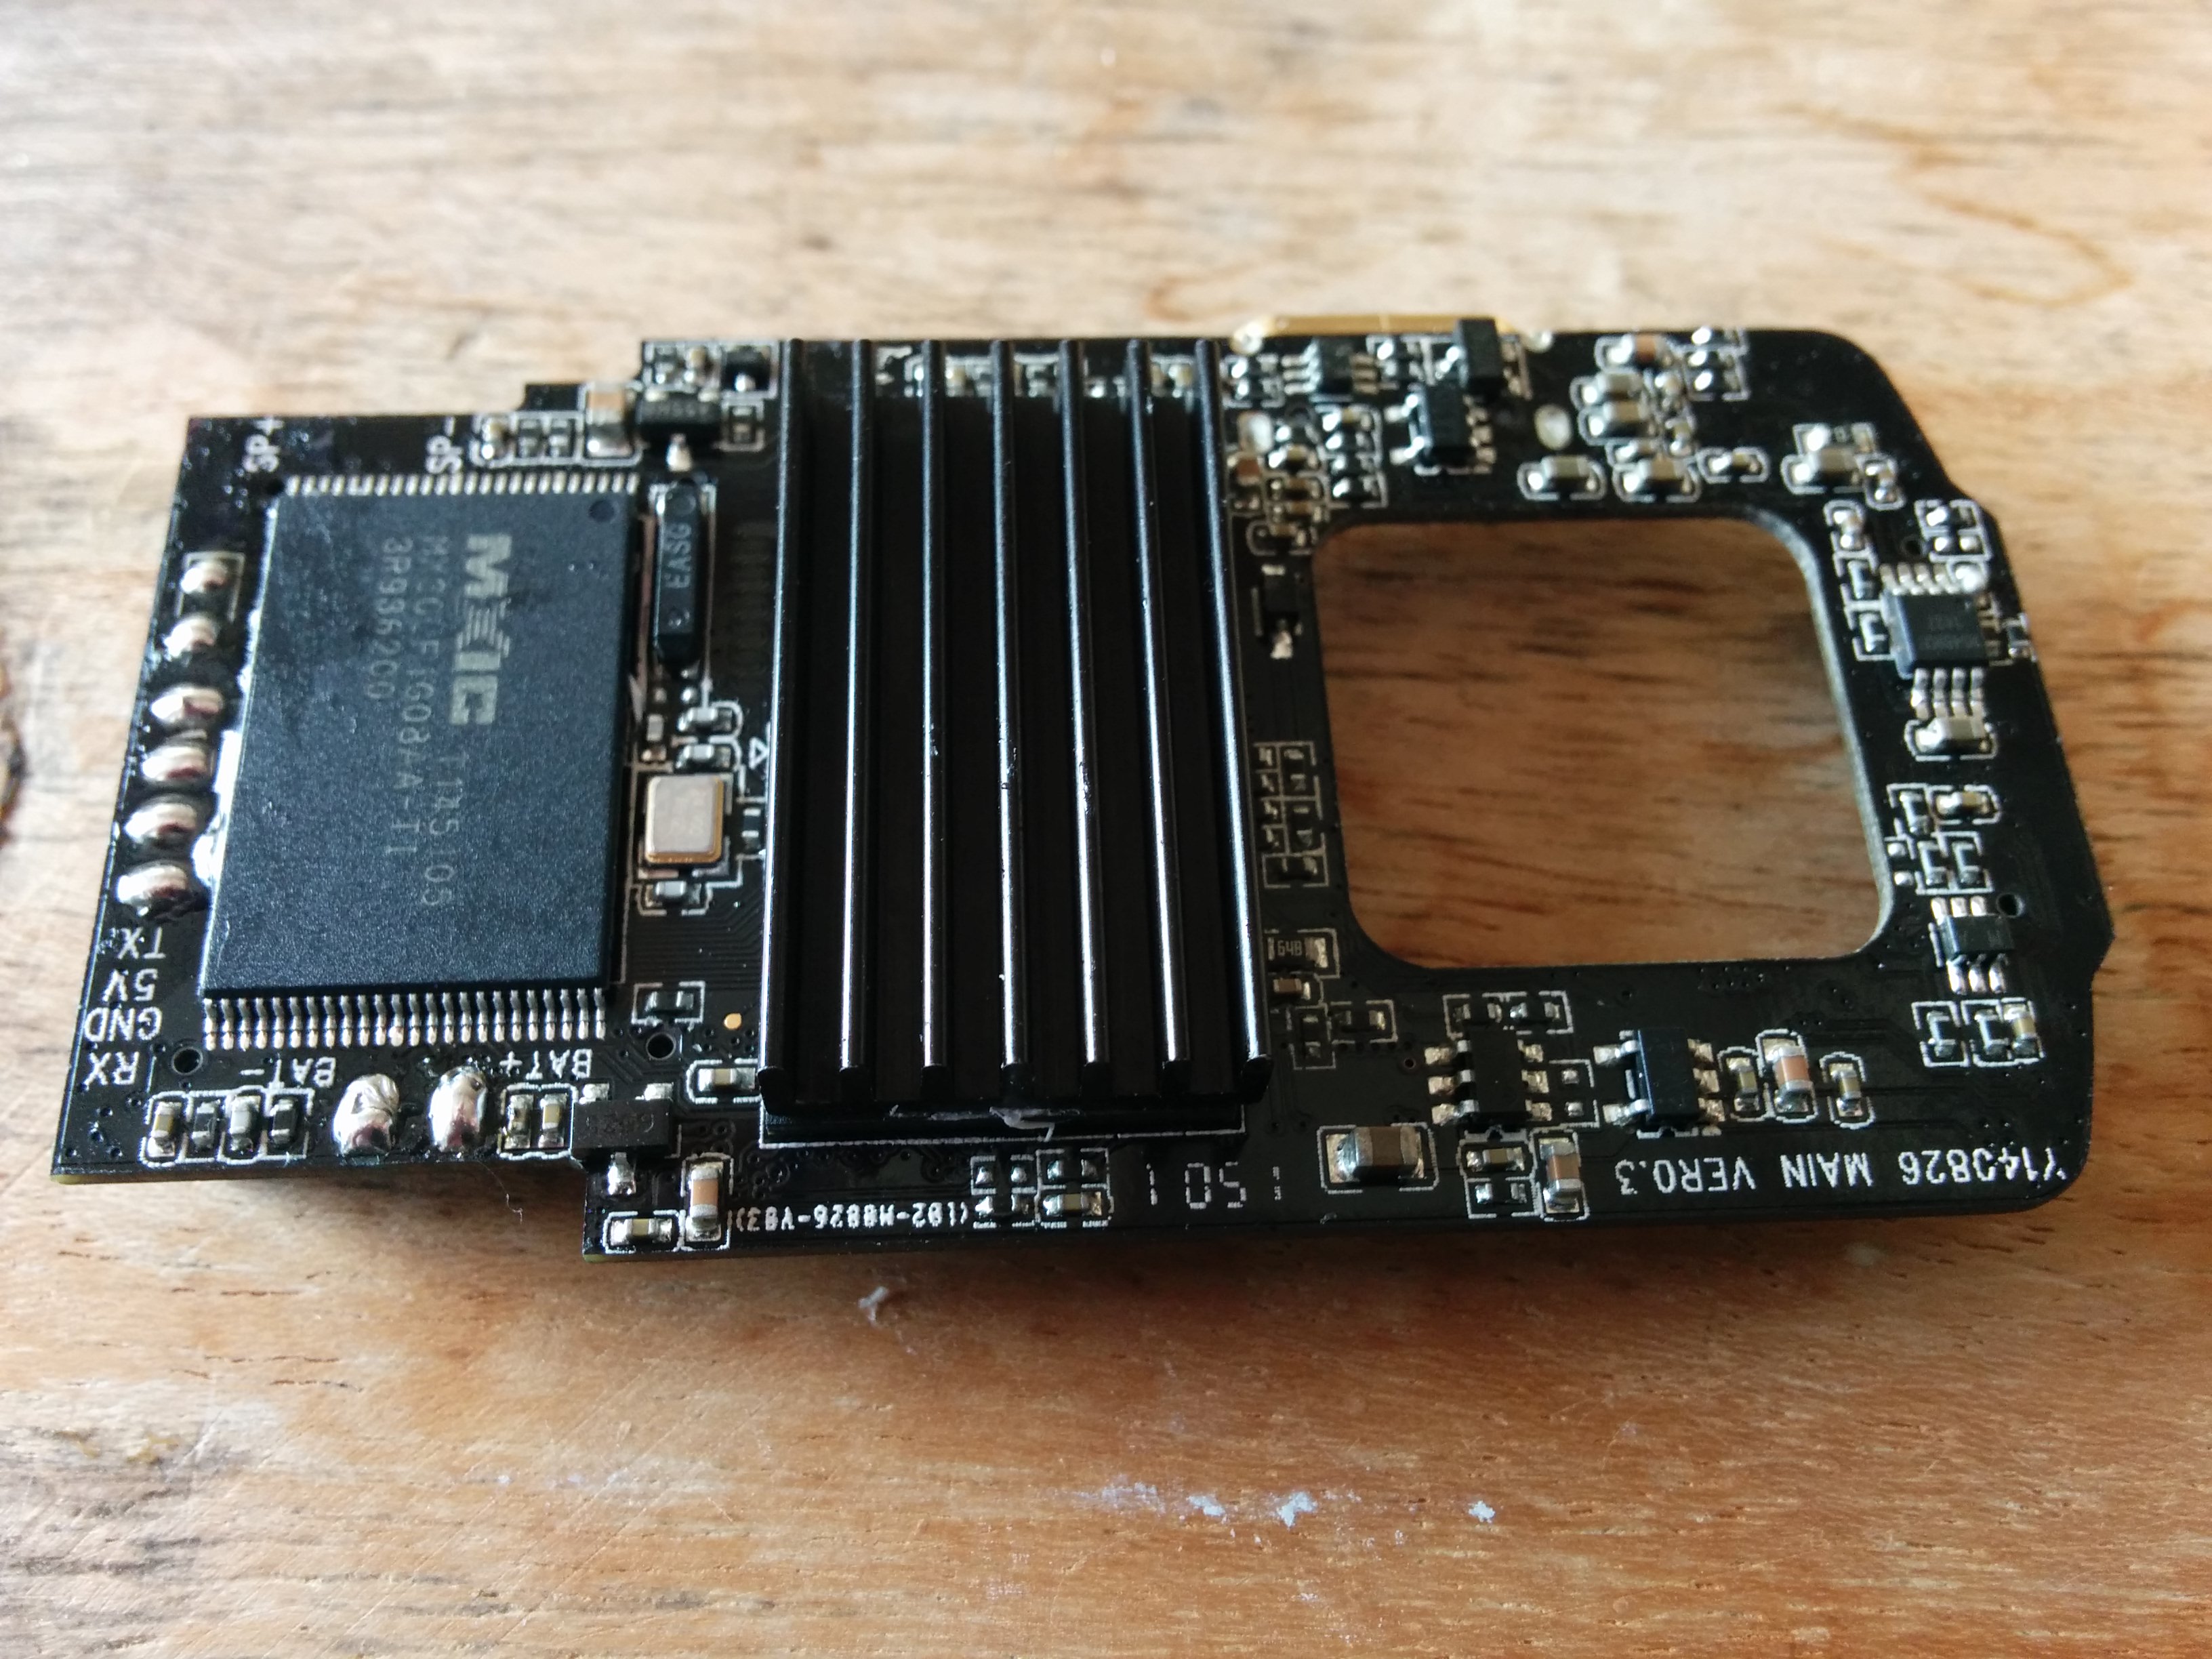
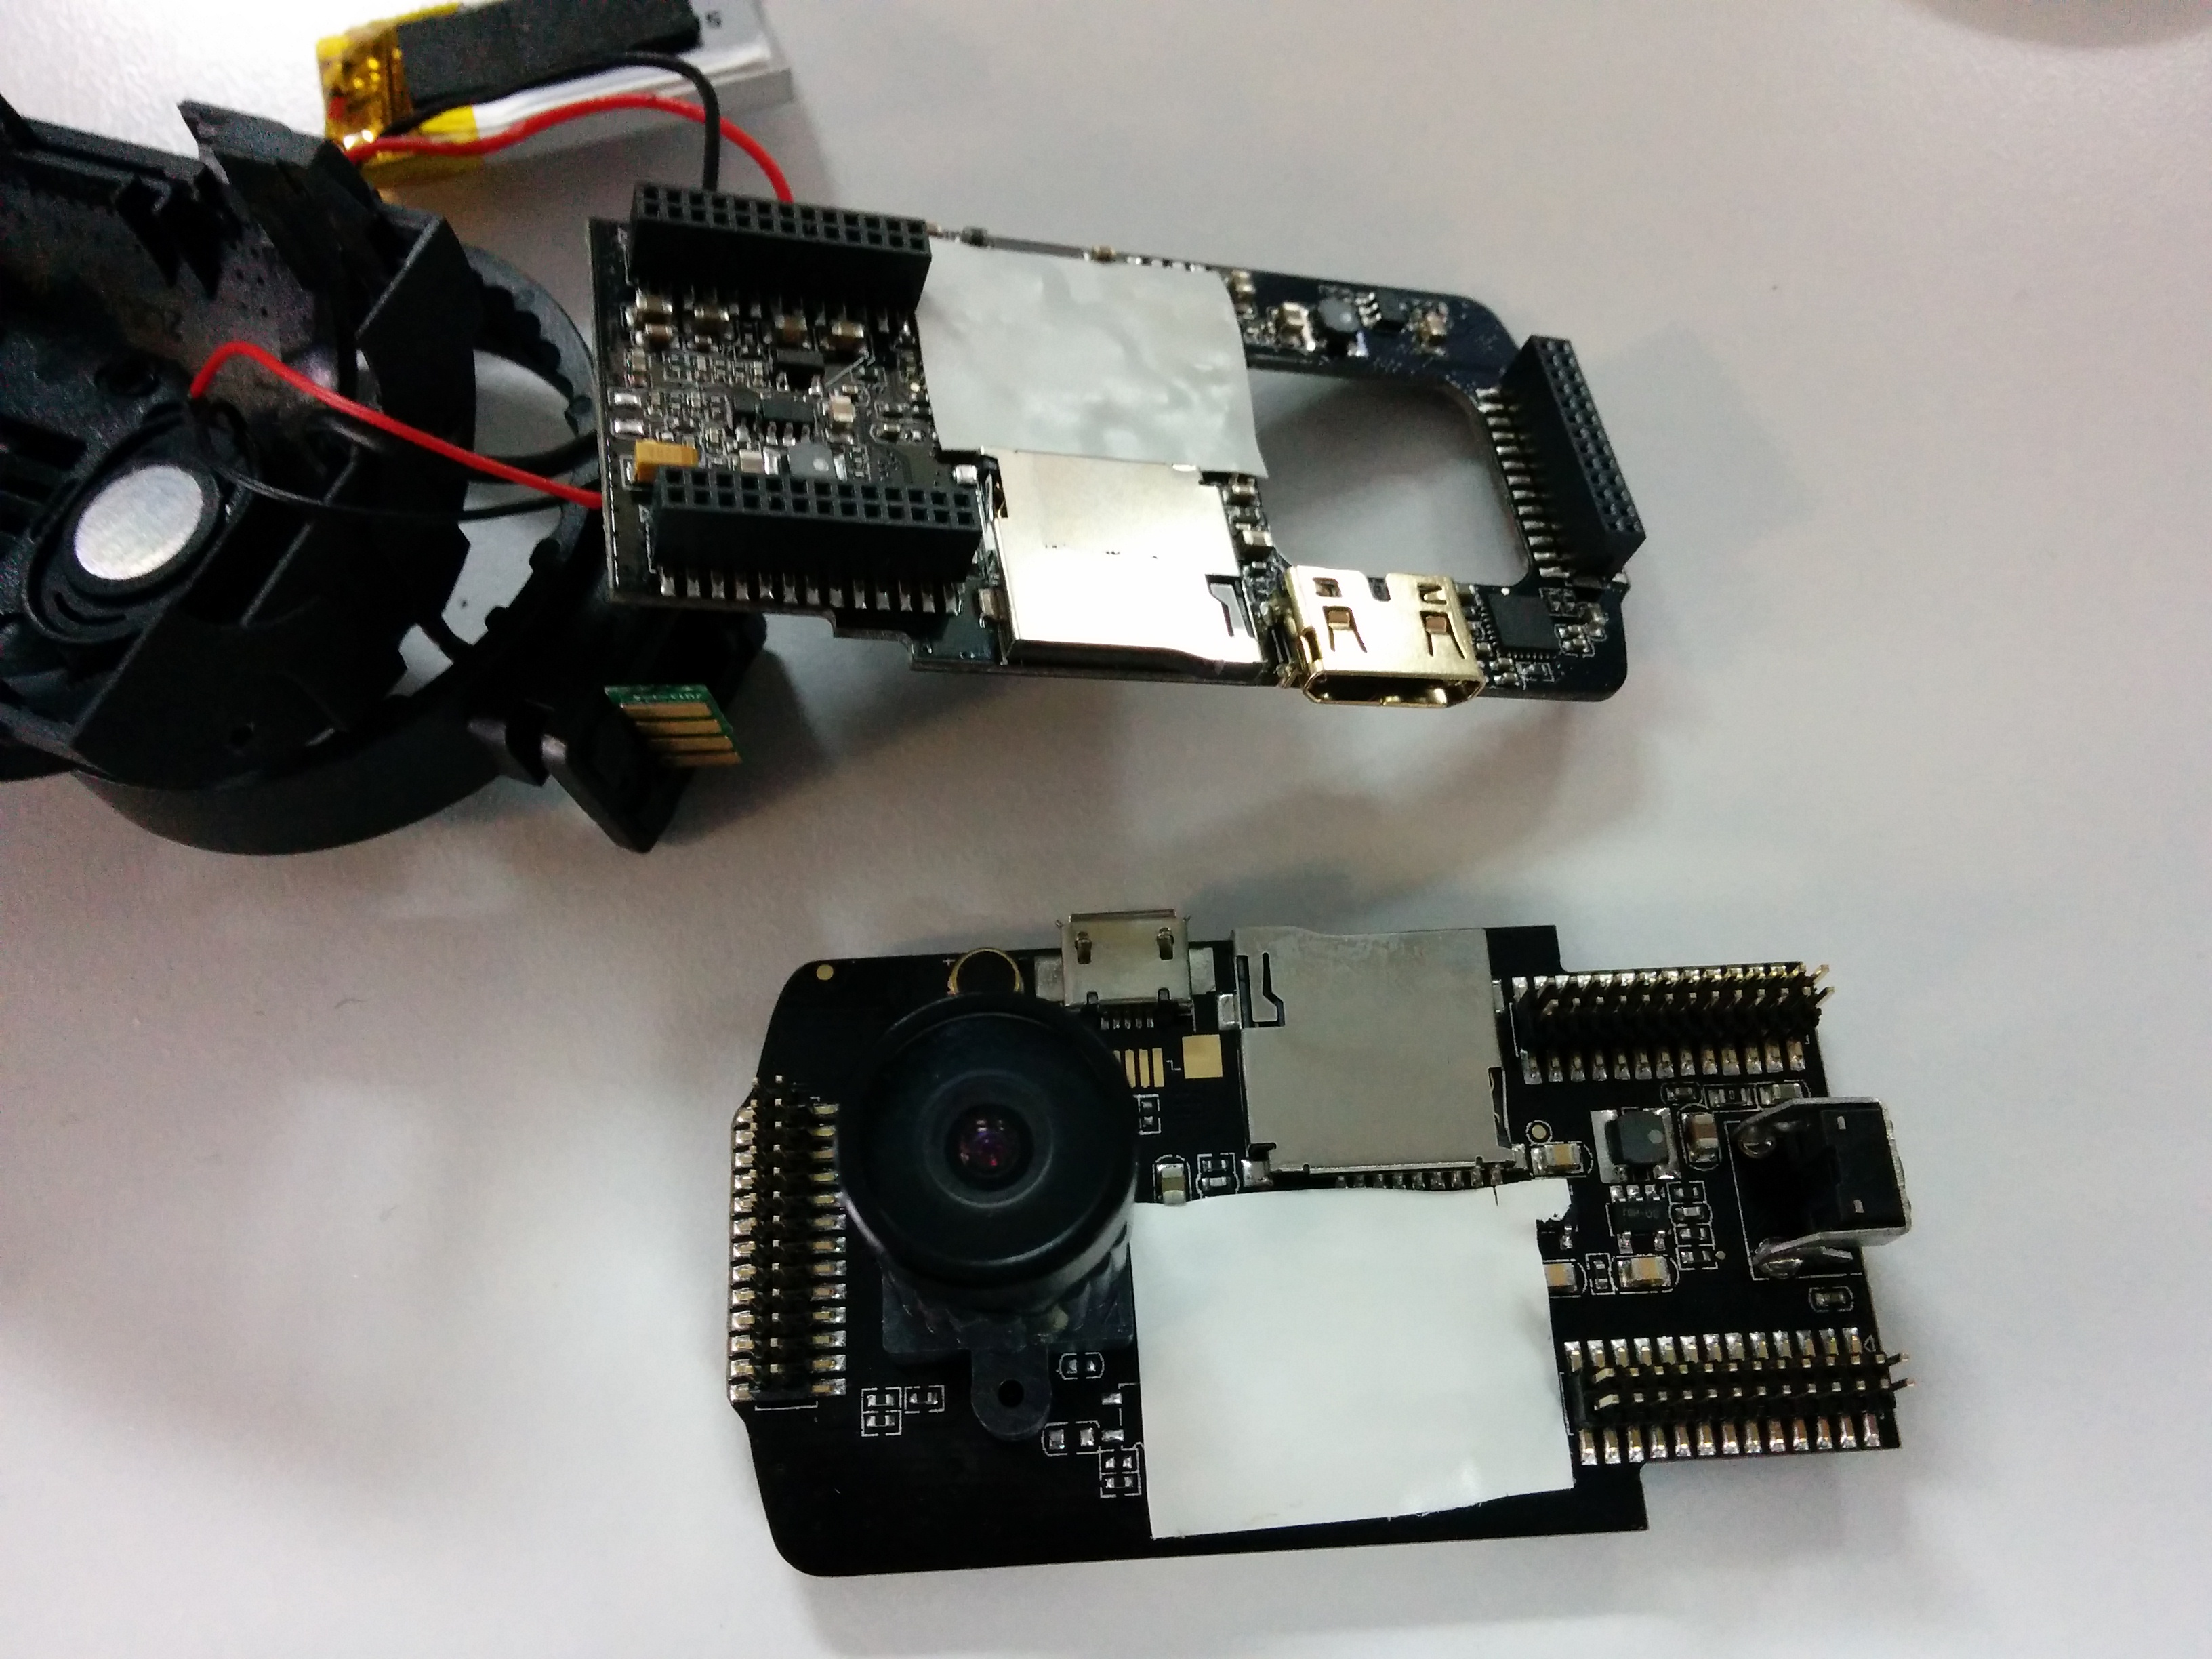
It is a bitch to remove, so I gently coerced it with a blade:
IMG_20160703_110803

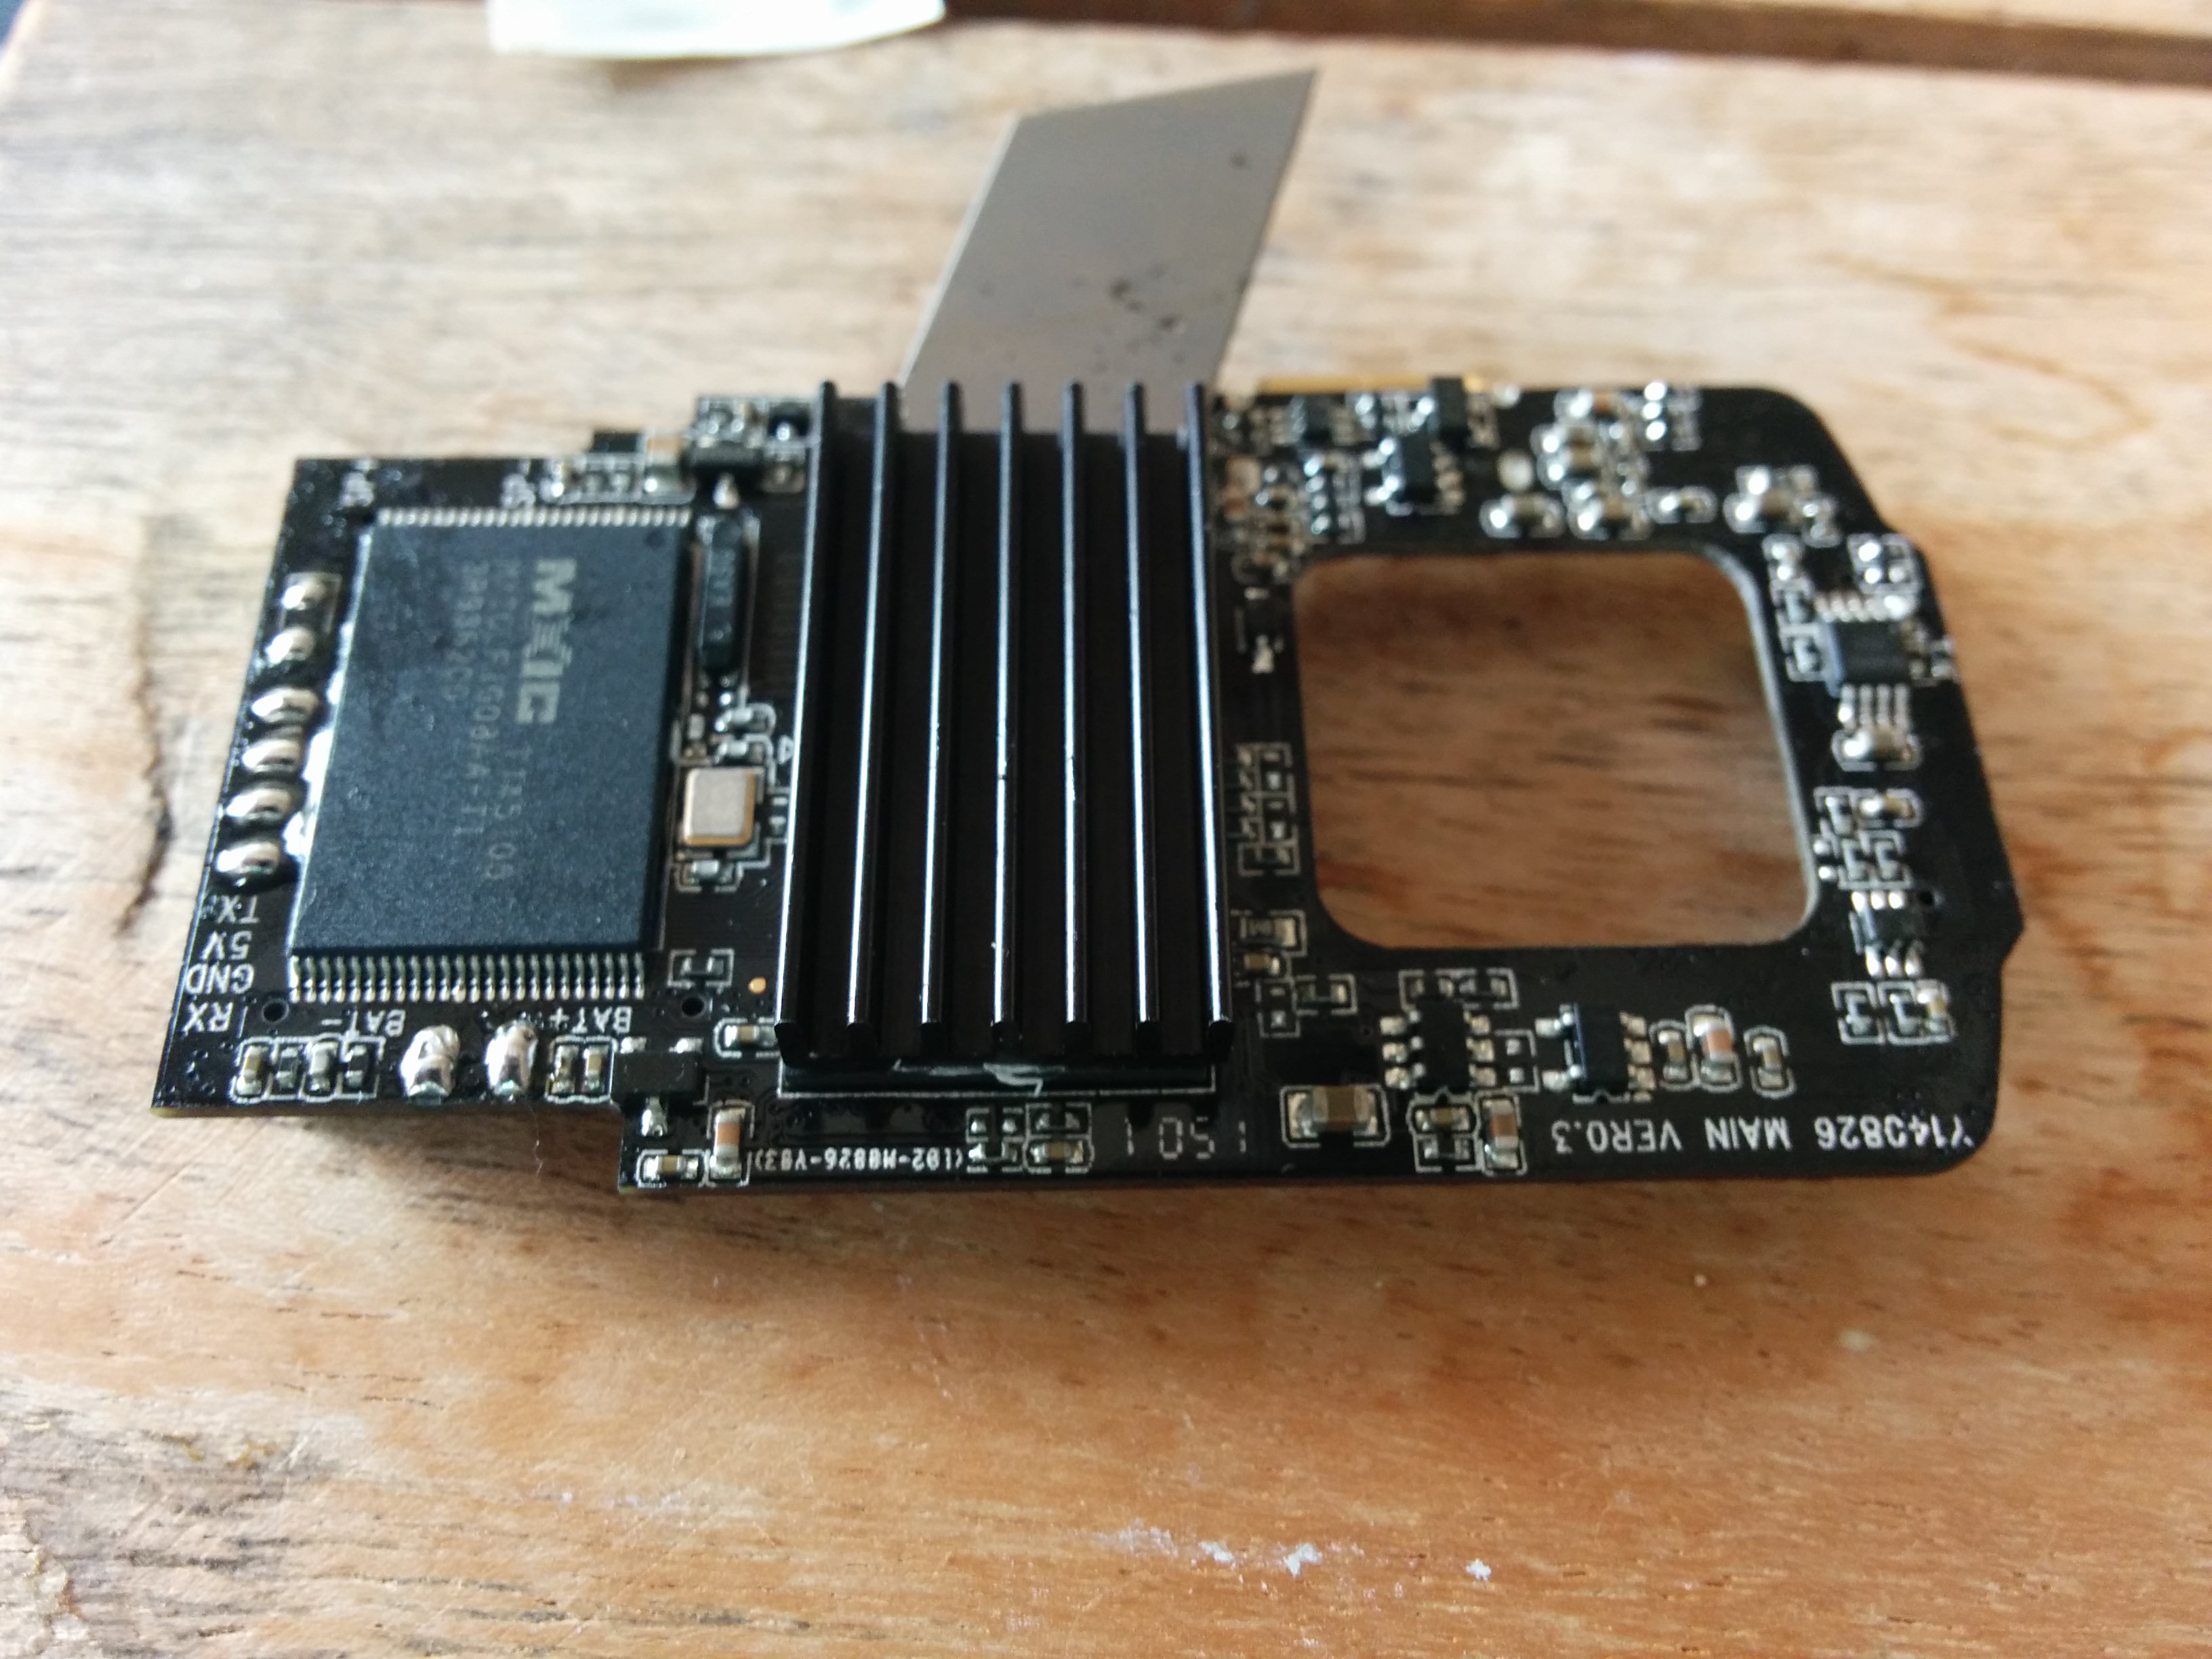
After some time of gentle pushing and heating it managed to peel off:
IMG_20160703_111536

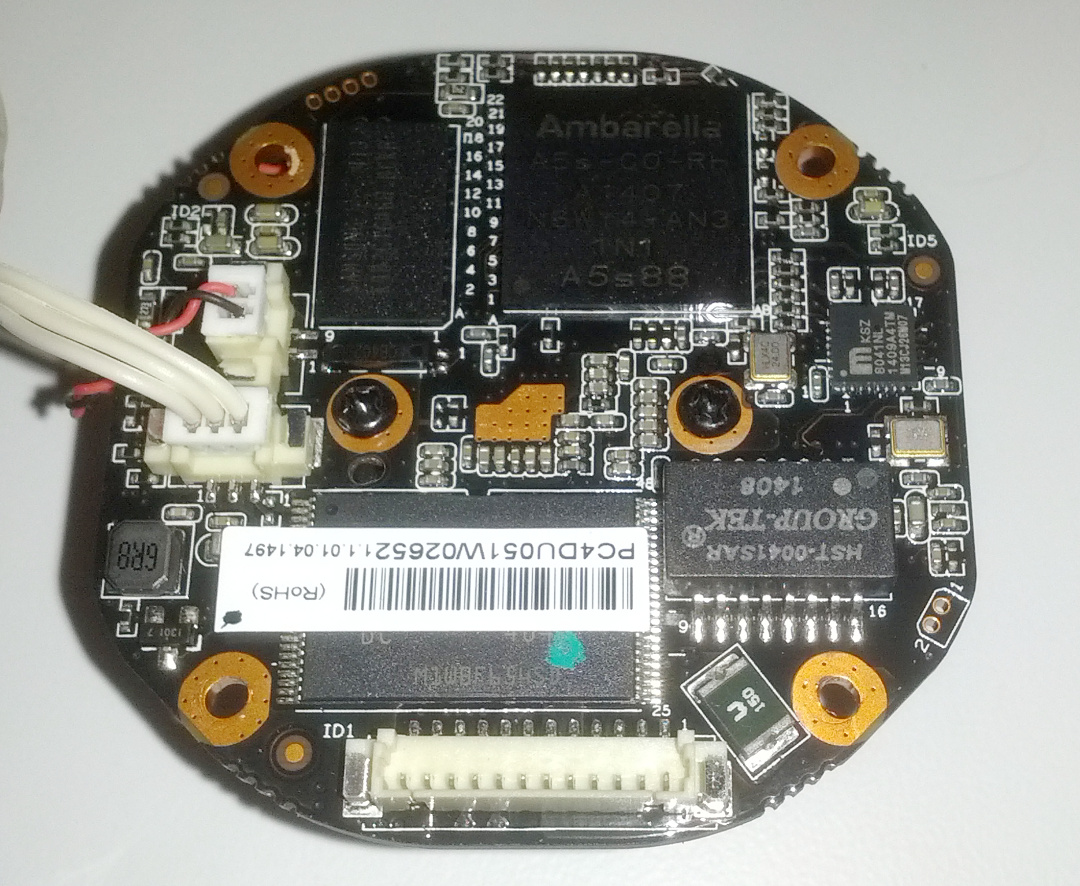
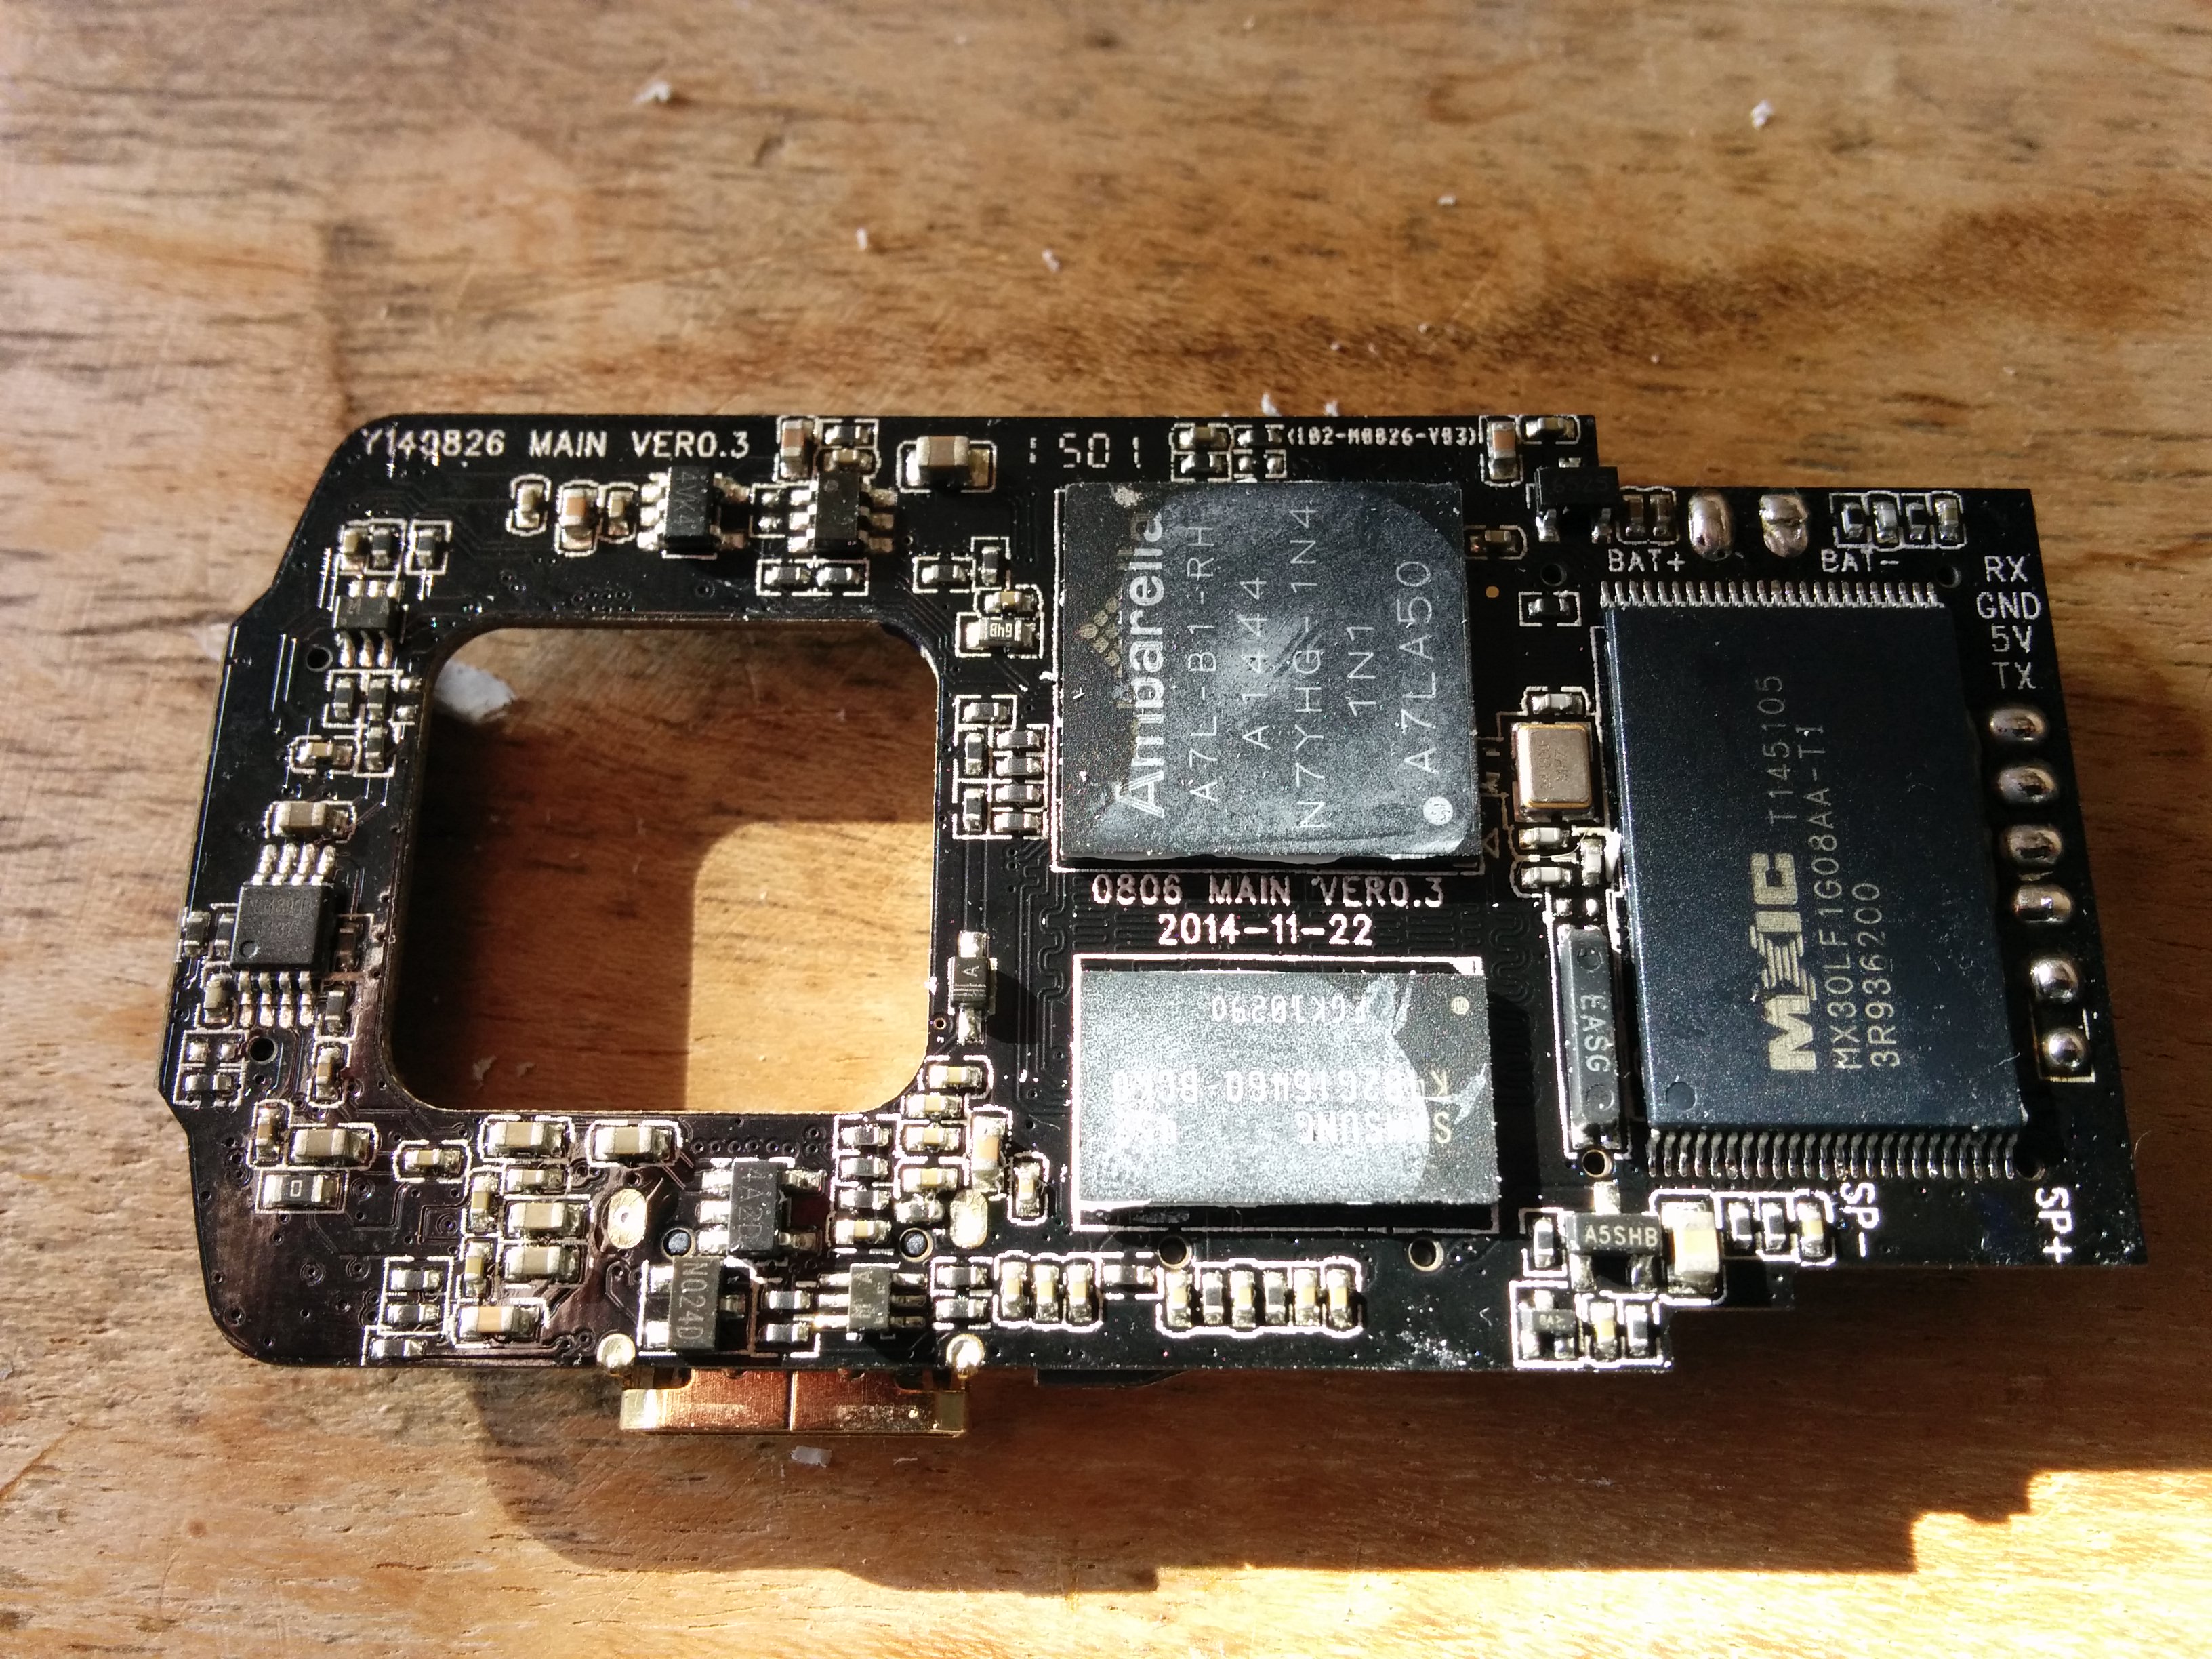
Revealing Samsung ram chip and Ambarella A7LA50 SoC:
IMG_20160703_111758

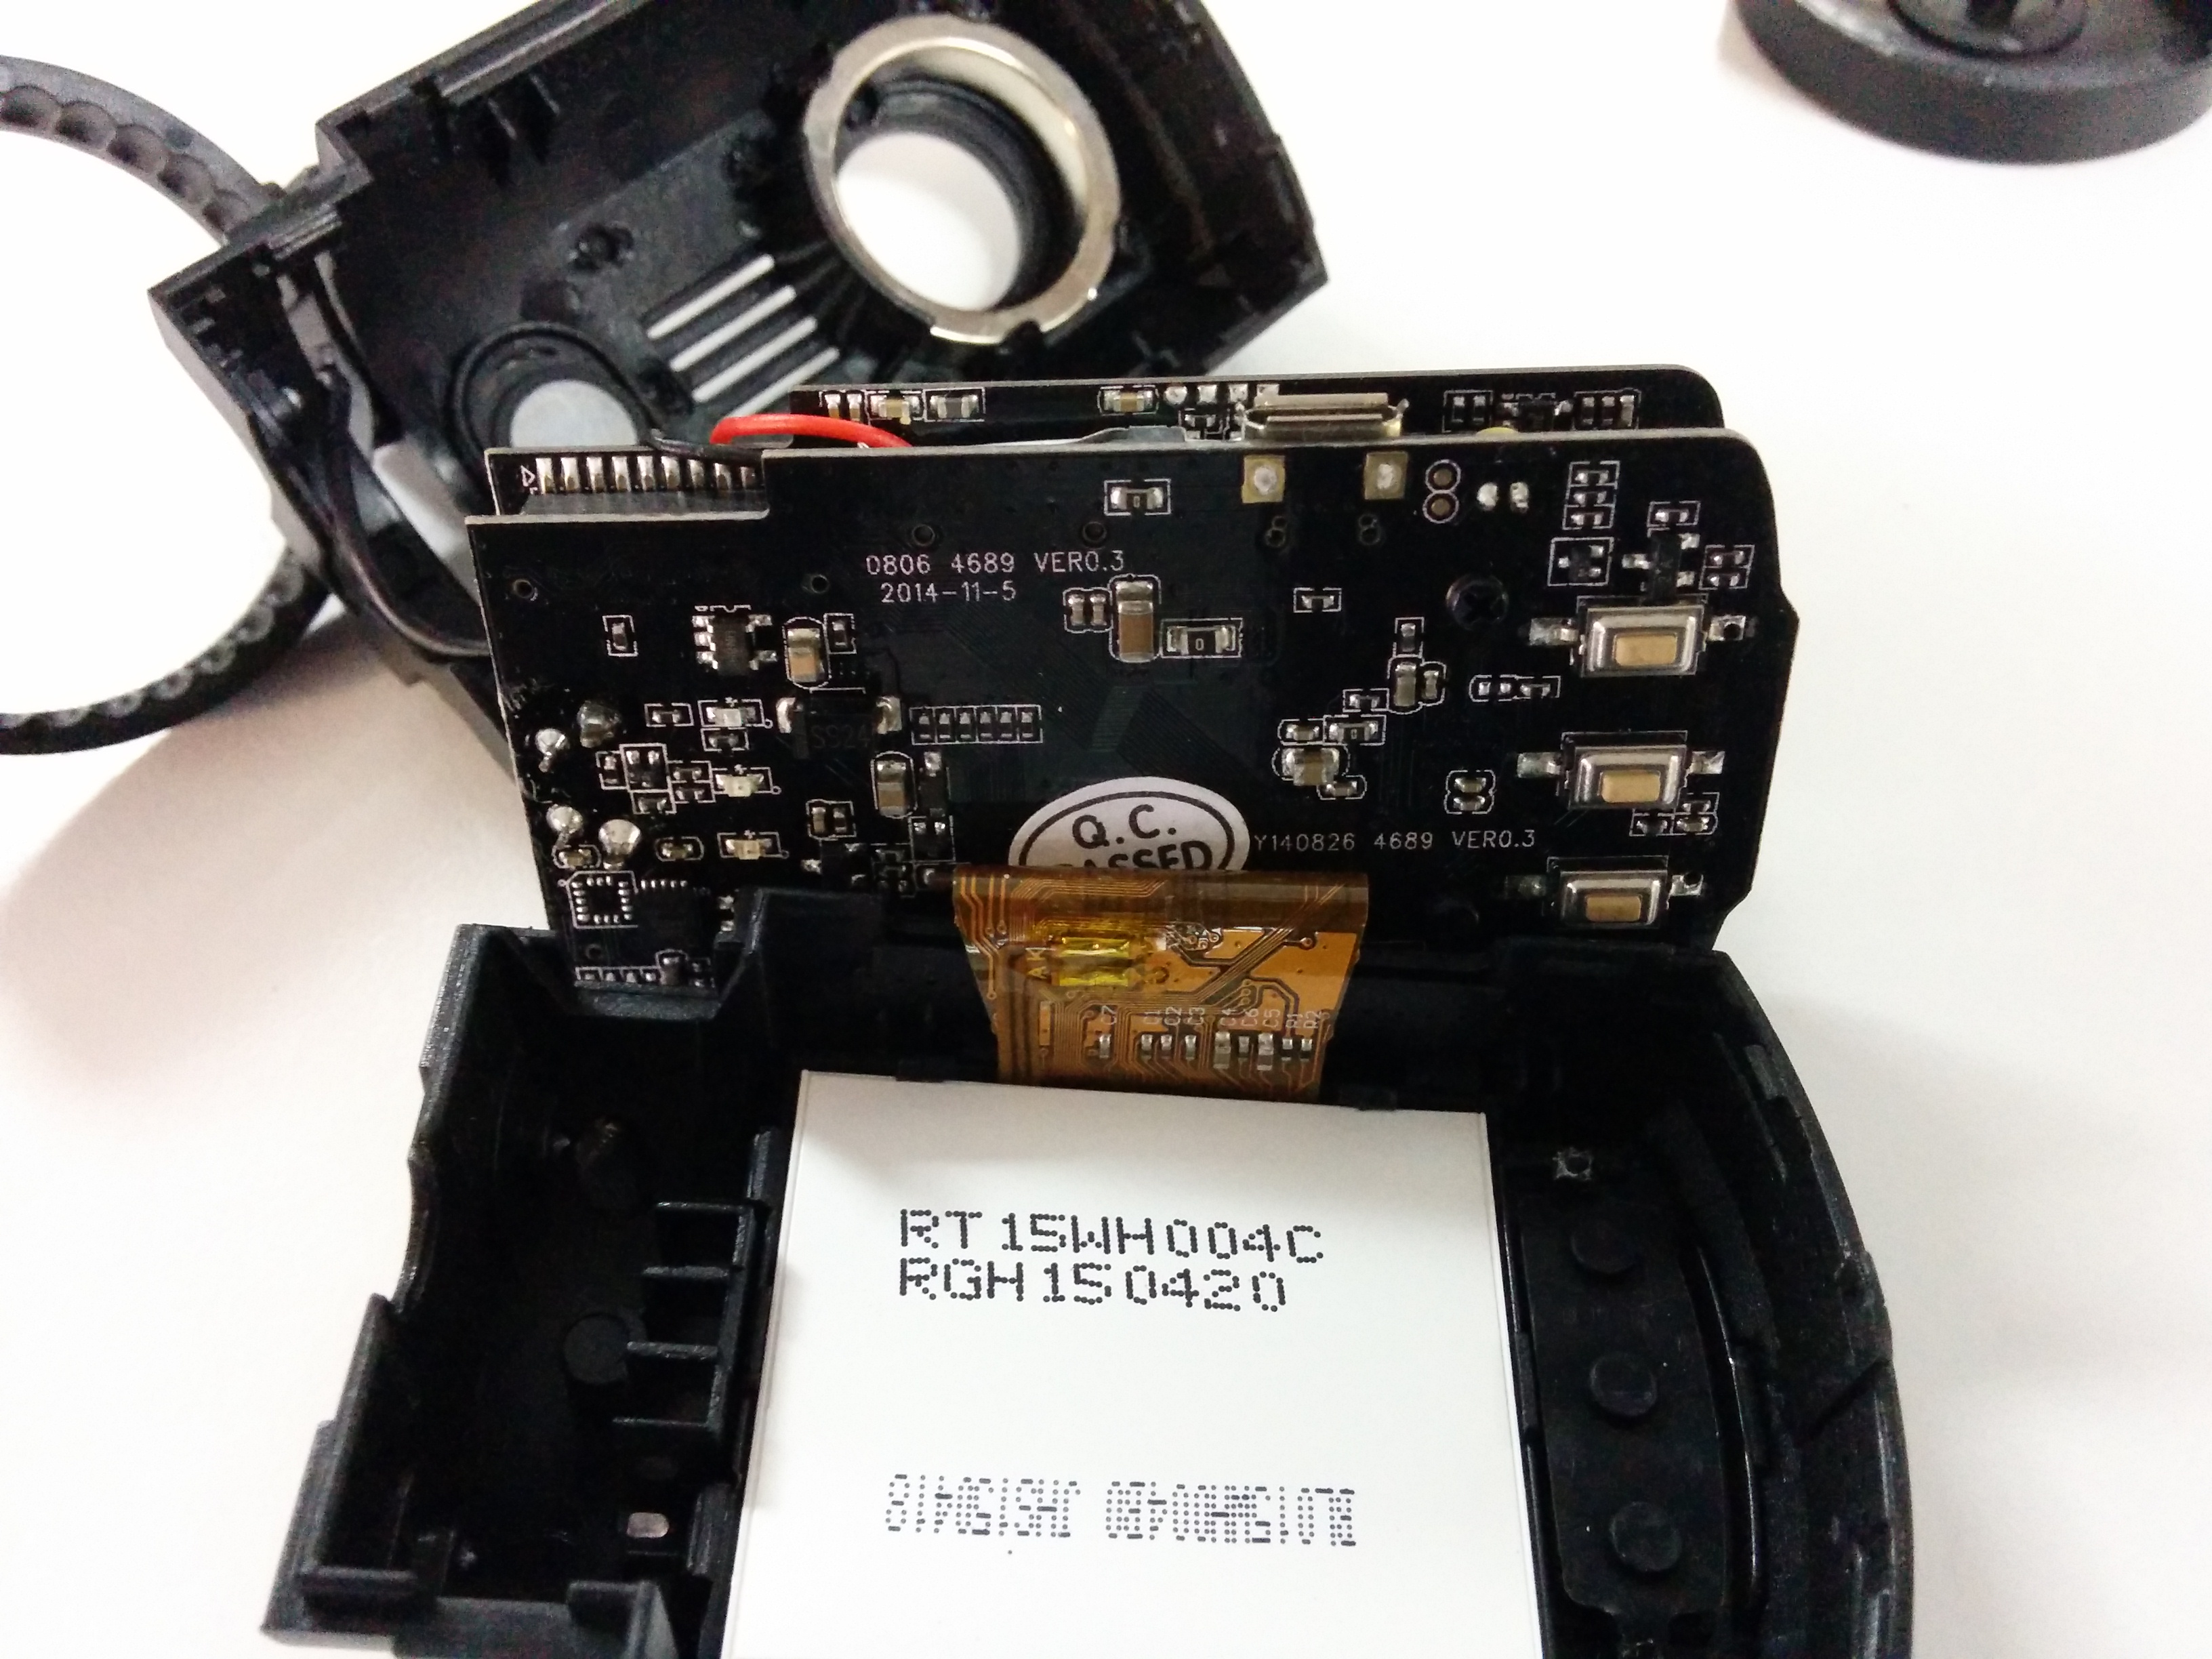
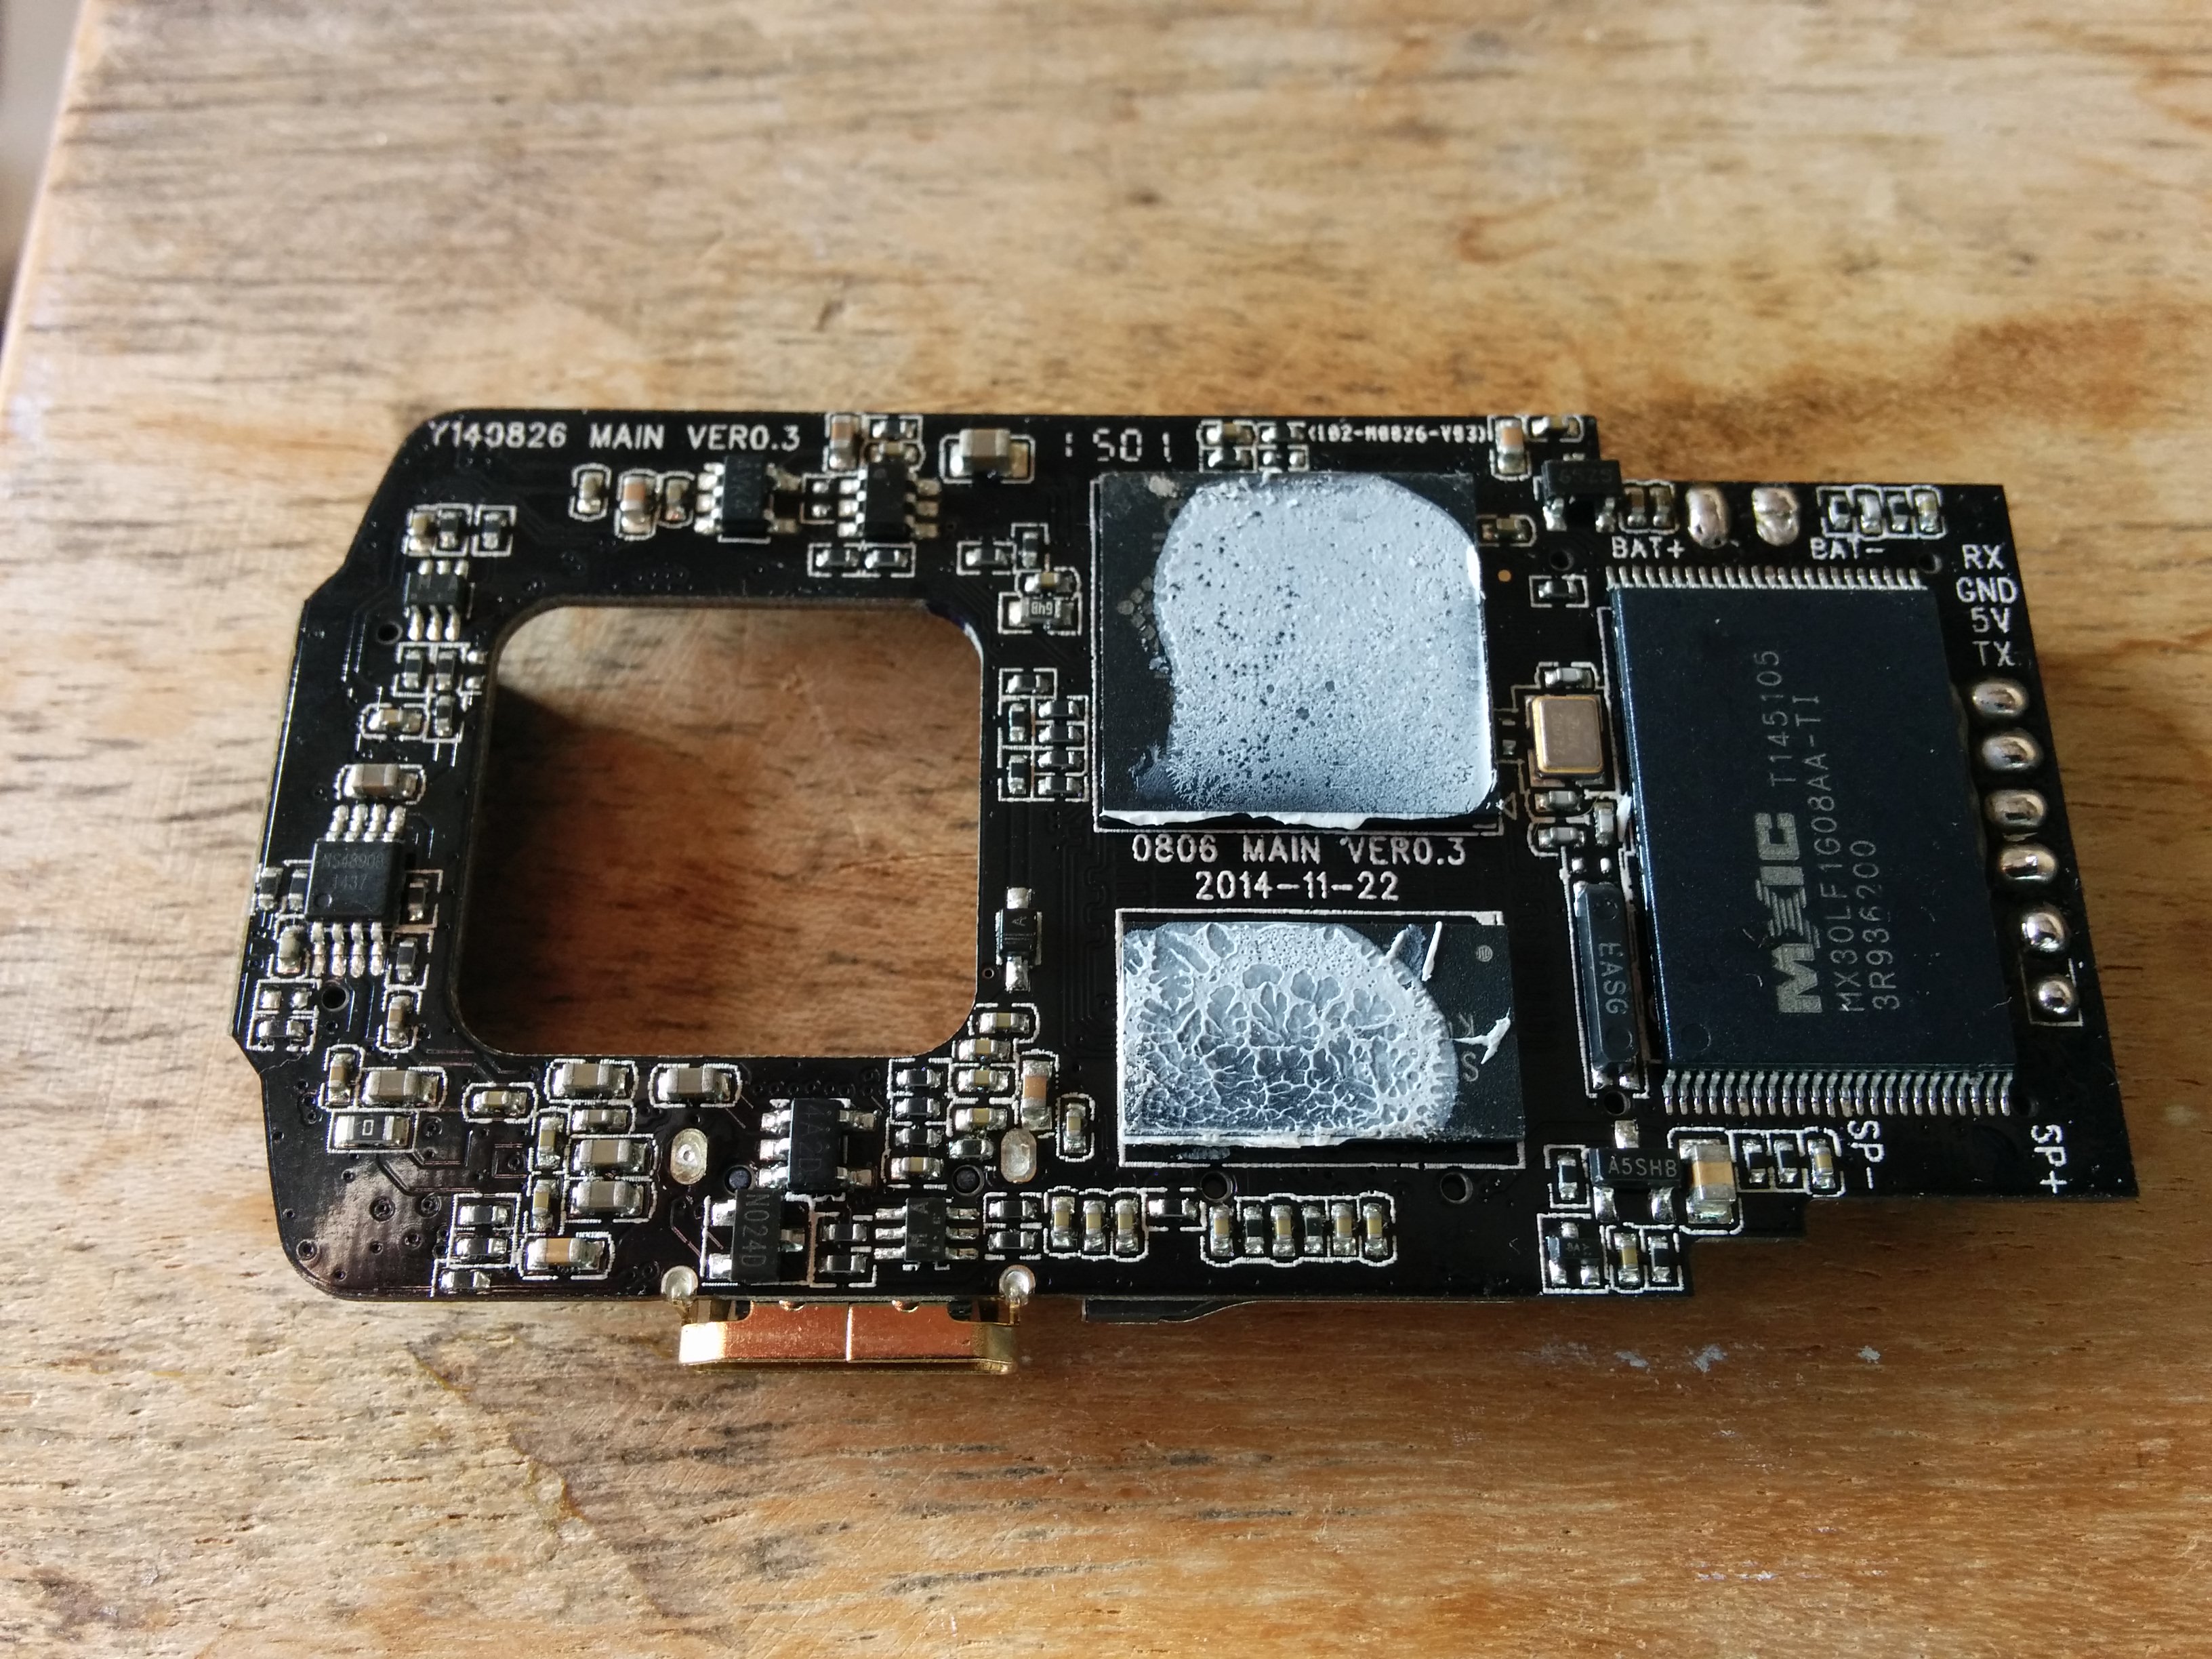
Here is why it was not working after slight drop (and crashing before that):
IMG_20160703_113213

Pulled out pads! Note that the blade I used to remove would cause other side of pads missing if I applied too much pressure.

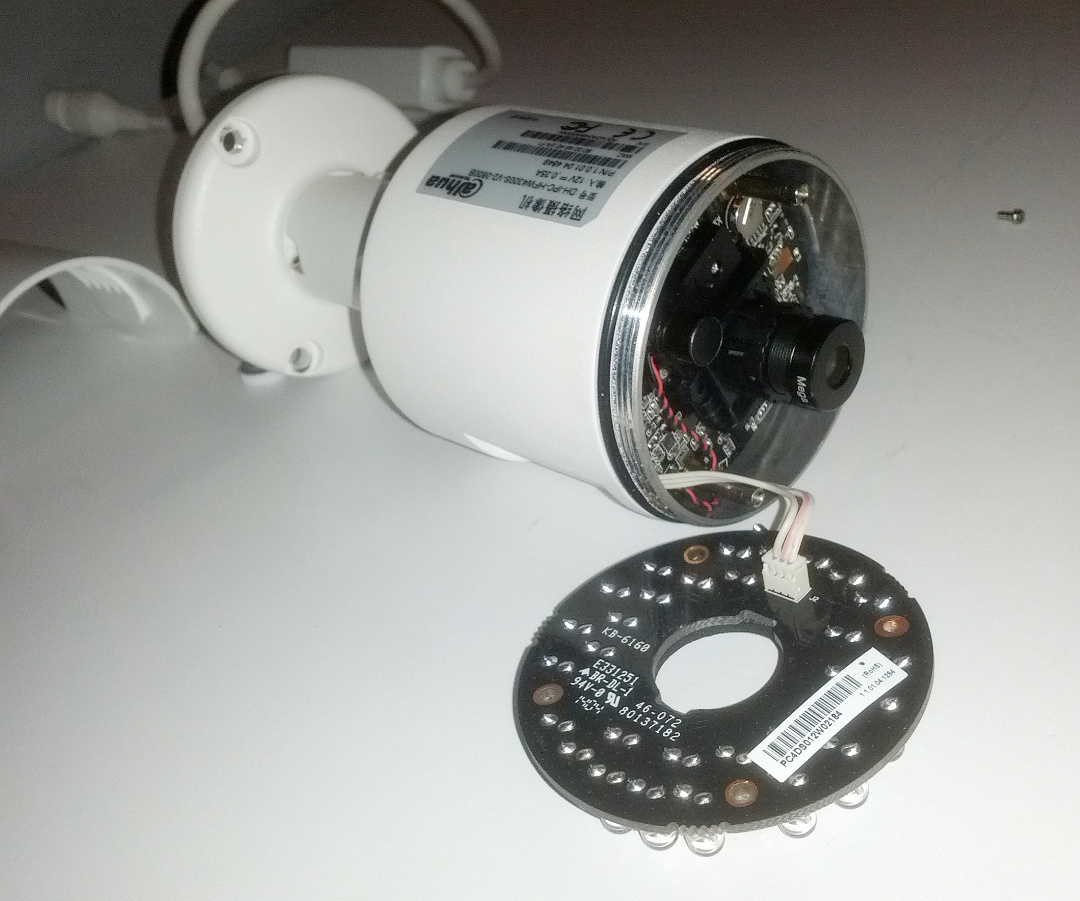
My theory is following: the heat sink that bridges RAM and SoC is causing stress on these chips. Mostly because it is glued and not mechanically pressed against the chips. This is a very silly design flaw, if for example, only SoC would have the heat sink (like found on IP cameras) then there would not be any stresses. I don’t think RAM needs heat sinking on those things.

I am tempted to take dremel to my other mini and split the heat sink in two…

Reverse engineering Hikvision SADP Tool

I got couple of Hikvision cameras that needed to have their passwords reset.

Instead of reset-to-factory default button these cameras have very elaborate password reset process.

Officially one must download SADP tool, get the serial number off the camera, fetch it to the Hikvision support, then they generate you a reset code that you plug in into the camera.

The unreliable Hikvision support can be bypassed with this tool (more details here).

I feel very dirty because I had to install the SADP in a Windows virtual machine (it does not work under Linux).
Interesting that the tool is build around QT and libpcap so technically it should not be too difficult to port it to Linux.

Looking at traffic captures the tool discovers the camera via multicast (239.255.255.250, udp port 37020) with this payload:

<?xml version="1.0" encoding="utf-8"?><Probe><Uuid>13A888A9-F1B1-4020-AE9F-05607682D23B</Uuid><Types>inquiry</Types></Probe>

The camera responds to with this:

<?xml version="1.0" encoding="UTF-8"?>
<ProbeMatch><Uuid>FC25924E-AFE2-49E6-ACC9-F84A6859054D</Uuid>
<Types>inquiry</Types>
<DeviceType>38930</DeviceType>
<DeviceDescription>DS-2CD2432F-IW</DeviceDescription>
<DeviceSN>DS-2CD2432F-IW20150126CCCH502126167</DeviceSN>
<CommandPort>8000</CommandPort>
<HttpPort>80</HttpPort>
<MAC>c0-56-e3-fe-42-92</MAC>
<IPv4Address>10.1.1.251</IPv4Address>
<IPv4SubnetMask>255.255.255.0</IPv4SubnetMask>
<IPv4Gateway>10.1.1.1</IPv4Gateway>
<IPv6Address>::</IPv6Address>
<IPv6Gateway>::</IPv6Gateway>
<IPv6MaskLen>64</IPv6MaskLen>
<DHCP>false</DHCP>
<AnalogChannelNum>0</AnalogChannelNum>
<DigitalChannelNum>1</DigitalChannelNum>
<SoftwareVersion>V5.2.5build 141201</SoftwareVersion>
<DSPVersion>V5.0, build 140714</DSPVersion>
<BootTime>2016-03-06 09:18:17</BootTime>
</ProbeMatch>

This is all nice and easy to replicate, except when discovering that when resetting the password the tool talks to camera directly via ethernet frames:

Reset packet:

12:14:16.063953 52:54:00:db:ae:e4 > XX:XX:XX:XX:XX:XX, ethertype Unknown (0x8033), length 80: 
        0x0000:  2102 0142 0000 173a 0604 0a00 ba54 5254  !..B...:.....TRT
        0x0010:  00db aee4 0a01 0102 XXXX XXXX XXXX 0a01  ........XXXXXX..
        0x0020:  01fb ffff ff00 5252 5364 5264 6572 6439  ......RRSdRderd9
        0x0030:  0000 a100 0000 0000 0000 0000 0000 0000  ................
        0x0040:  0000                                     ..

Response packet:

12:14:16.094857 XX:XX:XX:XX:XX:XX > 52:54:00:db:ae:e4, ethertype Unknown (0x8033), length 260: 
        0x0000:  2101 01f6 0000 173a 0604 0b01 8a3b XXXX  !......:.....;XX
        0x0010:  XXXX XXXX 0a01 01fb ffff ffff ffff 0000  XXXX............
        0x0020:  0000 ffff ff00 4453 2d32 4344 3234 3332  ......DS-2CD2432
        0x0030:  462d 4957 3230 3135 3031 3236 4343 4348  F-IW20150126CCCH
        0x0040:  XXXX XXXX XXXX XXXX XX00 0000 0000 0000  XXXXXXXXX.......
        0x0050:  0000 0000 0000 0000 9812 0000 1f40 0000  .............@..
        0x0060:  0001 0000 0000 5635 2e32 2e35 6275 696c  ......V5.2.5buil
        0x0070:  6420 3134 3132 3031 0000 0000 0000 0000  d.141201........
        0x0080:  0000 0000 0000 0000 0000 0000 0000 0000  ................
        0x0090:  0000 0000 0000 5635 2e30 2c20 6275 696c  ......V5.0,.buil
        0x00a0:  6420 3134 3037 3134 0000 0000 0000 0000  d.140714........
        0x00b0:  0000 0000 0000 0000 0000 0000 0000 0000  ................
        0x00c0:  0000 0000 0000 3230 3136 2d30 332d 3036  ......2016-03-06
        0x00d0:  2030 393a 3138 3a31 3700 0000 0000 0000  .09:18:17.......
        0x00e0:  0000 0000 0000 0000 0000 0000 0000 0000  ................
        0x00f0:  0000 0000 0000                           ......

Now looking further it appears that discovery as well as expected UDP communication there is also ethernet frame type of communication going on in parallel:

Broadcast:

12:13:29.539493 52:54:00:db:ae:e4 > ff:ff:ff:ff:ff:ff, ethertype Unknown (0x8033), length 80: 
        0x0000:  2102 0142 0000 1739 0604 0300 80b6 5254  !..B...9......RT
        0x0010:  00db aee4 0a01 0102 ffff ffff ffff 0000  ................
        0x0020:  0000 0000 0000 fe80 0000 0000 0000 889f  ................
        0x0030:  720d 7c8f 8429 0000 0000 0000 0000 0000  r.|..)..........
        0x0040:  0000                                     ..

Response:

12:13:29.555356 XX:XX:XX:XX:XX:XX > 52:54:00:db:ae:e4, ethertype Unknown (0x8033), length 416: 
        0x0000:  2101 01f6 0000 1739 0604 0400 8c42 XXXX  !......9.....BXX
        0x0010:  XXXX XXXX 0a01 01fb ffff ffff ffff 0000  XXXX............
        0x0020:  0000 ffff ff00 4453 2d32 4344 3234 3332  ......DS-2CD2432
        0x0030:  462d 4957 3230 3135 3031 3236 4343 4348  F-IW20150126CCCH
        0x0040:  XXXX XXXX XXXX XXXX XX00 0000 0000 0000  XXXXXXXXX.......
        0x0050:  0000 0000 0000 0000 9812 0000 1f40 0000  .............@..
        0x0060:  0001 0000 0000 5635 2e32 2e35 6275 696c  ......V5.2.5buil
        0x0070:  6420 3134 3132 3031 0000 0000 0000 0000  d.141201........
        0x0080:  0000 0000 0000 0000 0000 0000 0000 0000  ................
        0x0090:  0000 0000 0000 5635 2e30 2c20 6275 696c  ......V5.0,.buil
        0x00a0:  6420 3134 3037 3134 0000 0000 0000 0000  d.140714........
        0x00b0:  0000 0000 0000 0000 0000 0000 0000 0000  ................
        0x00c0:  0000 0000 0000 3230 3136 2d30 332d 3036  ......2016-03-06
        0x00d0:  2030 393a 3138 3a31 3700 0000 0000 0000  .09:18:17.......
        0x00e0:  0000 0000 0000 0000 0000 0000 0000 0000  ................
        0x00f0:  0000 0000 0000 029c 5648 0a01 0101 0000  ........VH......
        0x0100:  0000 0000 0000 0000 0000 0000 0000 0000  ................
        0x0110:  0000 0000 0000 0000 0000 0000 0000 0007  ................
        0x0120:  0000 0000 0000 0000 0000 0000 0000 0000  ................
        0x0130:  0000 0000 0000 0000 0000 0000 0000 0050  ...............P
        0x0140:  0000 0000 0000 0000 0000 0000 0000 0000  ................
        0x0150:  0000 0000 0000 0000 0000 0000 0000 0000  ................
        0x0160:  0000 4453 2d32 4344 3234 3332 462d 4957  ..DS-2CD2432F-IW
        0x0170:  0000 0000 0000 0000 0000 0000 0000 0000  ................
        0x0180:  0000 0000 0000 0000 0000 0000 0000 0000  ................
        0x0190:  0000

So theoretically it is possible to create a tool based on the reset password code generator to completely cut out middle man.
This is the way I see it working:

1) Discover camera and get serial number and camera ip
2) Get camera date/time via simple GET to port 80.
3) Generate reset code with camera serial number and date/time
4) send magic packet to reset camera.

I found some examples of the traffic that does not contain fe80 0000…XXXX…0000 bit at the end (looks like previous version of SADP Tool didn’t append that crap). I successfully replayed that packet.
I have noticed that the checksum does not include the source (header) of the packet, so as long as the MAC address matches in the body the header can be spoofed.

I have changed the mac address on VM where SADP Tool was running and looks like4 bytes between Source MAC and Destination MAC in the body changes. As well as 2x 2 bytes surrounding 06040300.

If I increment any number by one and decrement @ 0x0018 the packet gets response. This implies that the check sum is only 2 bytes long.

So far I figured out the check sum for older type of discovery packet (without crap at the end of the packet).

the check sum is located here:
0x0010: 00db aee4 0a01 0102 ffff ffff ffff 0000
In this example it is 0102.
Actually the check sum is 0201 (reversed order).
The check sum algorithm is 16-bit one’s complement.
The trick (which was given away by comparing sequential packets) is to ignore the header, and to reverse order in these two bytes:
0x0000: 2102 0142 0000 1739 0604 0300 80b6 5254
in example above they are check-summed as b680.

Next step is to see if I can apply the same method to the password reset packet….

At this stage I solved the following: discovery via frames, discovery via UDP, generate reset code and reset the camera via frame.

There is a potential problem to get camera time reliably (in case it is not configured in same subnet).

After poking around Sadp.dll I found these interesting XML strings:

<?xml version="1.0" encoding="utf-8"?><Probe><Uuid>%s</Uuid><Types>inquiry</Types></Probe>
<?xml version="1.0" encoding="utf-8"?><Probe><Uuid>%s</Uuid><Types>update</Types><MAC>%s</MAC><Password>%s</Password><IPv4Address>%s</IPv4Address><CommandPort>%d</CommandPort><HttpPort>%d</HttpPort><IPv4SubnetMask>%s</IPv4SubnetMask><IPv4Gateway>%s</IPv4Gateway><IPv6Address>%s</IPv6Address><IPv6Gateway>%s</IPv6Gateway><IPv6MaskLen>%d</IPv6MaskLen><DHCP>%s</DHCP></Probe>
<?xml version="1.0" encoding="utf-8"?><Probe><Uuid>%s</Uuid><MAC>%s</MAC><Types>reset</Types><Code>%s</Code></Probe>
<?xml version="1.0" encoding="utf-8"?><Probe><Uuid>%s</Uuid><MAC>%s</MAC><Types>reset</Types><Code>%s</Code><Password>%s</Password></Probe>
<?xml version="1.0" encoding="utf-8"?><Probe><Uuid>%s</Uuid><MAC>%s</MAC><Types>reset</Types><SyncIPCPassword>true</SyncIPCPassword ><Code>%s</Code><Password>%s</Password></Probe>
<?xml version="1.0" encoding="utf-8"?><Probe><Uuid>%s</Uuid><MAC>%s</MAC><Types>getcode</Types></Probe>
<?xml version="1.0" encoding="utf-8"?><Probe><Uuid>%s</Uuid><MAC>%s</MAC><Types>exchangecode</Types><Code>%s</Code></Probe>
<?xml version="1.0" encoding="utf-8"?><Probe><Uuid>%s</Uuid><MAC>%s</MAC><Types>activate</Types><Password>%s</Password></Probe>
<?xml version="1.0" encoding="utf-8"?><Probe><Uuid>%s</Uuid><MAC>%s</MAC><Types>getencryptstring</Types></Probe>

None of that proved to be useful of extracting local time (except inquiry).

See this post for actual script.

ILDVR INC-MH40D06 or hacking cheap chinese camera

Continuation of ILDVR INC-MH40D06

Since manufacturer will not divulge the super secret telnet password, and not having ability to turn off the telnet from web ui, I have decided to get access to camera via more brute method.

Continue reading ILDVR INC-MH40D06 or hacking cheap chinese camera

Dahua IPC-HDBW4300E

Dahua IPC-HDBW4300E with 2.8mm lens.

Bought on Aliexpress, initially came with Chinese firmware, but seller helped me resolve this (was advertised as English).

Reason why I went with dome vs bullet is because I needed wider angle camera.

Here it is:
IMG_20150601_093506

To adjust it one needs to remove the dome with Allen Key provided:

IMG_20150601_093933
(sorry about blurry photo).
IMG_20150601_093954

IMG_20150601_094002
Note: The 4 pin header (on the right) is for serial (RS232), while button next to it (not visible) is the reset button (press 5 seconds to reset).

From Firmware/System perspective it is no different to Dahua IPC-HFW4300S.

Day time image quality exactly the same, except of course the HFW4300S comes with 3.6mm lens minimum while HDBW4300E comes with 2.8mm.
Night time image quality is a bit worse (due to weaker IR, and wider lens).

Here is the angle comparison:

3.6mm (HFW4300S):
Dahua-IPC-HFW4300S-day

Dahua-IPC-HFW4300S-night

2.8mm (HDBW4300E):
2015-9-23-11-23-23-668869

2015-8-23-19-36-17-795868

inside of Mini0806

Update: if you ever thinking about buying this camera, don’t! Unless you wish to buy five them to get one good. It is plagued with issues, from assembly problems (jammed cable), crappy firmware, stability issues, poor choice of power supply IC (only 0.5V head room), random crashes to shitty plastic case that melts at 100’C.

Below is the breakdown of mini0806 dashcam.

The packaging contents:
IMG_20150727_161216

Camera itself:
IMG_20150807_113915

IMG_20150807_113946

IMG_20150807_113937

To open pop the rear cap with fingers:
IMG_20150807_132100

There are screws behind it holding the whole camera together:
IMG_20150807_132254

Notice torn cable inside of the ring? This is a common assembly/design fault:
IMG_20150807_132408

The shell is easily separated:
IMG_20150807_132554
The beefy heat sink is a good thing to have, I believe it is relatively easy to add a micro fan there (maybe with minimal case cutting).

IMG_20150807_132613

The two boards held together quite tight. Here is the camera side:
IMG_20150807_133206

IMG_20150807_133216

Here is the back side:
IMG_20150807_133319

Notice how battery is simply jammed between two halves? It is held by double sided tape…

Under the battery:
IMG_20150807_133359

I have added insulation tape around battery area in case the battery swells in future:
IMG_20150807_133725

Camera is easily assembled back, one thing to watch out for is the power/GPS cable that feeds through the ring. It can be easily jammed and torn by adjusting the angle, if it is not assembled carefully. I bolted the contact pad last which allowed me to check if the cable is jammed.

Navman (Mio) MiVue 388

Navman_MiVue388

I bought Navman MiVue 388 for holiday in Australia, as I was going to do a few thousands kilometres worth of driving.
This camera is sold everywhere else under Mio brand. It is not a Navman product.
When I was purchasing this dash camera I had few prerequisites (which it met, somewhat):
1) 1080p
2) suction cup mount (for easy removal from rental)
3) Modest size
4) Available next day
5) Reasonably priced (under $250)
6) GPS
So basically the only product in New Zealand that met those was this camera.

Whatever you do, do not buy this dash camera. There is nothing really positive I can write about it (apart that it supports 64GB VFAT formatted card, despite the specifications). It pales in comparison to a much cheaper G1W, or Mini0806 (also crap! DO NOT BUY THESE!) or even my dated Blackvue DR400G-HD II. If you are after a good value for money camera get G1W for ~$60USD. Same applies to MiVue 338/358.

Image quality is very grainy:

I didn’t test the camera with optional CPL filter as Navman didn’t sell it at the time (it could have been sources from eBay as Mio branded).

Beyond image quality there are other major issues:

* Suction cup mount is a standard GPS mount, is way too big and vibration prone. It is not very good and falls off after few hours. Not possible for discreet mounting in a smaller car without major view obstruction.
* After 1 month of operation the face plate (screen cover) fell off. It was stuck on by two short strips of double sided tape. After reattaching second time, I gave up and now the camera is used without it.
* Occasionally it decided to completely lose time settings and gets stuck on Setup Time screen. While in that state it does not record!!!
* Cannot turn off blue pixelated “MiVue388” logo on top of the screen (without hacking firmware).
* Battery life is hopeless (about 1 minute and 30 seconds). Good luck actually using park mode.

Two of the issues were because of the climate in New Zealand; this camera is not suitable for being attached permanently on the windscreen due to heat. It is probably far worse for it in Australia.

To address the shitty mount I have decided to build my own mount (secured by not suction cup but double sided tape).
The materials I used are the following:

* Piece of scrap aluminium plate (some random cut off)
* A random drawer knob that I found at hardware store (a 16mm ball with threaded hole and a screw).
* 3M moulding tape
* Black paint

IMG_20140816_125834
IMG_20140816_125848
IMG_20140816_125901
IMG_20140816_125928

Test fit:
IMG_20140816_130112
IMG_20140816_130157

Painted and assembled:
IMG_20140816_131827
IMG_20140816_131849
IMG_20140816_132327

Finished product:
IMG_20140817_141948
IMG_20140817_142026

With my mount the dash cam no longer blocks the view, in fact it is almost not visible (apart from status LED) from drivers seat. It is also very discreet from outside as it is masked by mirror contour.

Converting Blackvue Dashcam gps log

It appears that Blackvue dashcams log GPS data in “almost” NMEA format.
It is possible to convert the file using gpsbabel utility into KML format that google maps/earth can understand.
All you need to do is strip time stamp appended to each line in the log and them process the output with gpsbabel:

cat {BLACKVUE_GPS_LOG}.gps | awk -F ']' '{ print $2 }' | egrep -v '^$' > {BLACKVUE_GPS_LOG}.nmea
gpsbabel -i NMEA -f  {BLACKVUE_GPS_LOG}.nmea -o KML -F {BLACKVUE_GPS_LOG}.kml

This is what log looks like:

[1389266060242]$GPRMC,221417.990,A,4533.1826,S,16737.5506,E,054.7,035.5,080114,,,A*77

[1389266060242]$GPVTG,035.5,T,,M,054.7,N,101.4,K,A*0C

[1389266060242]$GPGGA,221418.990,4533.1701,S,16737.5631,E,1,11,1.1,204.6,M,1.7,M,,0000*78

[1389266060242]$GPGSA,A,3,16,07,03,19,23,13,10,06,09,27,08,,2.0,1.1,1.7*3D

[1389266060242]$GPGSV,3,1,12,13,80,310,39,07,50,247,36,23,50,019,48,03,48,066,46*71

[1389266060242]$GPGSV,3,2,12,16,45,128,43,27,42,084,44,06,41,096,44,19,28,038,46*79

[1389266060242]$GPGSV,3,3,12,10,26,260,31,08,19,261,32,09,16,257,26,05,06,210,*77

[1389266061239]$GPRMC,221418.990,A,4533.1701,S,16737.5631,E,054.8,035.0,080114,,,A*7F

Rebooting IP cameras remotely

Hikvision

Complete Hikvision API documentation is available here.

To reboot remotely a Hikvision IP camera, all one needs to do is ‘PUT’ /System/reboot:

curl -X PUT --user {USERNAME}:{PASSWORD} http://{CAMERA_IP}/System/reboot

Dahua

Complete Dahua API documentation is available here.

To reboot remotely a Hikvision IP camera, all one needs to do is 'GET' /cgi-bin/magicBox.cgi?action=reboot:

curl --user {USERNAME}:{PASSWORD} http://{CAMERA_IP}/cgi-bin/magicBox.cgi?action=reboot

inside of Dahua IPC-HFW4300S

I have decided to switch back from 8mm lens to 3.6mm lens (Mega brand, sold as 3.6mm, f2.3, M12, for 1/3″ sensor).

Disassembly is fairly straight forward.
dahua-ipc-hfw4300s-000
Note: there is no need to remove screw from the back of the camera. It looks like it is covering a breathing hole (the screw does not hold anything).

Unscrew the front half:
dahua-ipc-hfw4300s-001

The IR LED PCB is held by couple of screws:
dahua-ipc-hfw4300s-002

In case of lens change there is no need to disassemble further. But for curiosity I continued.
The SoC board is held by another couple of screws and two screw posts that IR LED PCB was screwed into. These posts can be unscrewed by flat screw driver.
dahua-ipc-hfw4300s-003
Interestingly enough the camera is mostly empty space, the raised part of the body inside is used as heat sink (covered by yellow heat sink pad). There was a bag of silica gel inside.

The SoC board with lens:
dahua-ipc-hfw4300s-004
Lens is simply threaded on the sensor body, secured by locking nut. Everything was finger tight. The locking nut is transferred to the new lens and then the whole thing is assembled back, except IR PCB and front cover. Focusing is done on live camera, preferably with a special pattern. The trick is slightly “over” focus, and then tighten the locking nut (while holding the lens).

Back of SoC board:
dahua-ipc-hfw4300s-005

dahua-ipc-hfw4300s-006

Here what states on the “CPU”:

Ambarella
A5s-CO-RH
A1407
N6WY4-AN3
1N1
A5s88

Here is the front of SoC with lens removed:

dahua-ipc-hfw4300s-007
The dust speckle on the sensor was courtesy of Chinese aliexpress seller (probably when they replaced the lens to 8mm).
EDIT: the unpopulated 4 pin header (top right) is for the Serial (RS232) connector, the unpopulated 2 pin header (bottom left, next to battery) is for the reset button.

I used a bit of sticky tape to remove the dust speckle without leaving anything else on the IR filter.

The screws were one time use only (made out of Chinesium) so I replaced them with nice stainless steel screws.