Interfacing PTC06 UART camera with micropython

For a while I was looking a simple camera that I could use with micropython and ESP32 board.

Initially I looked at Arducam 2MP camera, but that turned out to be a real pain to interface with, and it took up way to many IO pins for my liking. The micropython is barely fast enough to actually do handle the packets. Of course there weren’t off the shelf library to do what I wanted. In addition the image quality was not great, even though it was a 2MP camera.

I decided to try a low cost UART (serial) camera instead. Downside is the camera only 640×480, the upside is that the power consumption is around 30mA (half of what the Arducam is). Another upside that the camera is physically smaller (specifically the lens). Most importantly the UART protocol the camera uses is very simple, and it only needs two IO pins to operate.

Continue reading Interfacing PTC06 UART camera with micropython

Brother MFC-9320CW No Ethernet Link Repair

After the lightning strike on our mains transformer one of the printers (Brother MFC-9320CW) lost Ethernet link.

Upon further troubleshooting I concluded that the PHY chip gave up the ghost.
The chip in question is ASIX AX88796BLF. It appears from the board it has absolutely no input protection what so ever, hence it gave up the ghost.
A bit of warning: the AX88796BLF comes in QFP64 7mm x 7mm package with a microscopic 0.4mm pin pitch. I would not recommend this repair without hot air.

Continue reading Brother MFC-9320CW No Ethernet Link Repair

Converting DeWalt DCB101 110V charger to 240V

Here is how I converted north American Dewalt DCB101 to proper supply voltage (warning: do it at your own risk).
I have made this conversion based on many internet forum posts and youtube videos.
Note: there are at least two versions of this charger and newer version requires rewinding the transformer (at least according to internet).

Why? For some stupid reason 240V chargers locally cost 2 to 3 times more than in USA.

Continue reading Converting DeWalt DCB101 110V charger to 240V

Unbricking Asus Chromebox CN60

Asus CN60 is a good platform to re-purpose to run vanilla Linux on, since they come with decent CPU, while RAM can be upgraded to 16GB, and SSD to 512GB.

Unfortunately out of the box they come locked down by Google, with non-standard BIOS/UEFI, making it not possible to wipe the useless ChromeOS in favour of something like Ubuntu.

Fortunately there is a way to un-Google-fy it.

Continue reading Unbricking Asus Chromebox CN60

Beware of fake Philips HID Bulbs!

I decided to replace the 6300k HID bulbs on one of my cars, with more sensible 4300k OEM solution.

I came across reasonably priced Toyota Genuine Bulbs on trademe.co.nz (NZ ebay type of thing).

The particular bulbs I was after were D4R, or Toyota Genuine Part 90981-20015 (alternatively Philips 42406).

They were priced (~$80NZD) similar to Genuine Philips 42406 in USA (~$50USD), so seemed to be reasonable. The Toyota Genuine are after all Philips 42406 in TGP box.

When I tried to fit the bulbs I noticed they were extremely tight. Then I looked closely and did some googling.

Continue reading Beware of fake Philips HID Bulbs!

External Western Digital USB drives and why to avoid them

Today I encountered a dead Western Digital USB 2.5″ drive.
The drive in question is “WD 1TB Elements SE Portable Hard Drive USB 3.0” with WDBPCK0010BBK-01 part number.
Searching for the part number on WD site leads nowhere.

The error was:

 Buffer I/O error on dev sdb, logical block 0, async page read 

Continue reading External Western Digital USB drives and why to avoid them

inside of Dahua IPC-HFW4300S

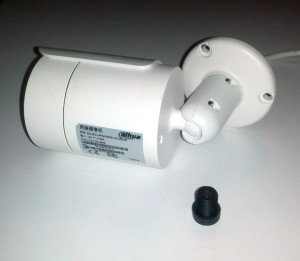
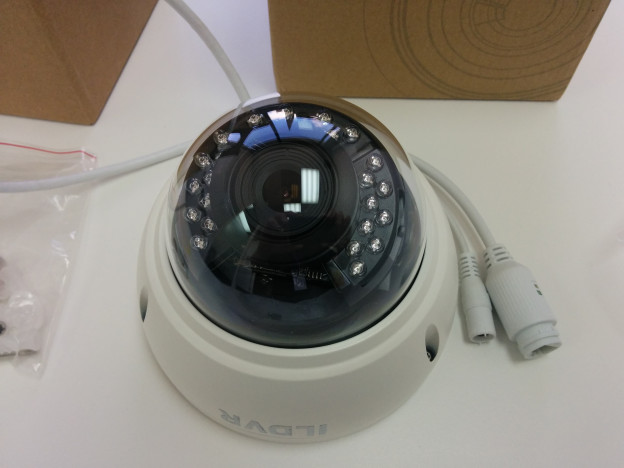
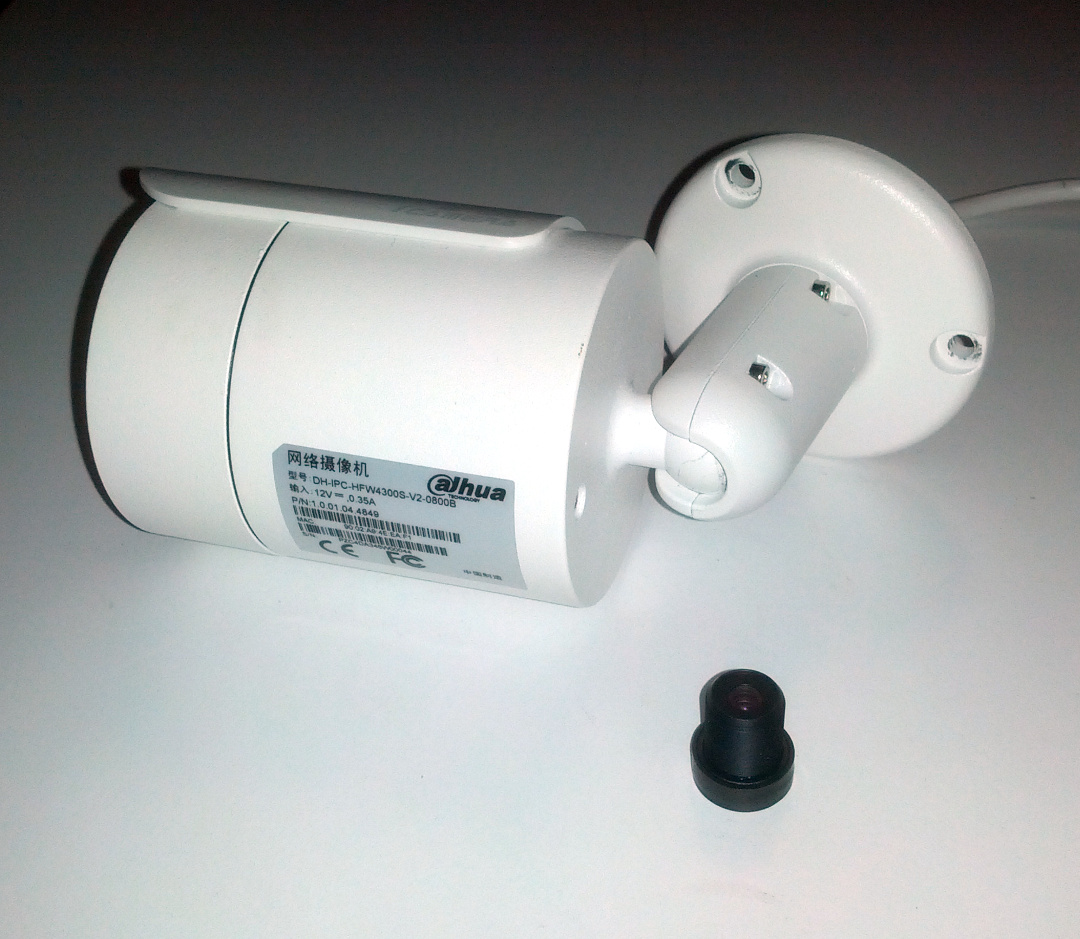
I have decided to switch back from 8mm lens to 3.6mm lens (Mega brand, sold as 3.6mm, f2.3, M12, for 1/3″ sensor).

Disassembly is fairly straight forward.
dahua-ipc-hfw4300s-000
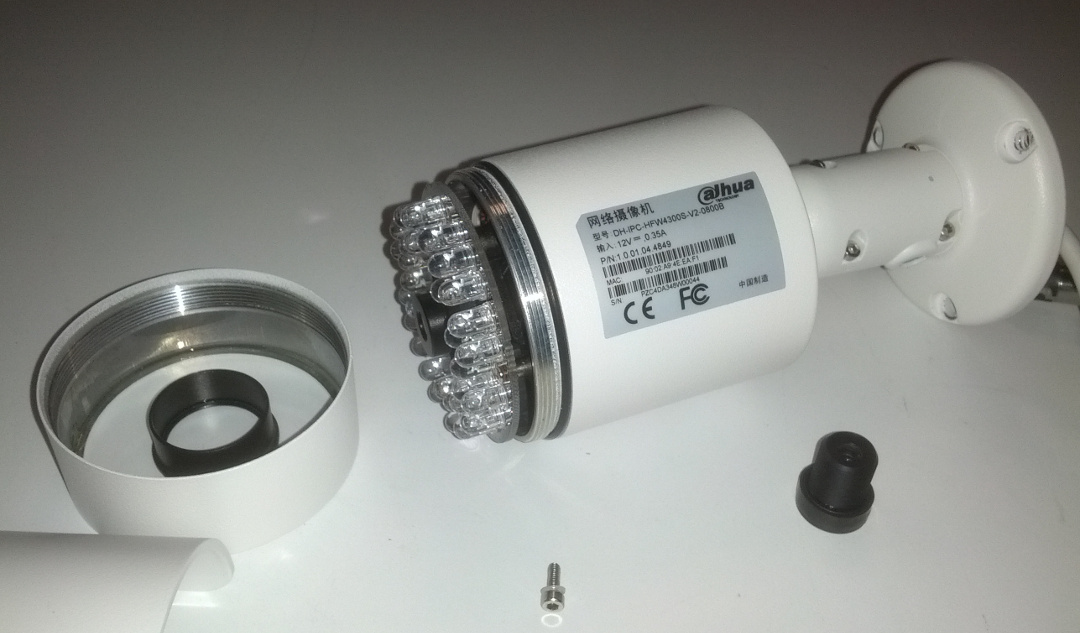
Note: there is no need to remove screw from the back of the camera. It looks like it is covering a breathing hole (the screw does not hold anything).

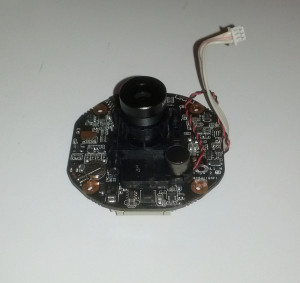
Unscrew the front half:
dahua-ipc-hfw4300s-001

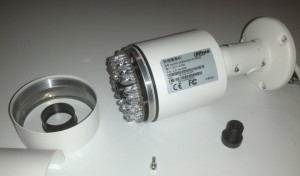
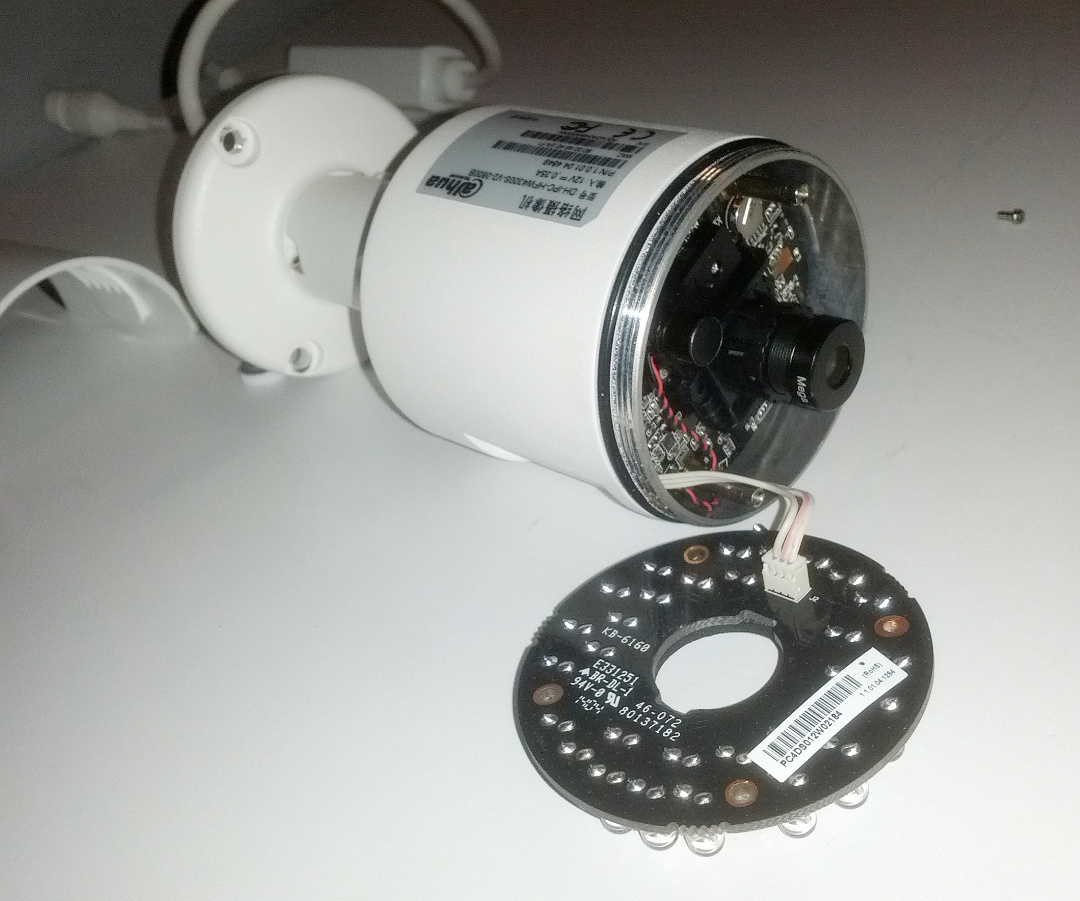
The IR LED PCB is held by couple of screws:
dahua-ipc-hfw4300s-002

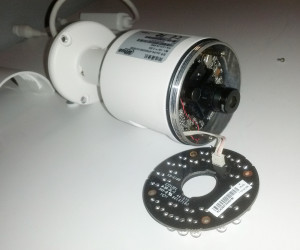
In case of lens change there is no need to disassemble further. But for curiosity I continued.
The SoC board is held by another couple of screws and two screw posts that IR LED PCB was screwed into. These posts can be unscrewed by flat screw driver.
dahua-ipc-hfw4300s-003
Interestingly enough the camera is mostly empty space, the raised part of the body inside is used as heat sink (covered by yellow heat sink pad). There was a bag of silica gel inside.

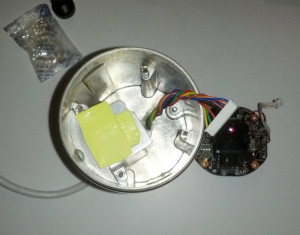
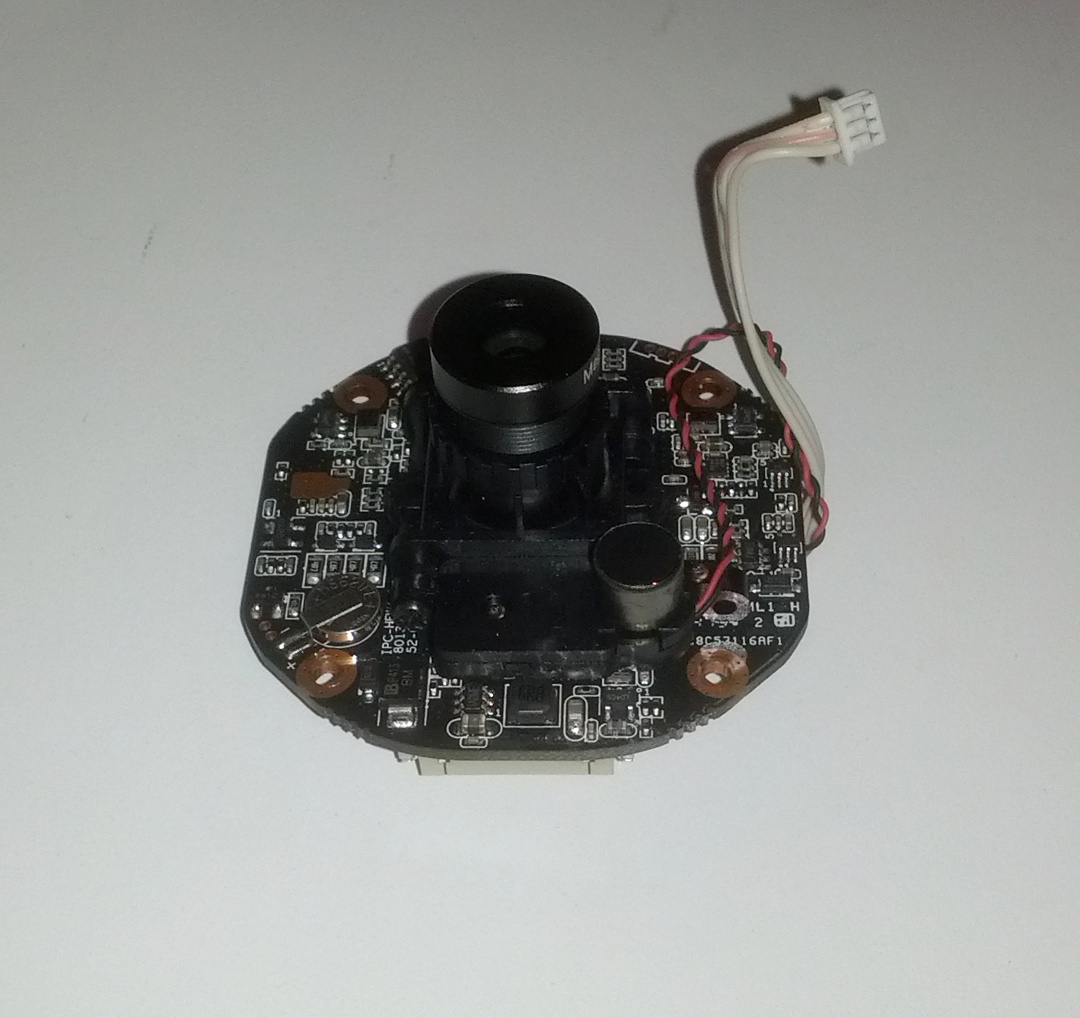
The SoC board with lens:
dahua-ipc-hfw4300s-004
Lens is simply threaded on the sensor body, secured by locking nut. Everything was finger tight. The locking nut is transferred to the new lens and then the whole thing is assembled back, except IR PCB and front cover. Focusing is done on live camera, preferably with a special pattern. The trick is slightly “over” focus, and then tighten the locking nut (while holding the lens).

Back of SoC board:
dahua-ipc-hfw4300s-005

dahua-ipc-hfw4300s-006

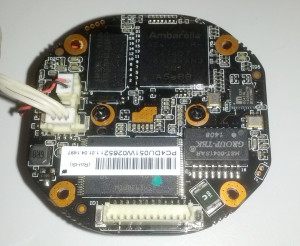
Here what states on the “CPU”:

Ambarella
A5s-CO-RH
A1407
N6WY4-AN3
1N1
A5s88

Here is the front of SoC with lens removed:

dahua-ipc-hfw4300s-007
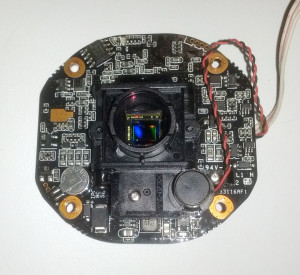
The dust speckle on the sensor was courtesy of Chinese aliexpress seller (probably when they replaced the lens to 8mm).
EDIT: the unpopulated 4 pin header (top right) is for the Serial (RS232) connector, the unpopulated 2 pin header (bottom left, next to battery) is for the reset button.

I used a bit of sticky tape to remove the dust speckle without leaving anything else on the IR filter.

The screws were one time use only (made out of Chinesium) so I replaced them with nice stainless steel screws.