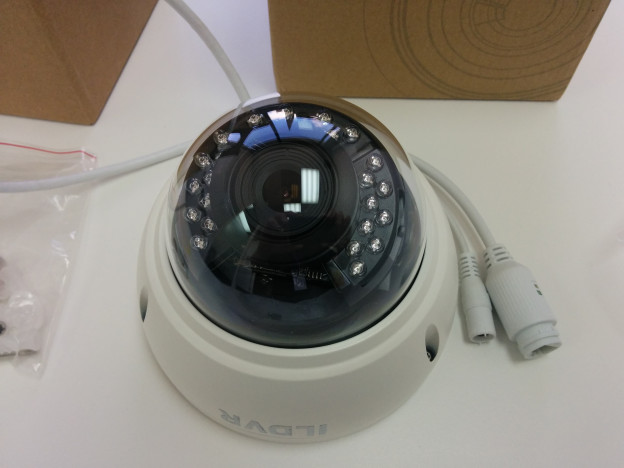
So here I am poking at ILDVR INC-MH40D06 only to discover more and more security issues.
Author: iamroot
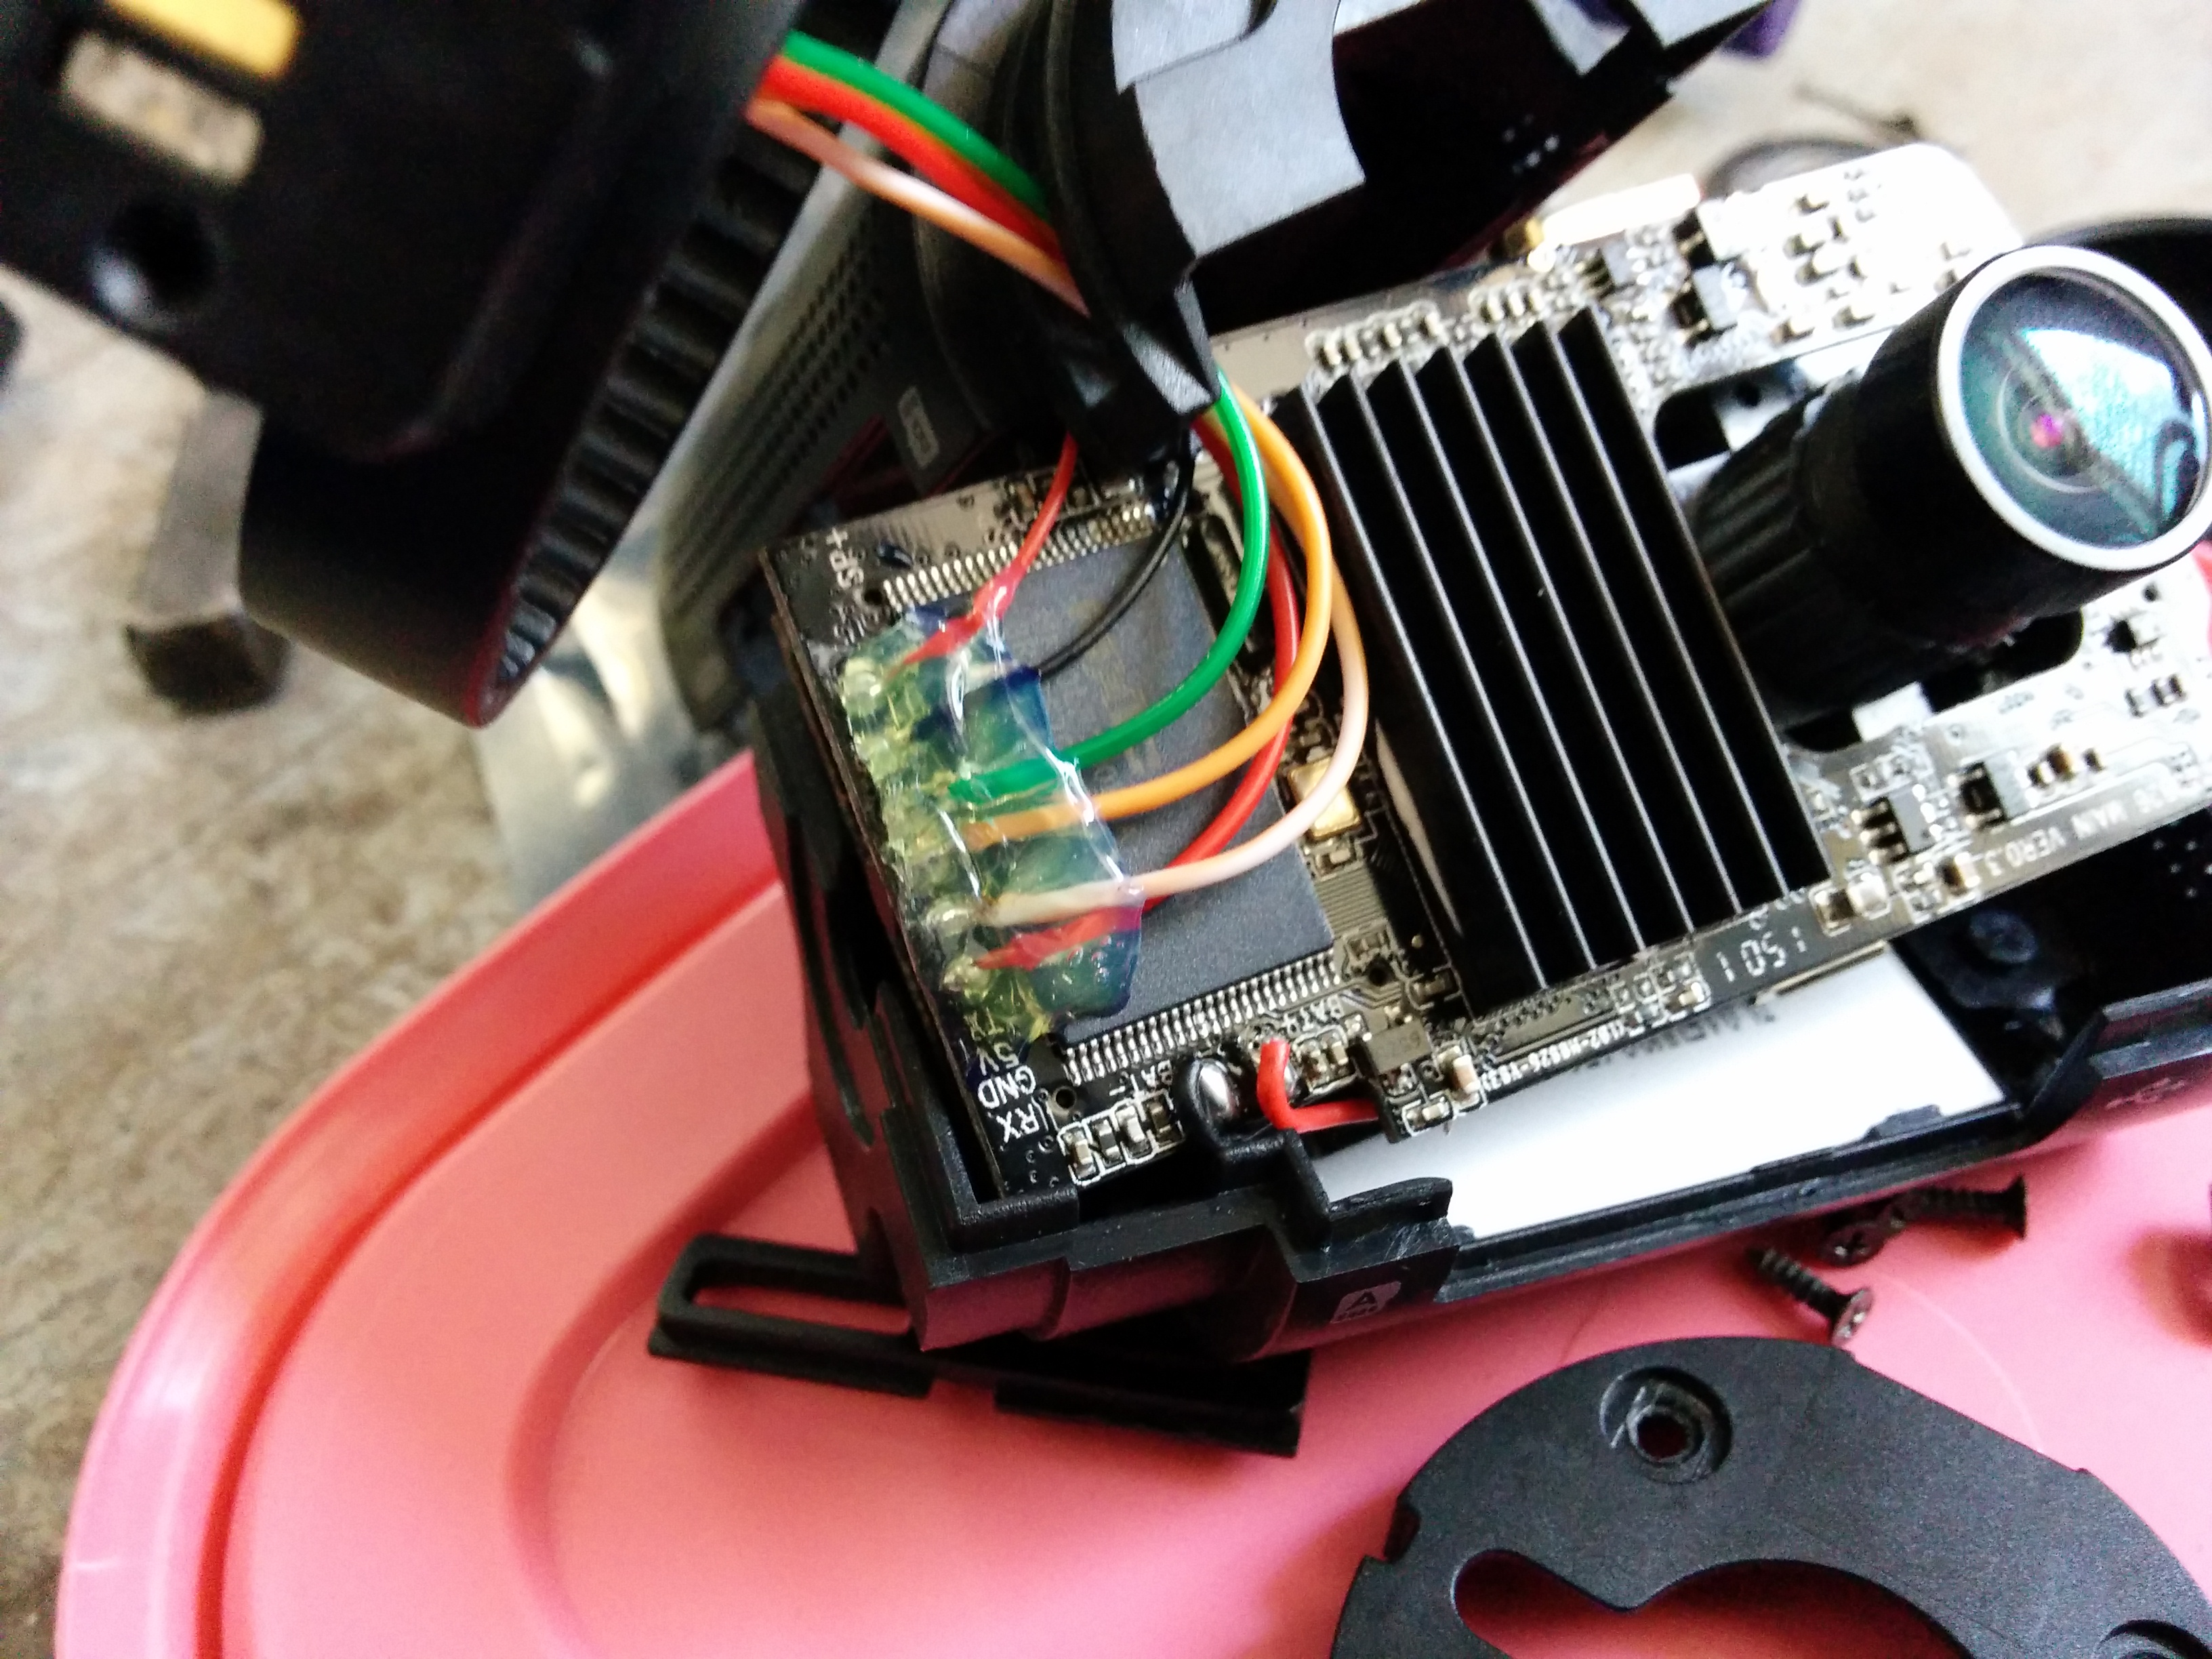
mini0806 internal cable issue
So, Why my second mini0806 was always crashing?
Turns out to be it was the internal cable after all.
Update: it was still crashing (differently), so cable was not the ultimate problem. I didn’t figured out the problem as camera is dead now from a relatively soft drop.
Here is the fix:

hot glue for a good measure:
The original cable:
I used some telephone/Cat5 cable due to lack of better alternative, it works good now.
I also noticed a peculiar thing: card slot A and slot B have different read/write speeds.
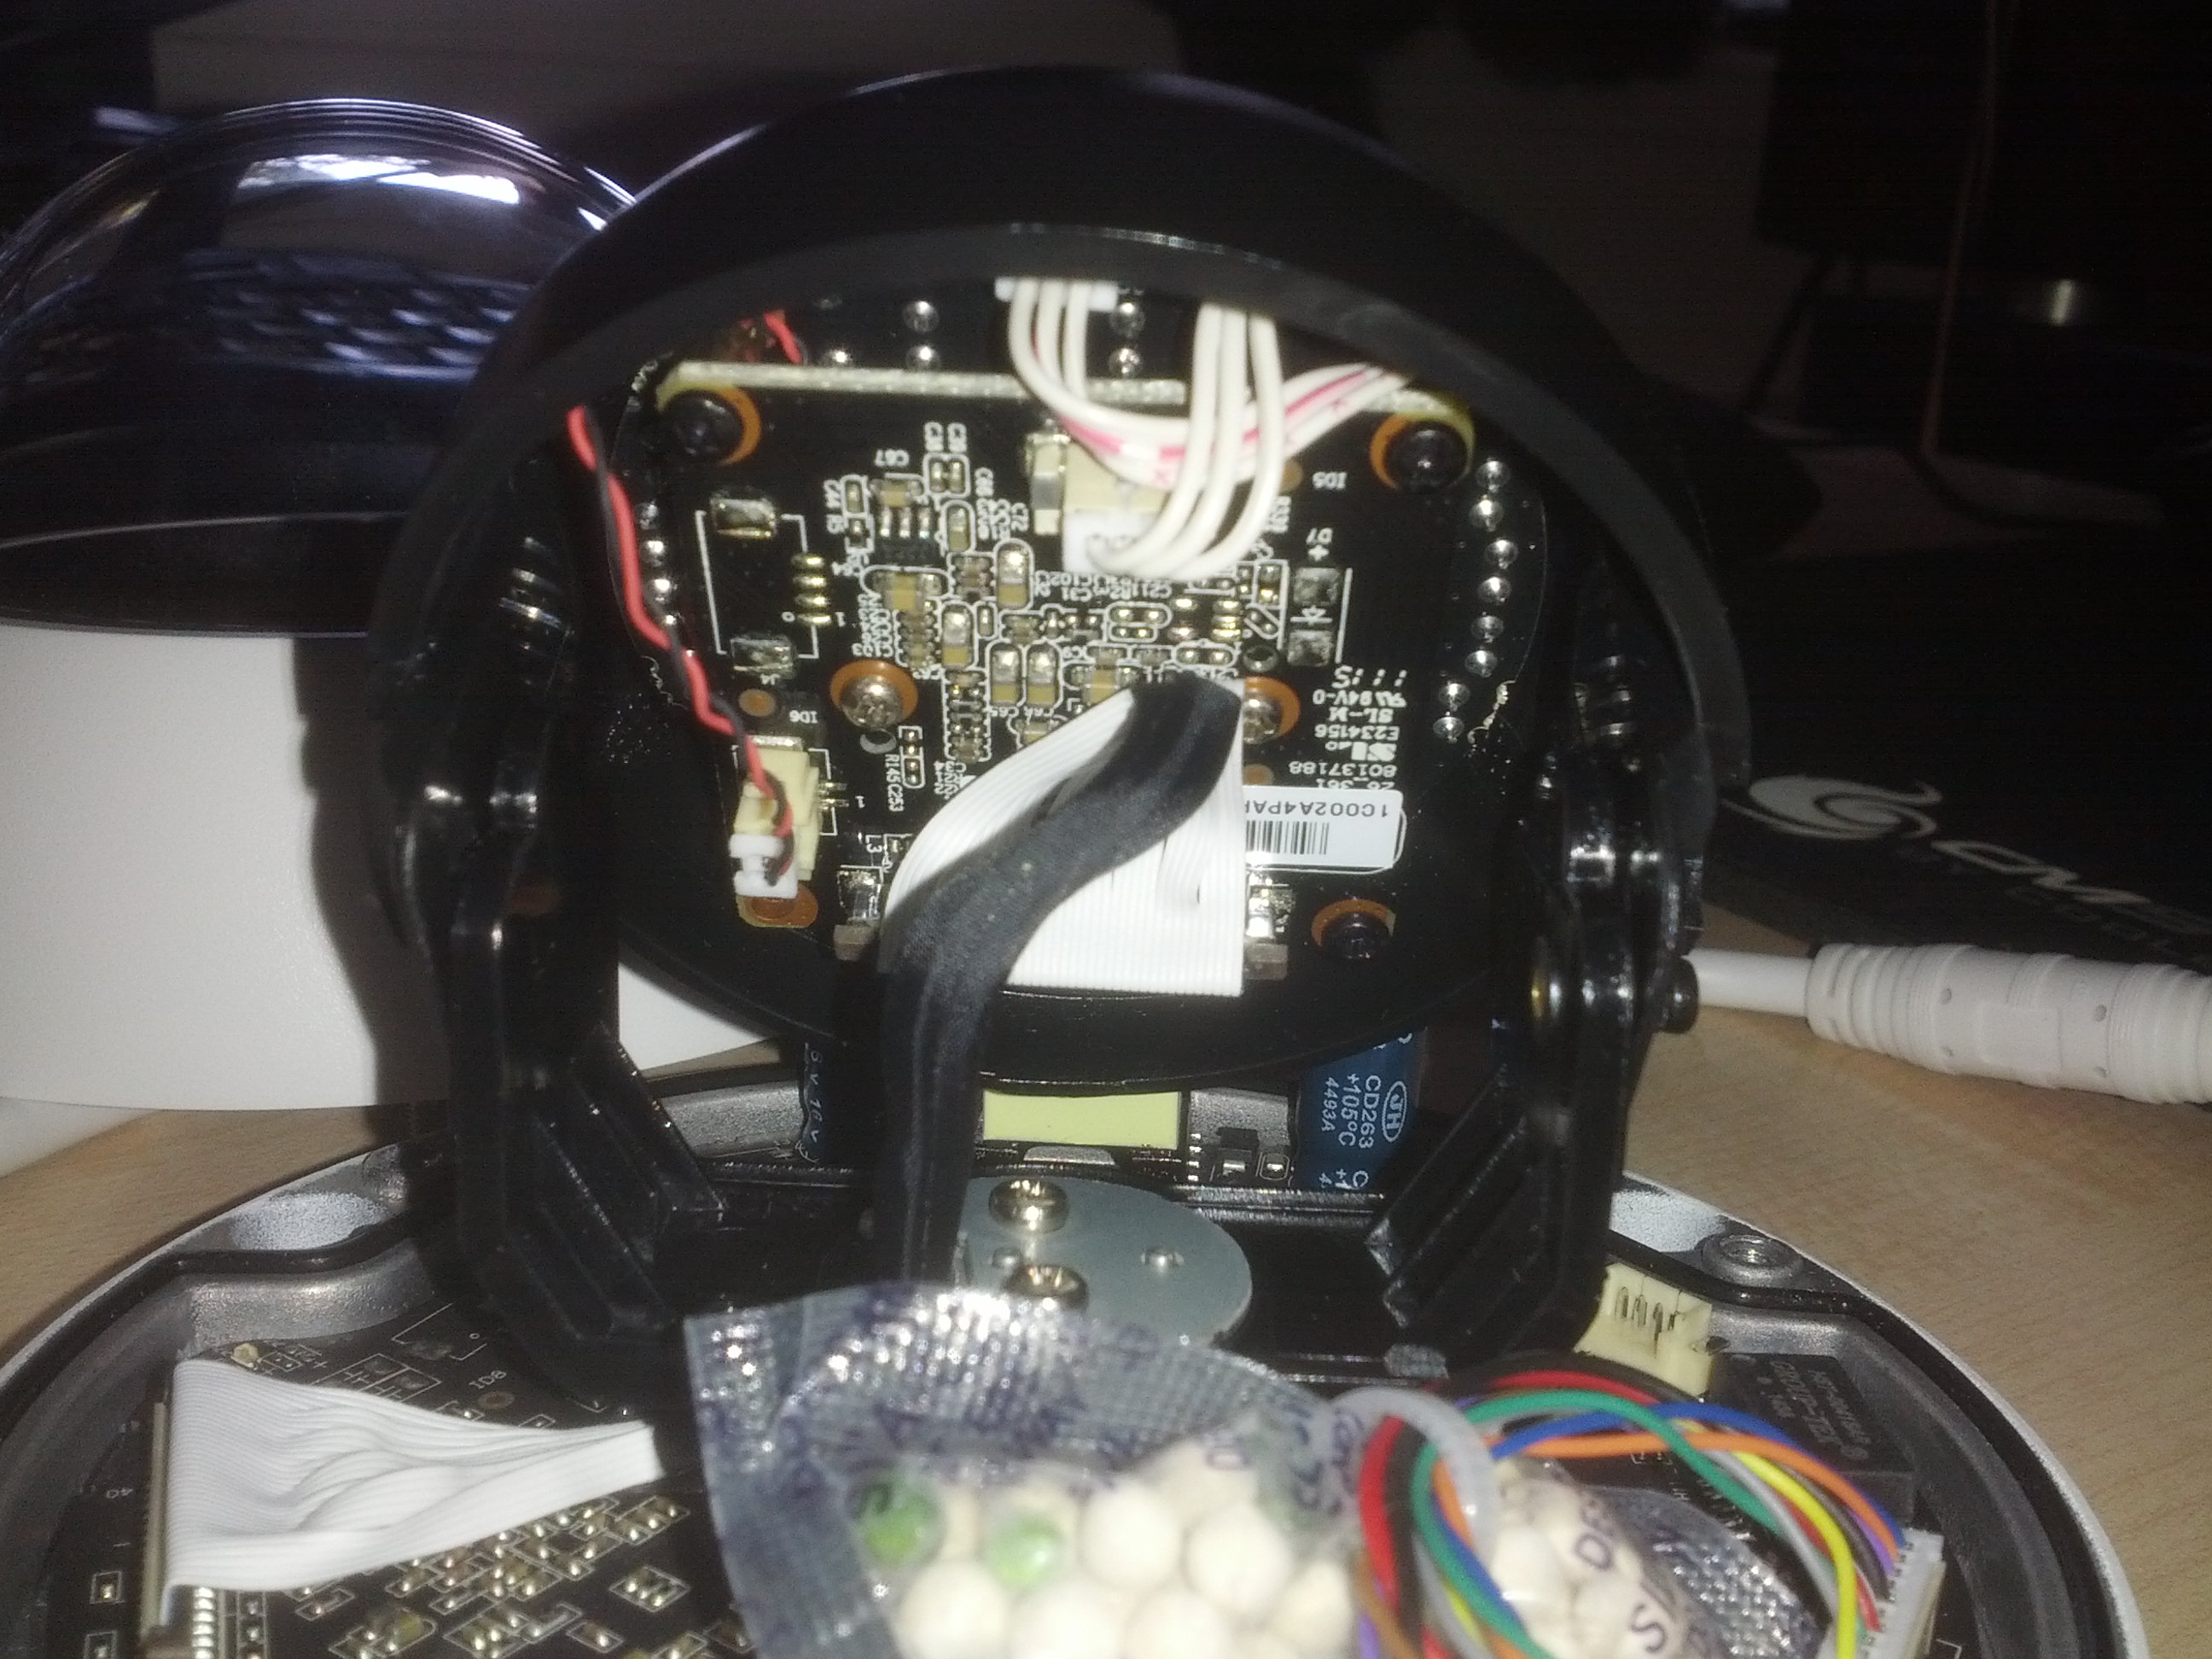
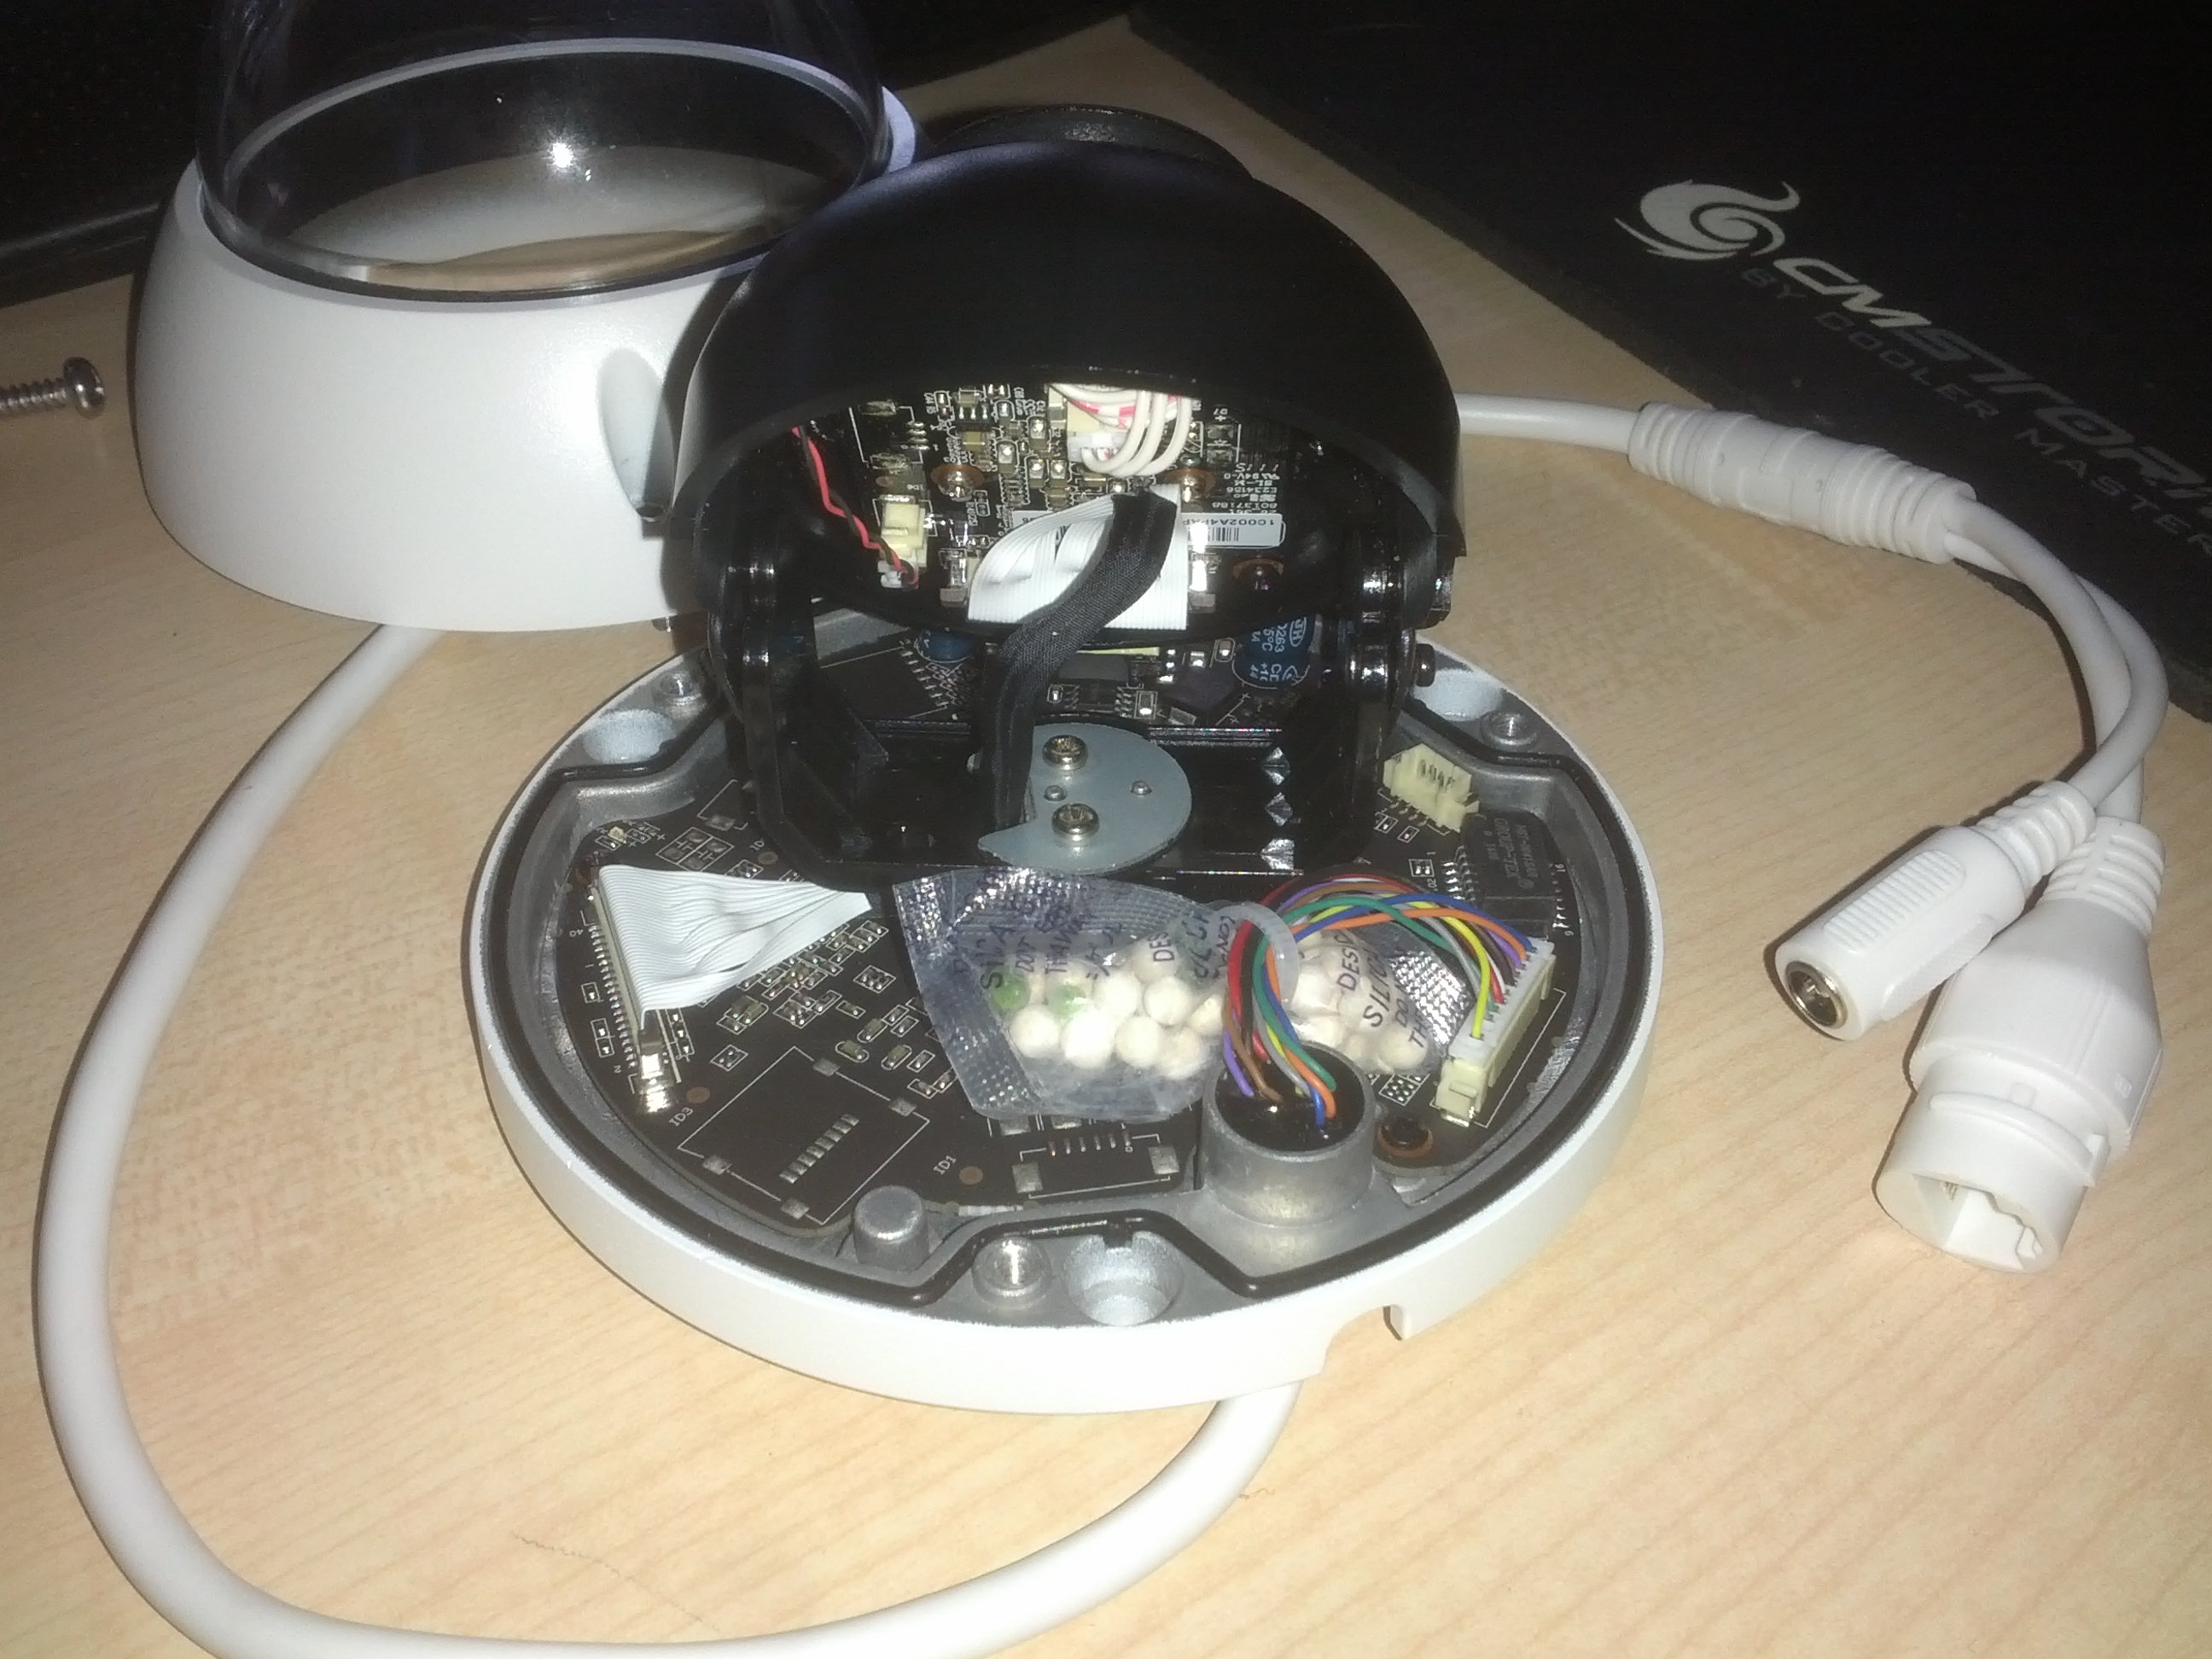
ILDVR INC-MH40D06 or hacking cheap chinese camera
Continuation of ILDVR INC-MH40D06
Since manufacturer will not divulge the super secret telnet password, and not having ability to turn off the telnet from web ui, I have decided to get access to camera via more brute method.
Continue reading ILDVR INC-MH40D06 or hacking cheap chinese camera
ILDVR INC-MH40D06
ILDVR INC-MH40D06
Attention: before you read all this, see this post!
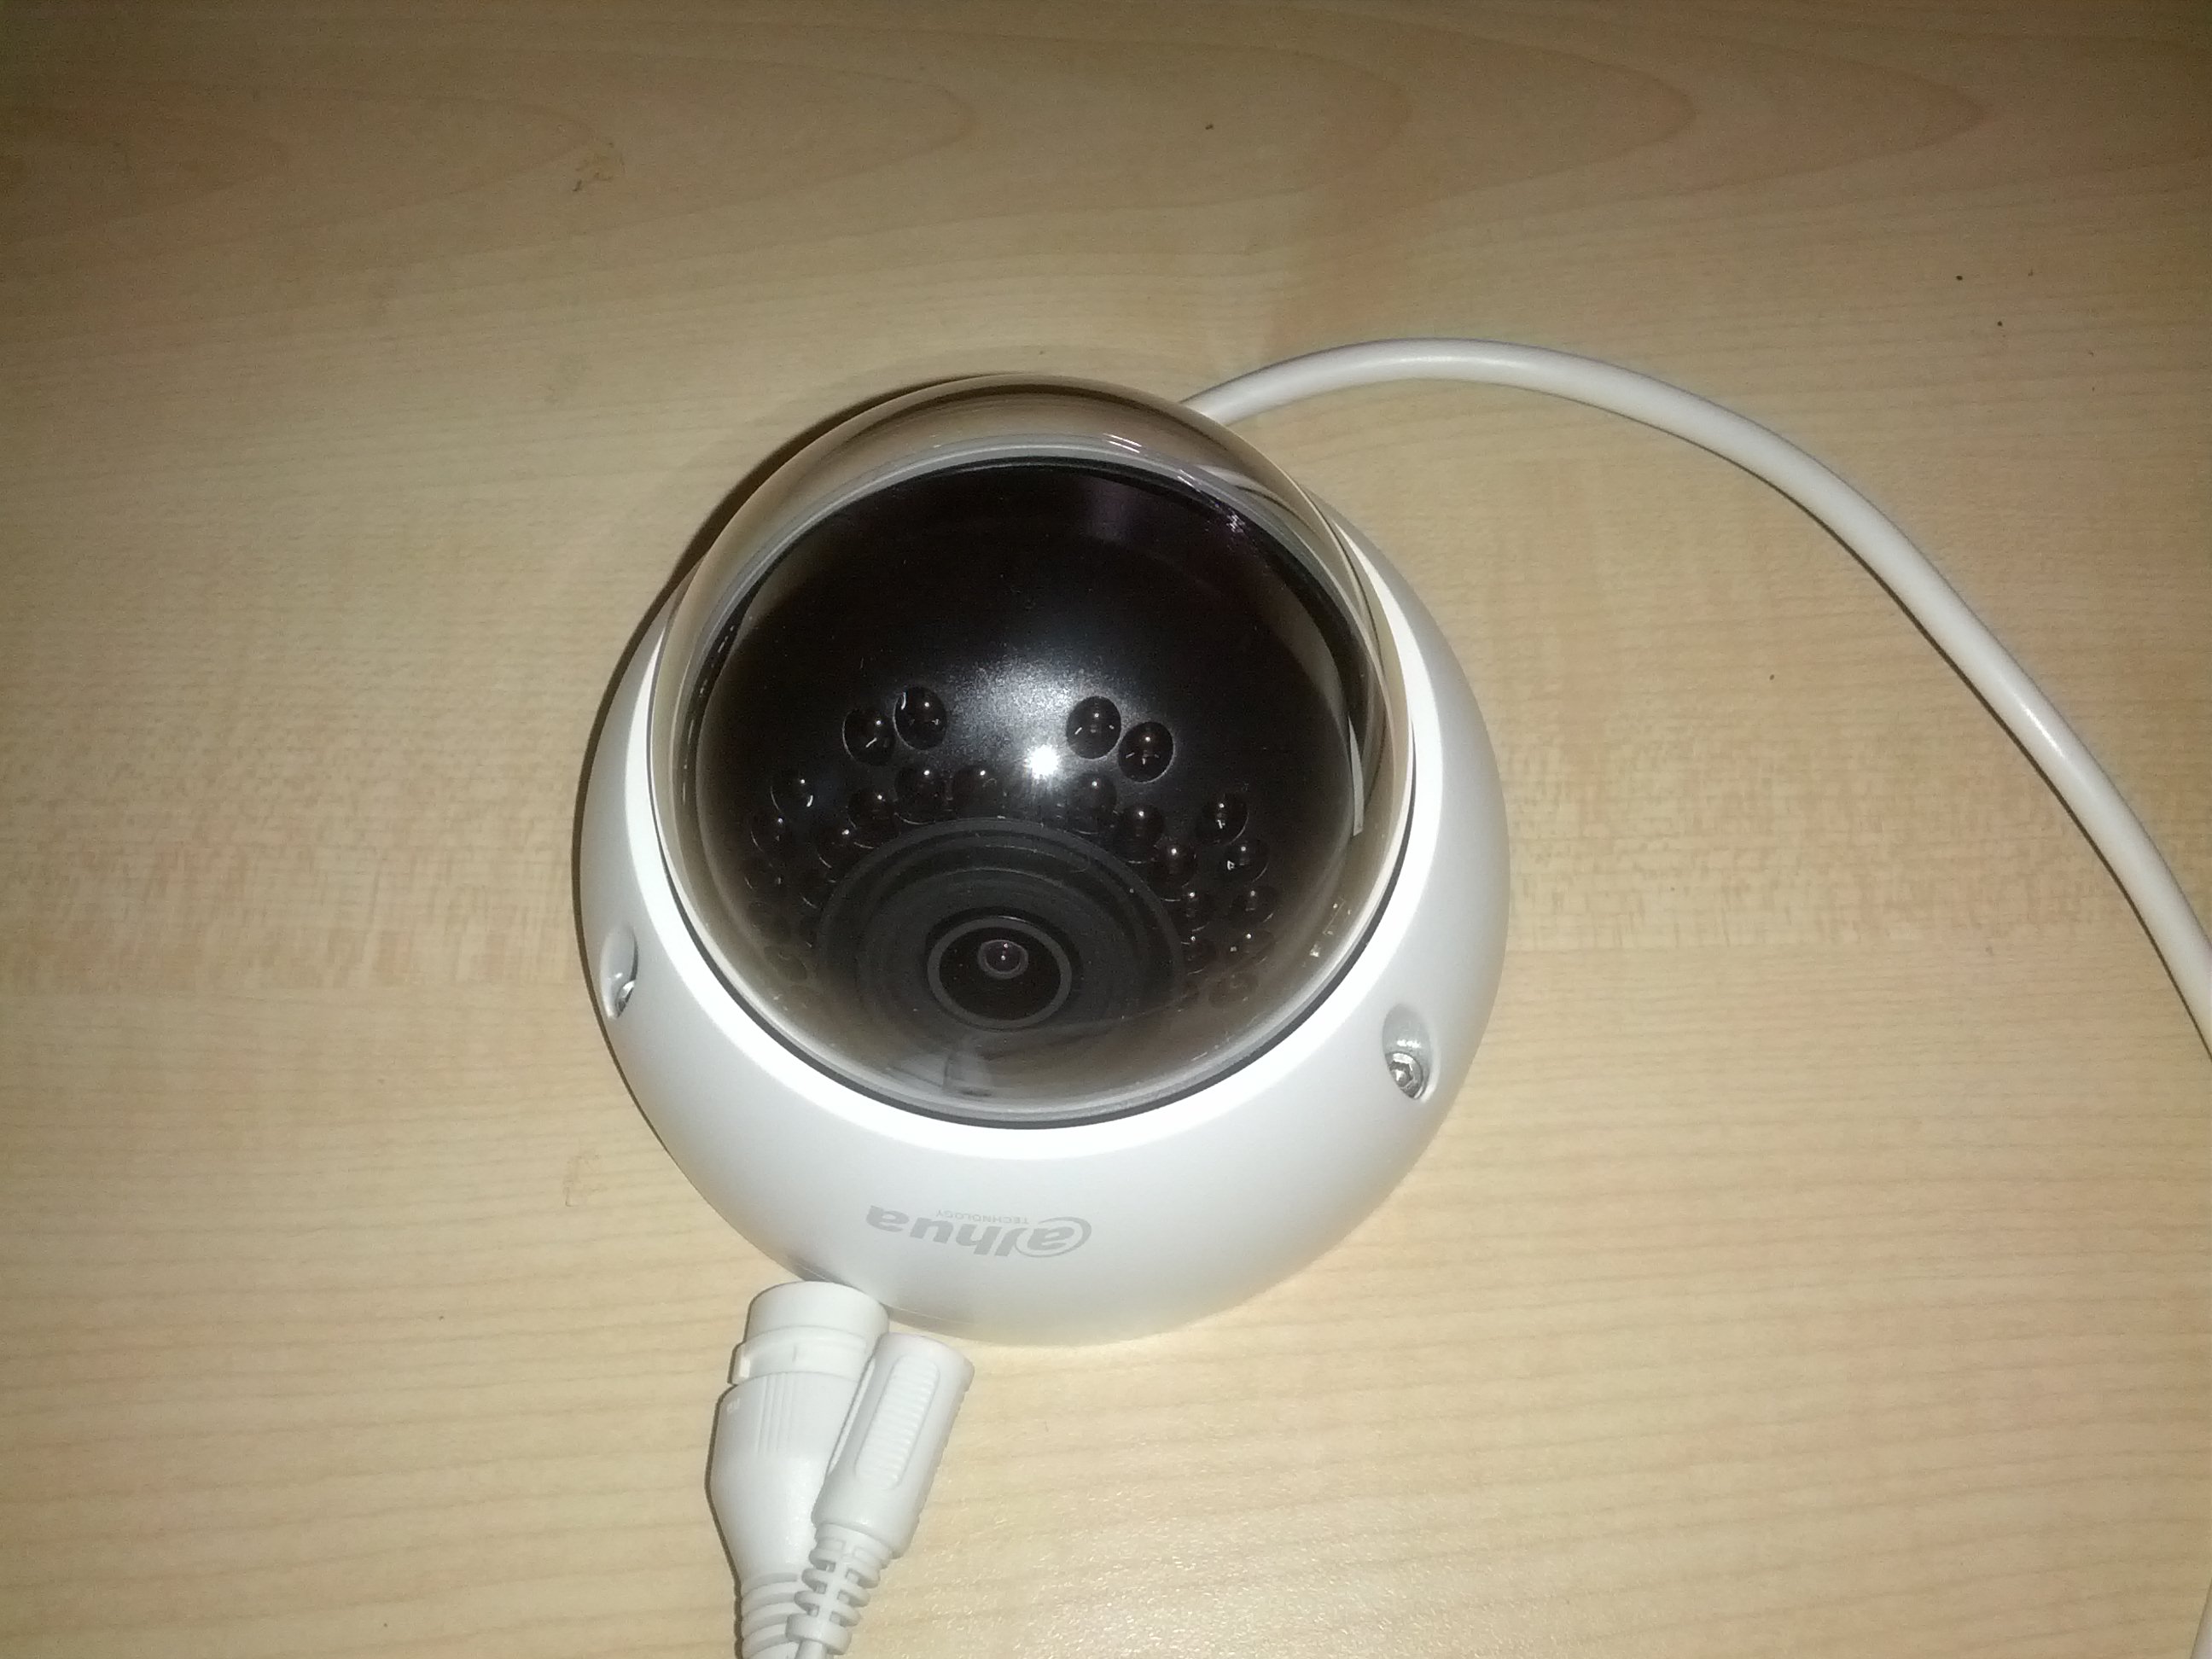
A 4MP dome IP camera (this particular has 2.8mm lens) ordered from ildvr.com, somewhat unknown company between western IP camera enthusiasts (although it is known in Russian circles). I have stumbled up when researching new cameras on some Russian website.
Dynamic HTML5 video page generator
Not sure if this is optimal, as I am not a “web” developer, here is a dynamically generated simple HTML5 page:
<!DOCTYPE html>
<html>
  <script type="text/javascript">
function sVideo(){
    d = new Date();
    var streams = ["stream1","steam2","steam3","streamN","streamN+1"];
    var l = streams.length;
    for (var i = 0; i < l; i++){

        var vDiv = document.createElement("div");
        vDiv.style.position="relative";
        vDiv.style.cssFloat="left";
        vDiv.style.display="table-row";

        var vVideo = document.createElement("video");
        vVideo.id = streams[i];
        var source = document.createElement('source');
        source.src = 'http://example.com/video/'+streams[i]+'?t='+ d.getTime();
        source.type = 'video/webm'
        vVideo.appendChild(source);

        vVideo.play();
        vVideo.removeAttribute("controls");

        vDiv.appendChild(vVideo);

        var aDiv = document.getElementById("anchor");
        aDiv.appendChild(vDiv);
   }
}
  </script>
  <body onload="sVideo()">
    <div id="anchor" style="position:relative; float:left; display:table">
    </div>
  </body>
</html>
Here what it does:
For every stream in the list ‘streams’ it generates a div (the divs are arranged in a table), into which it places video block with stream source and type.
This page does not work with iOS because it does not support webm. On other hand it works perfectly fine on a shitty $50 android device. Actually it works everywhere except iOS (Linux, Windows, Android, FreeBSD and OSX).
Apple sucks
I was given an iPad. I decided to try it out.
After multitude of accepts of EULA, filling out personal information (apple ID shit), silly security questions, I managed to get to “use” it.
First thing I did is to try out my CCTV feeds in Safari. These work everywhere (Linux, FreeBSD, Windows, OSX etc.), well everywhere except iOS.
Epic fail.
My CCTV feeds are simple HTML5 <video> tags with webm container and libvpx format. I feed them via ffserver/ffmpeg.
Very clean and efficient setup (here is the html/javascript example).
Shitty safari browser does not support webm. Installing “different” browser not going to help as any “different” browser is just a skin to the shitty safari. Apple does not allow alternative browsers.
So next option is to try mp4 container with h264 format, only problem is mp4 does not work with non seekable video.
You get this:
[mp4 @ 0x25185b0]muxer does not support non seekable outputEpic fail indeed.
So shall I try HLS? Good luck with that, I can’t even trouble shoot it because iOS is so castrated (view source? browser console? anything?)!
I didn’t get anywhere with HLS either (no idea how to test it without Apple envirnoment with some basic debugging tools).
Besides HLS is not a true video tag.
In reality Safary is a non-HTML5 browser and does not support HTML5. Because of the browser lock-in there is no way for iOS to support HTML5 (this should be illegal, it should be my choice what I run on my device). Thus iOS devices are stuck in stone age.
Reality distortion field is a real thing, there are some serious issues with iOS (FFS! At least support open/royalty free formats).
As far as I am concerned iPad and iPhone is a fucking toy, as because of the walled garden it limits usability of the device.
Because of this I will not willingly buy anything from Apple. Screw you Apple.
P.S. I installed Firefox for shits and giggles and it was a far cry from actual Firefox. Why they even bother, they only tar their image because of how shitty Firefox on iOS is (and no, there are no customisation or extensions)!
P.P.S. there is another way of making this work: play 10-30second videos with javascript loading them (while they are being generated on server). I might implement it once I get over it…
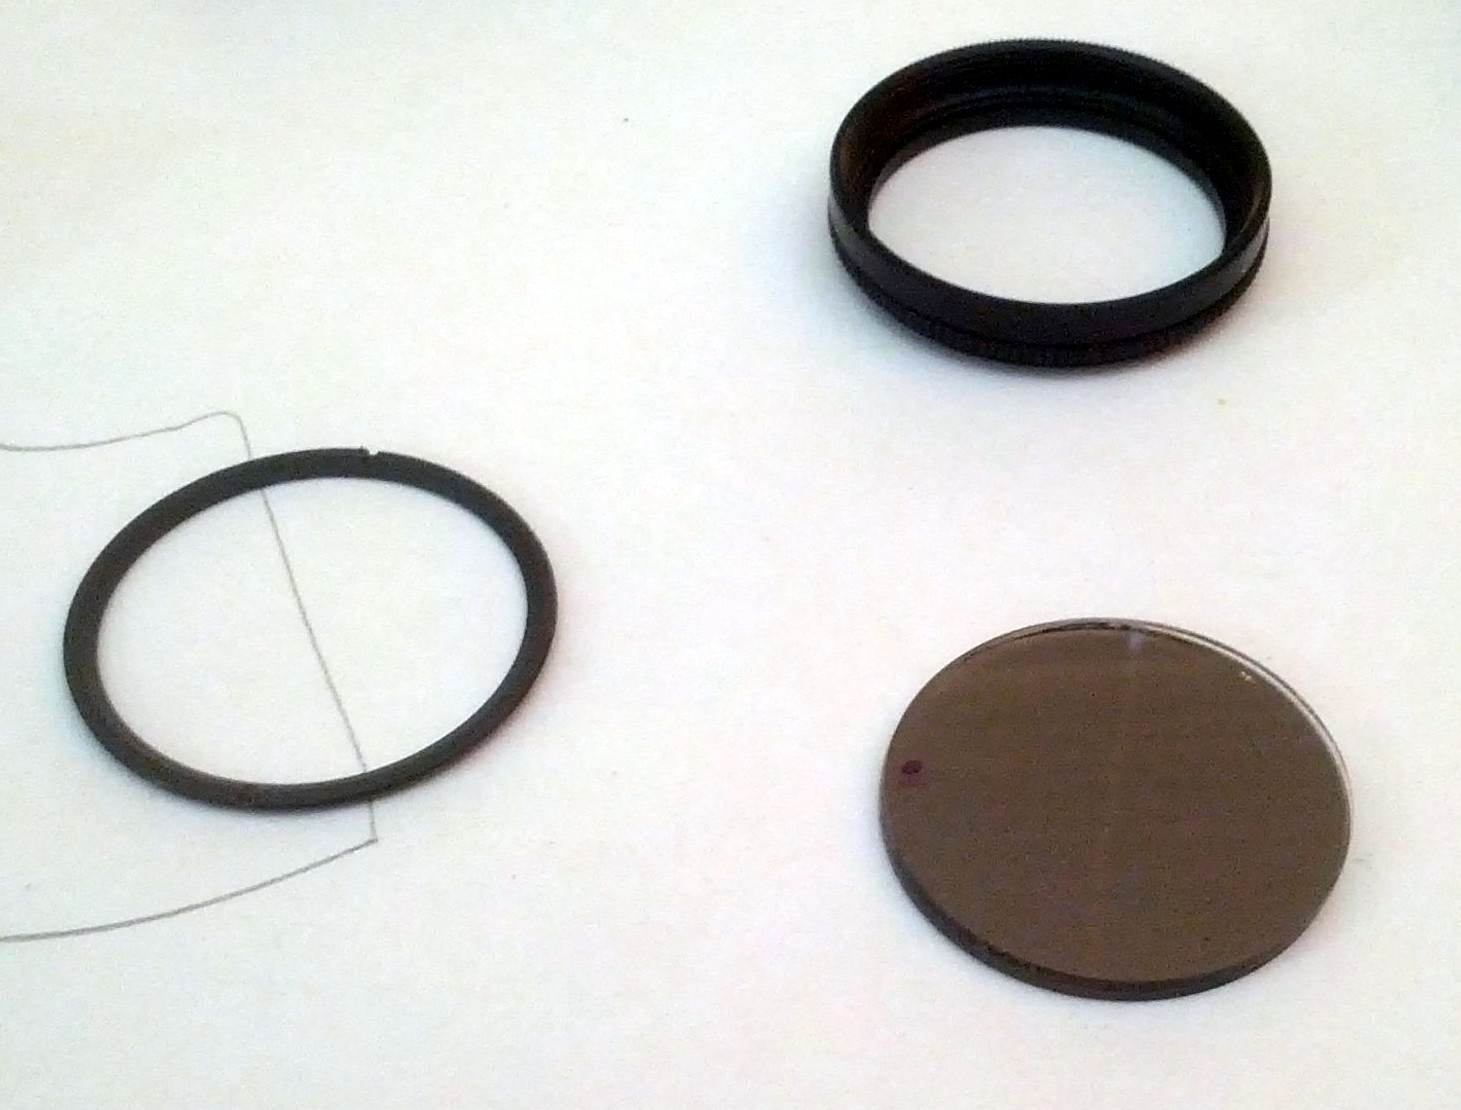
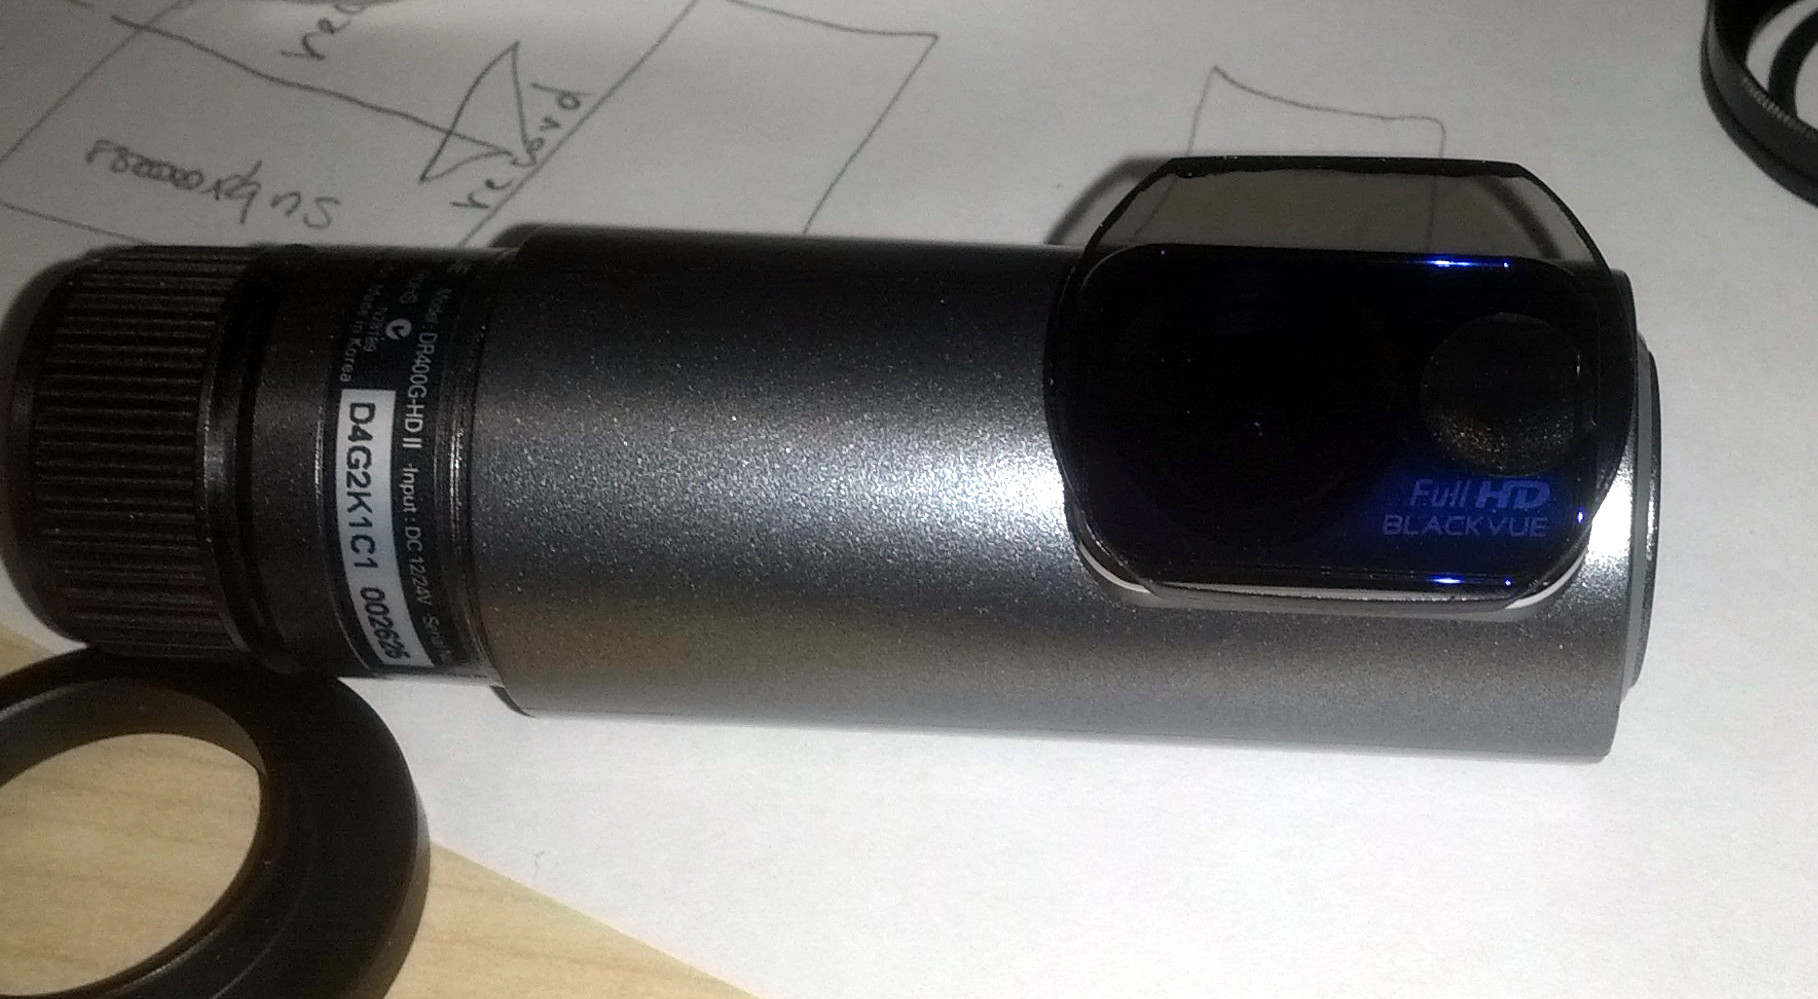
Adding CPL filter to Blackvue DR400G-HD II
Adding CPL filter to Blackvue DR400G-HD II
There is no “standard” fitting CPL filter for Blackvue DR400G-HD II, so I decided to make my own.
I bought cheap CPL filter for GoPro for Aliexpress and modified it to “fit”.
The filter glass can be extracted from metal ring by un-screwing inner ring:

Notice I have already marked “top” with marker. To determine “top” I simply sat in the car with sun high and rotated the CPL filter (make sure you have front and back correct) so there is no glare.
Here is the glass out (make sure you keep track of top and front).
Test fit:
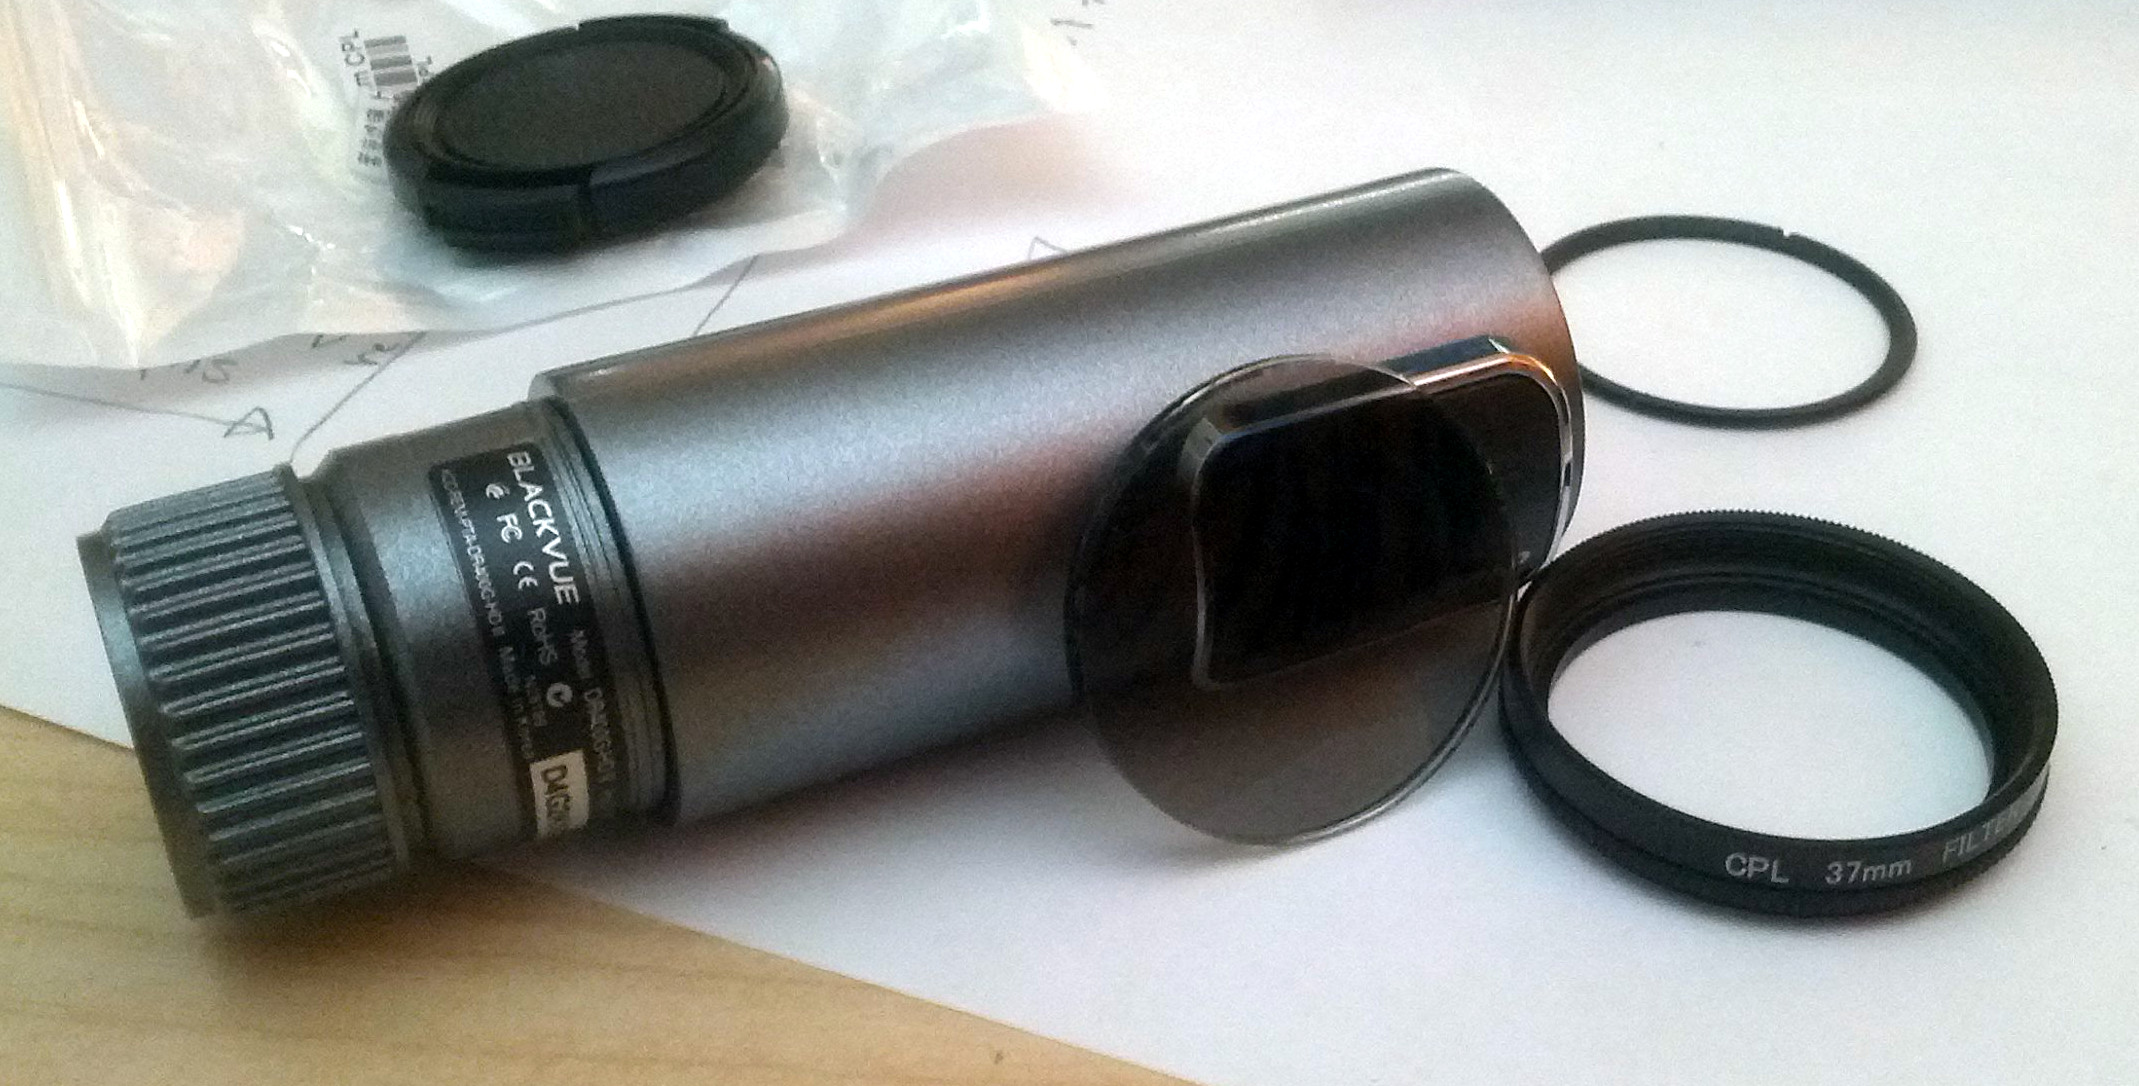
Since the filter was too large (it would interfere with windscreen), I decided to grind it into this shape:
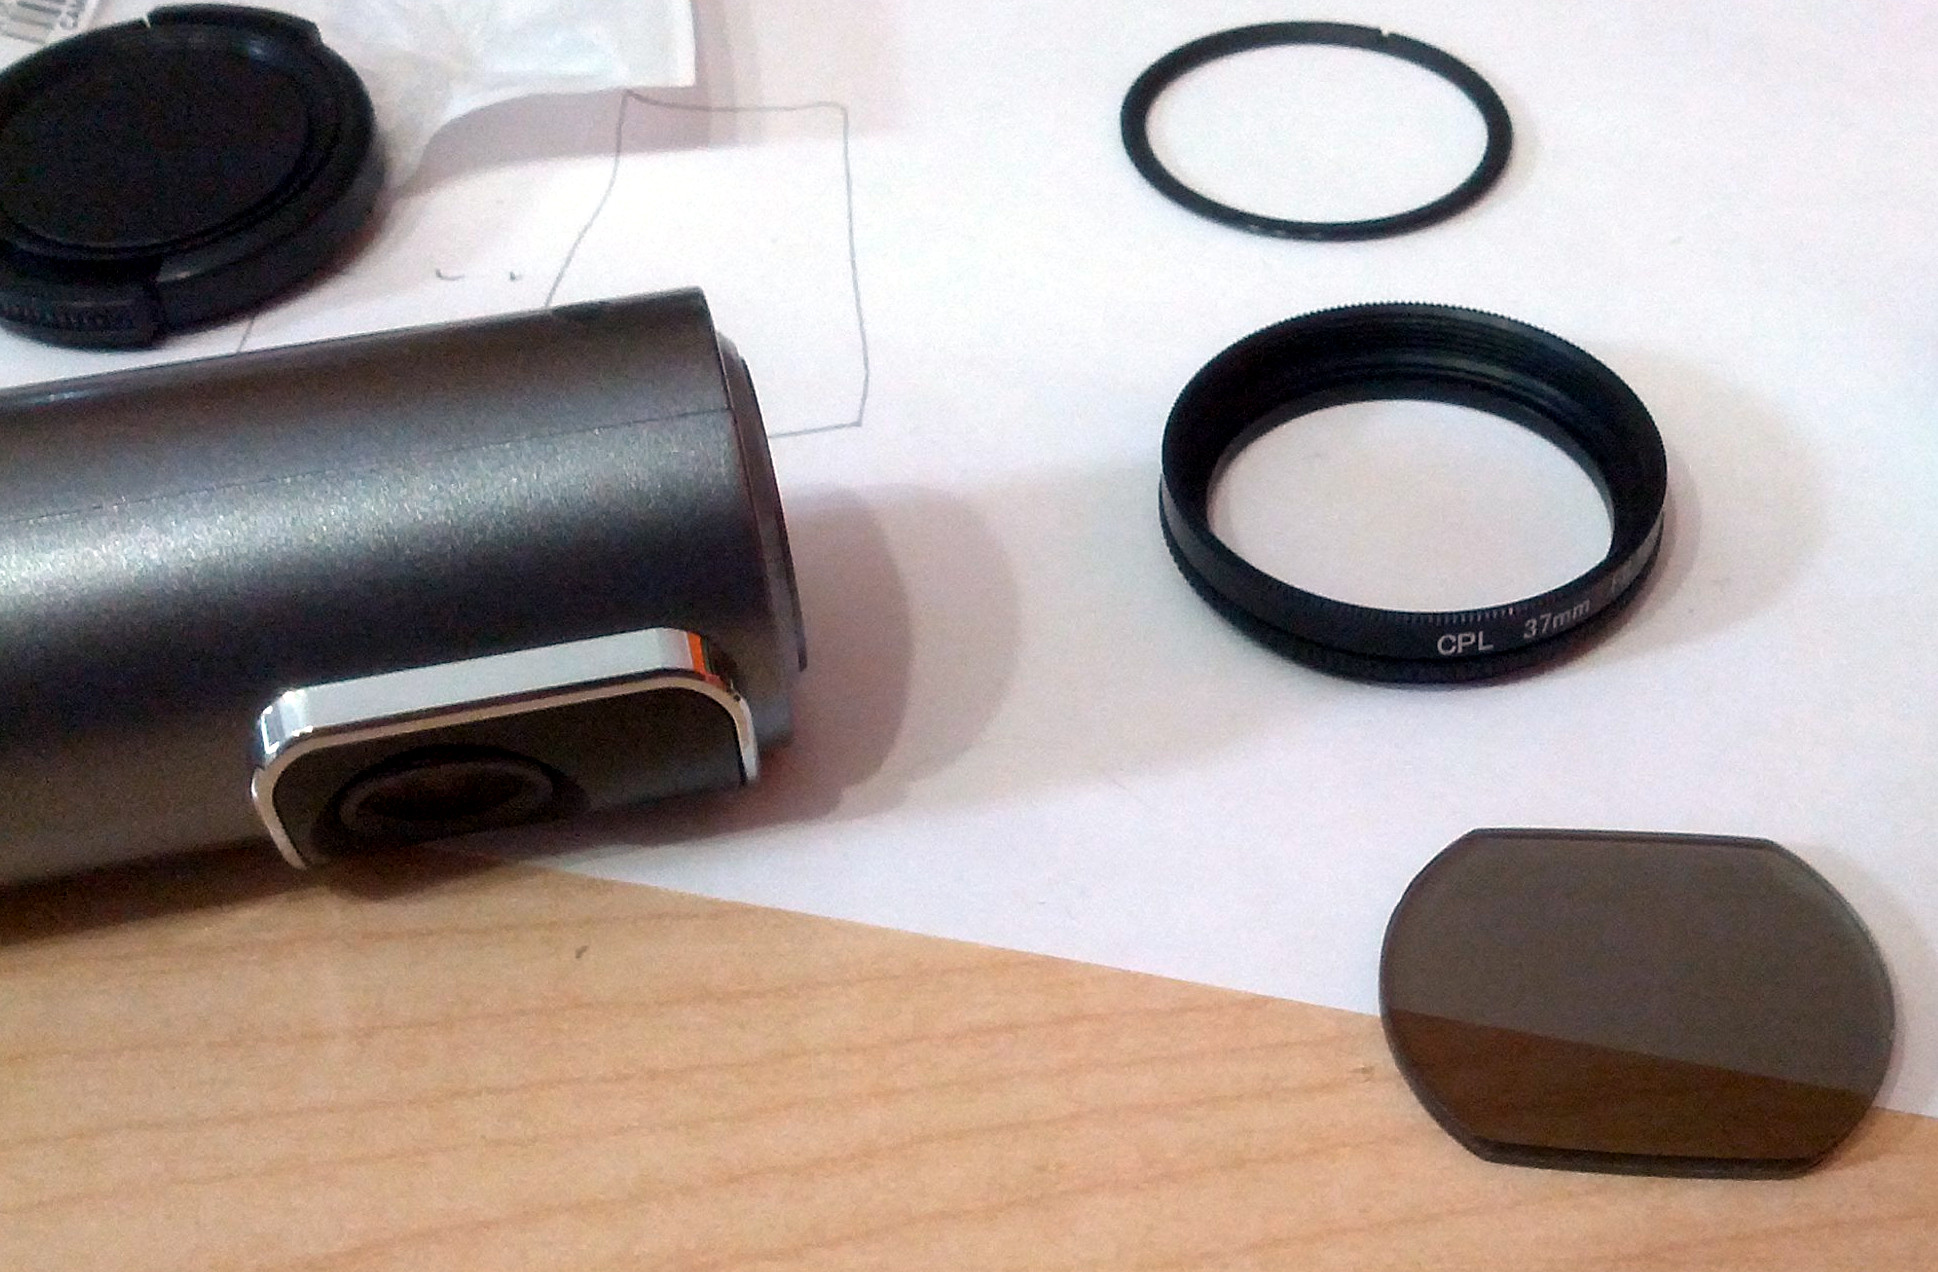
Grinding is a slow process involving slow orbital sanding with water (P400 or so). Don’t rush it or glass will crack (or the inner filter melt).
Test fit post grind:

Glued with dab of hot glue:
Note: in hot climate I recommend replacing hot glue with quality double sided moulding (thick) tape, as once the camera gets to about 60-70’C the glue will soften and lens will slide.
Dahua IPC-HDBW4300E
Dahua IPC-HDBW4300E with 2.8mm lens.
Bought on Aliexpress, initially came with Chinese firmware, but seller helped me resolve this (was advertised as English).
Reason why I went with dome vs bullet is because I needed wider angle camera.
Here it is:
To adjust it one needs to remove the dome with Allen Key provided:

(sorry about blurry photo).
Note: The 4 pin header (on the right) is for serial (RS232), while button next to it (not visible) is the reset button (press 5 seconds to reset).
From Firmware/System perspective it is no different to Dahua IPC-HFW4300S.
Day time image quality exactly the same, except of course the HFW4300S comes with 3.6mm lens minimum while HDBW4300E comes with 2.8mm.
Night time image quality is a bit worse (due to weaker IR, and wider lens).
Here is the angle comparison:
3.6mm (HFW4300S):
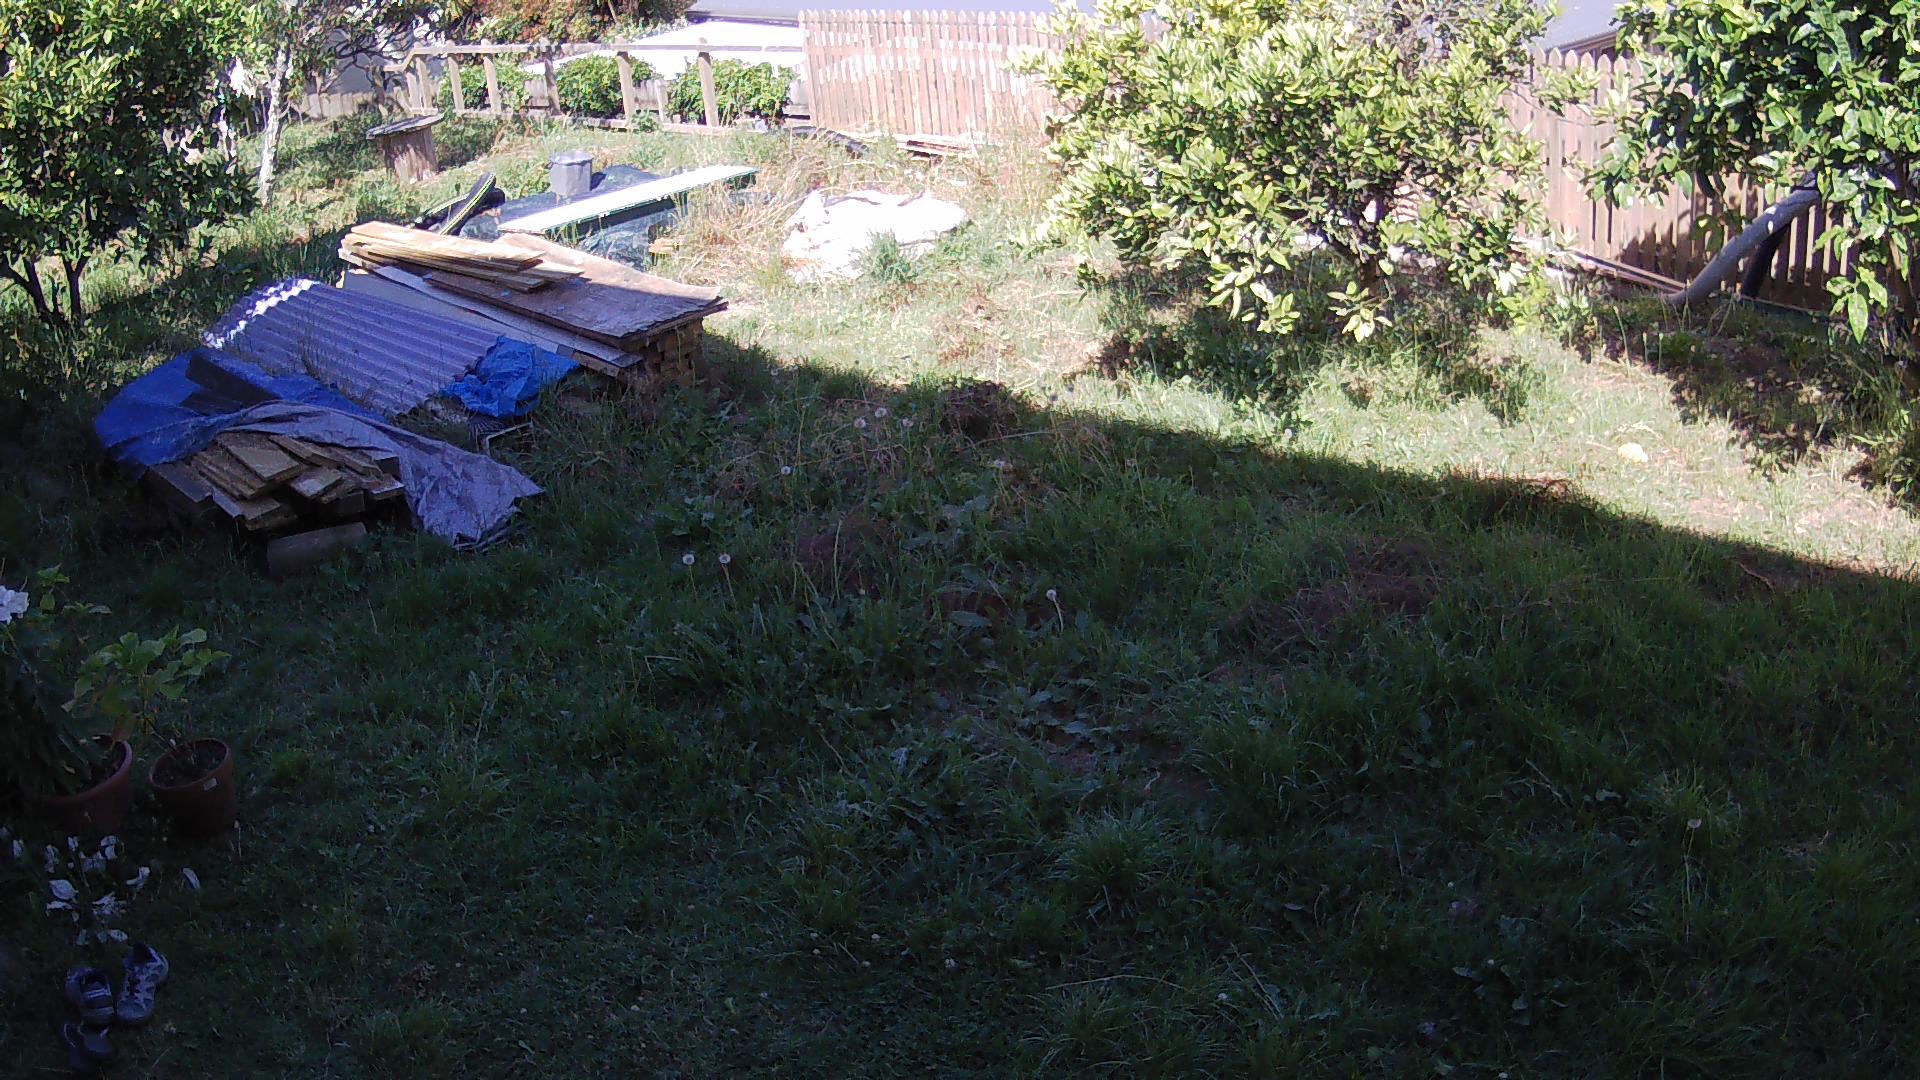
2.8mm (HDBW4300E):

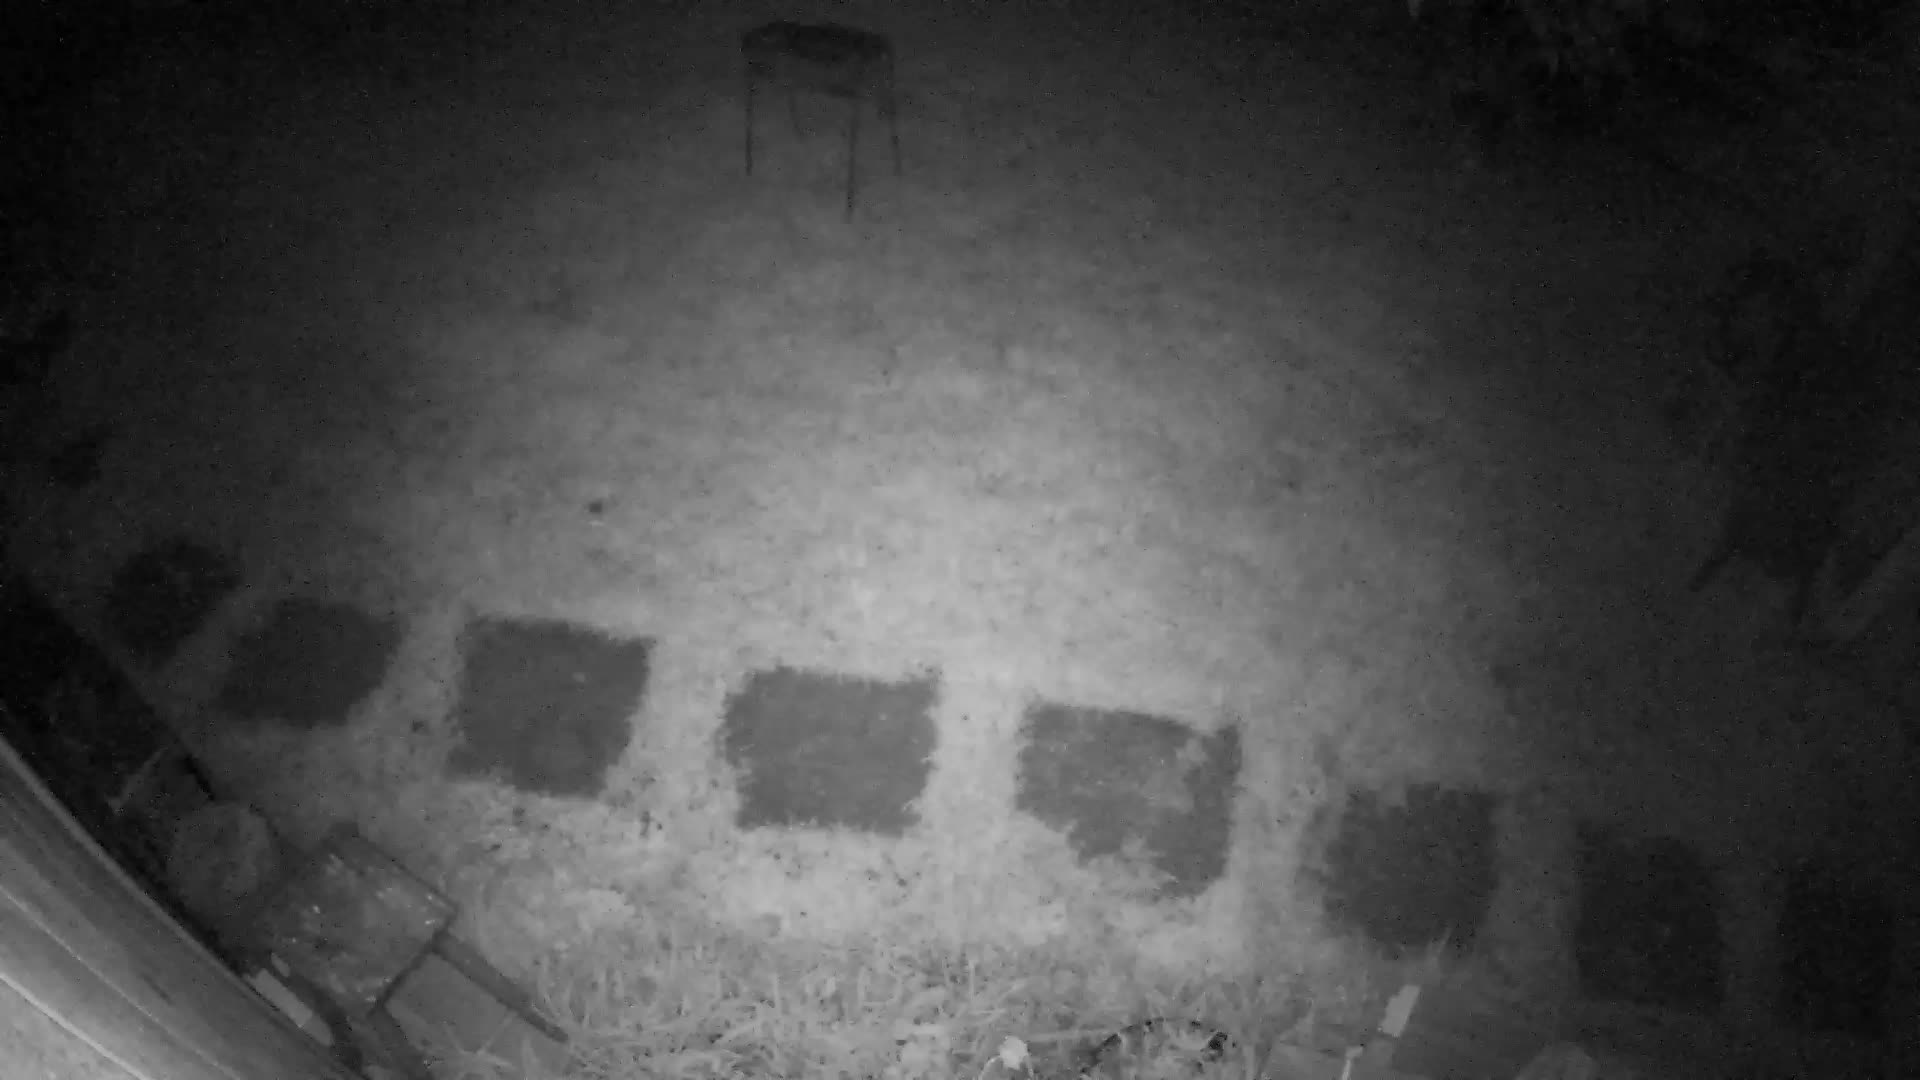
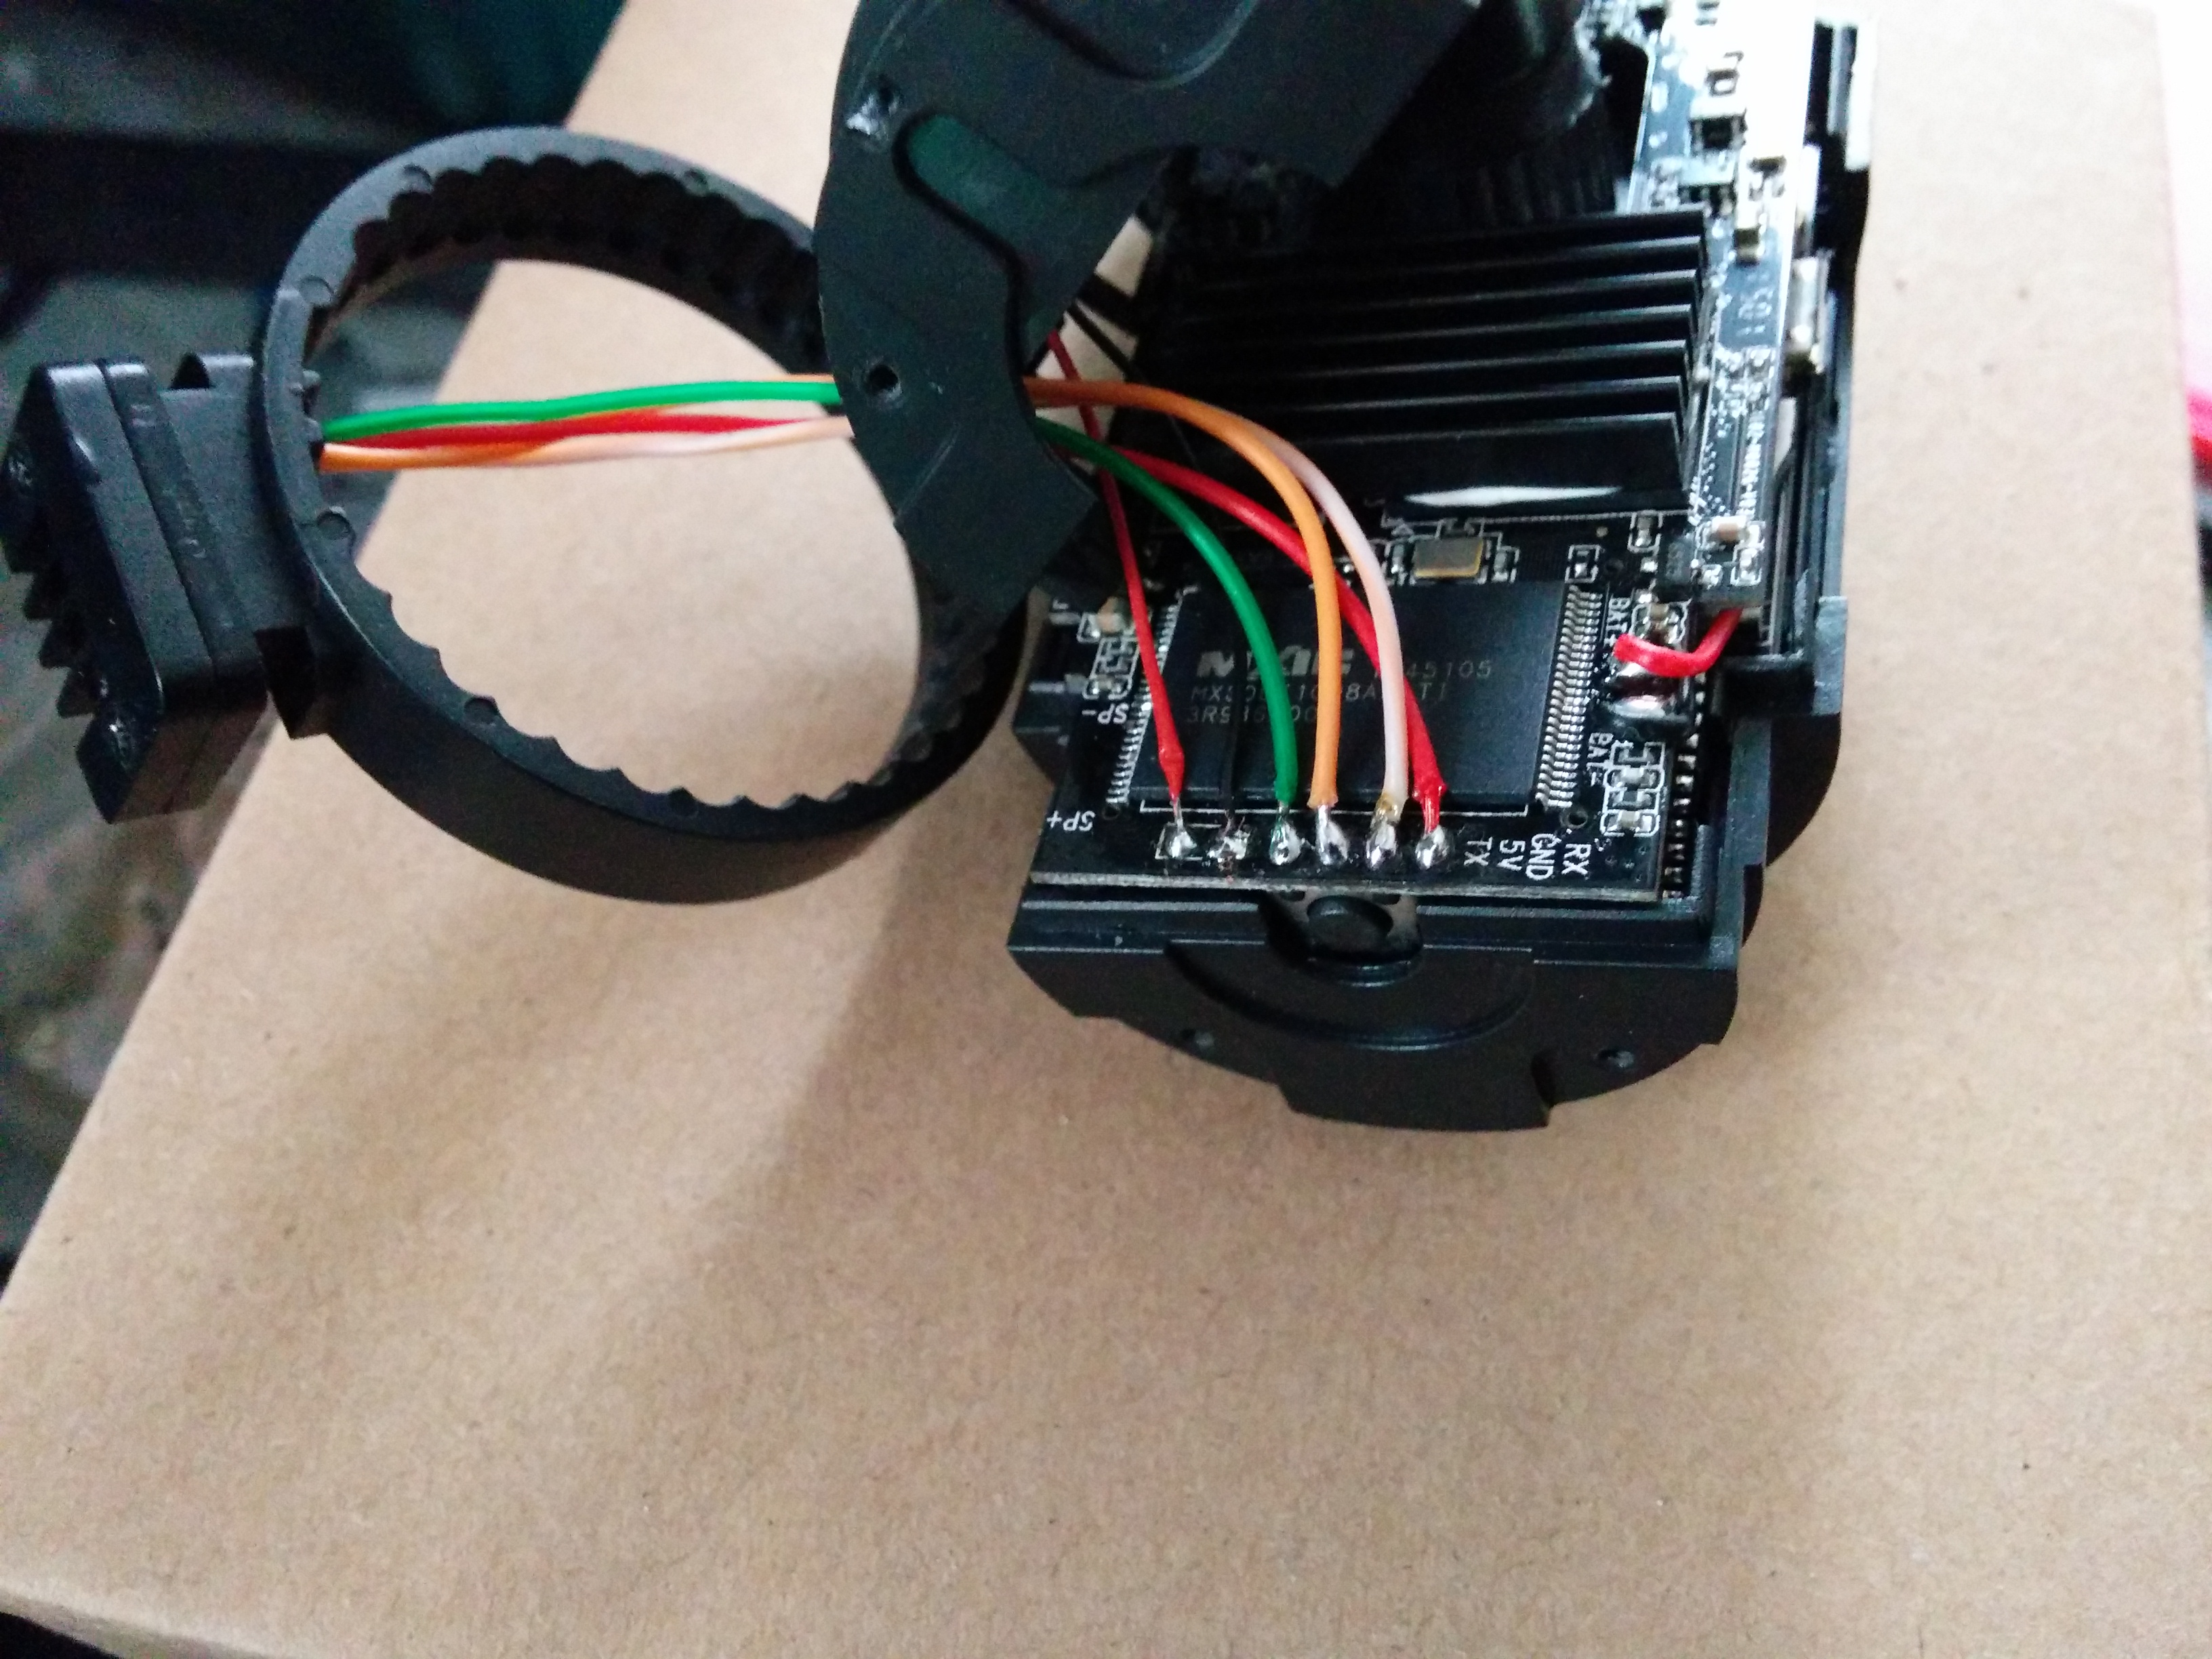
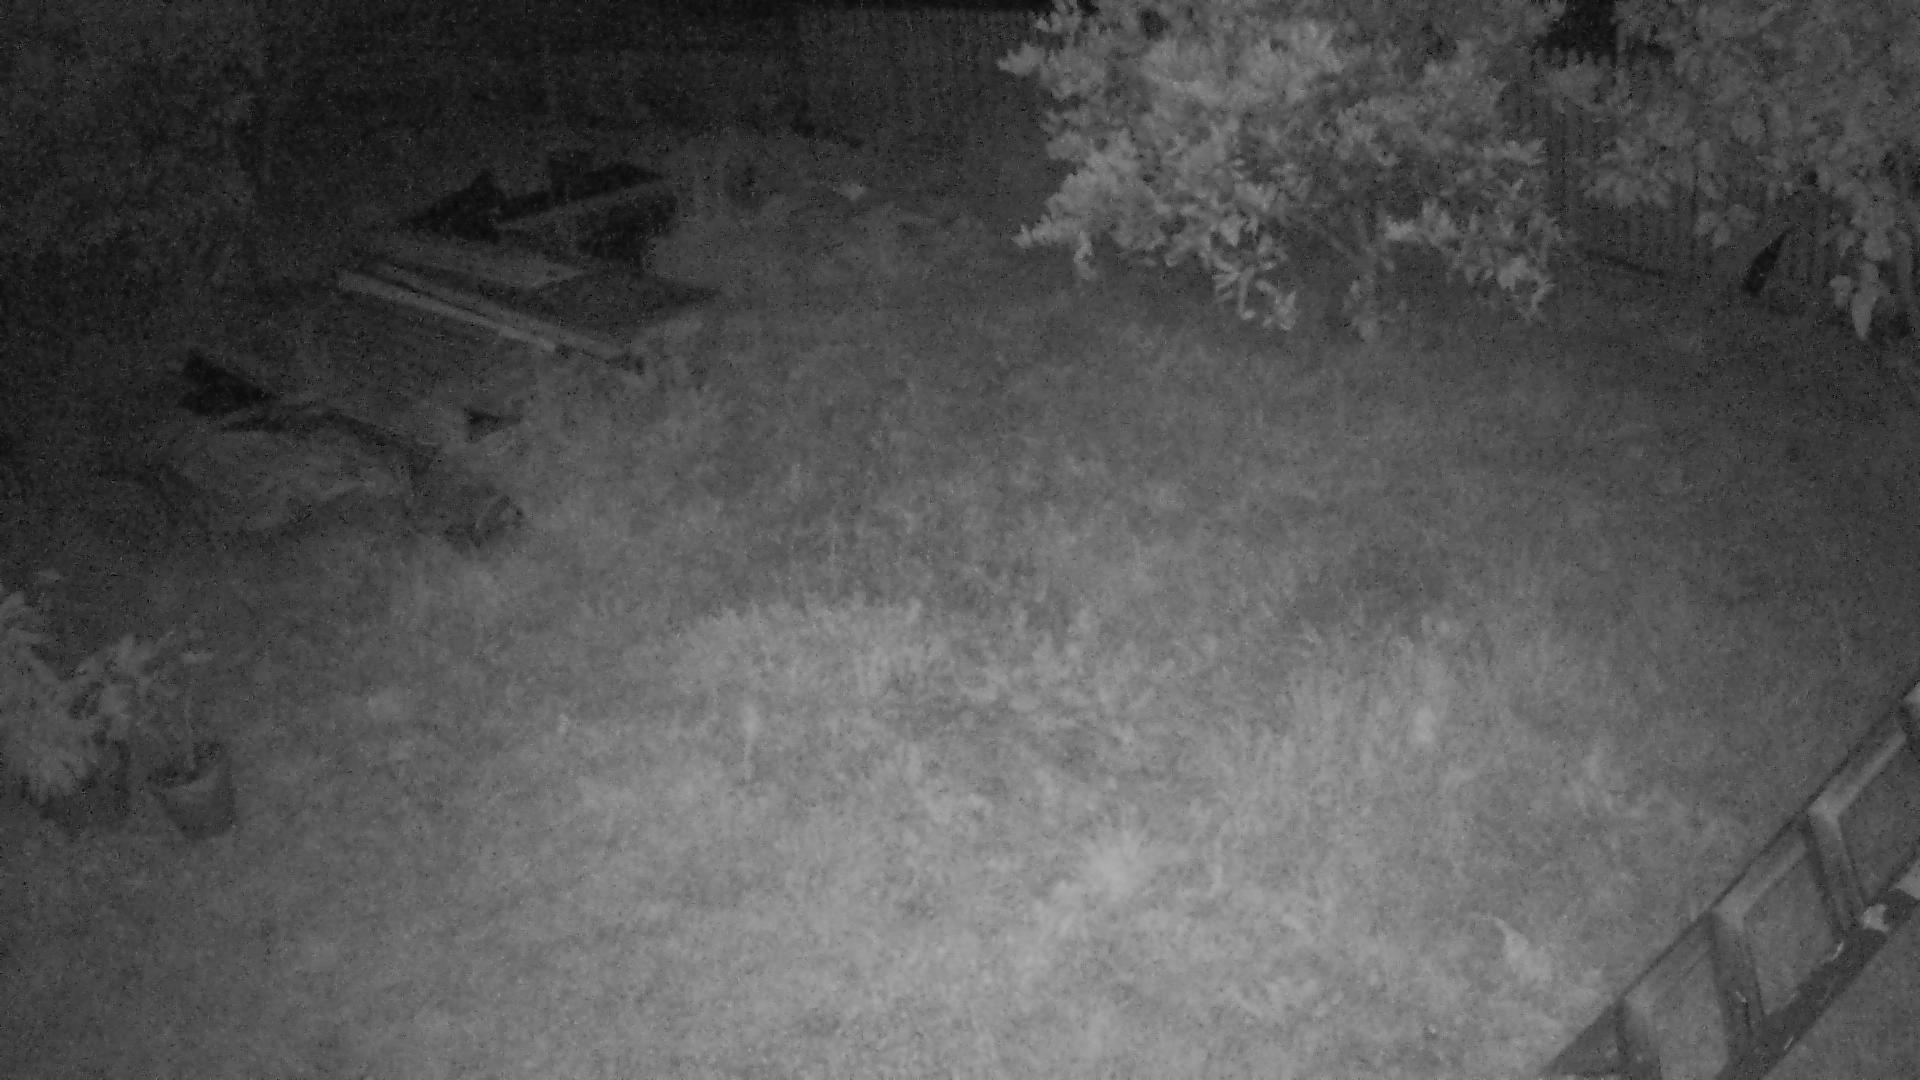
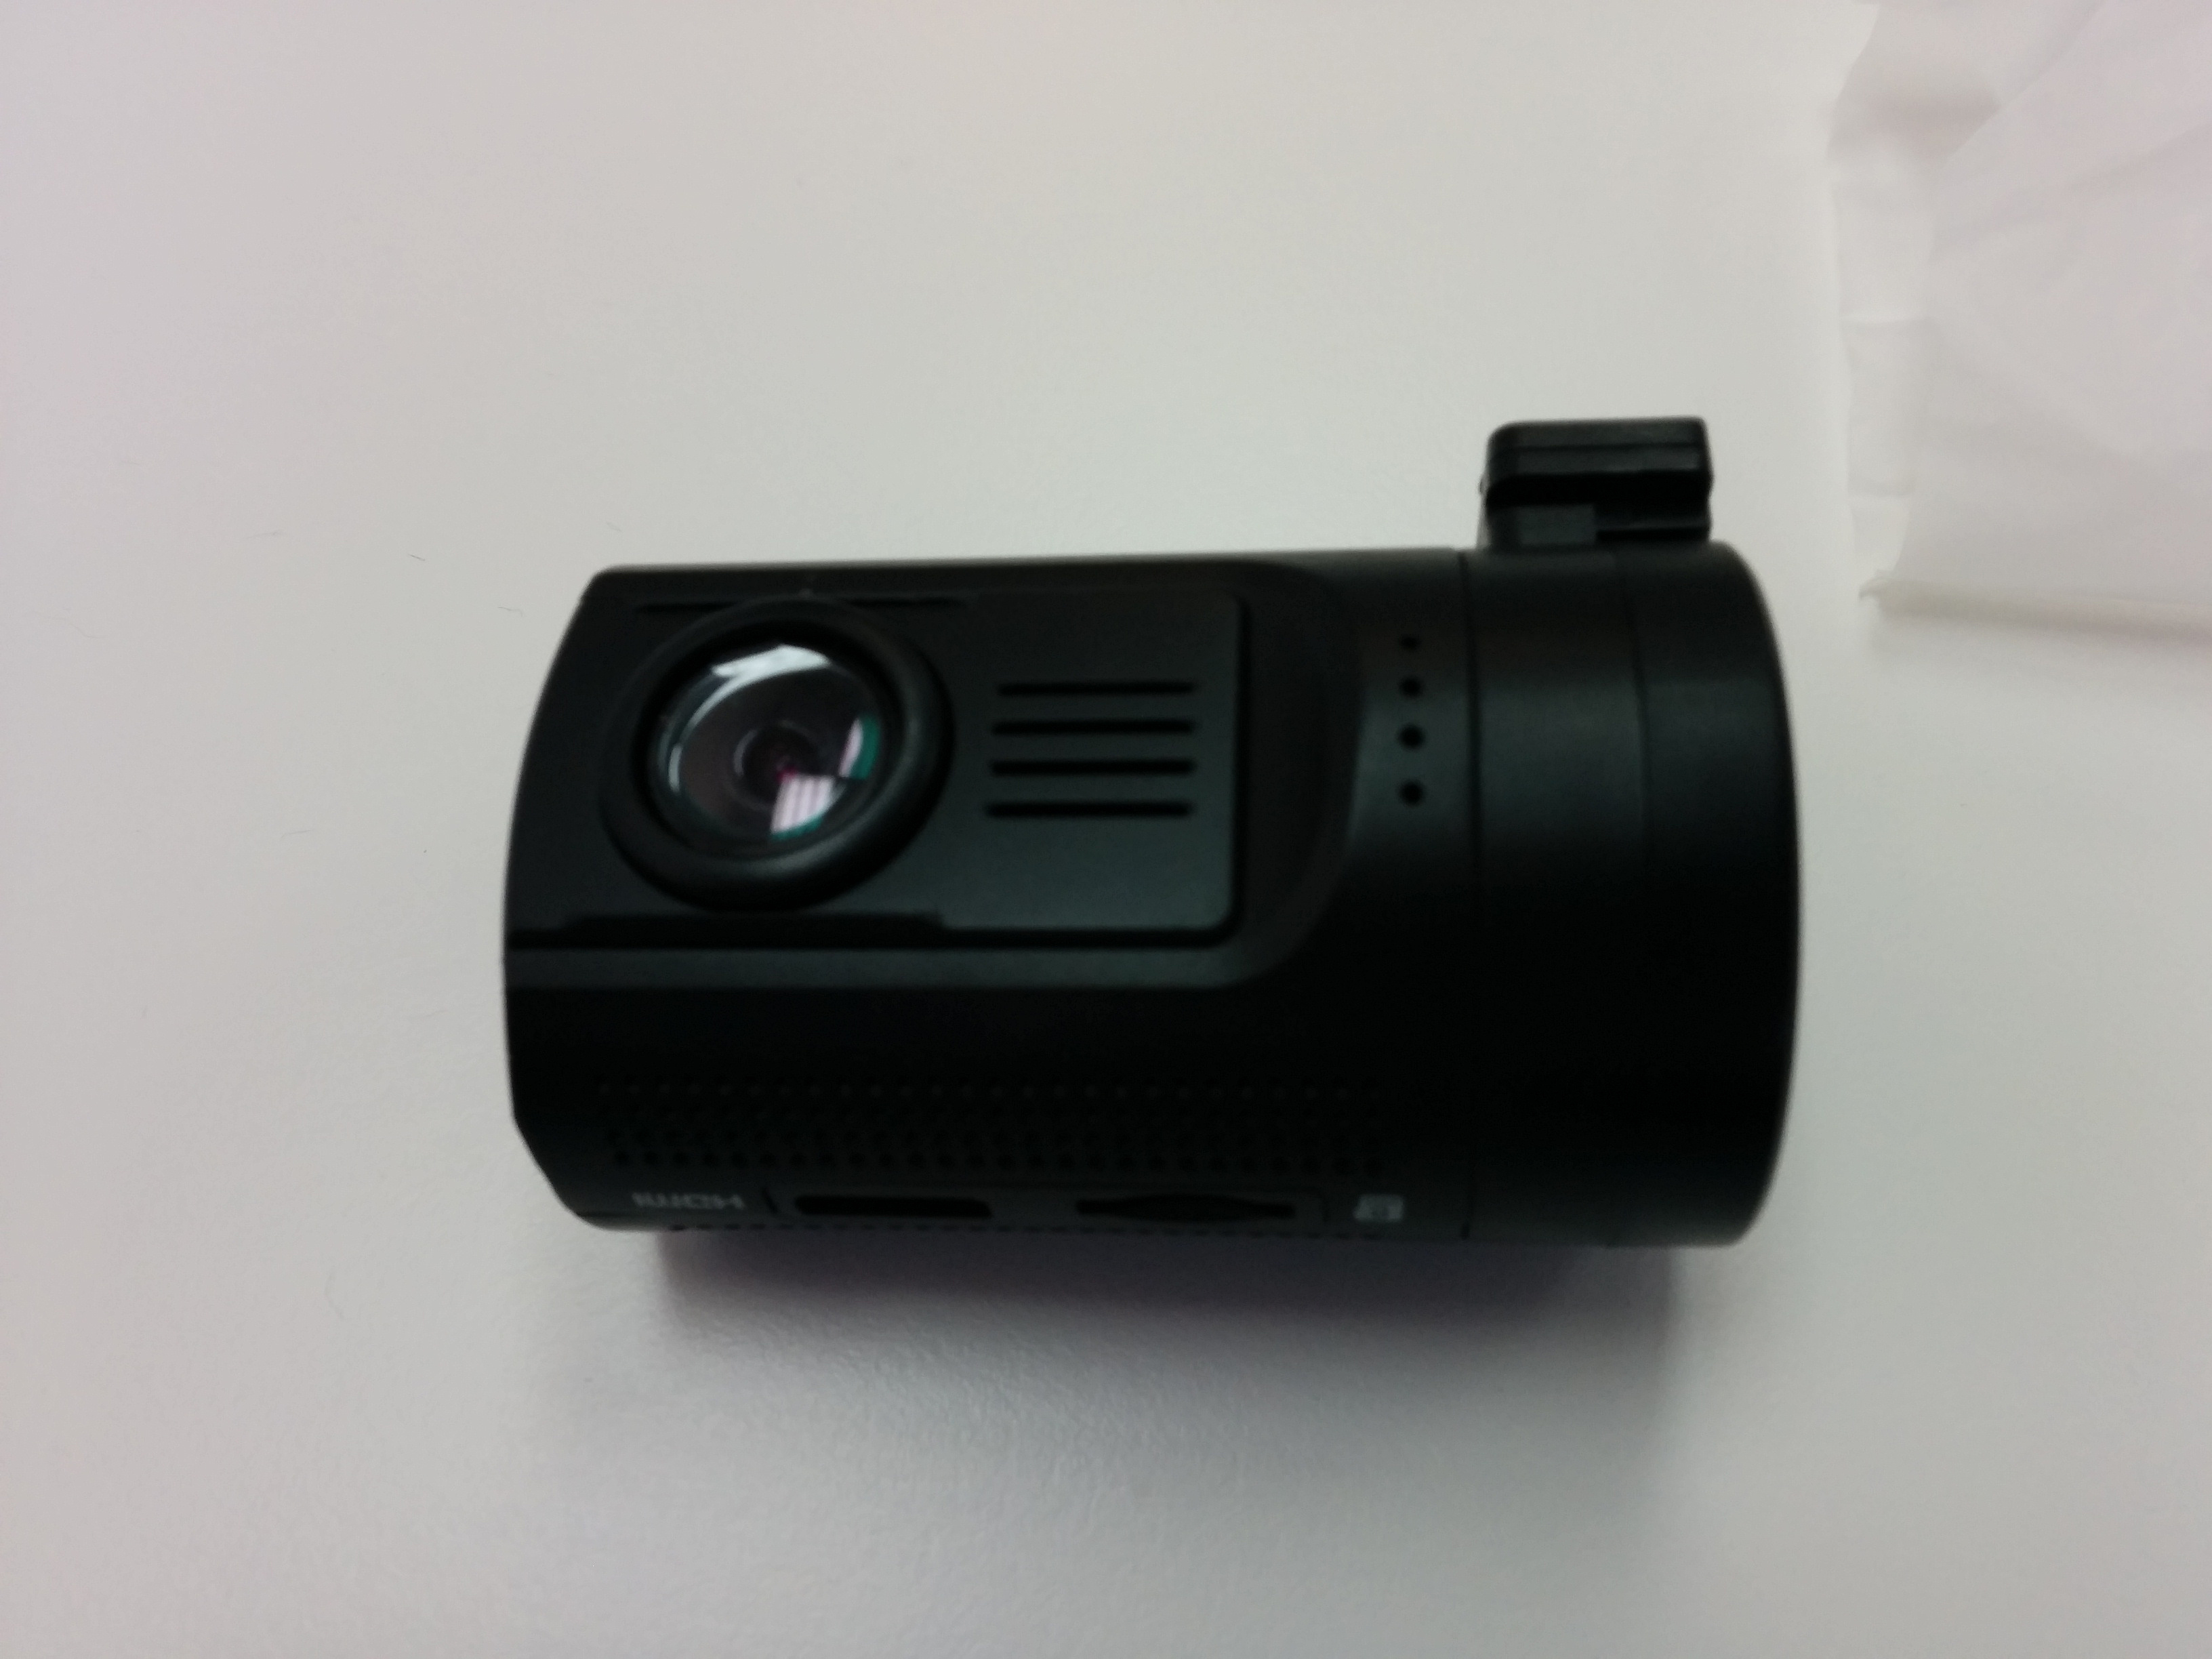
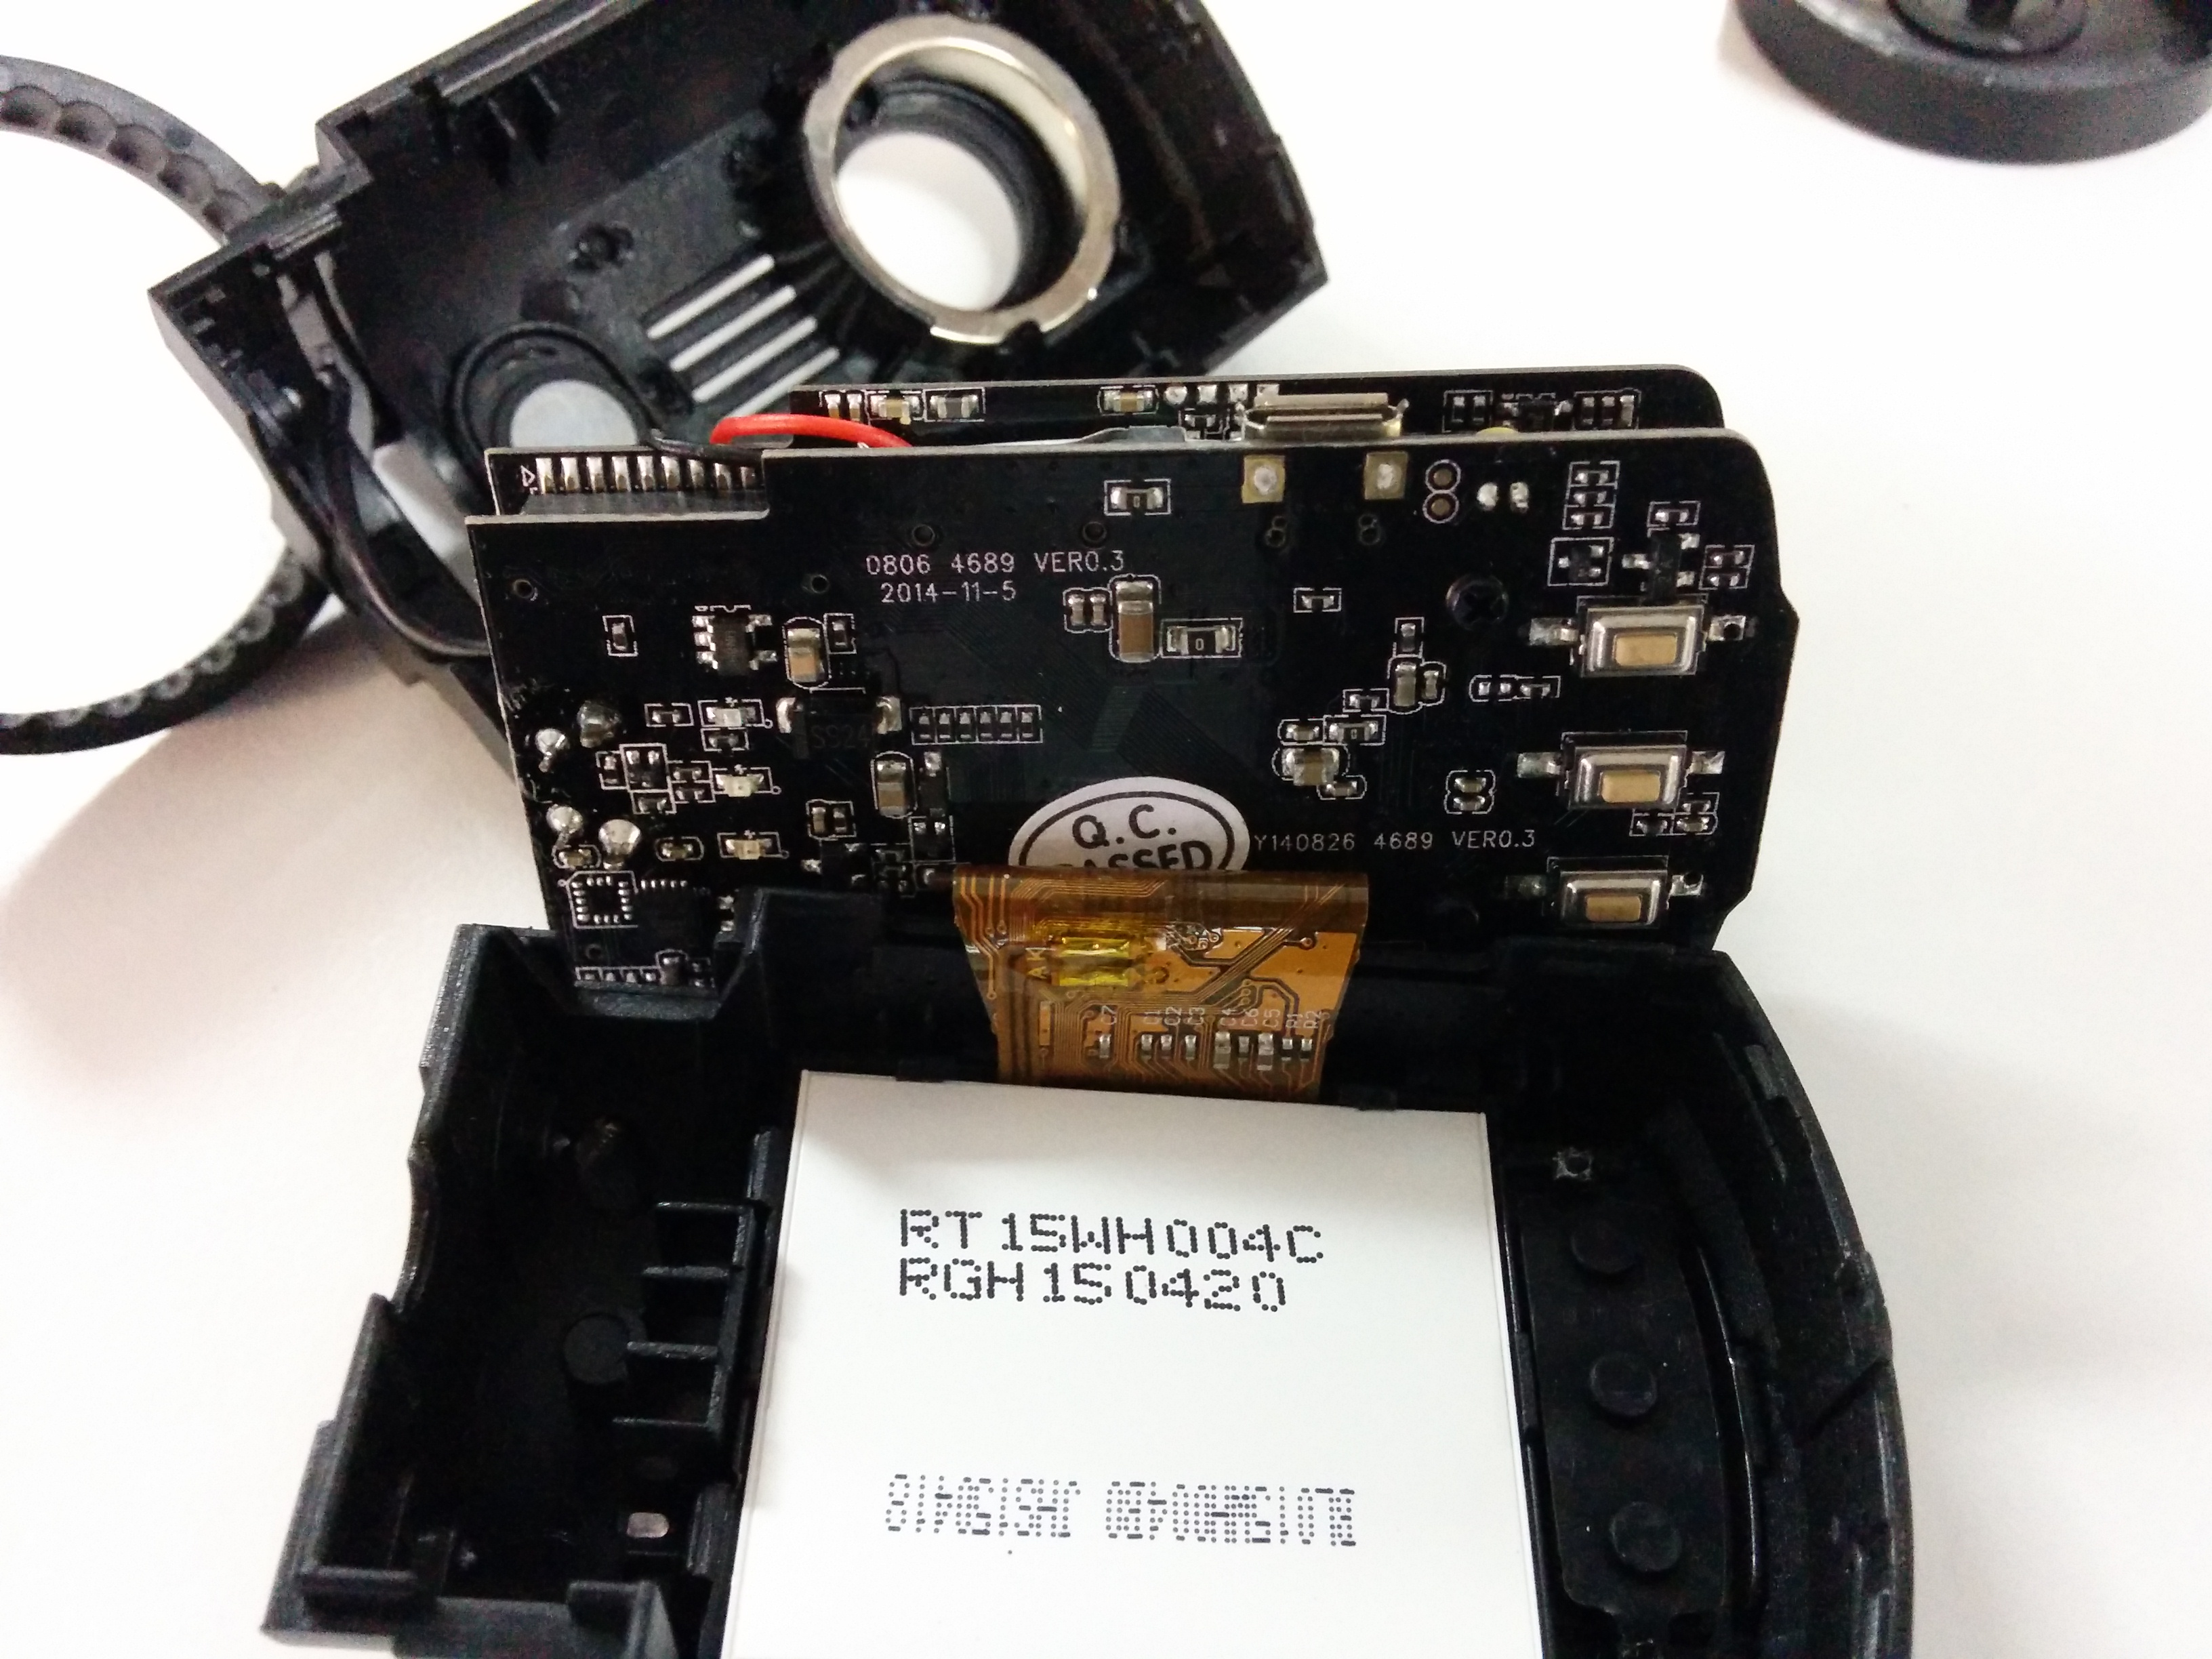
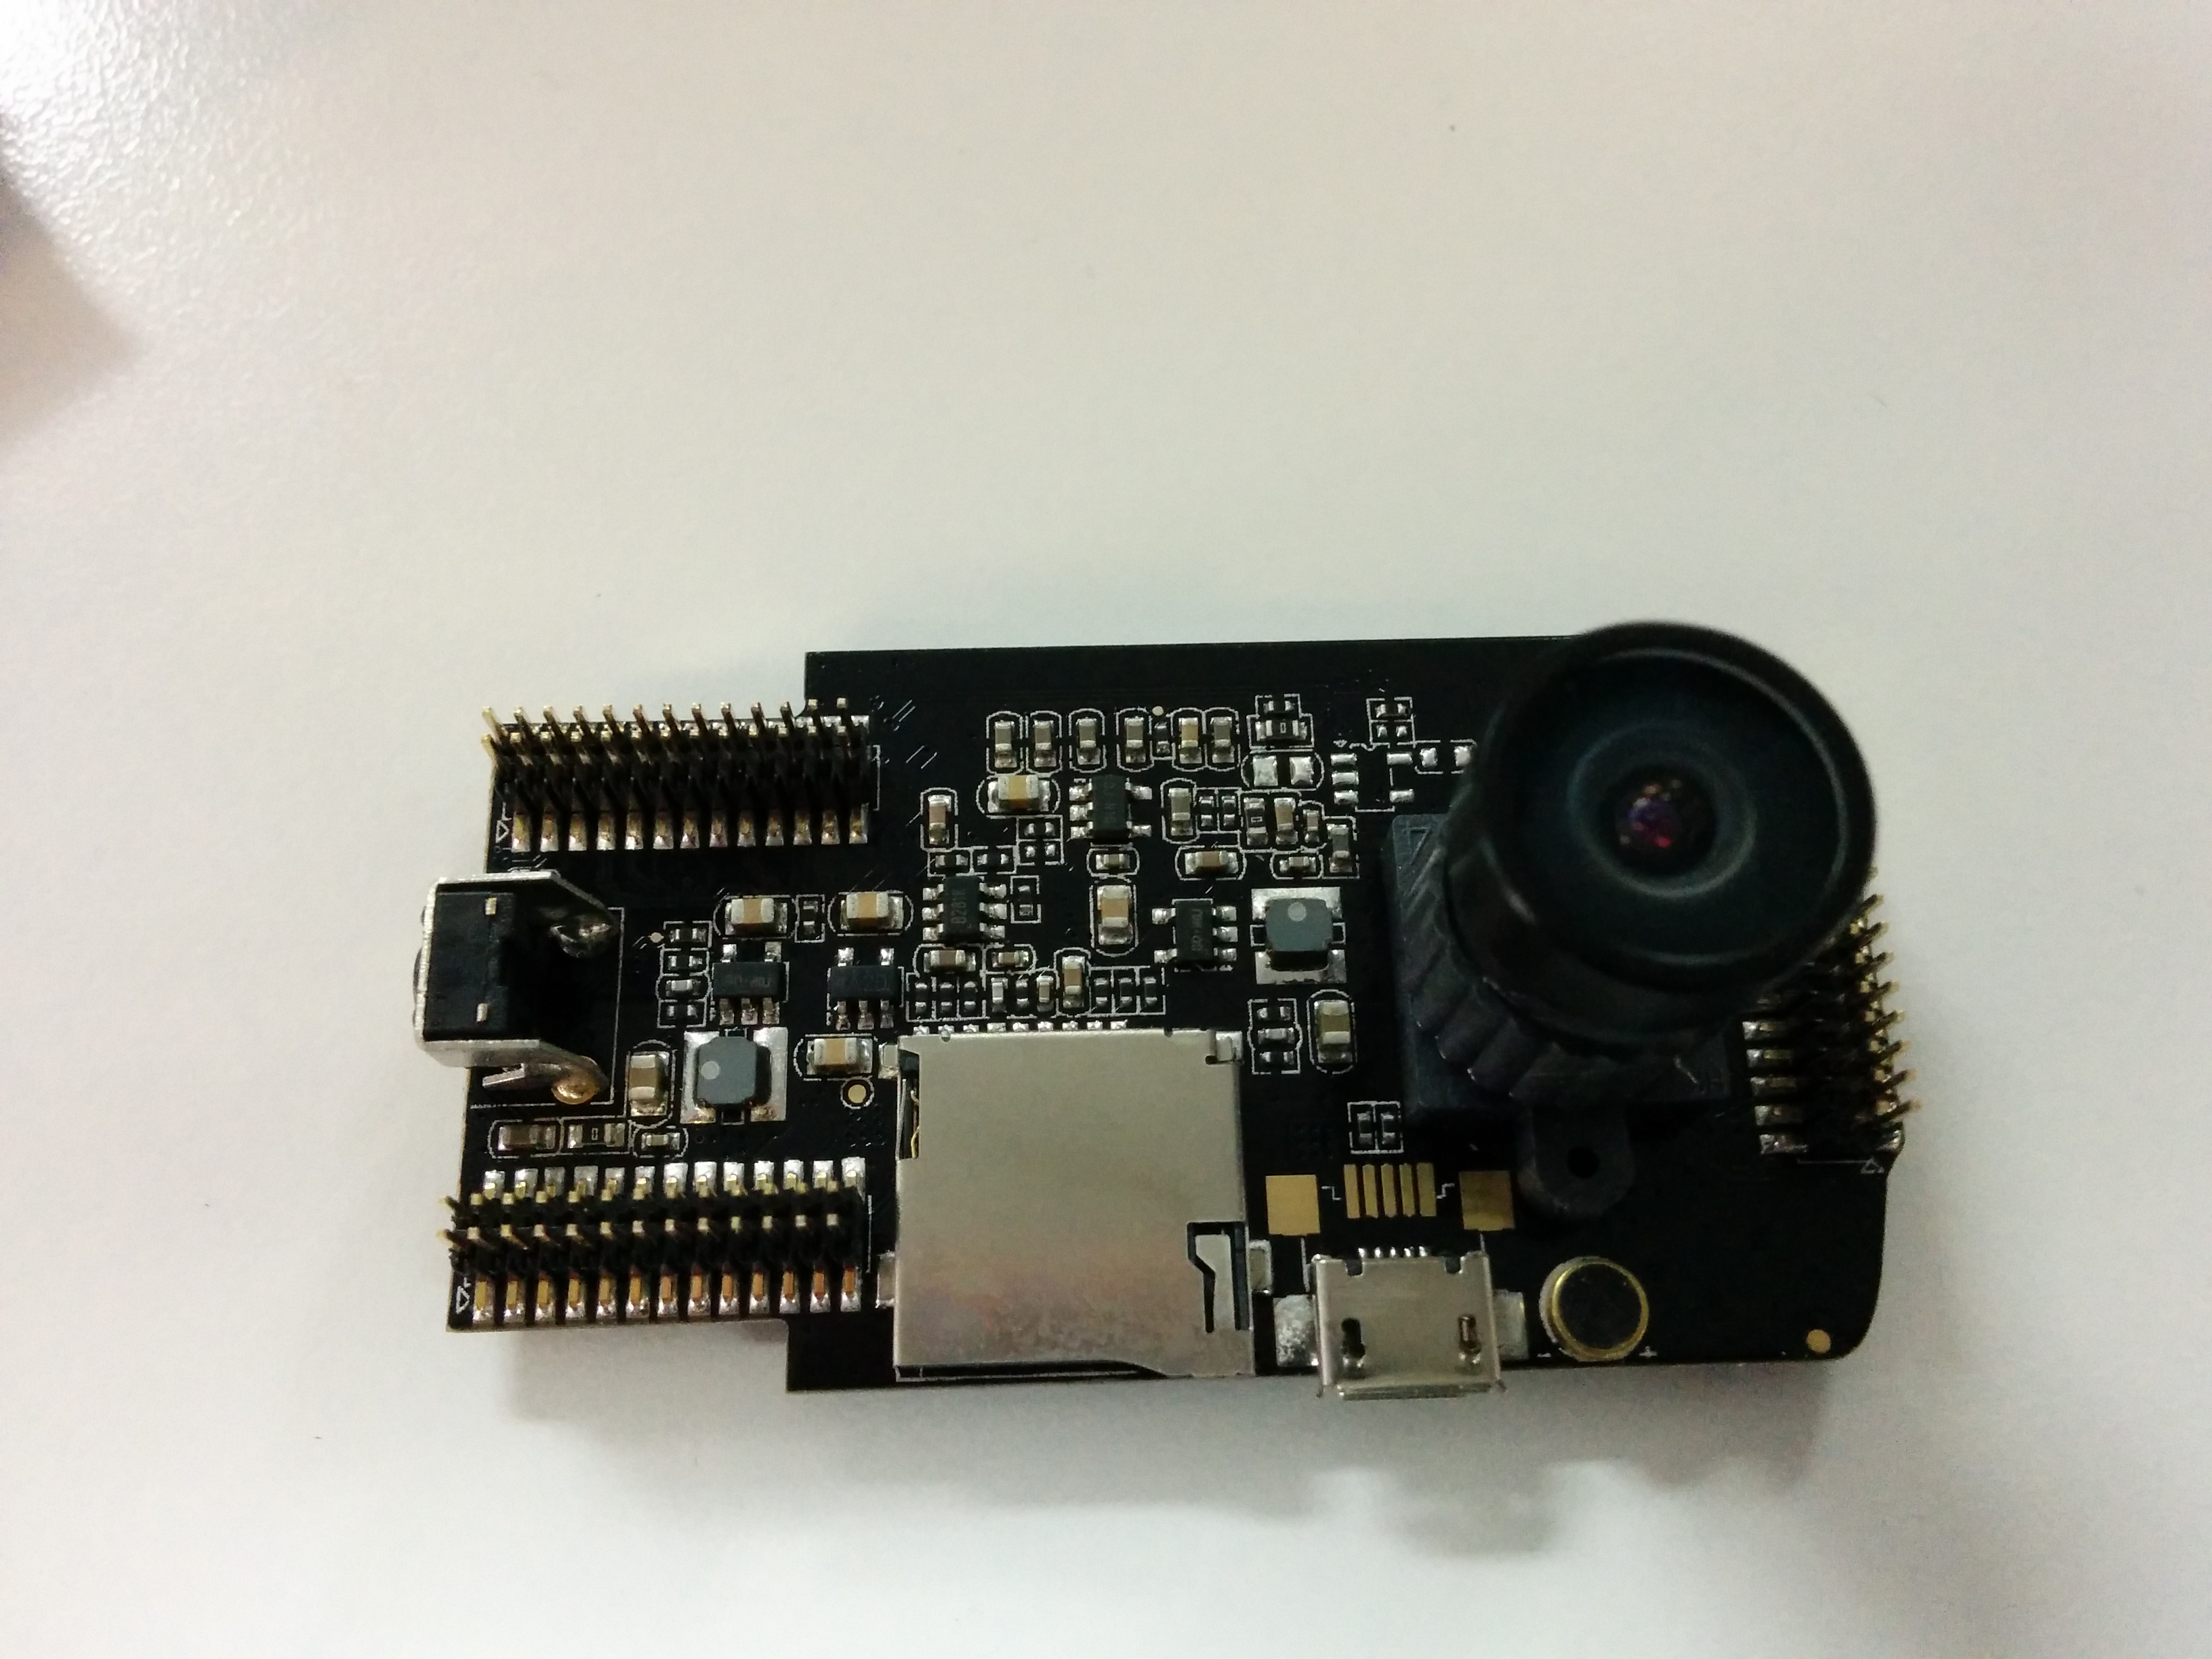
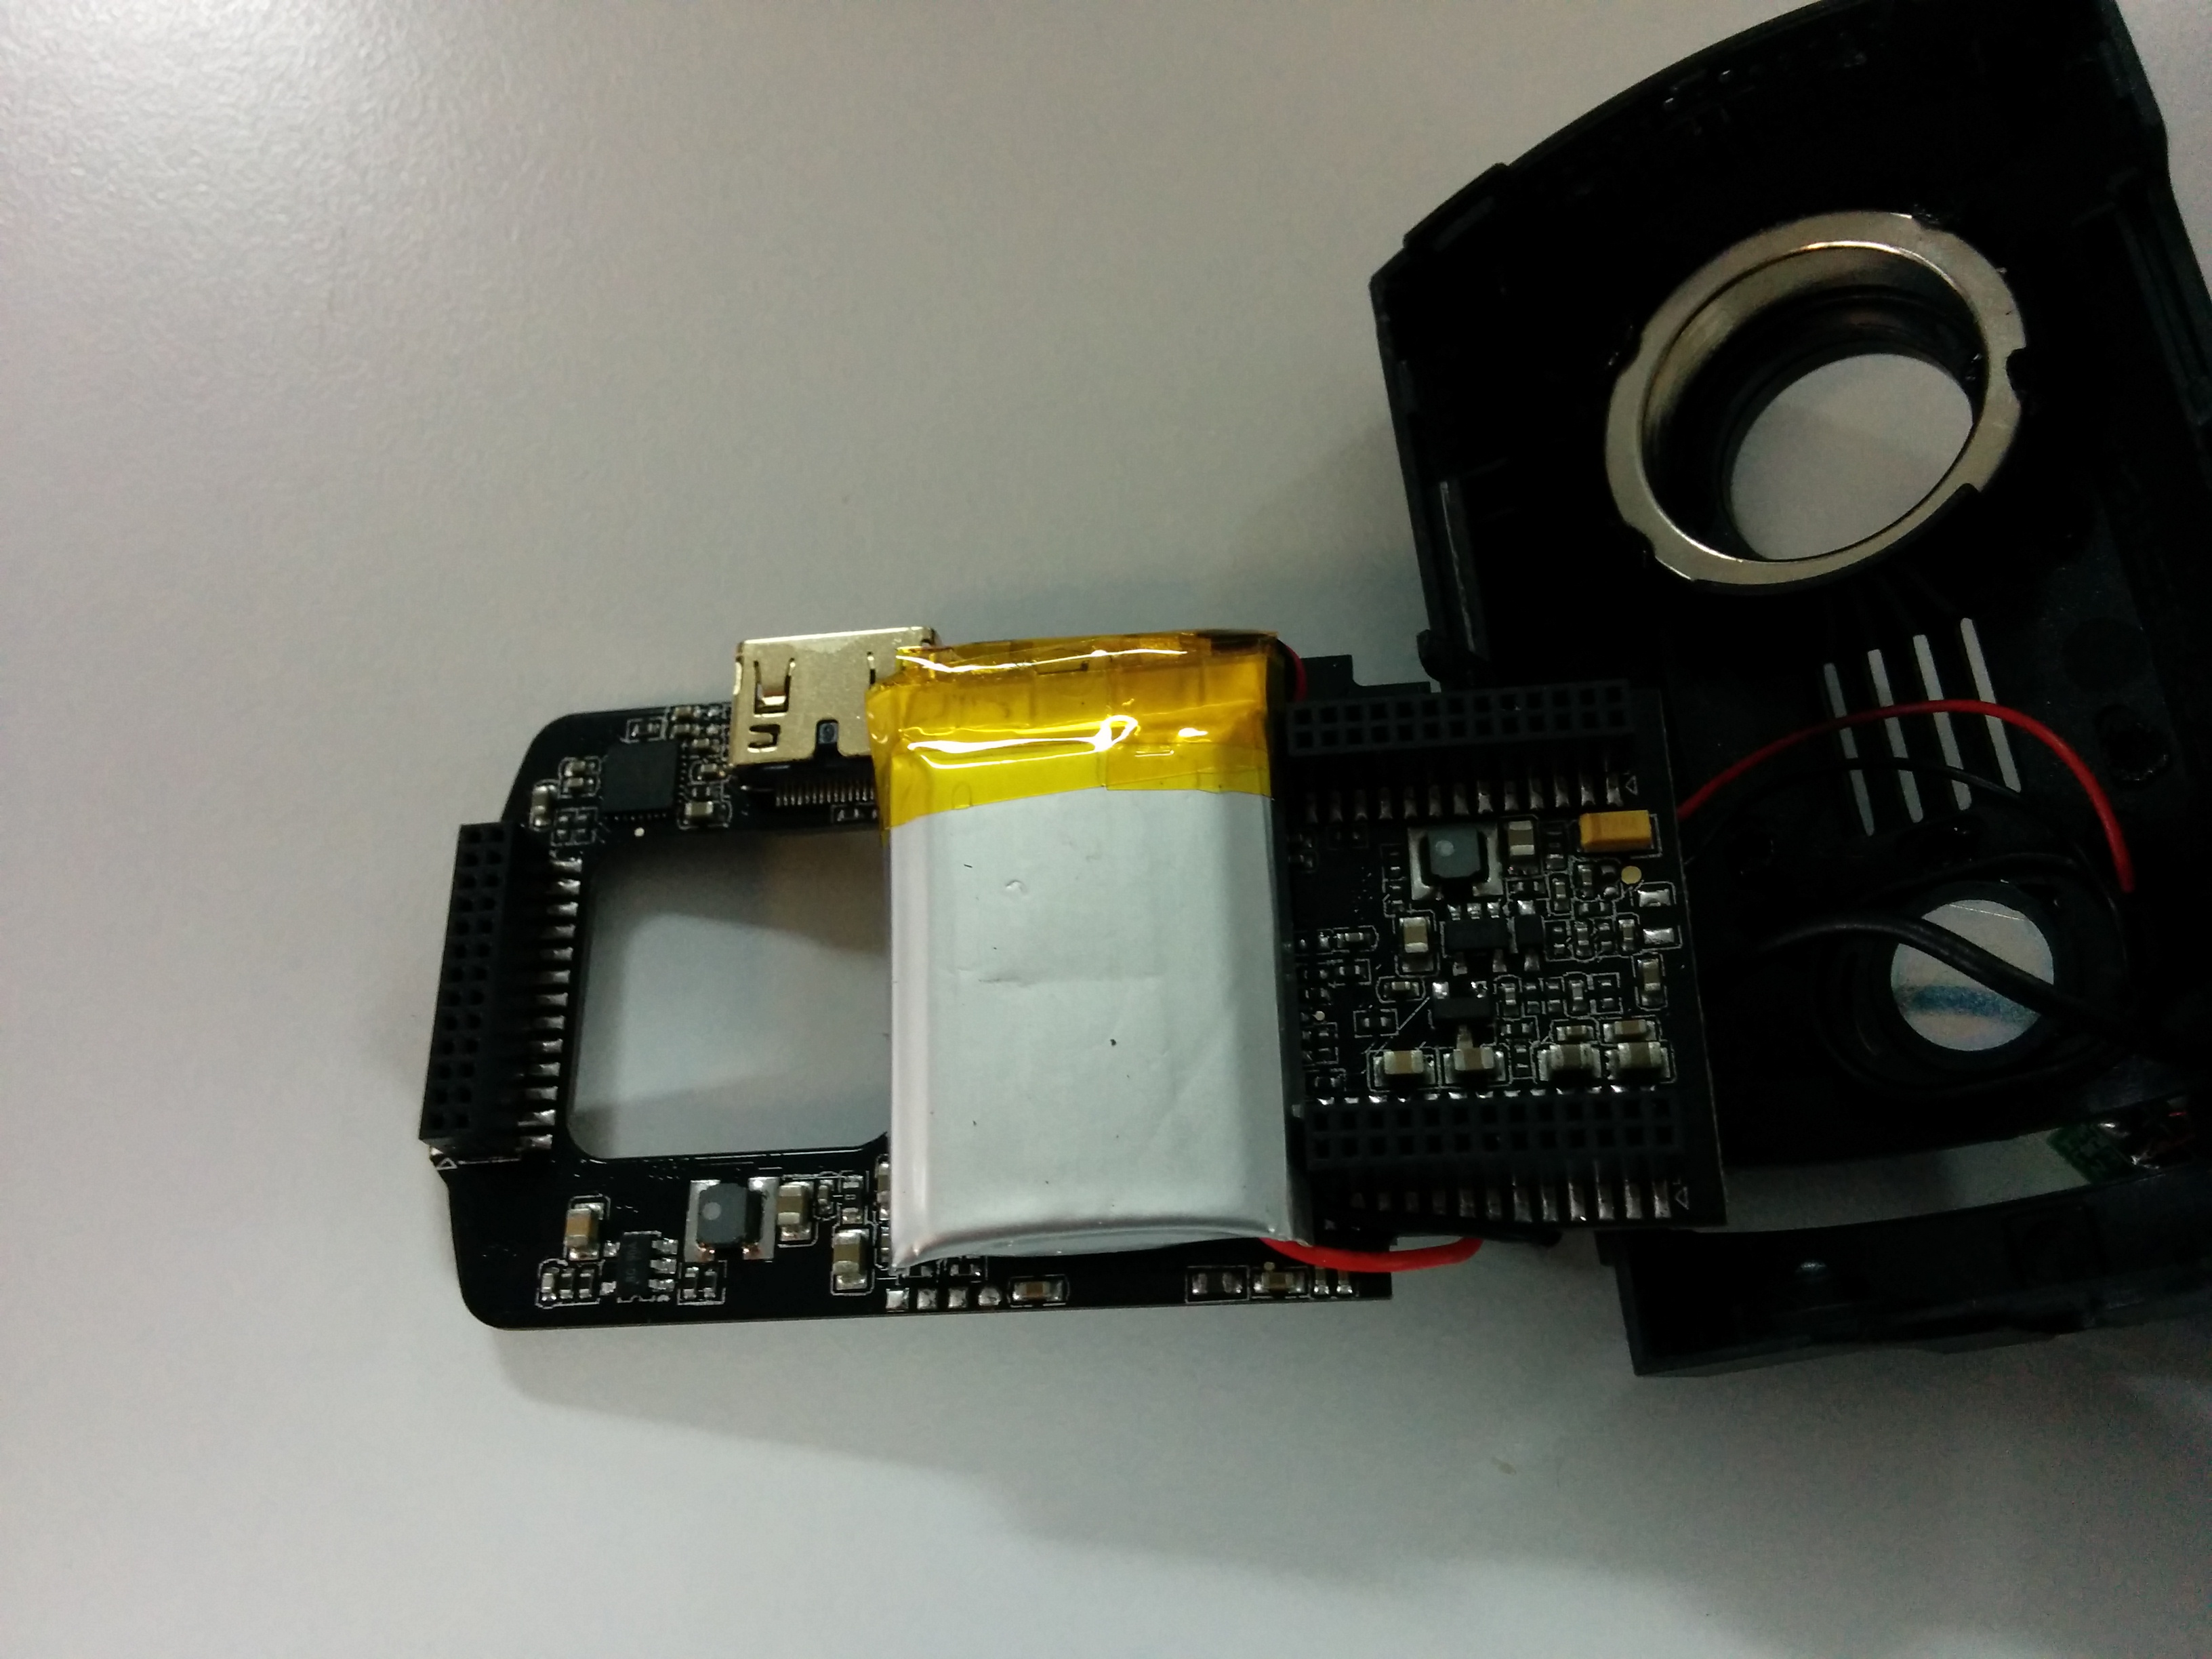
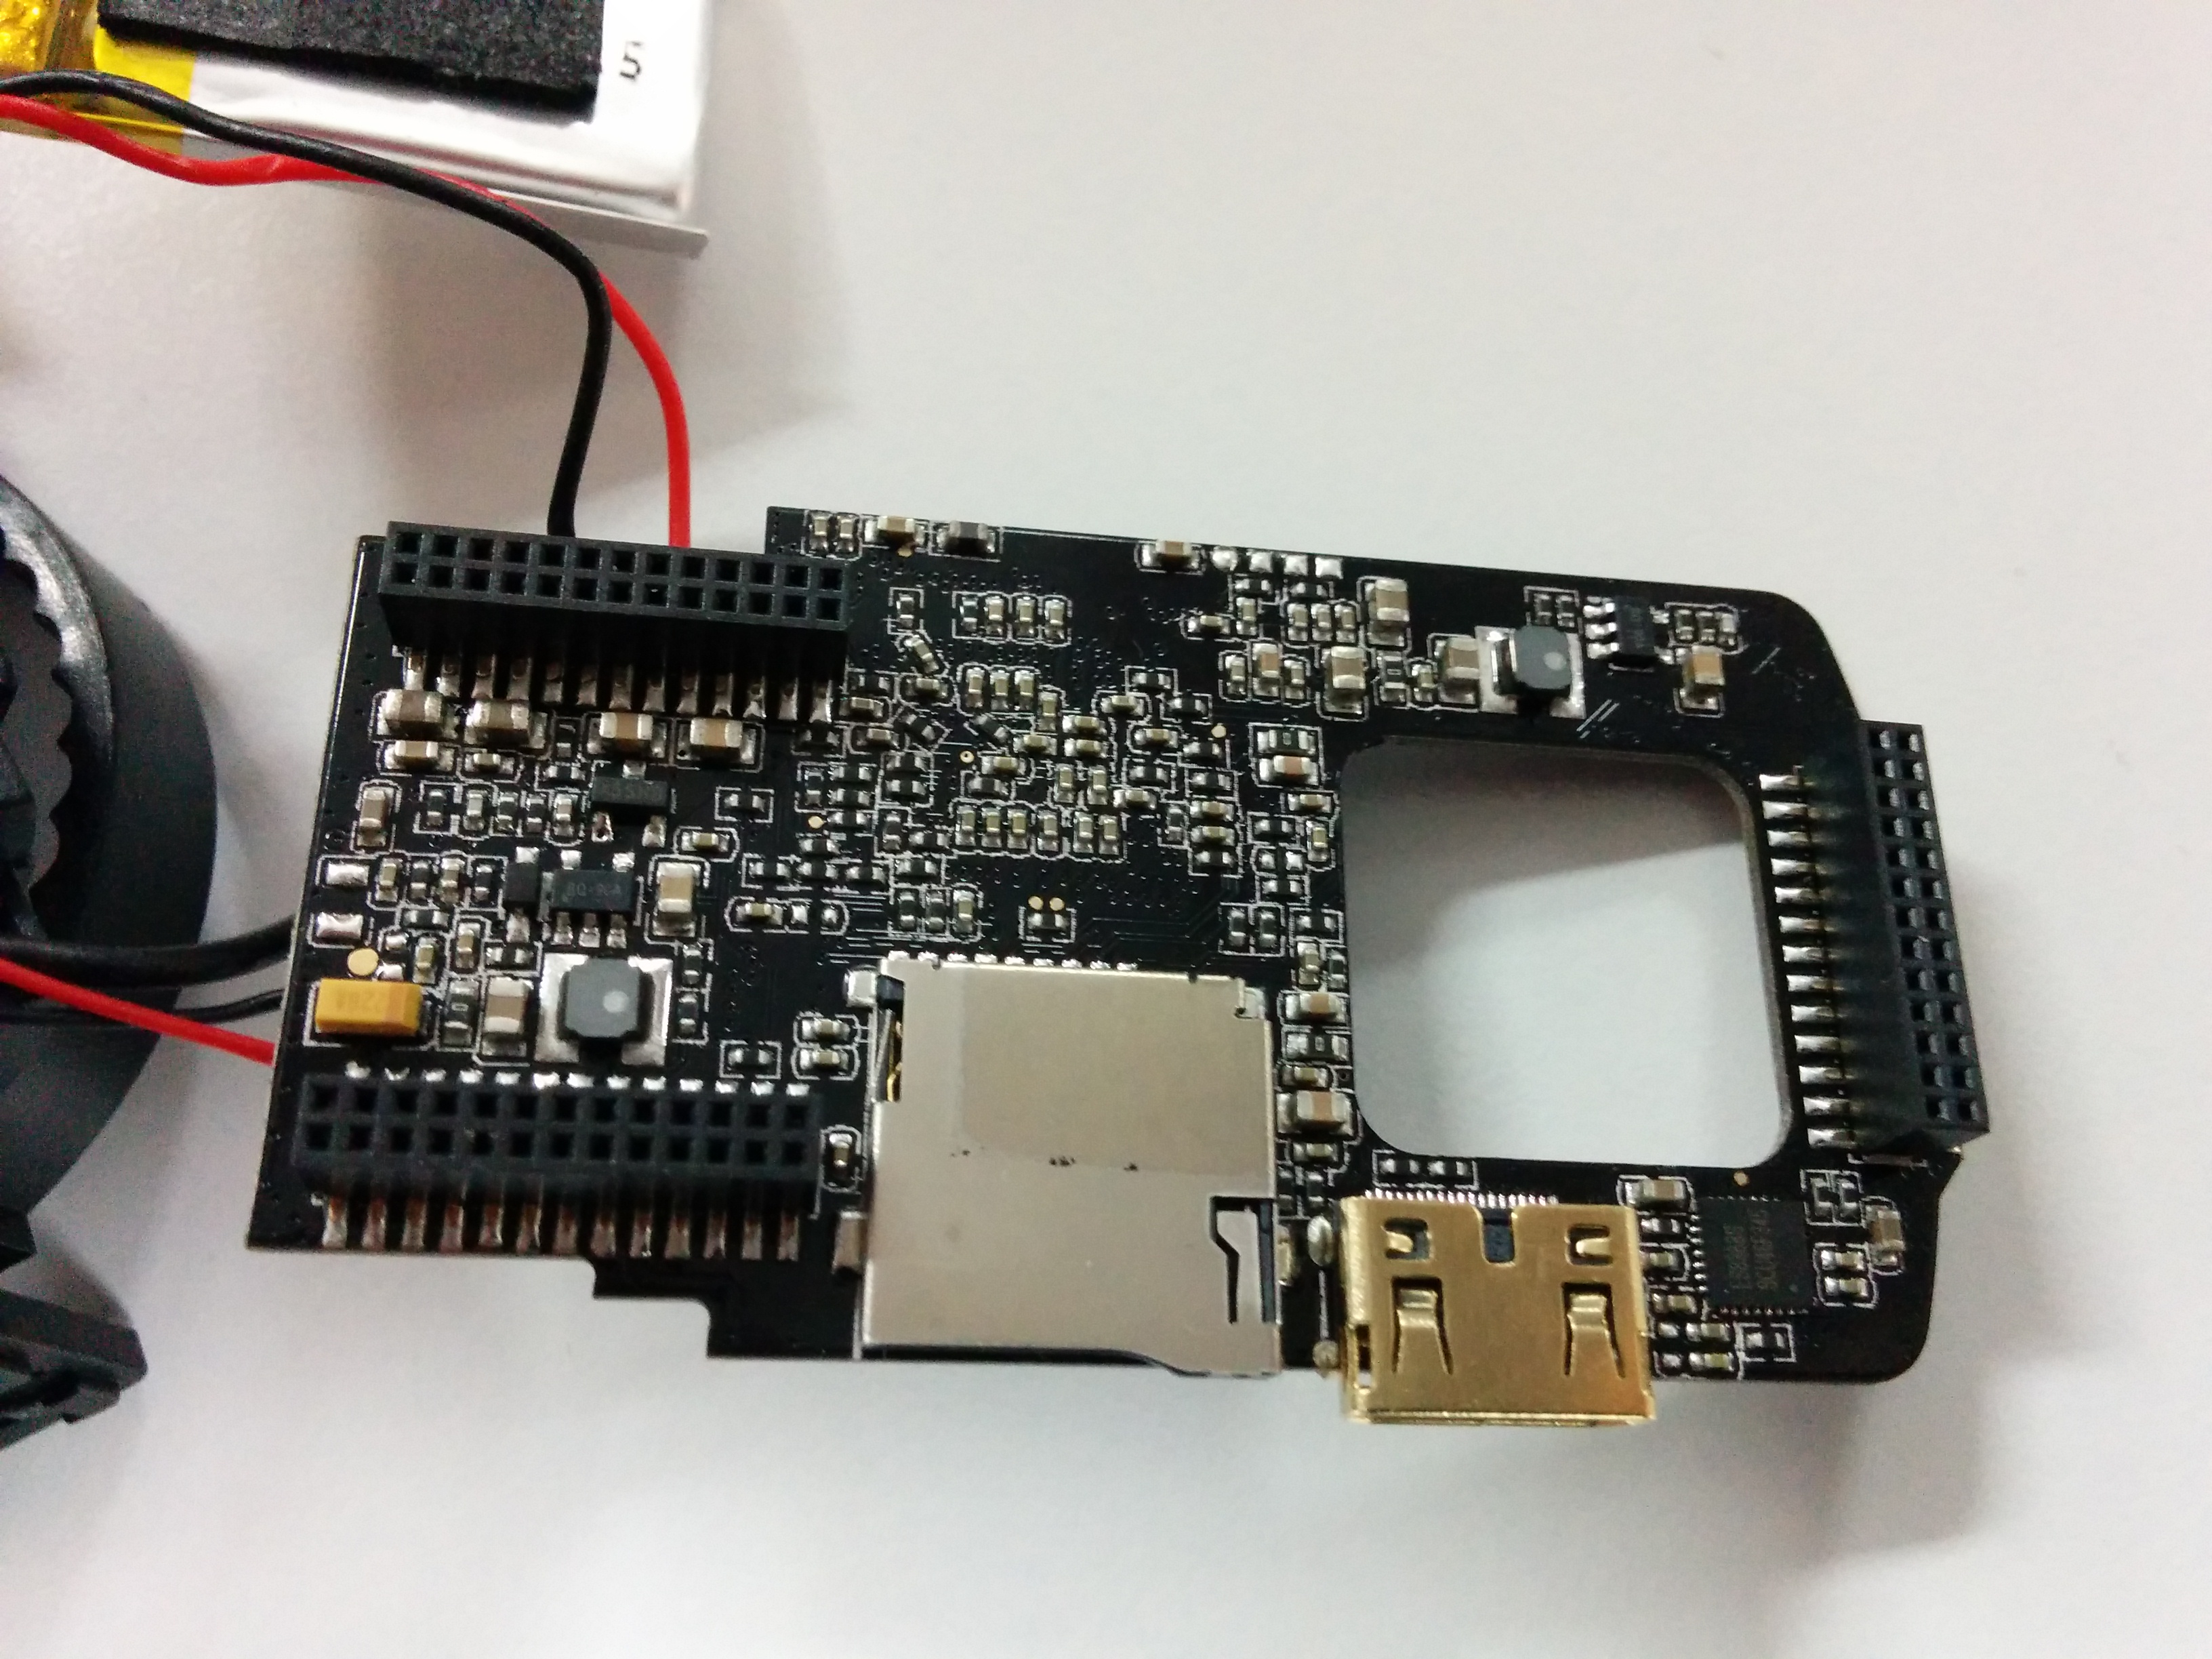
inside of Mini0806
Update: if you ever thinking about buying this camera, don’t! Unless you wish to buy five them to get one good. It is plagued with issues, from assembly problems (jammed cable), crappy firmware, stability issues, poor choice of power supply IC (only 0.5V head room), random crashes to shitty plastic case that melts at 100’C.
Below is the breakdown of mini0806 dashcam.
The packaging contents:
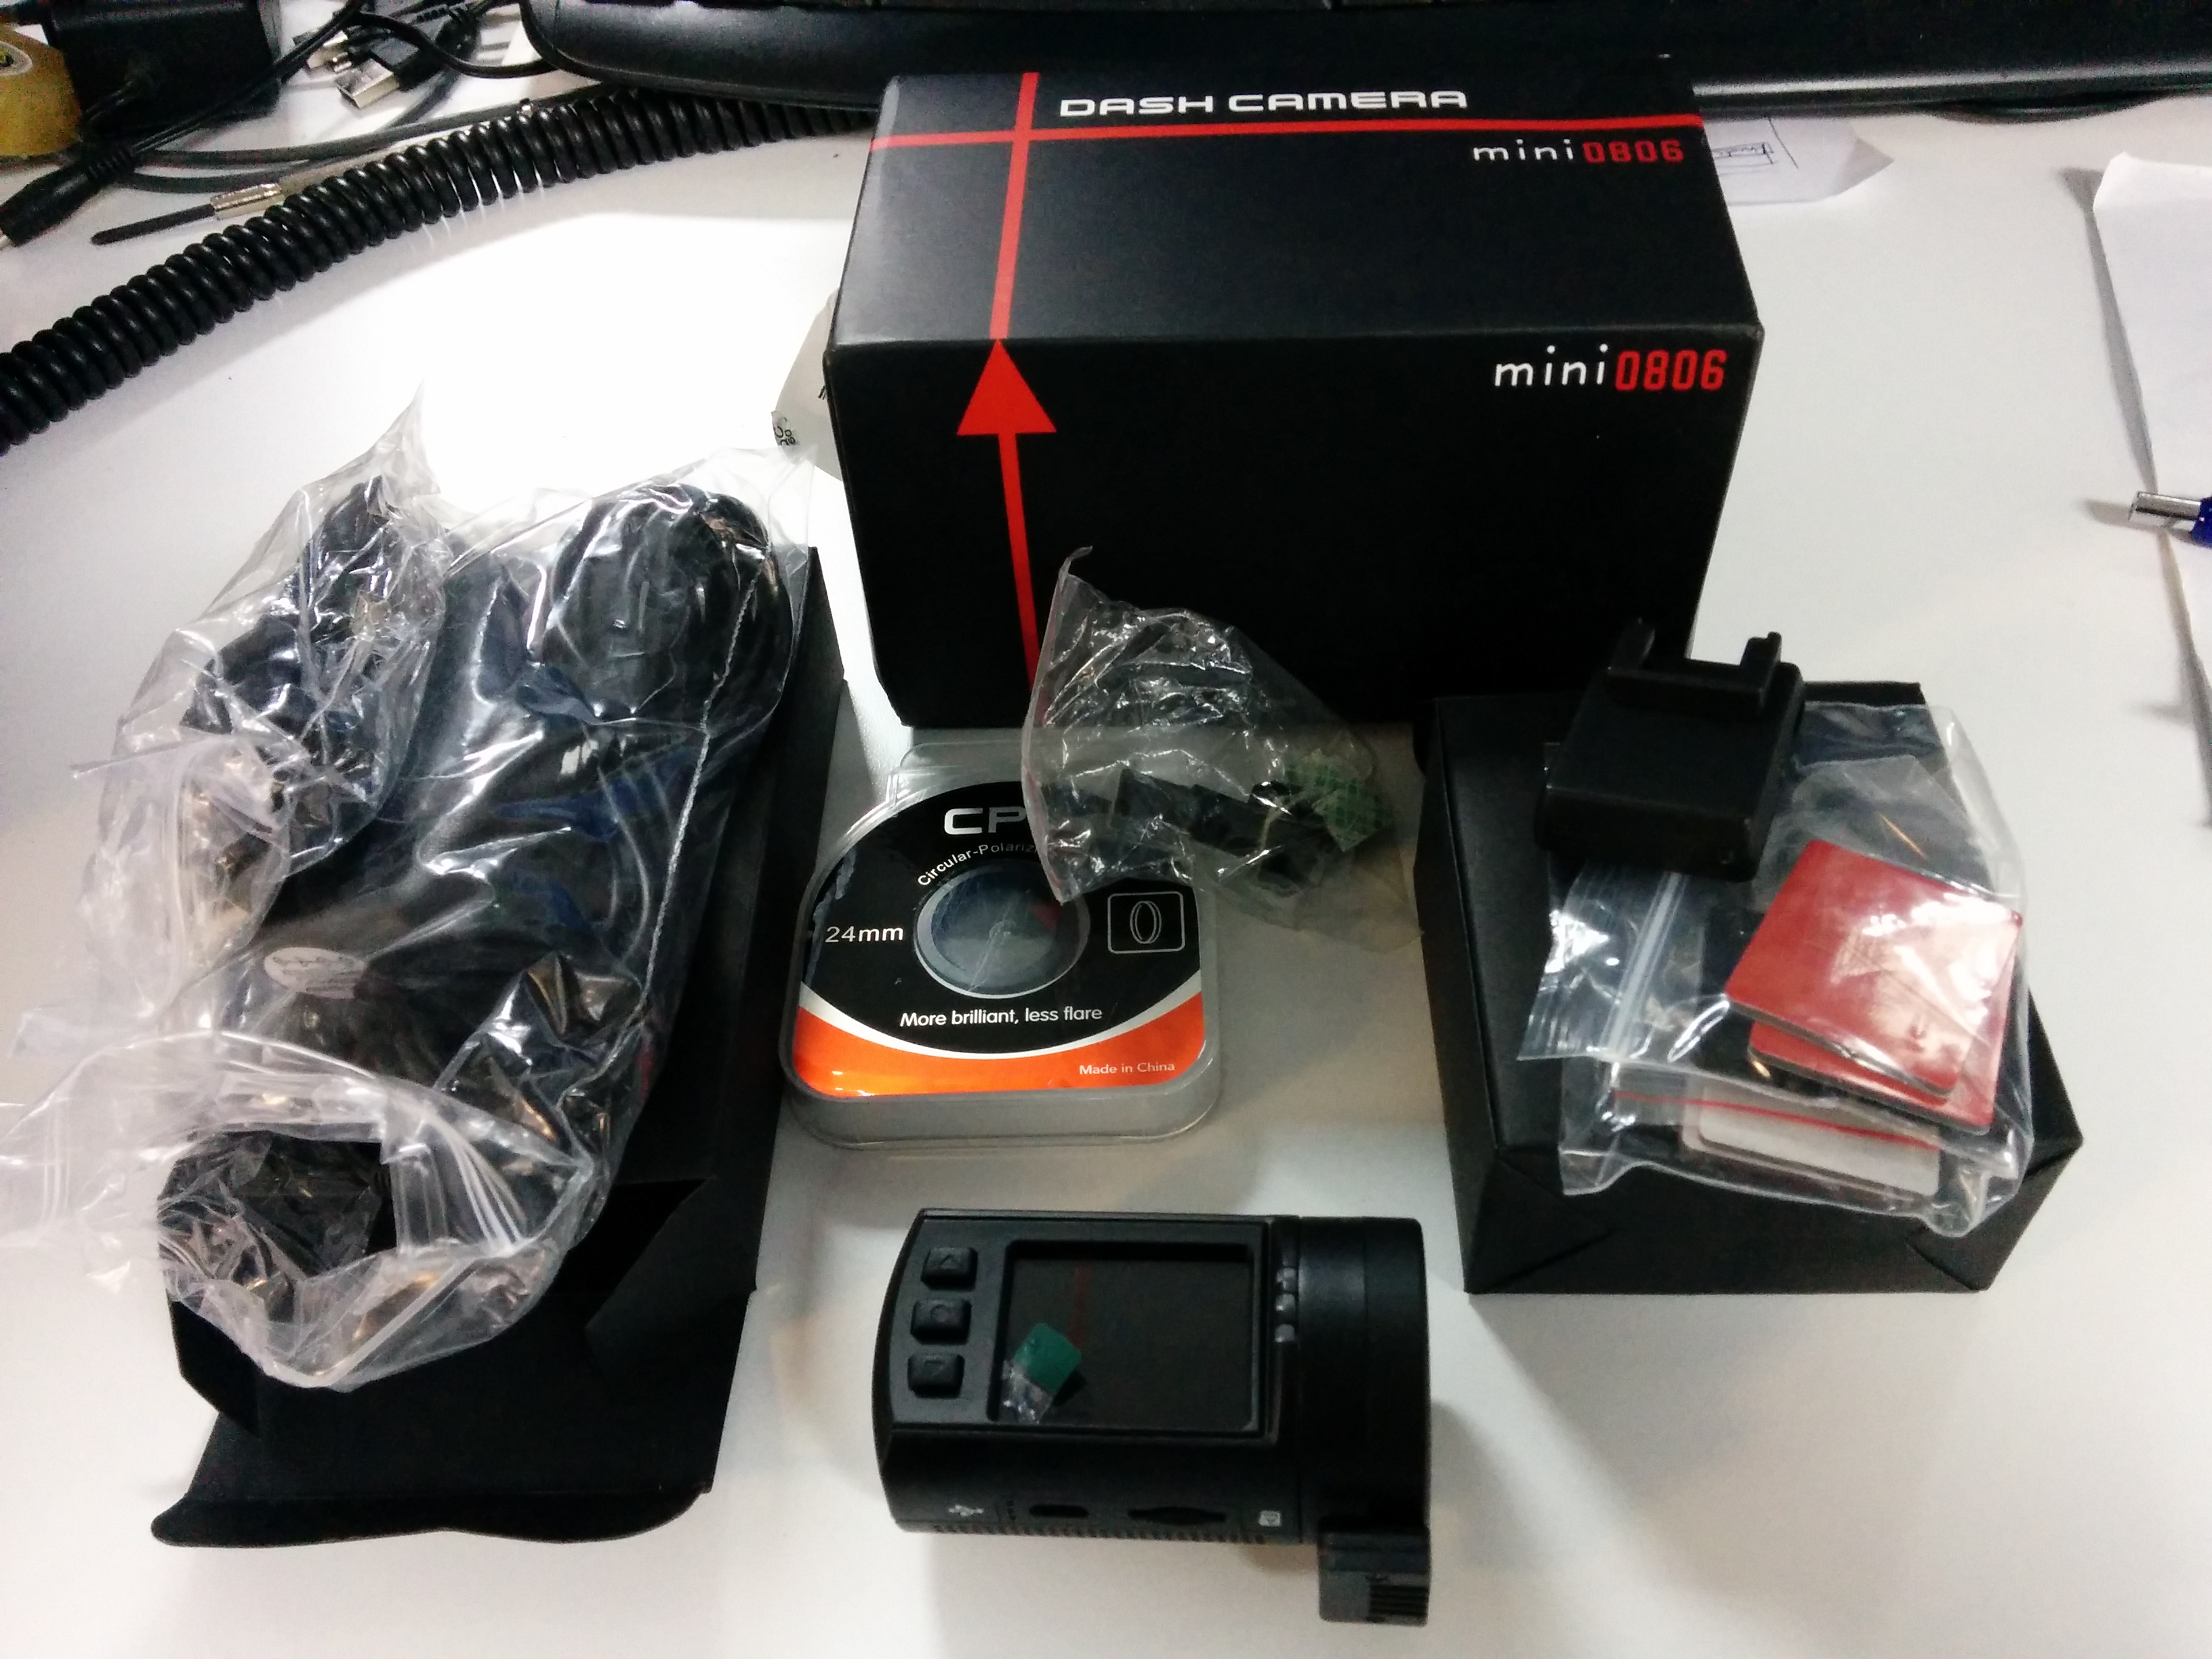
Camera itself:
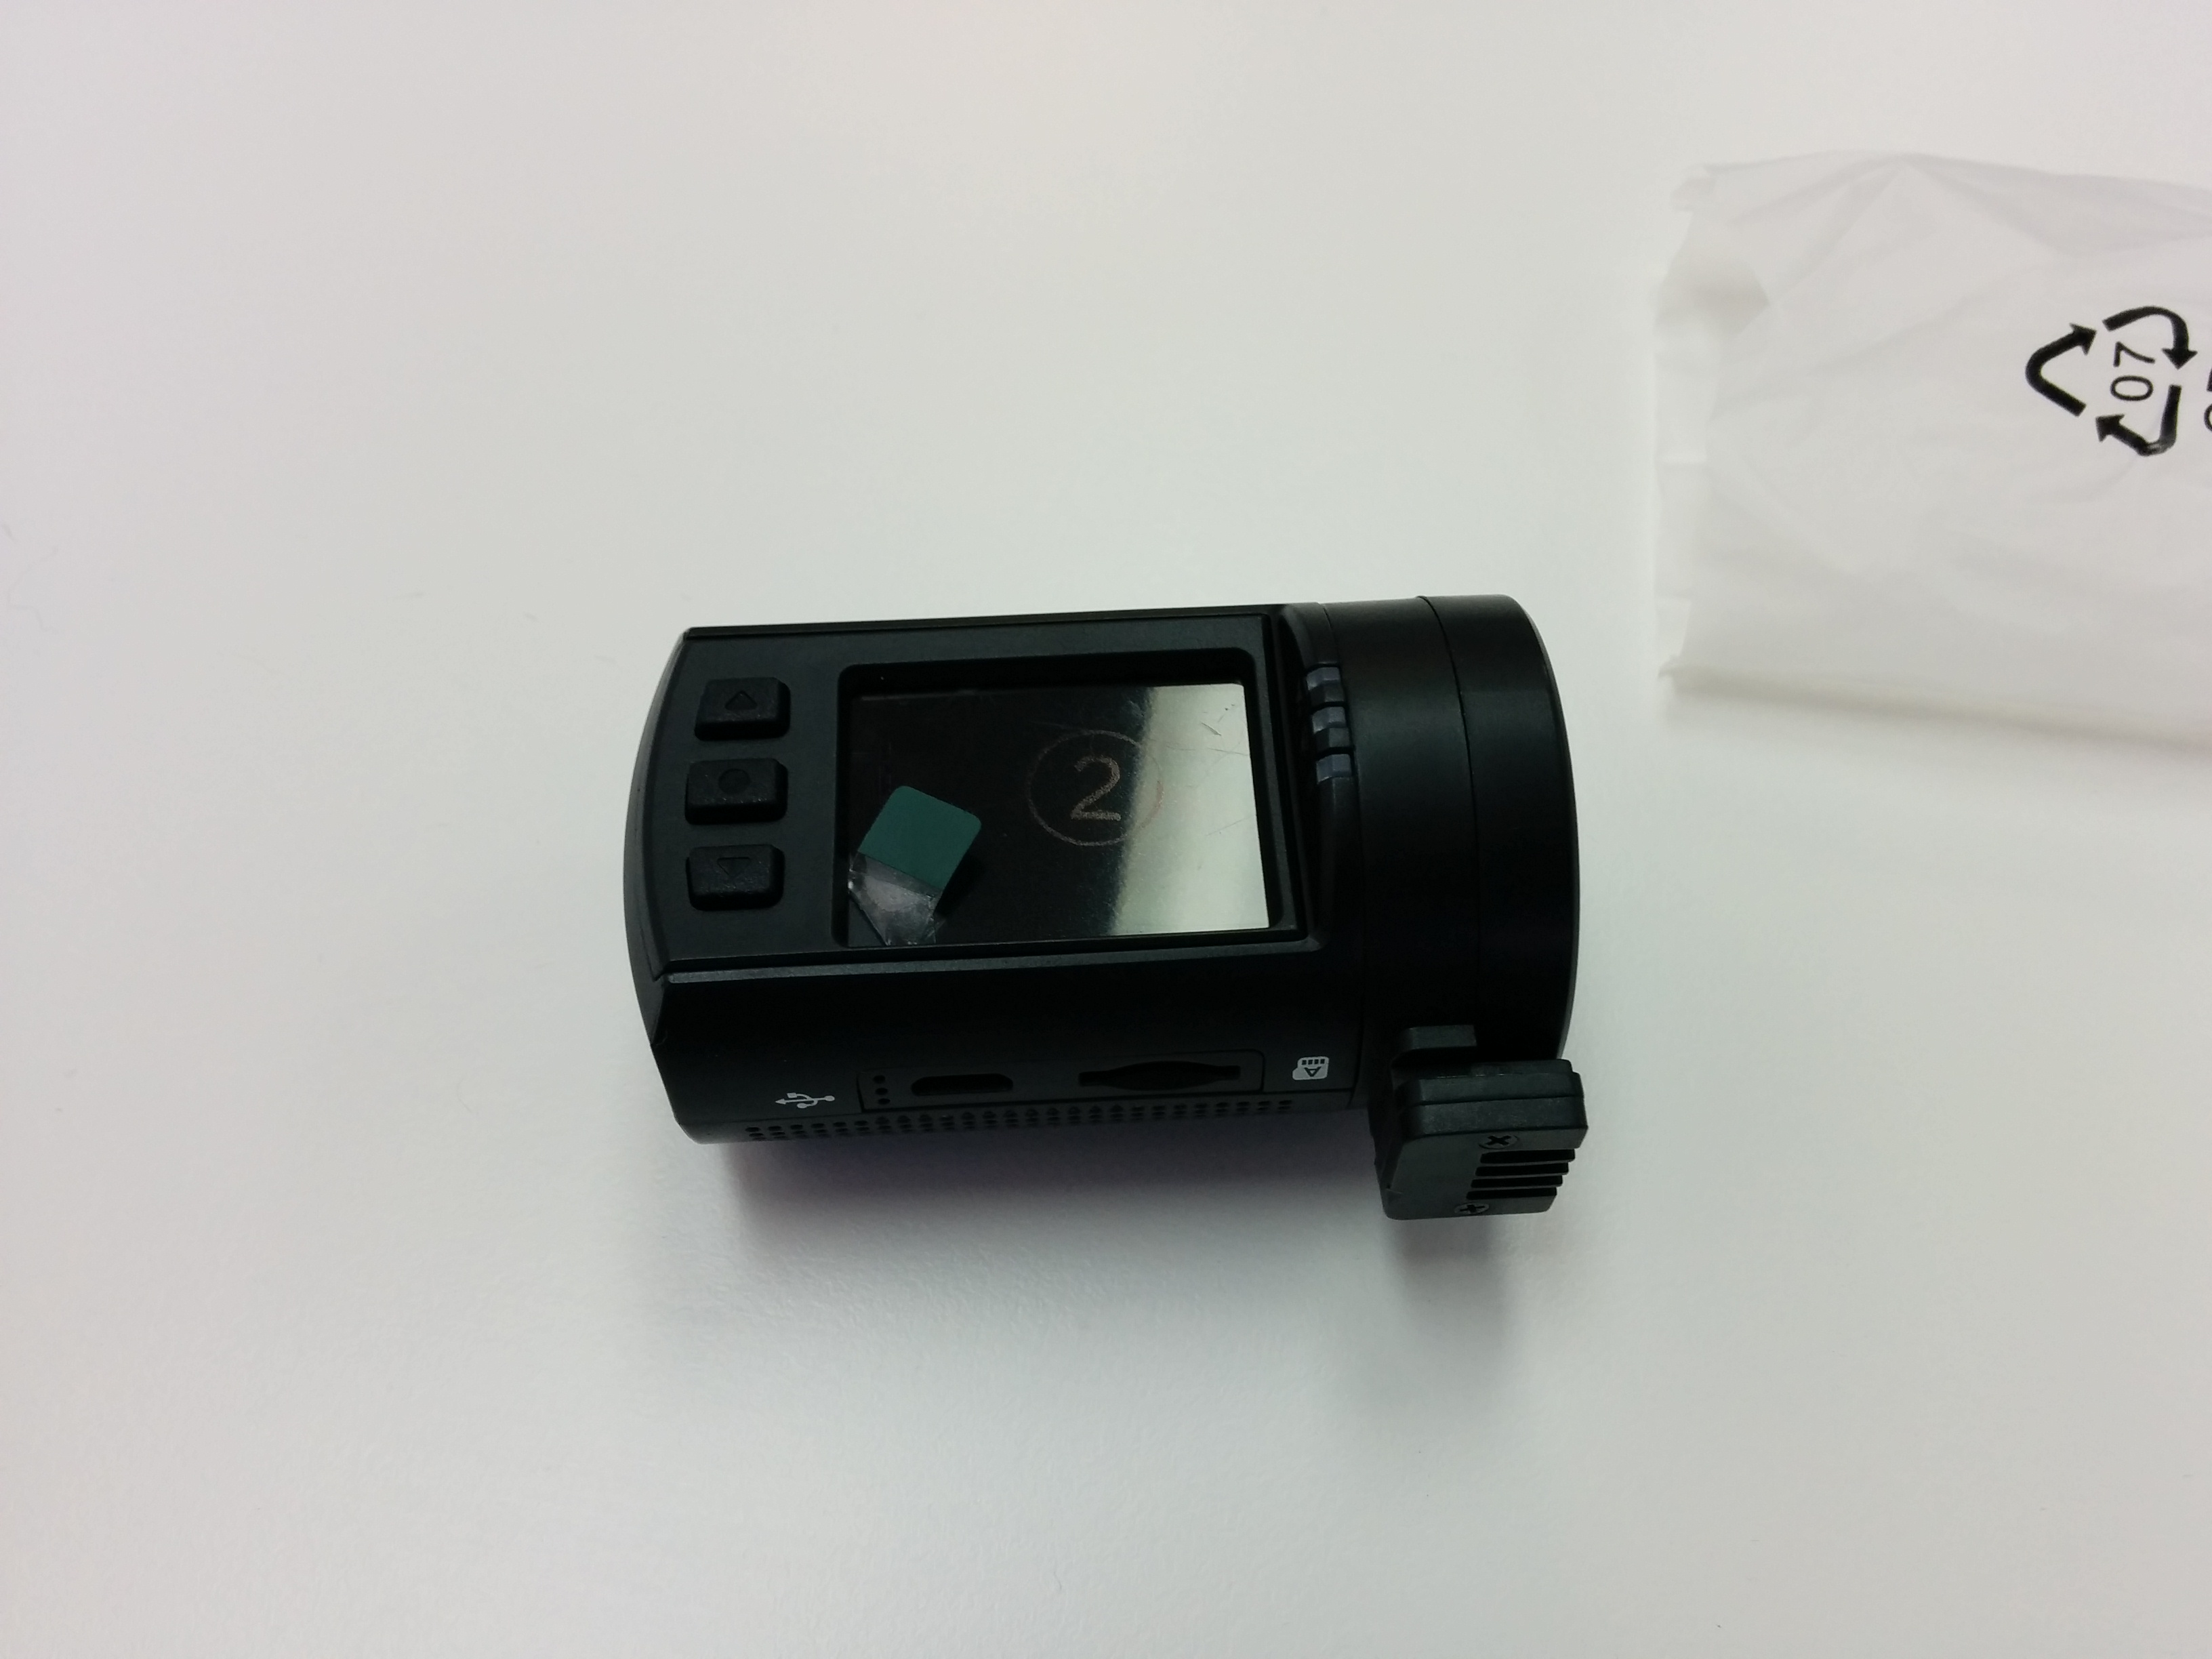
To open pop the rear cap with fingers:
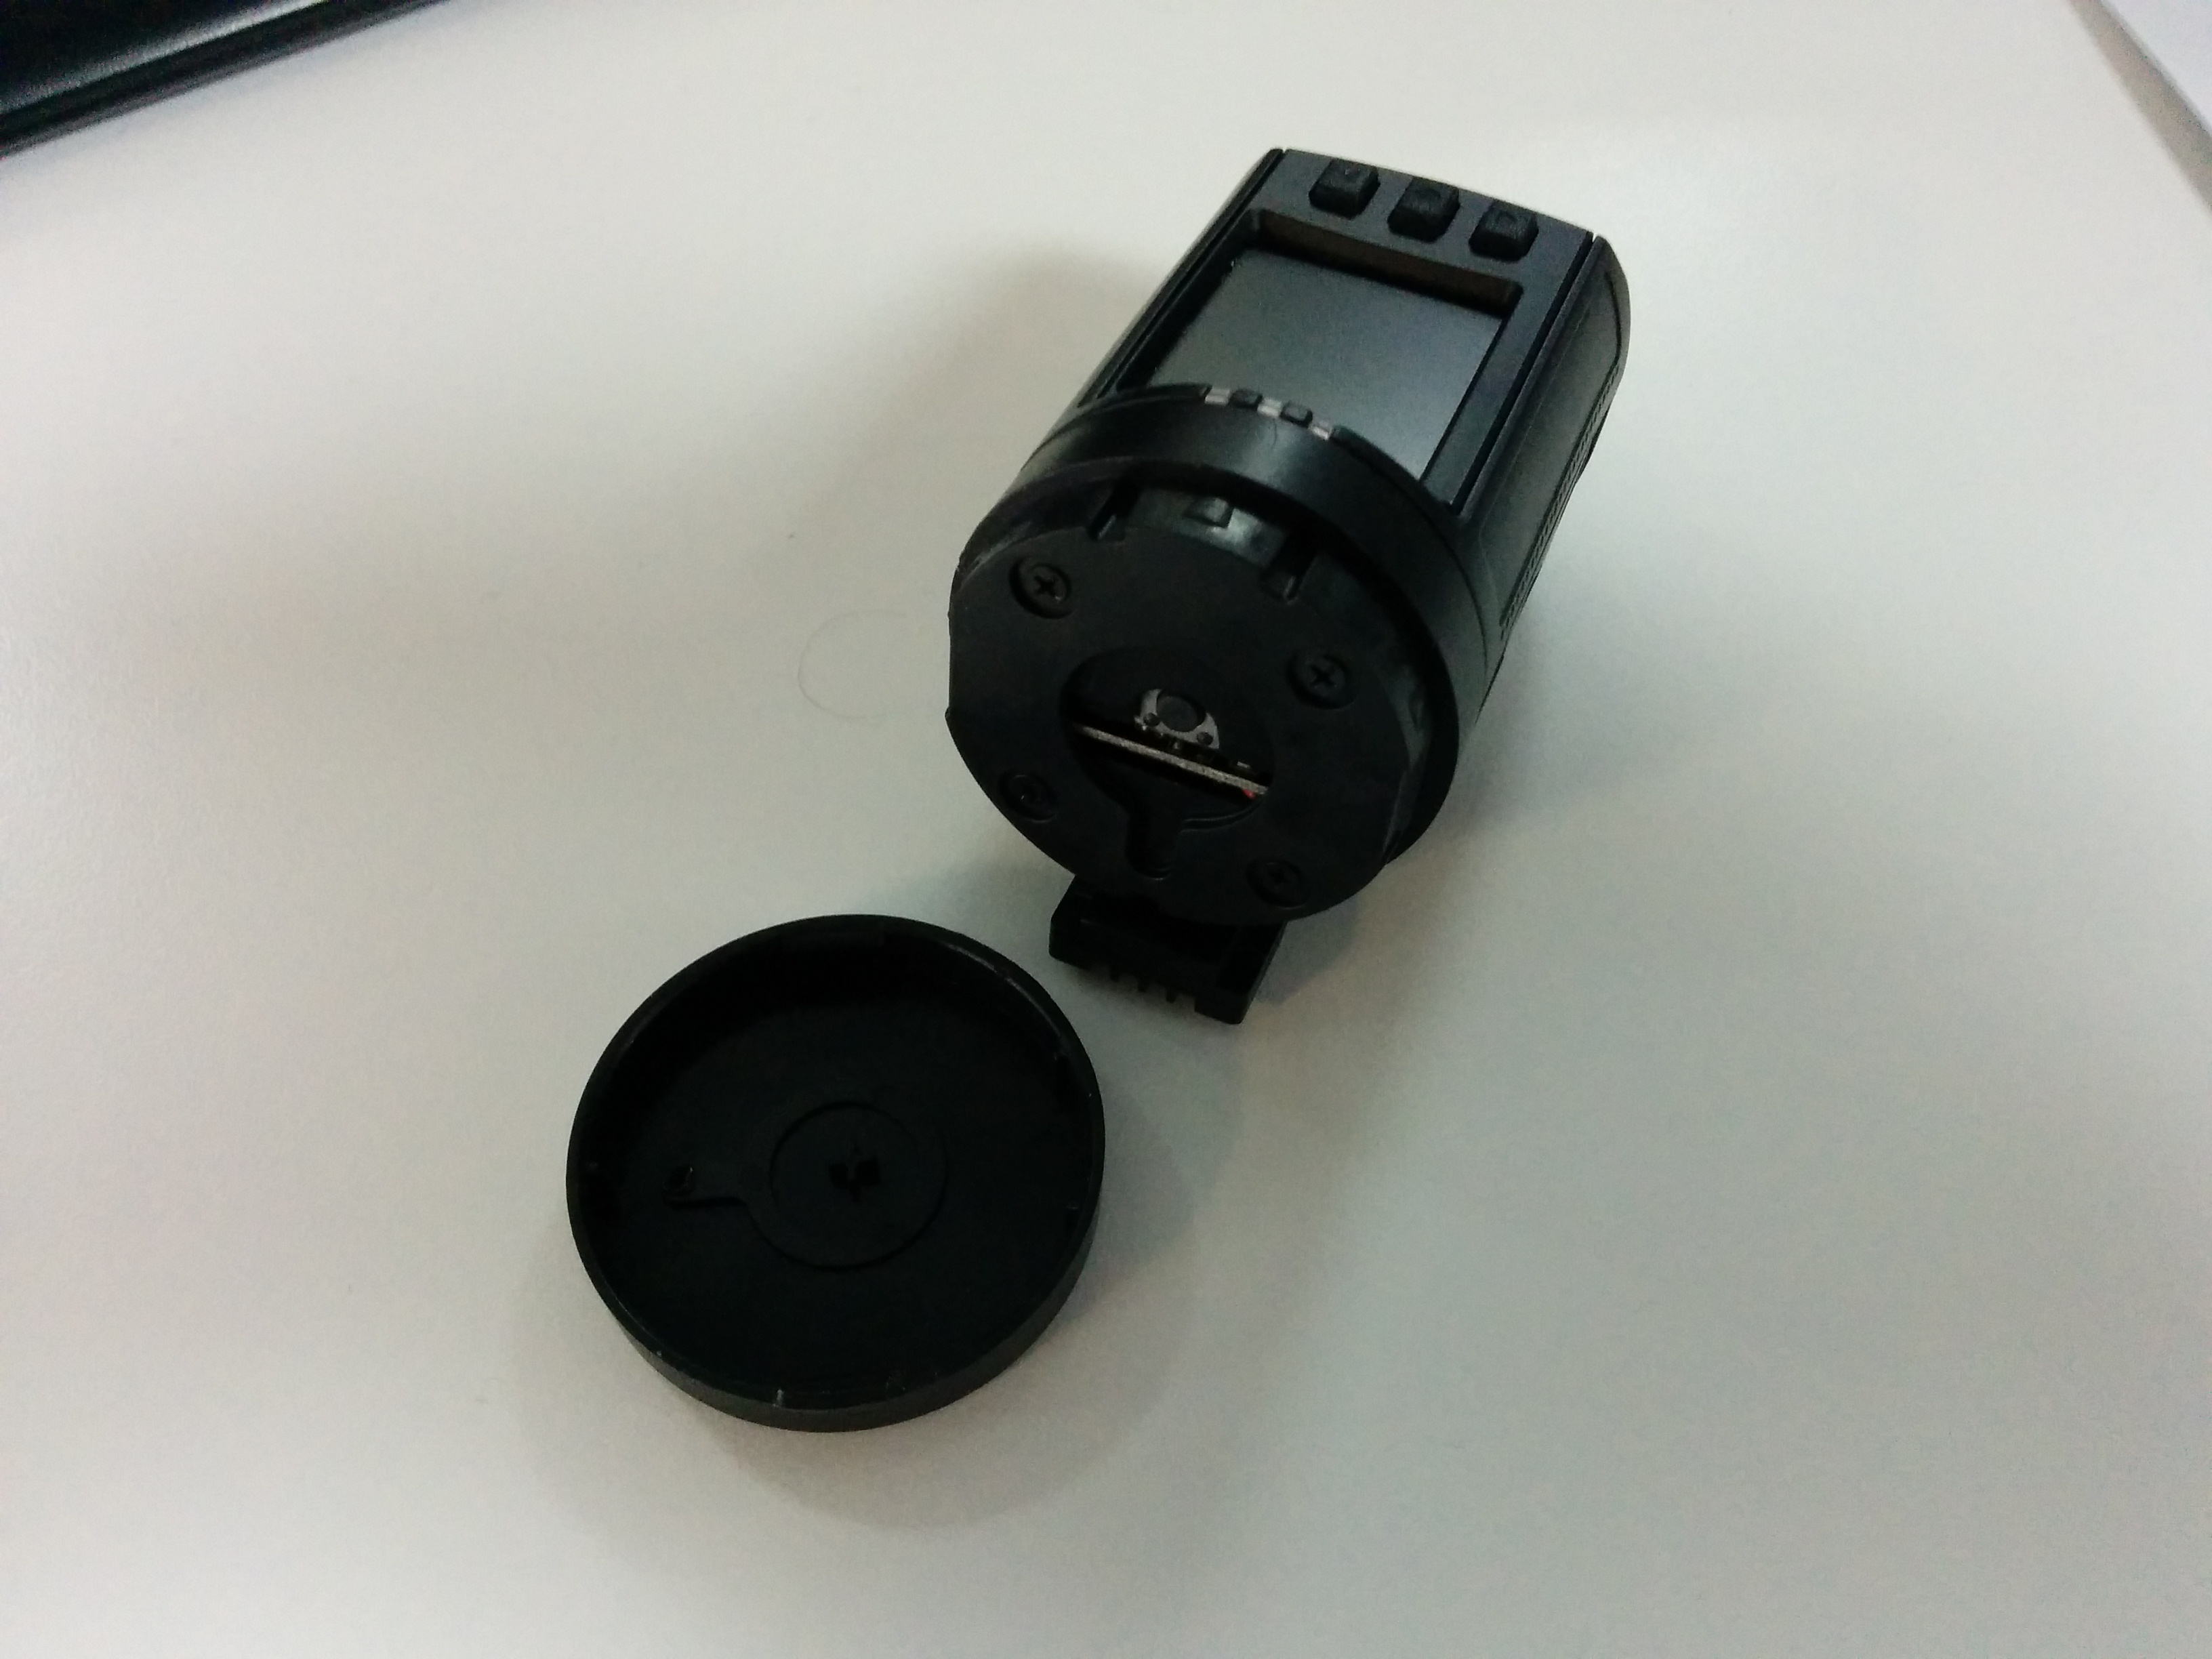
There are screws behind it holding the whole camera together:
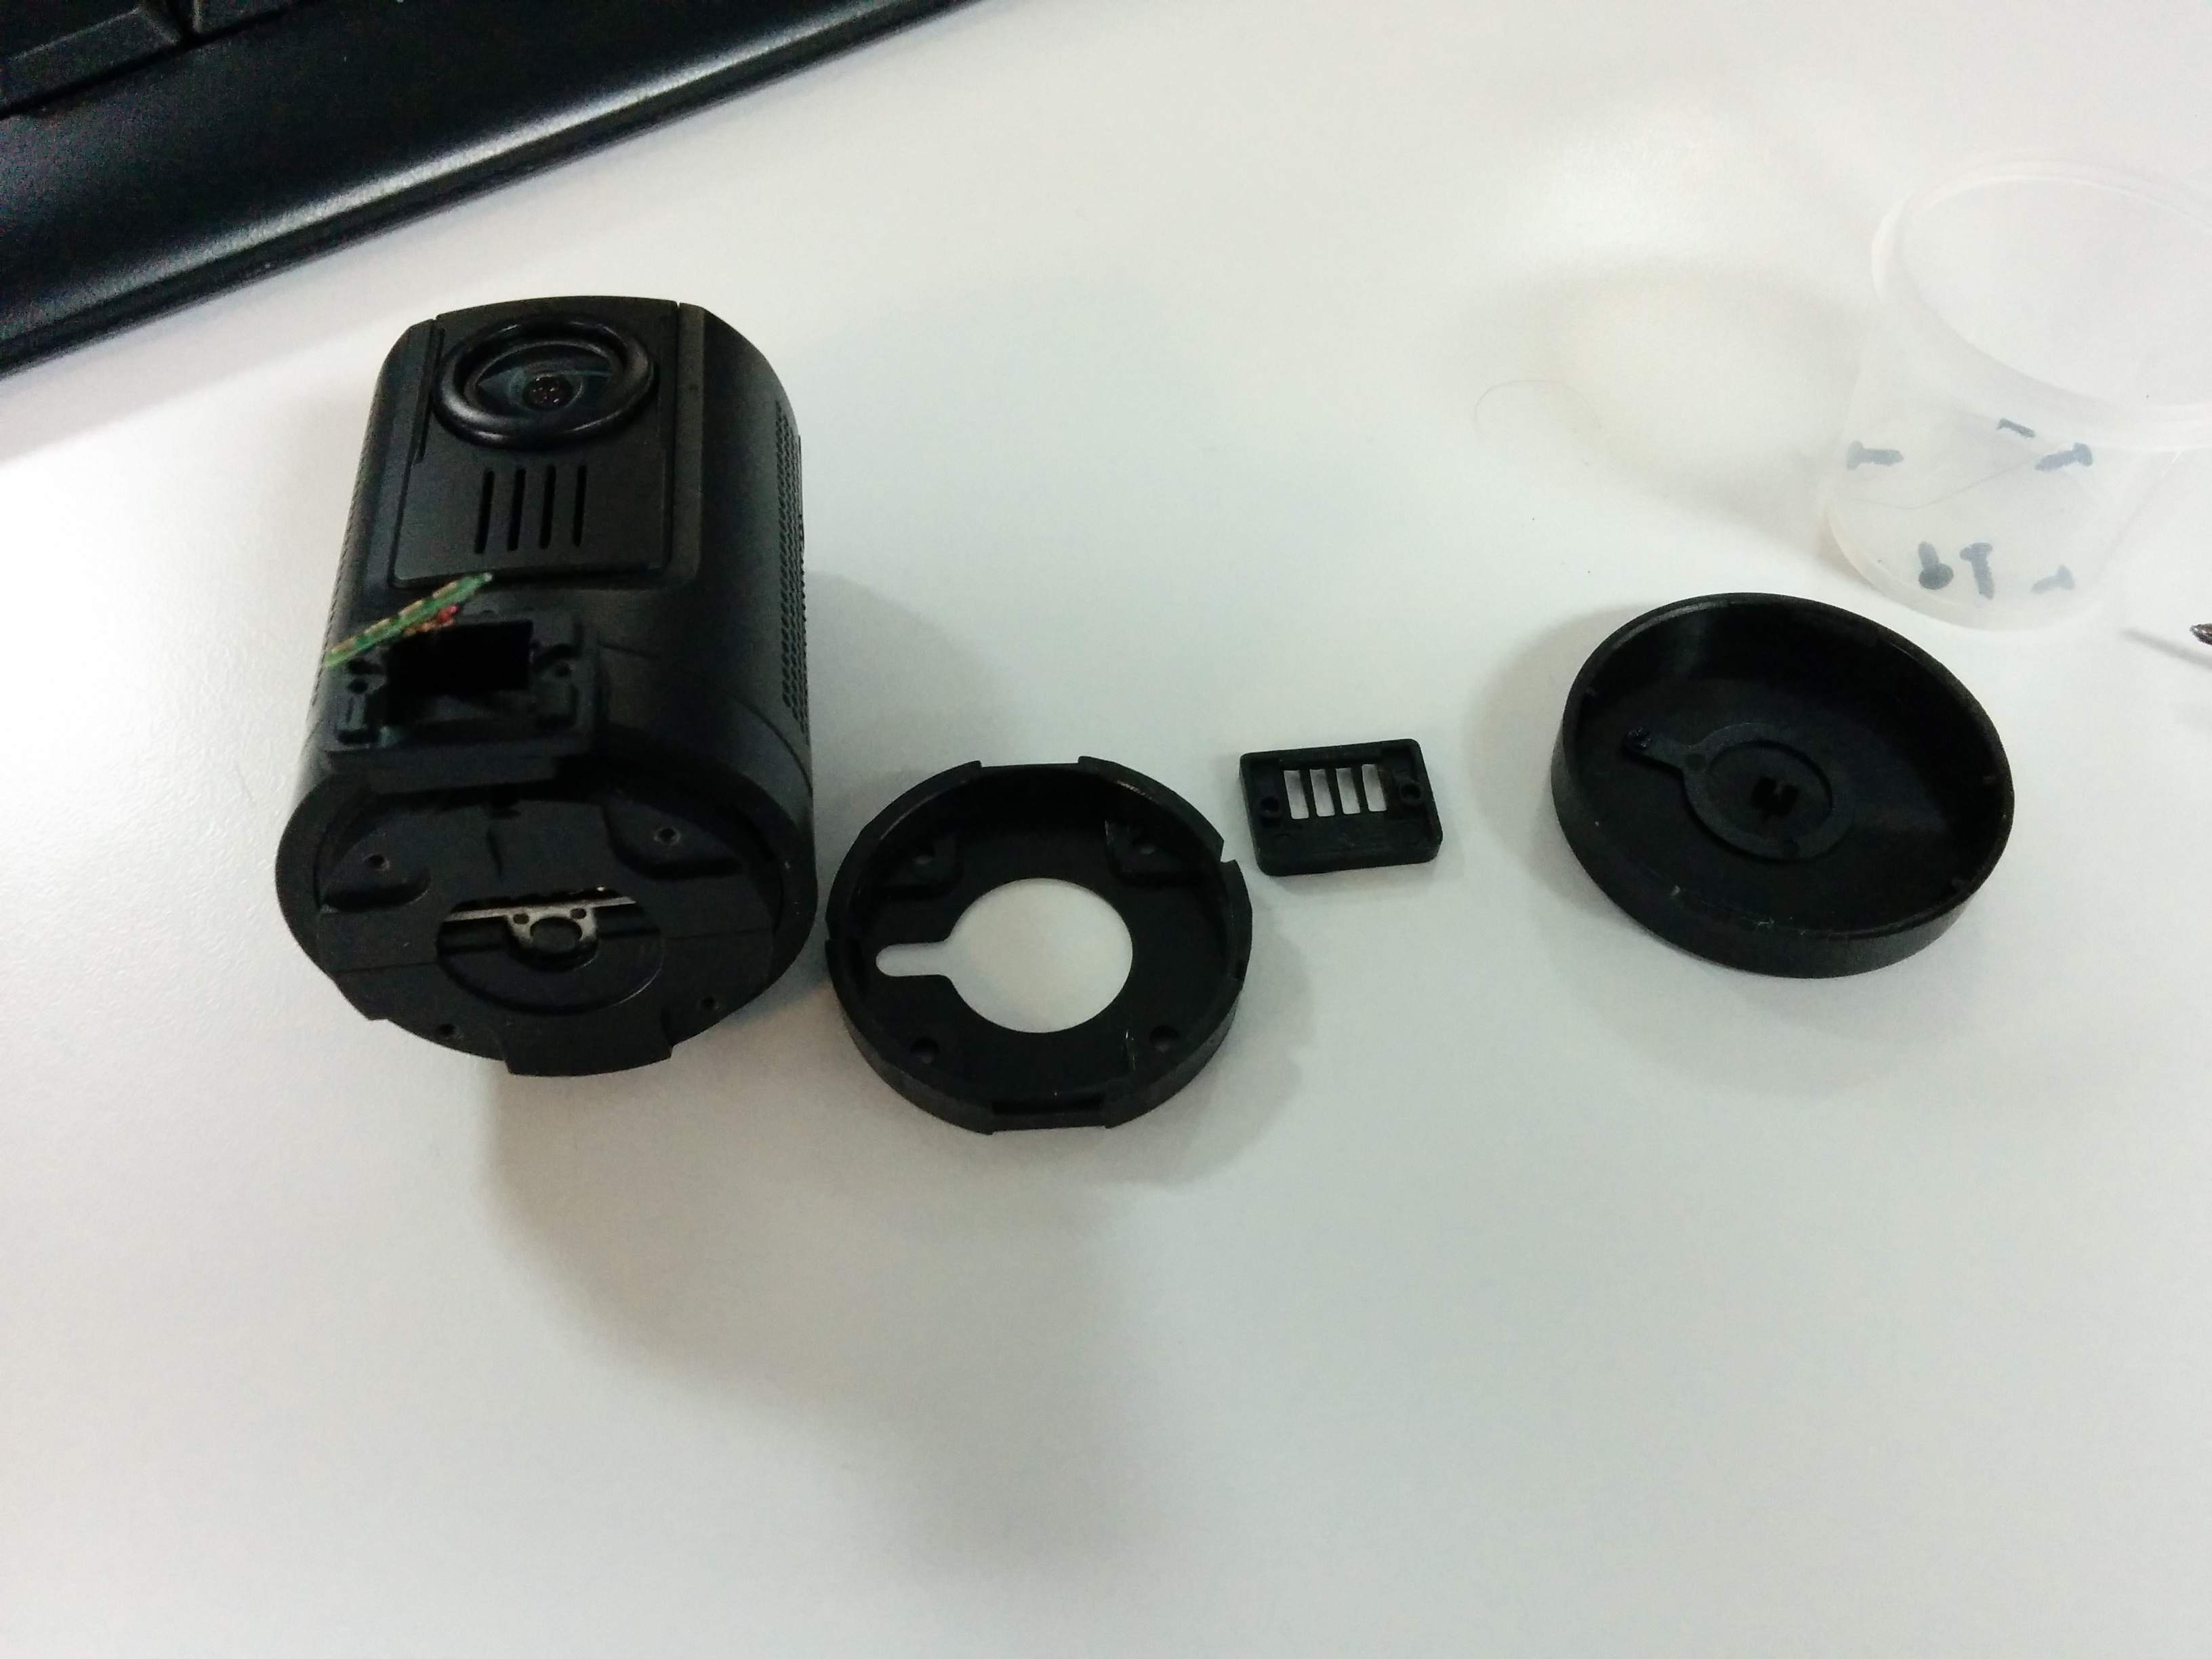
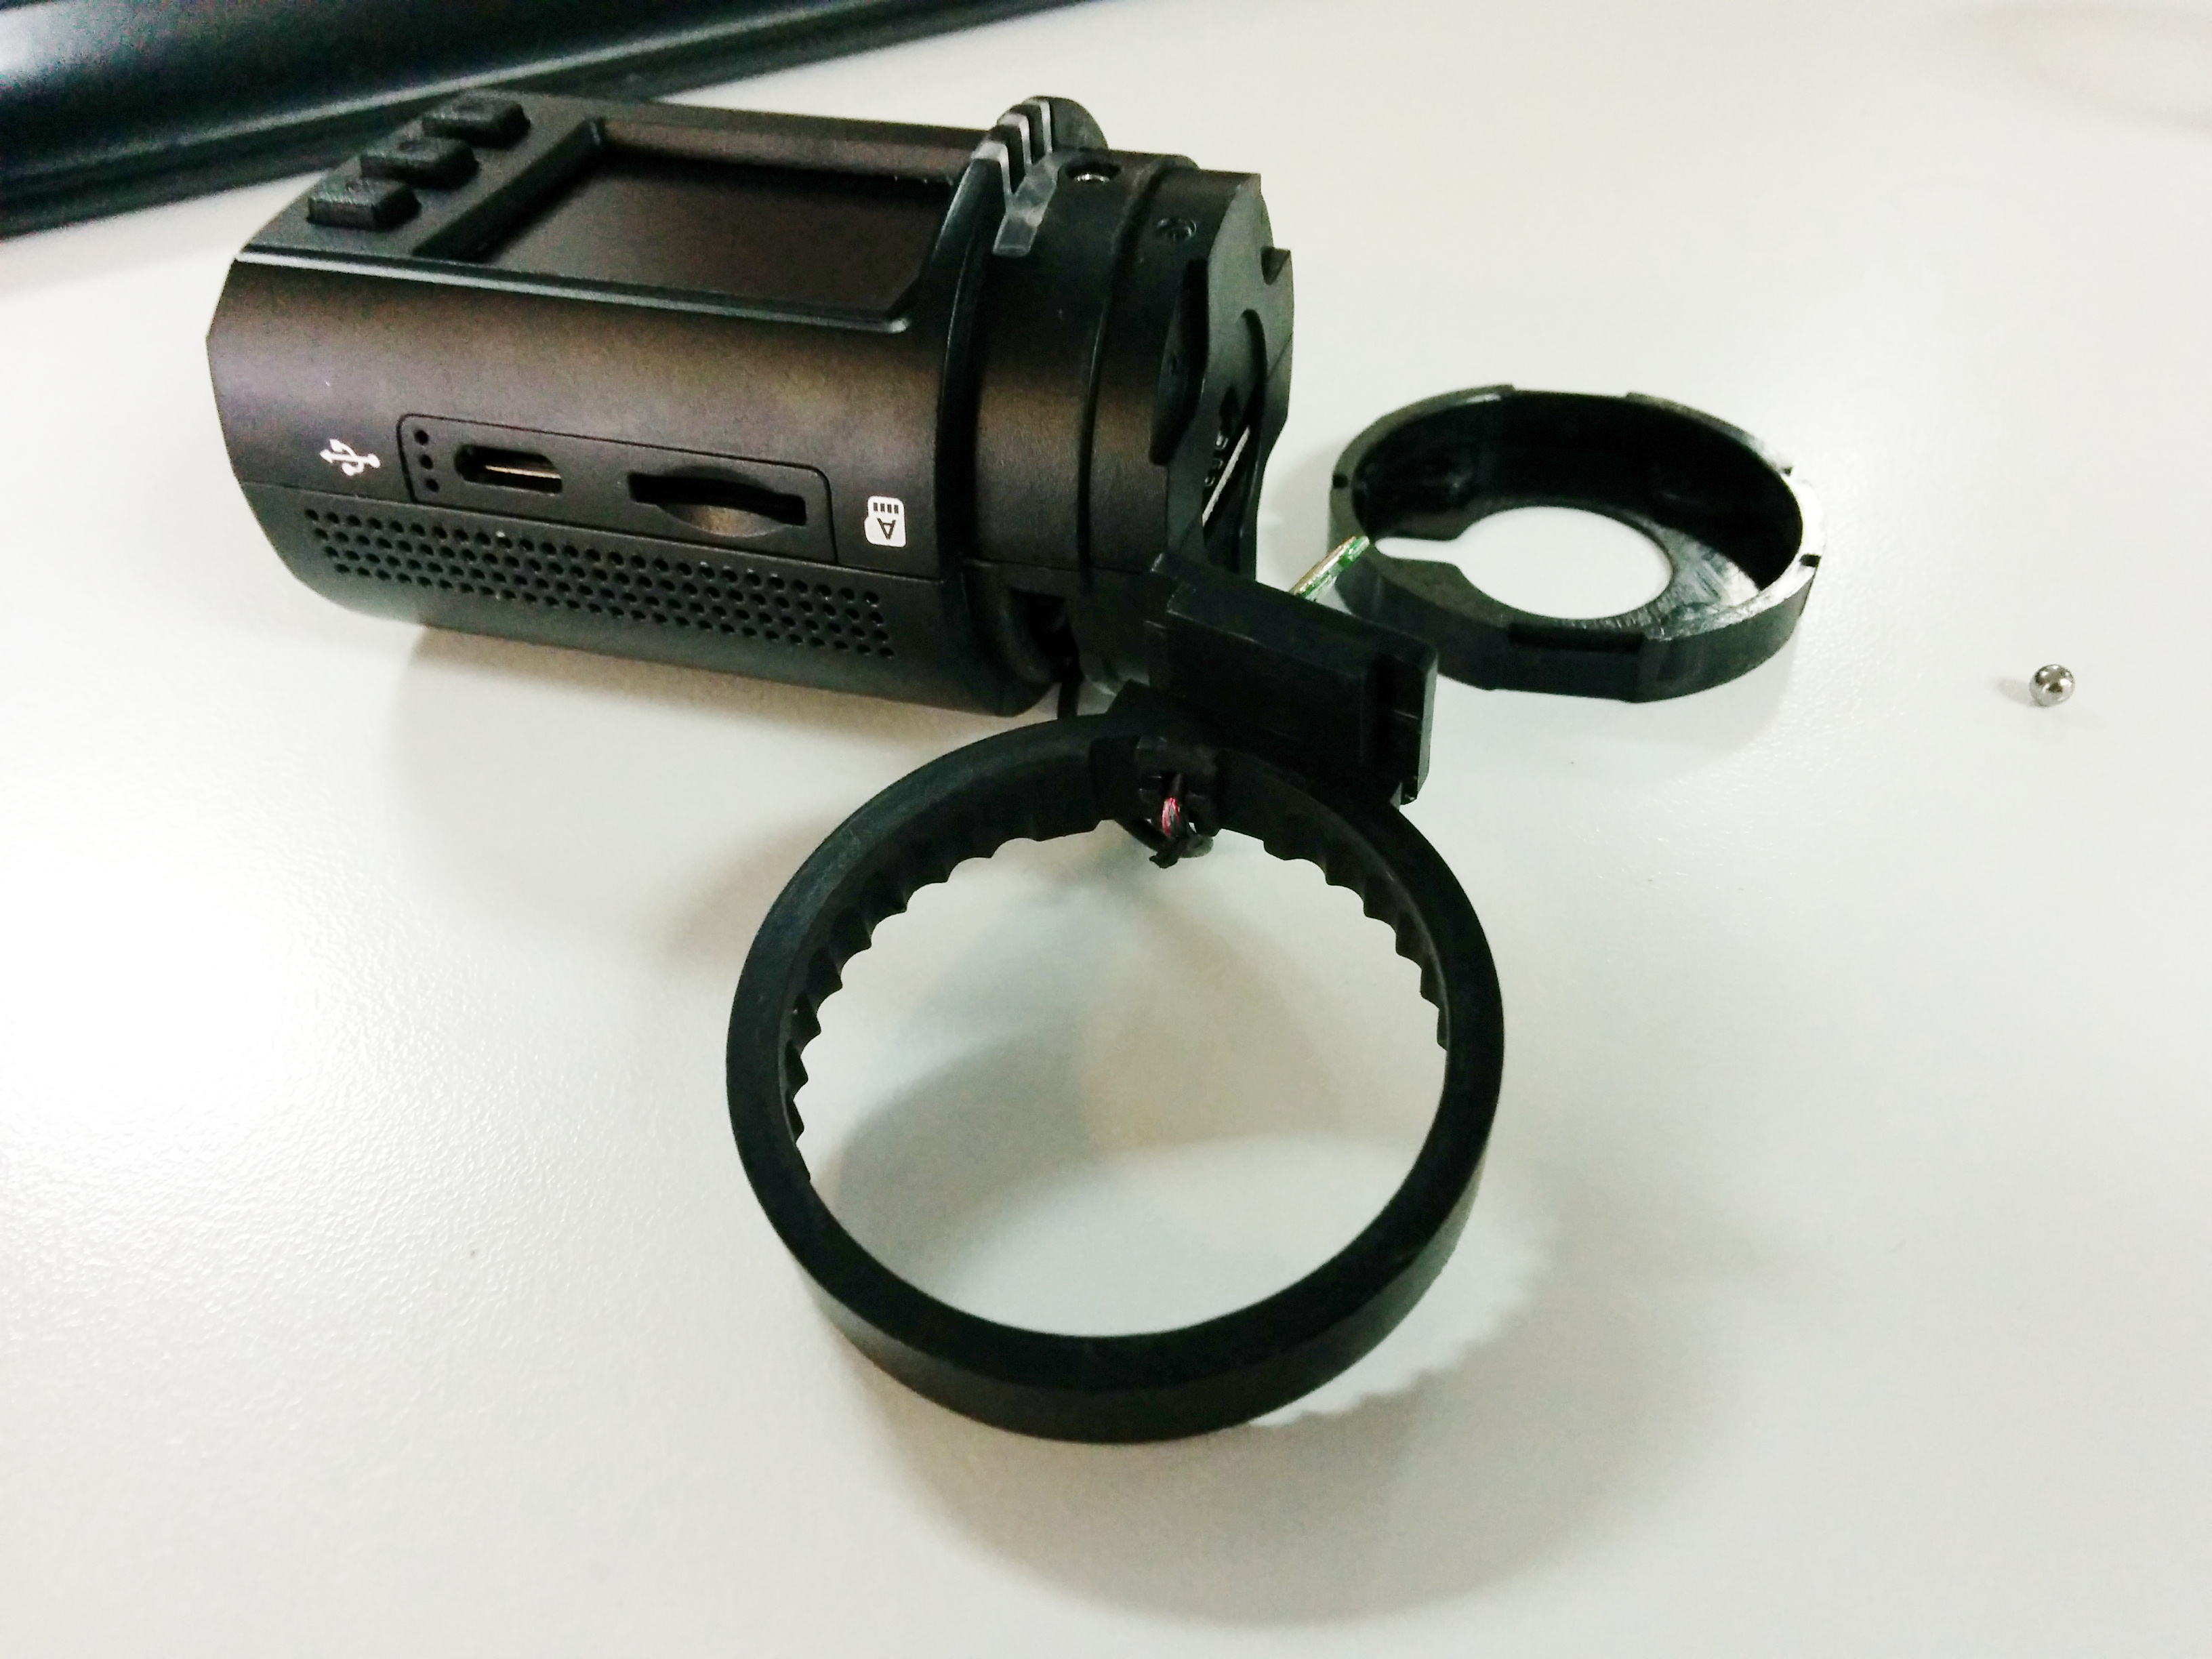
Notice torn cable inside of the ring? This is a common assembly/design fault:
The shell is easily separated:
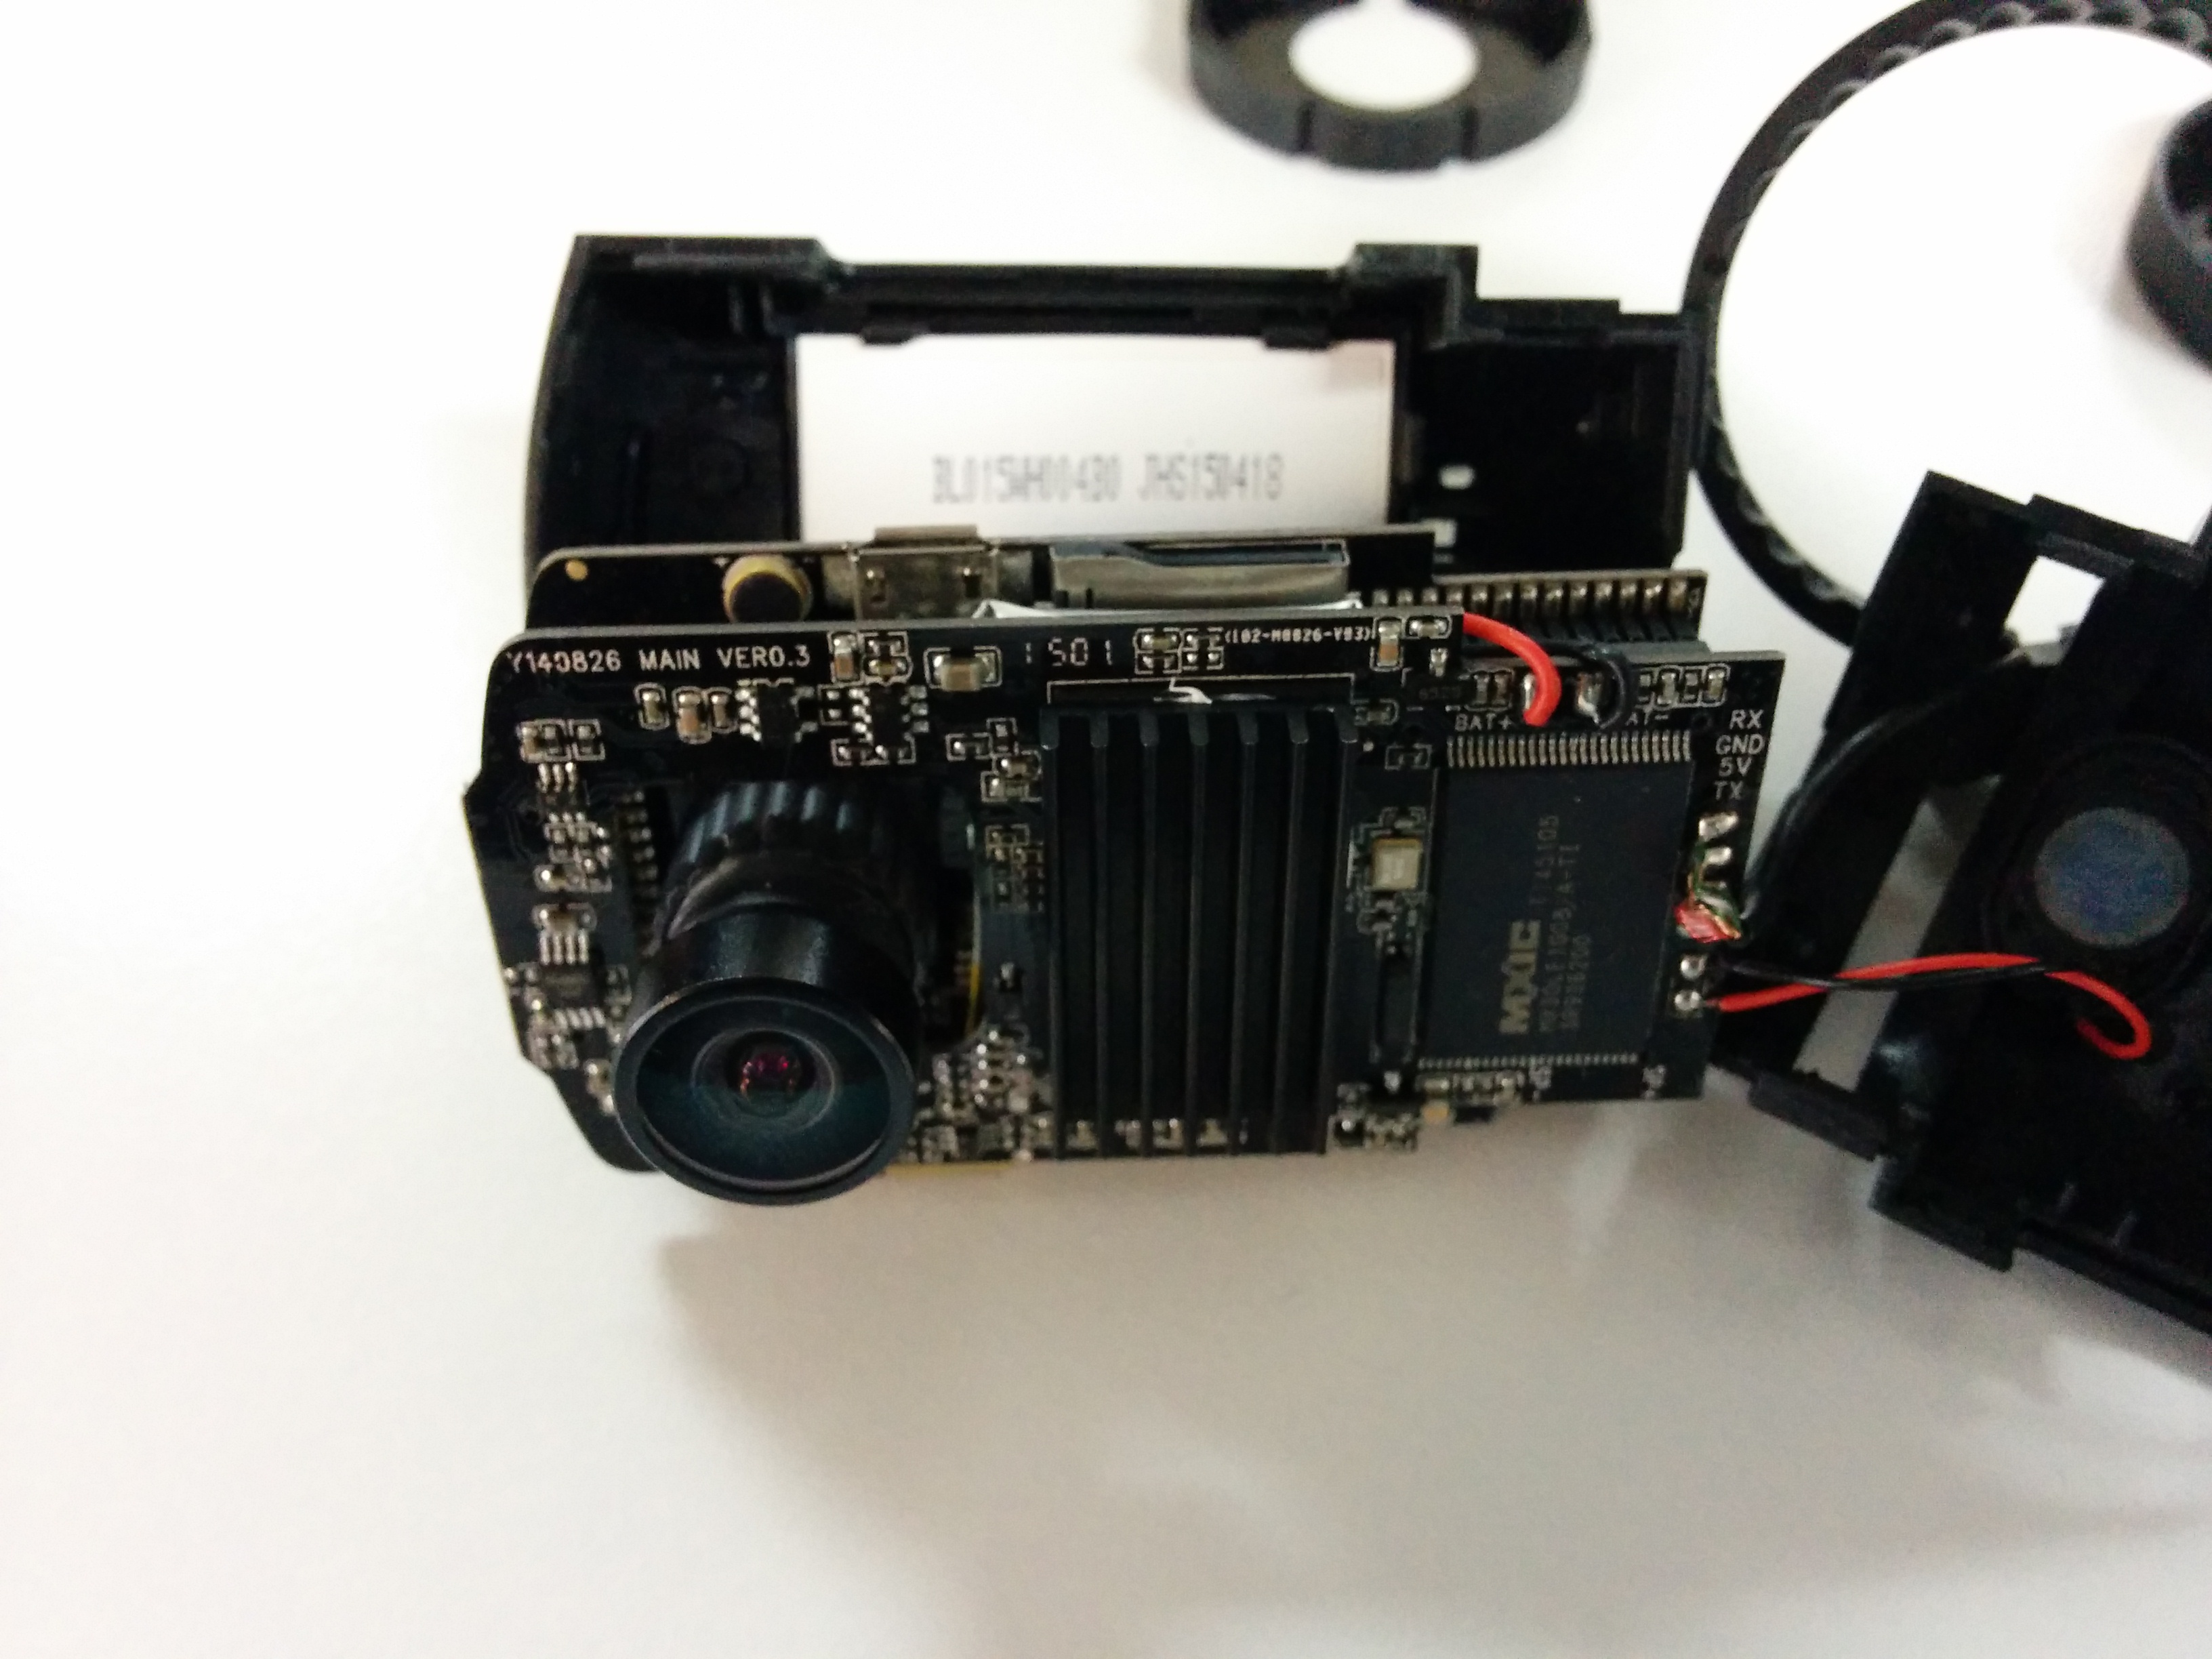
The beefy heat sink is a good thing to have, I believe it is relatively easy to add a micro fan there (maybe with minimal case cutting).
The two boards held together quite tight. Here is the camera side:

Here is the back side:
Notice how battery is simply jammed between two halves? It is held by double sided tape…
Under the battery:
I have added insulation tape around battery area in case the battery swells in future:
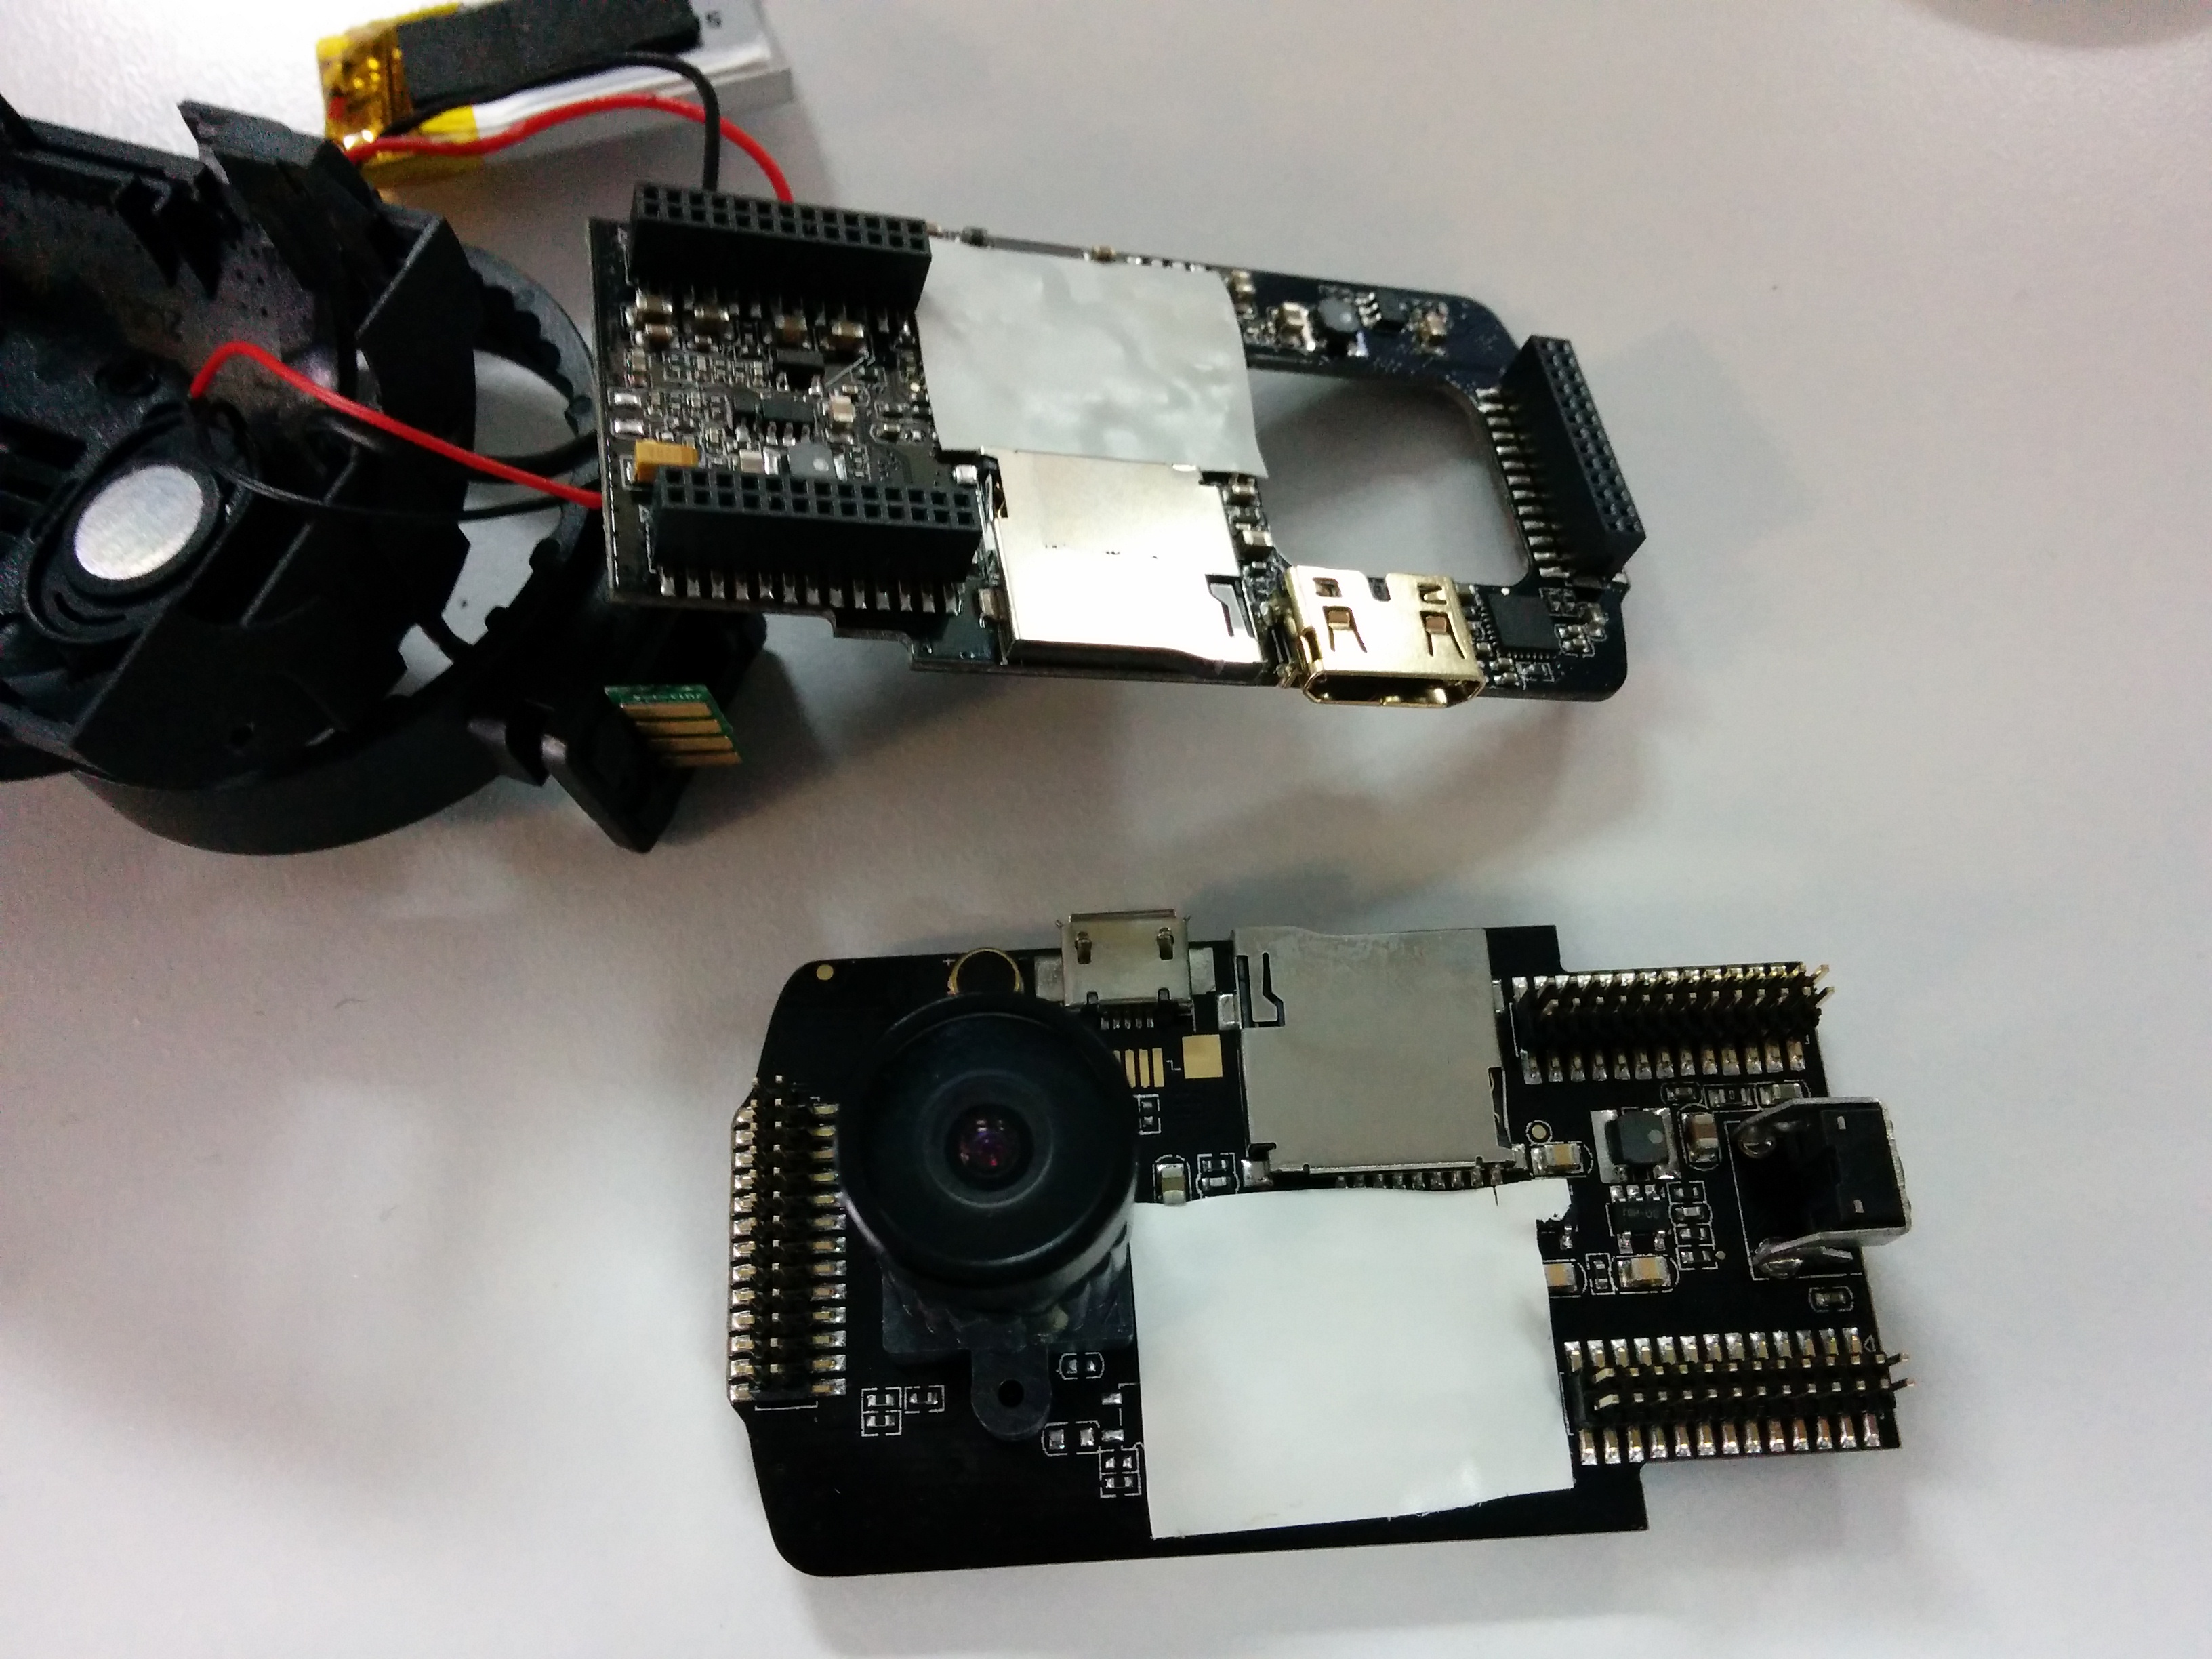
Camera is easily assembled back, one thing to watch out for is the power/GPS cable that feeds through the ring. It can be easily jammed and torn by adjusting the angle, if it is not assembled carefully. I bolted the contact pad last which allowed me to check if the cable is jammed.
Replacing Transmission and Differential oil in GRB WRX STI
The oil:
For gearbox/front diff and rear diff I use Motul Gear 300:
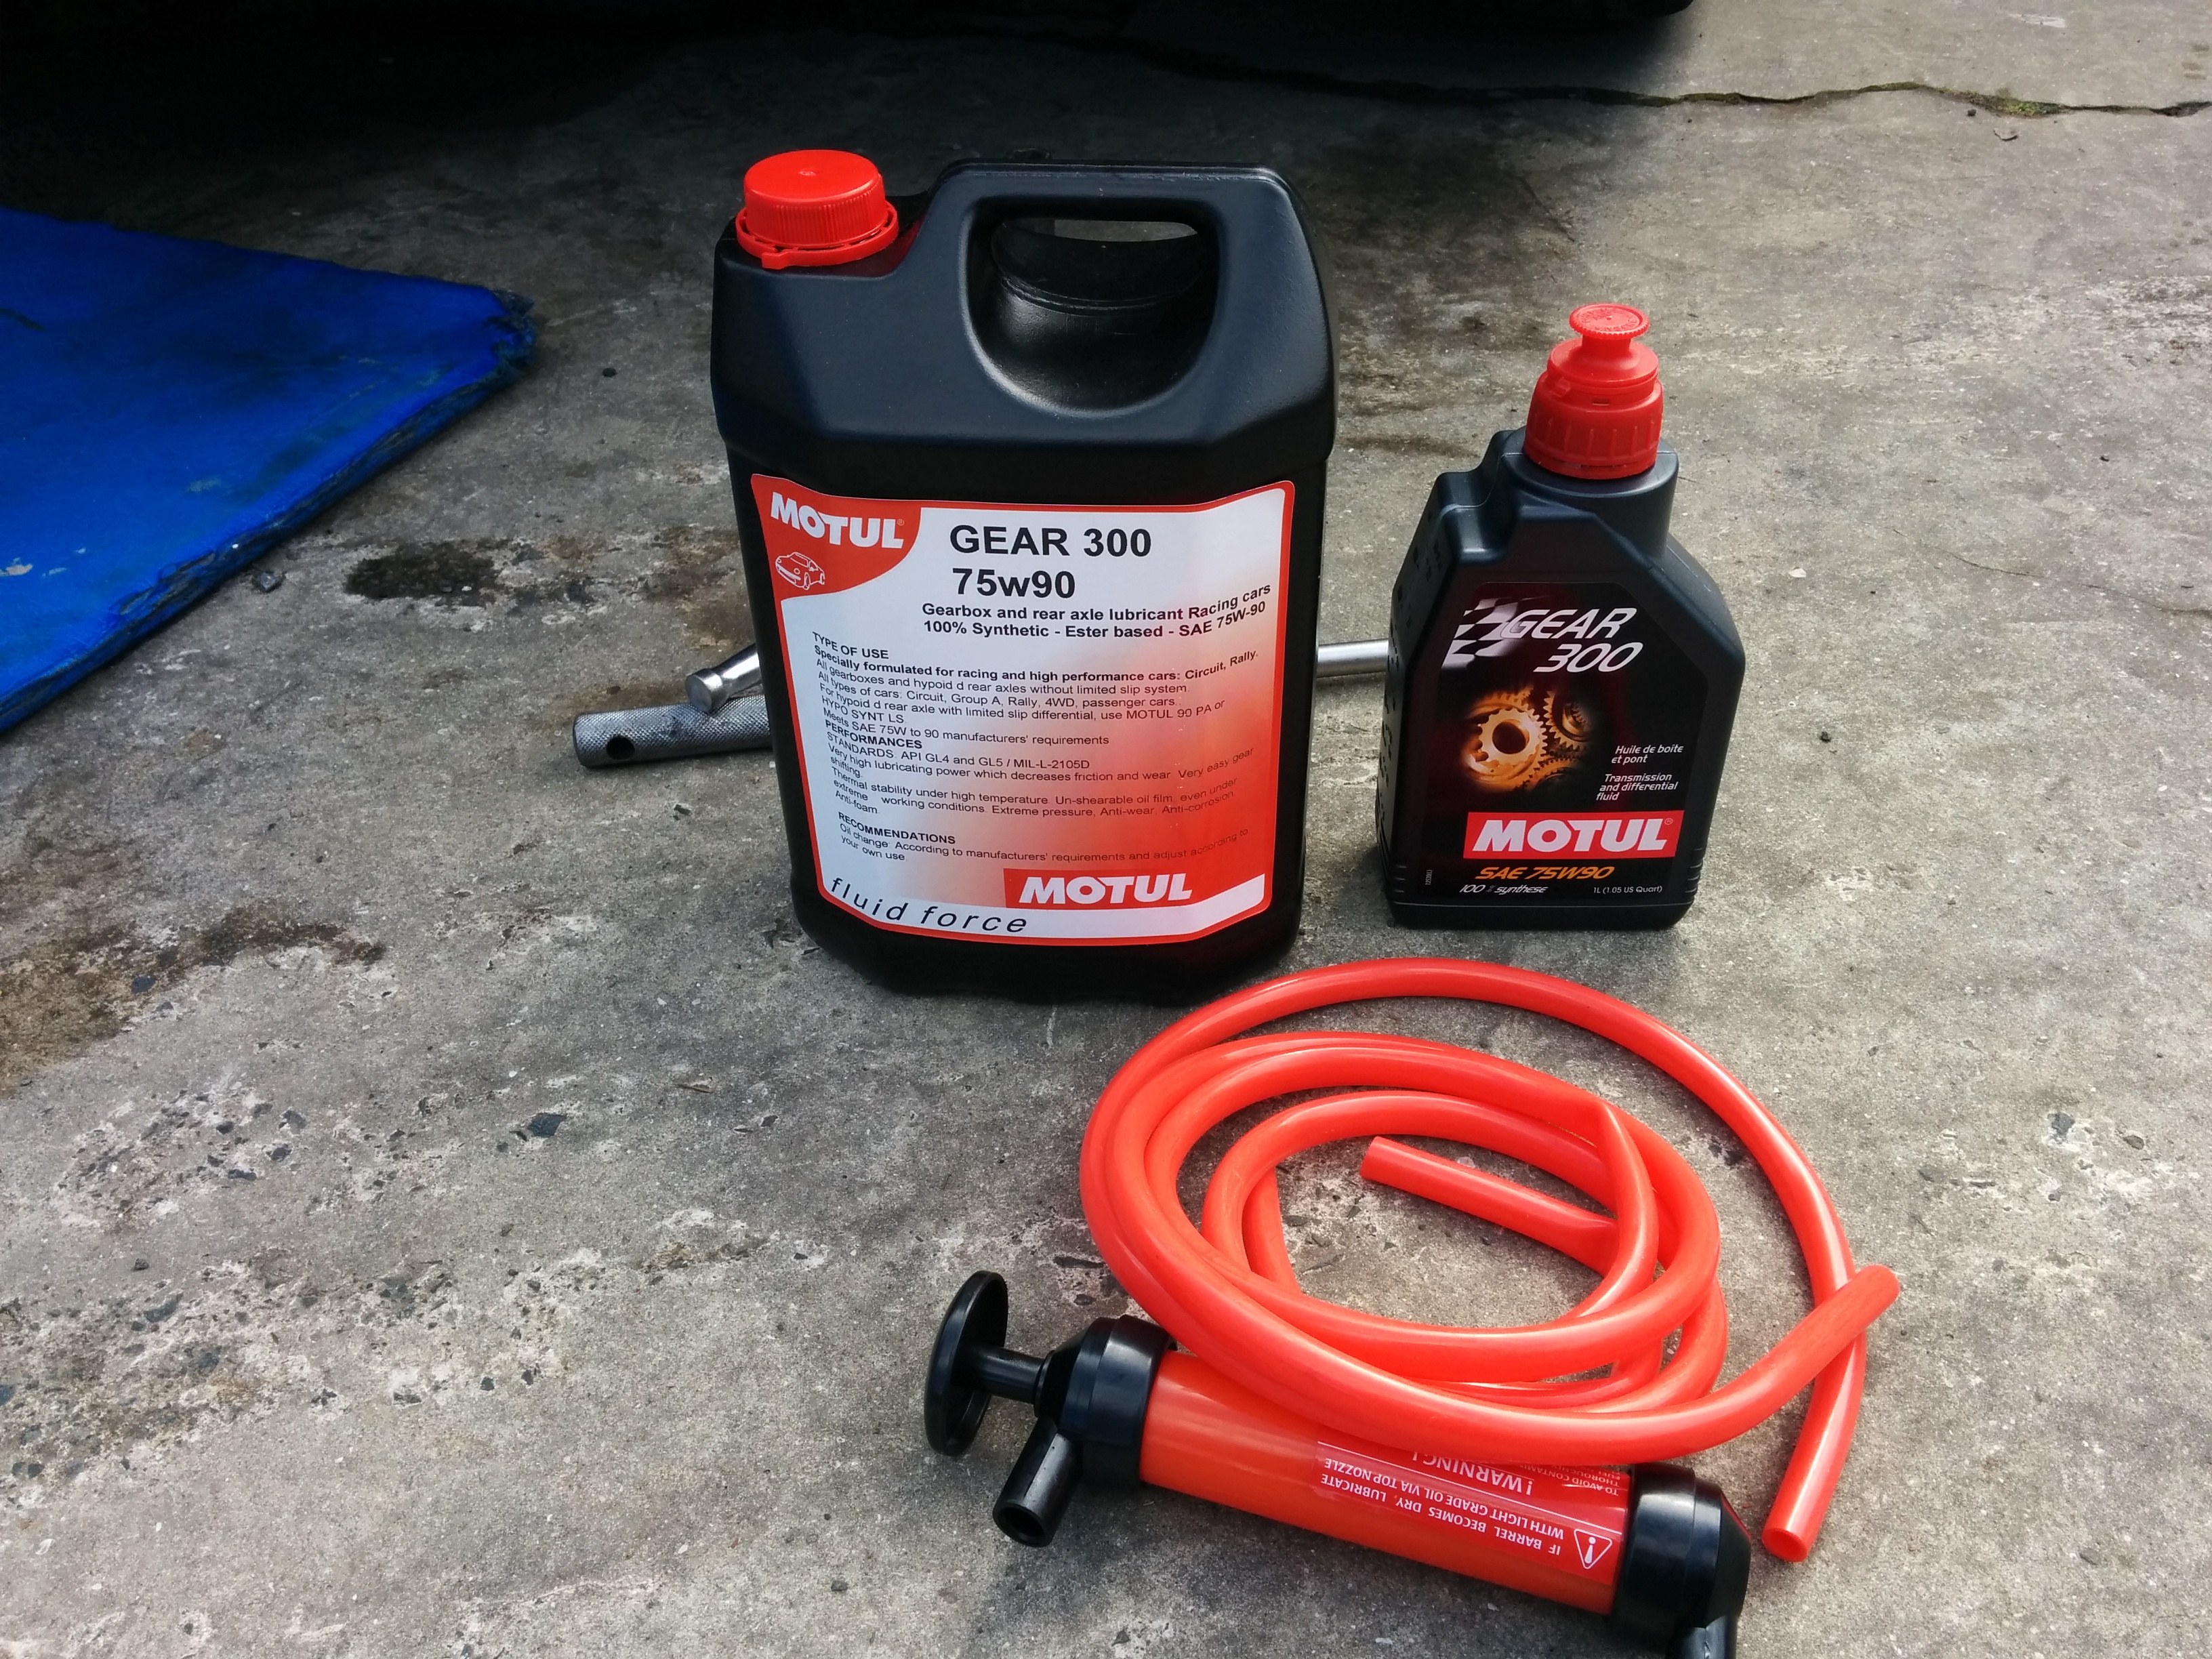
Oil Volume:
- Gearbox and front diff: 4.1L
- Rear diff: 1.1L
Requires 6L to purchase (or 4L can + left overs from last time), about $250 NZD for Motul Gear 300.
Before start make sure that car sits on four axle stands, and is levelled.
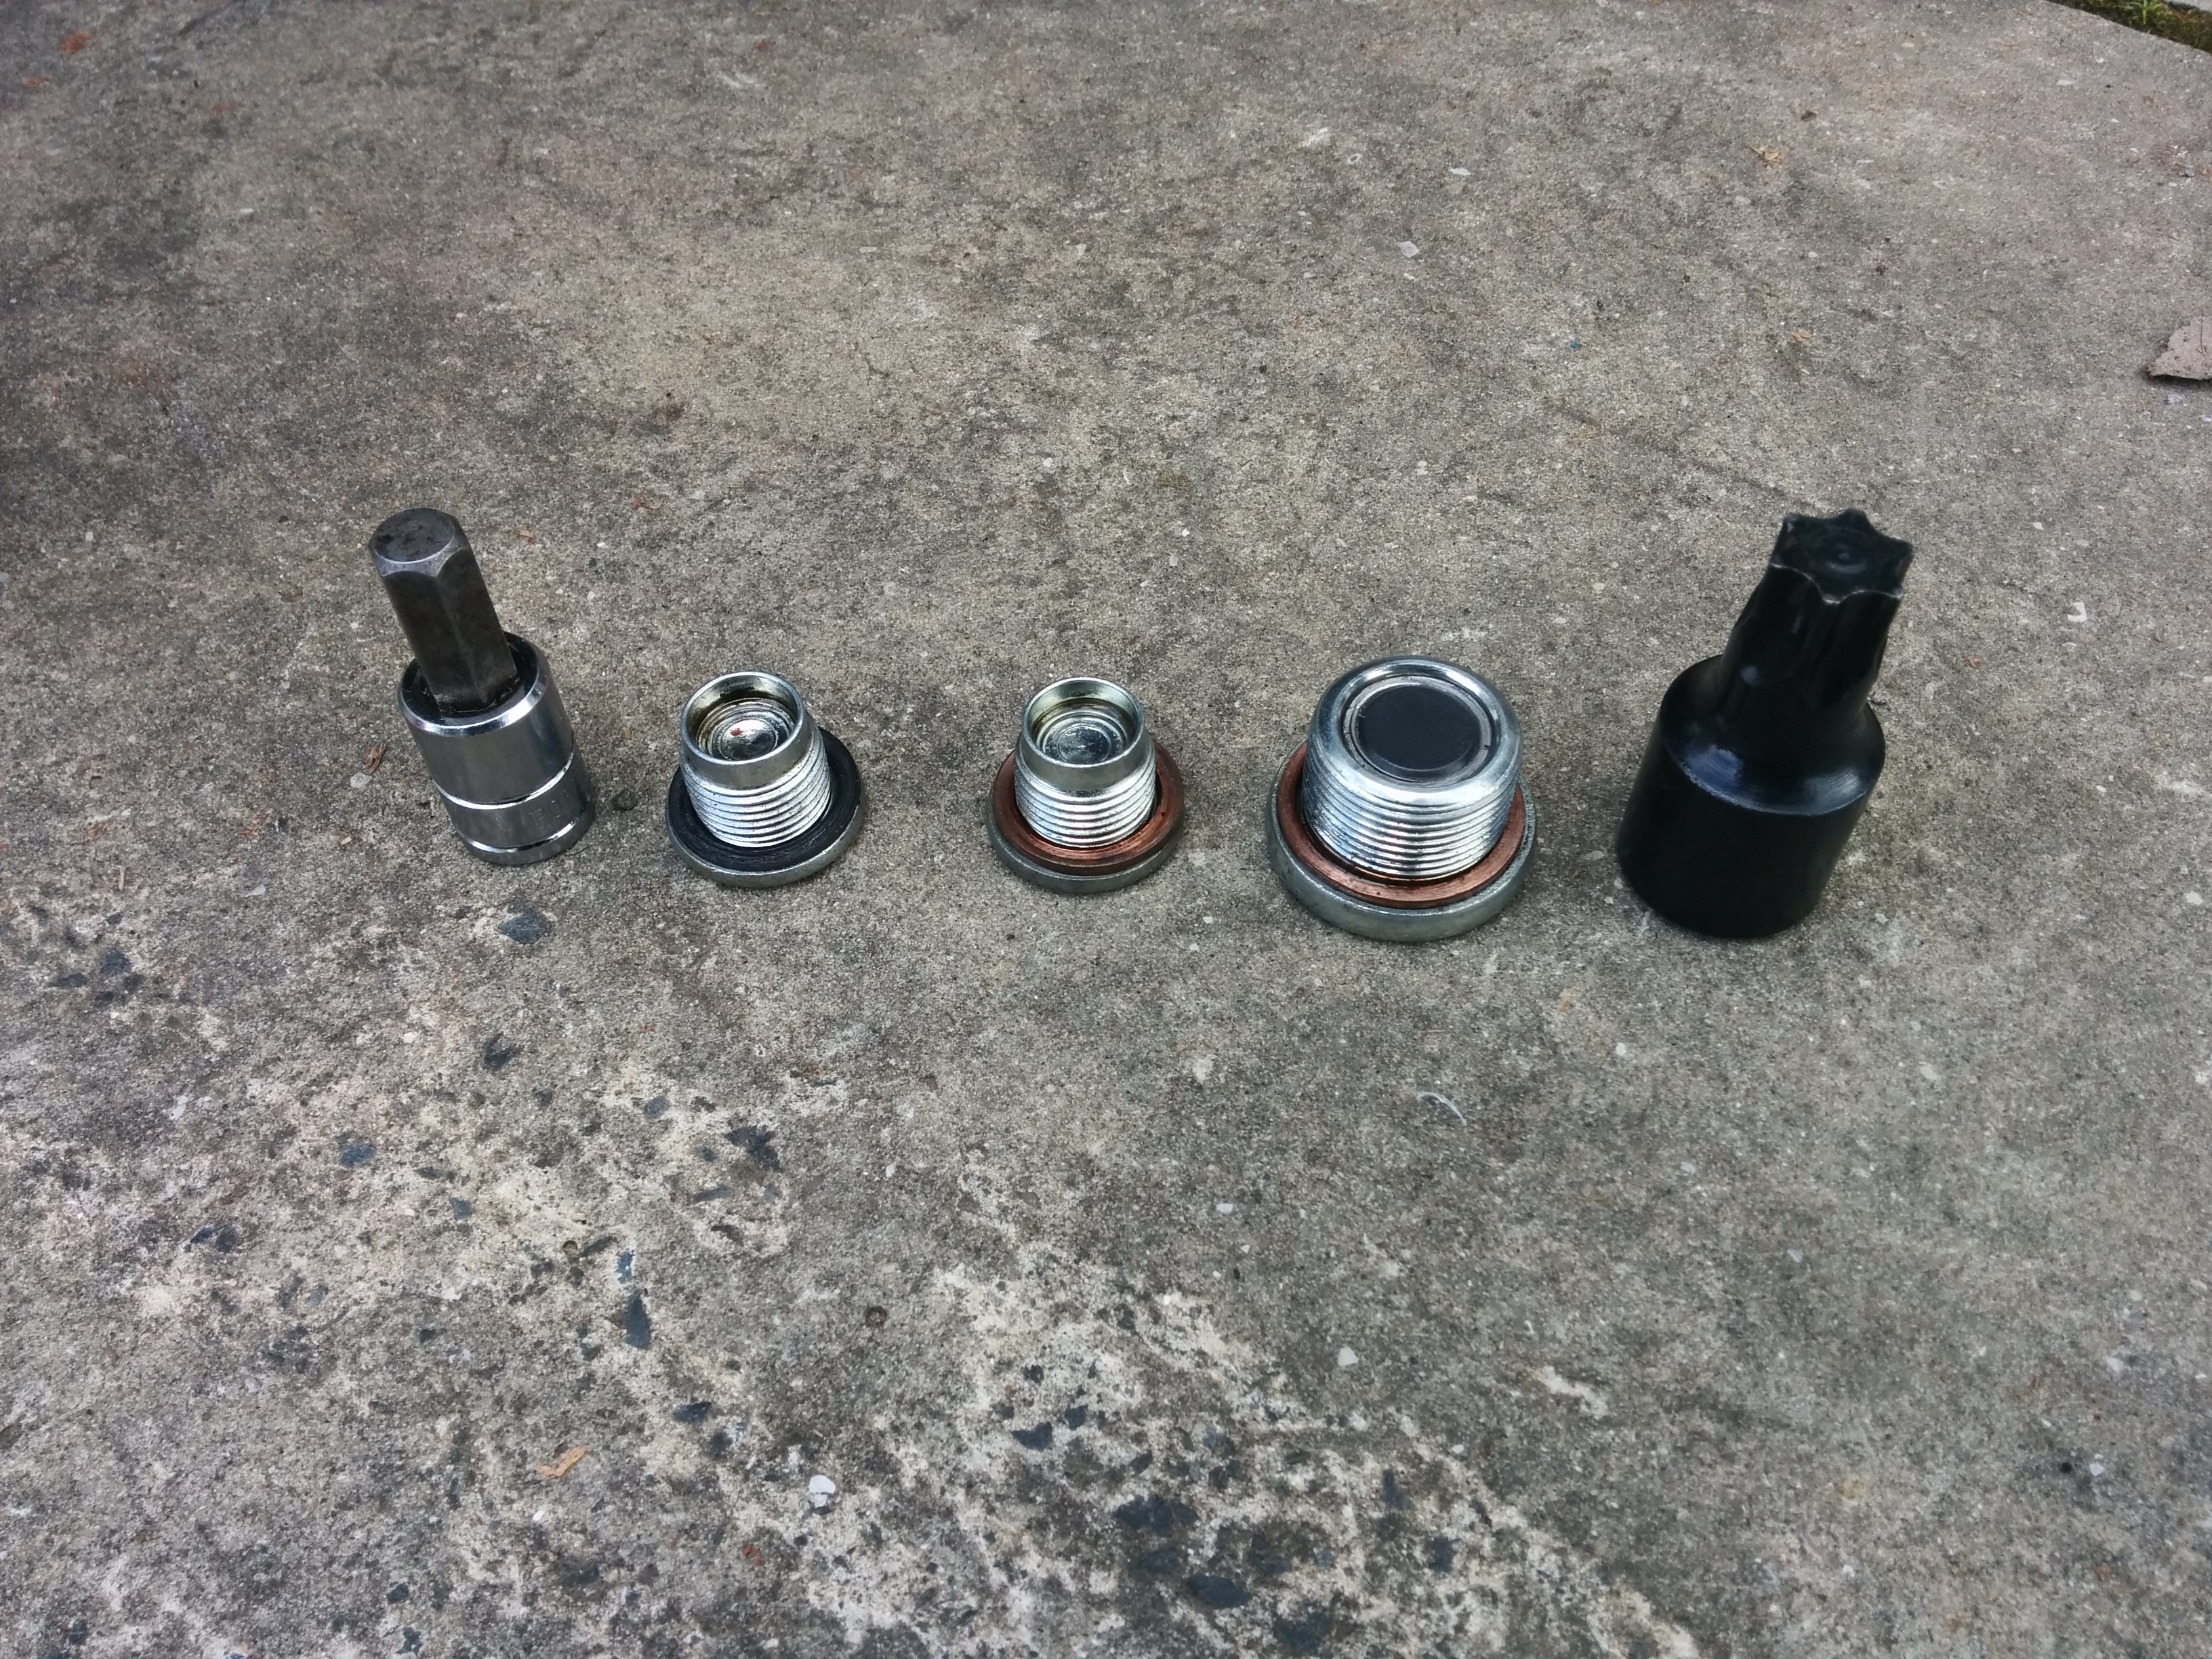
It is good idea to replace all the drain plug washers at same time.
Rear differential:
Relatively easy job.
Tools required:
- Jack
- 4x axle stands
- 17mm socket
- 19mm deep socket or 22mm deep socket
- Hand pump or syringe like device
Assuming the car is already on axle stands and levelled…
To drain oil:
Remove drain plug (17mm bolt on the bottom).
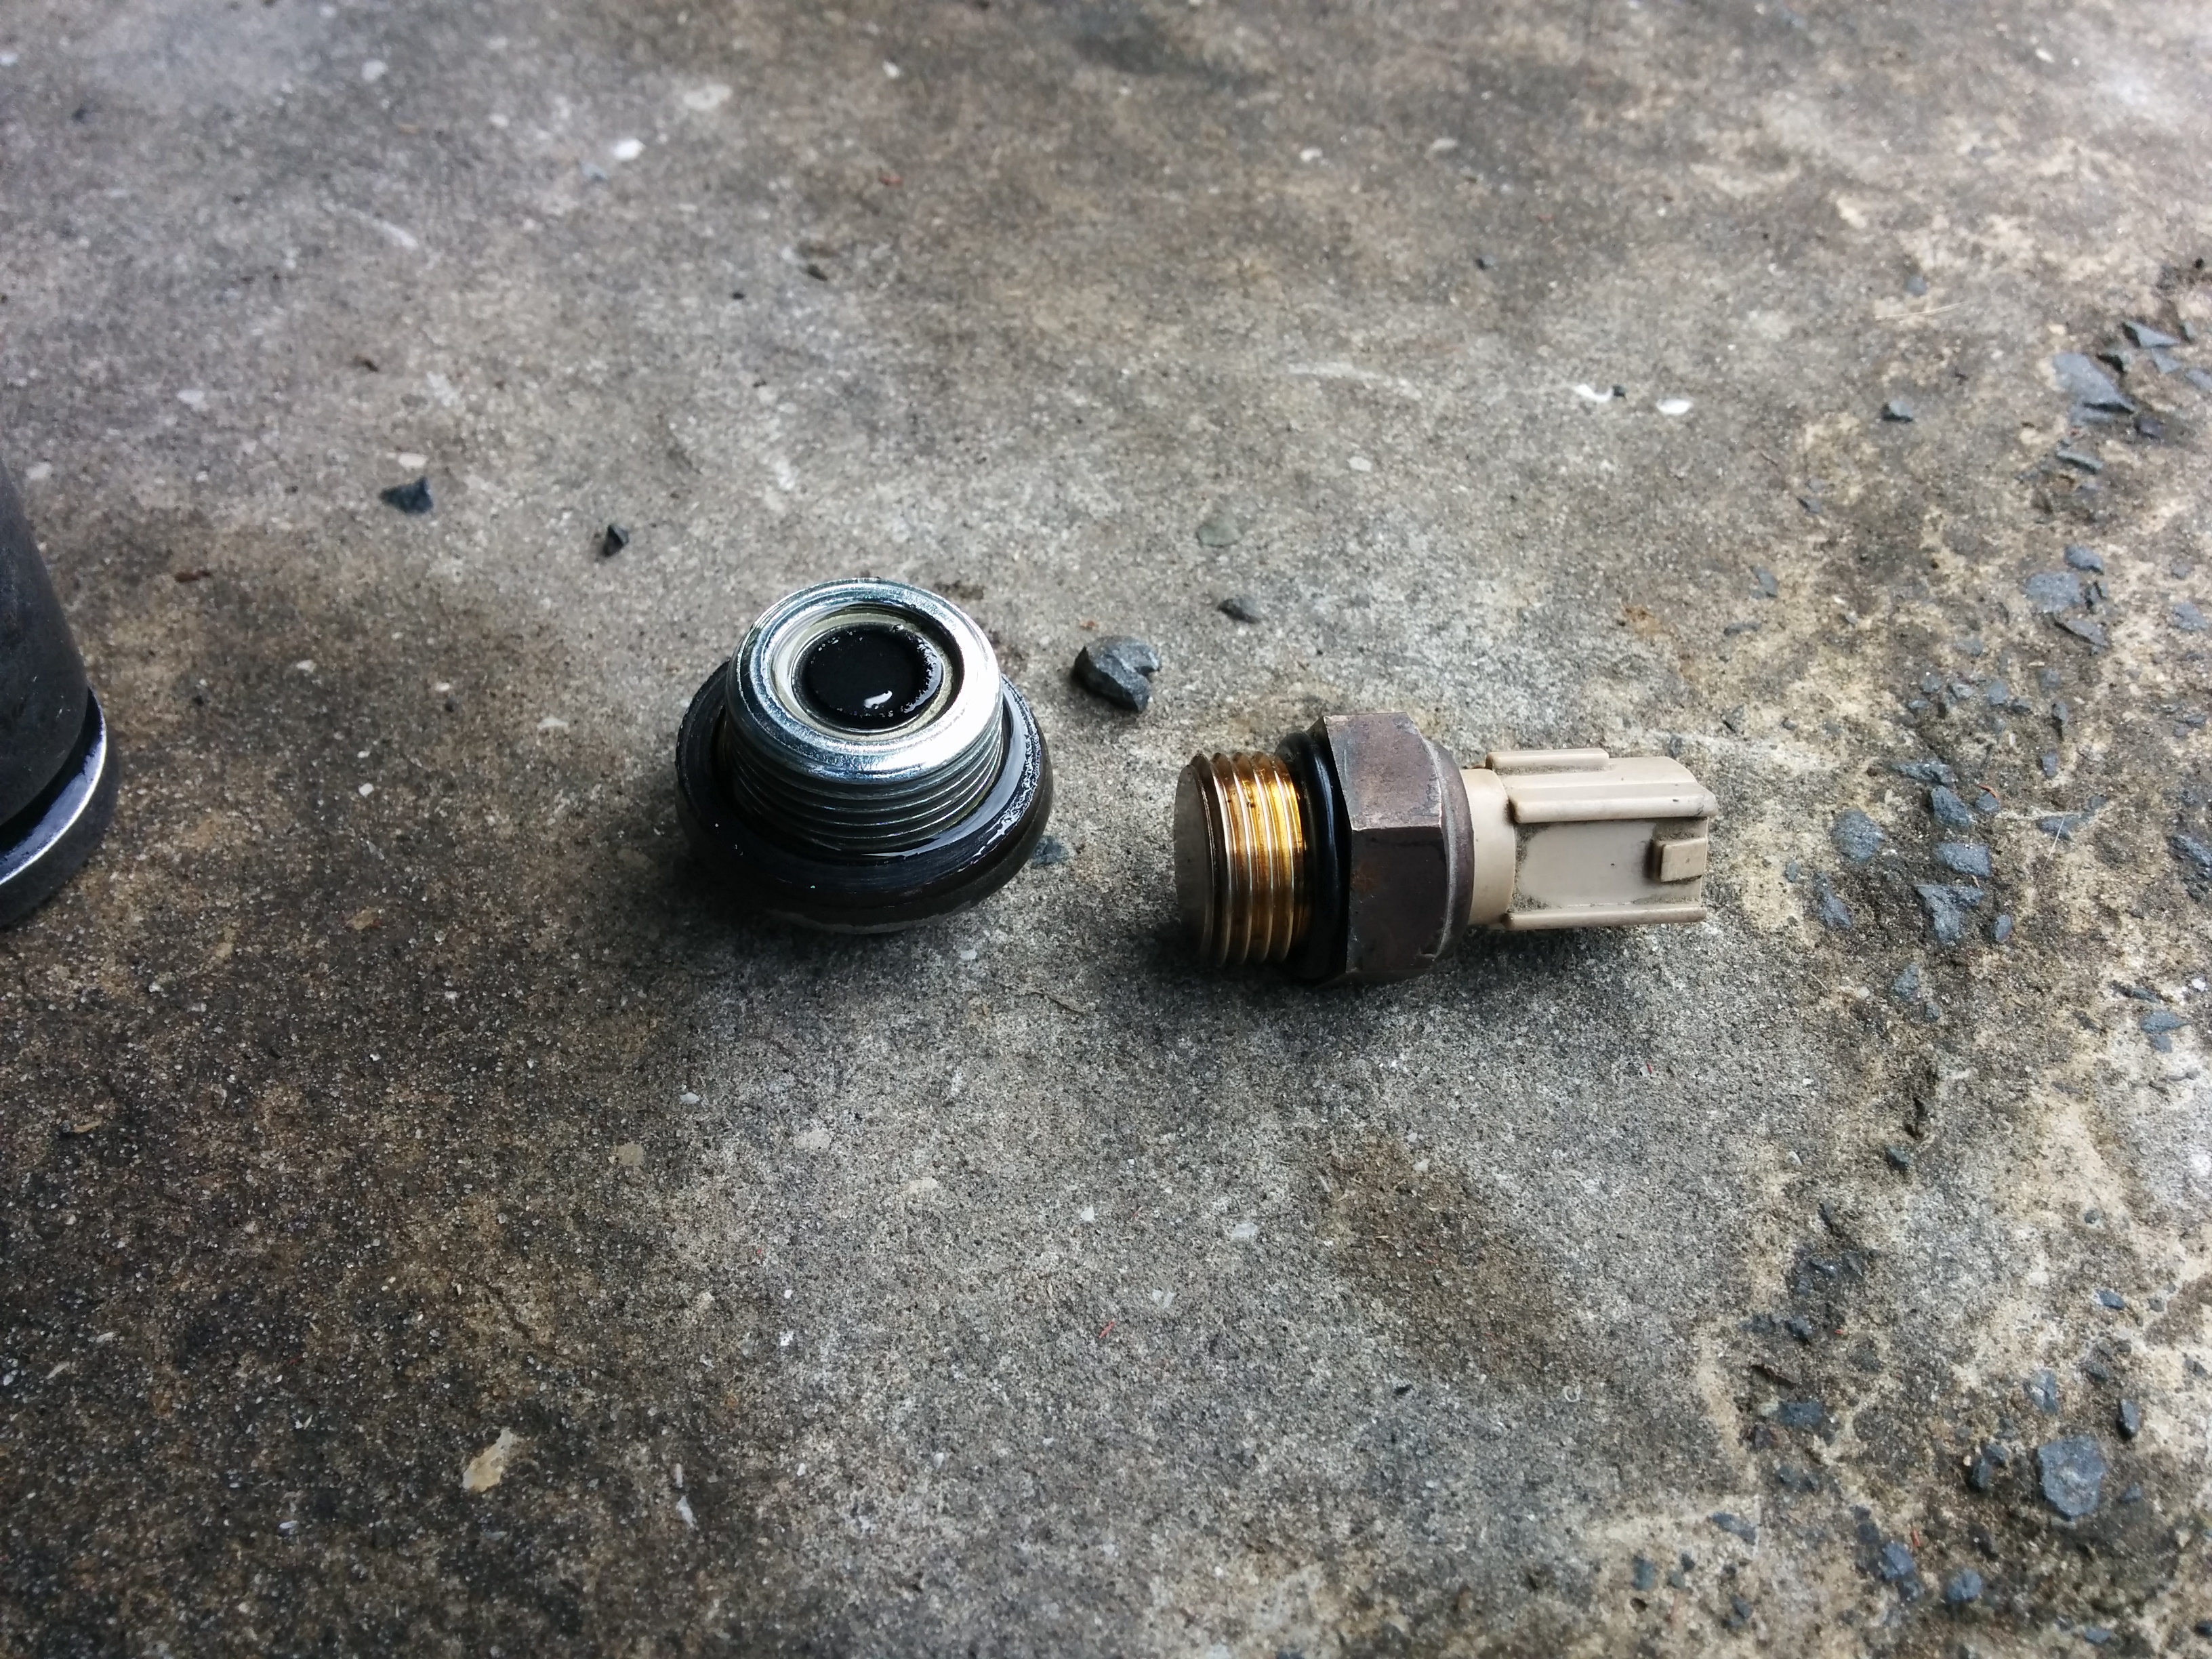
Here is both drain plug and temperature sensor removed (used later for filling).
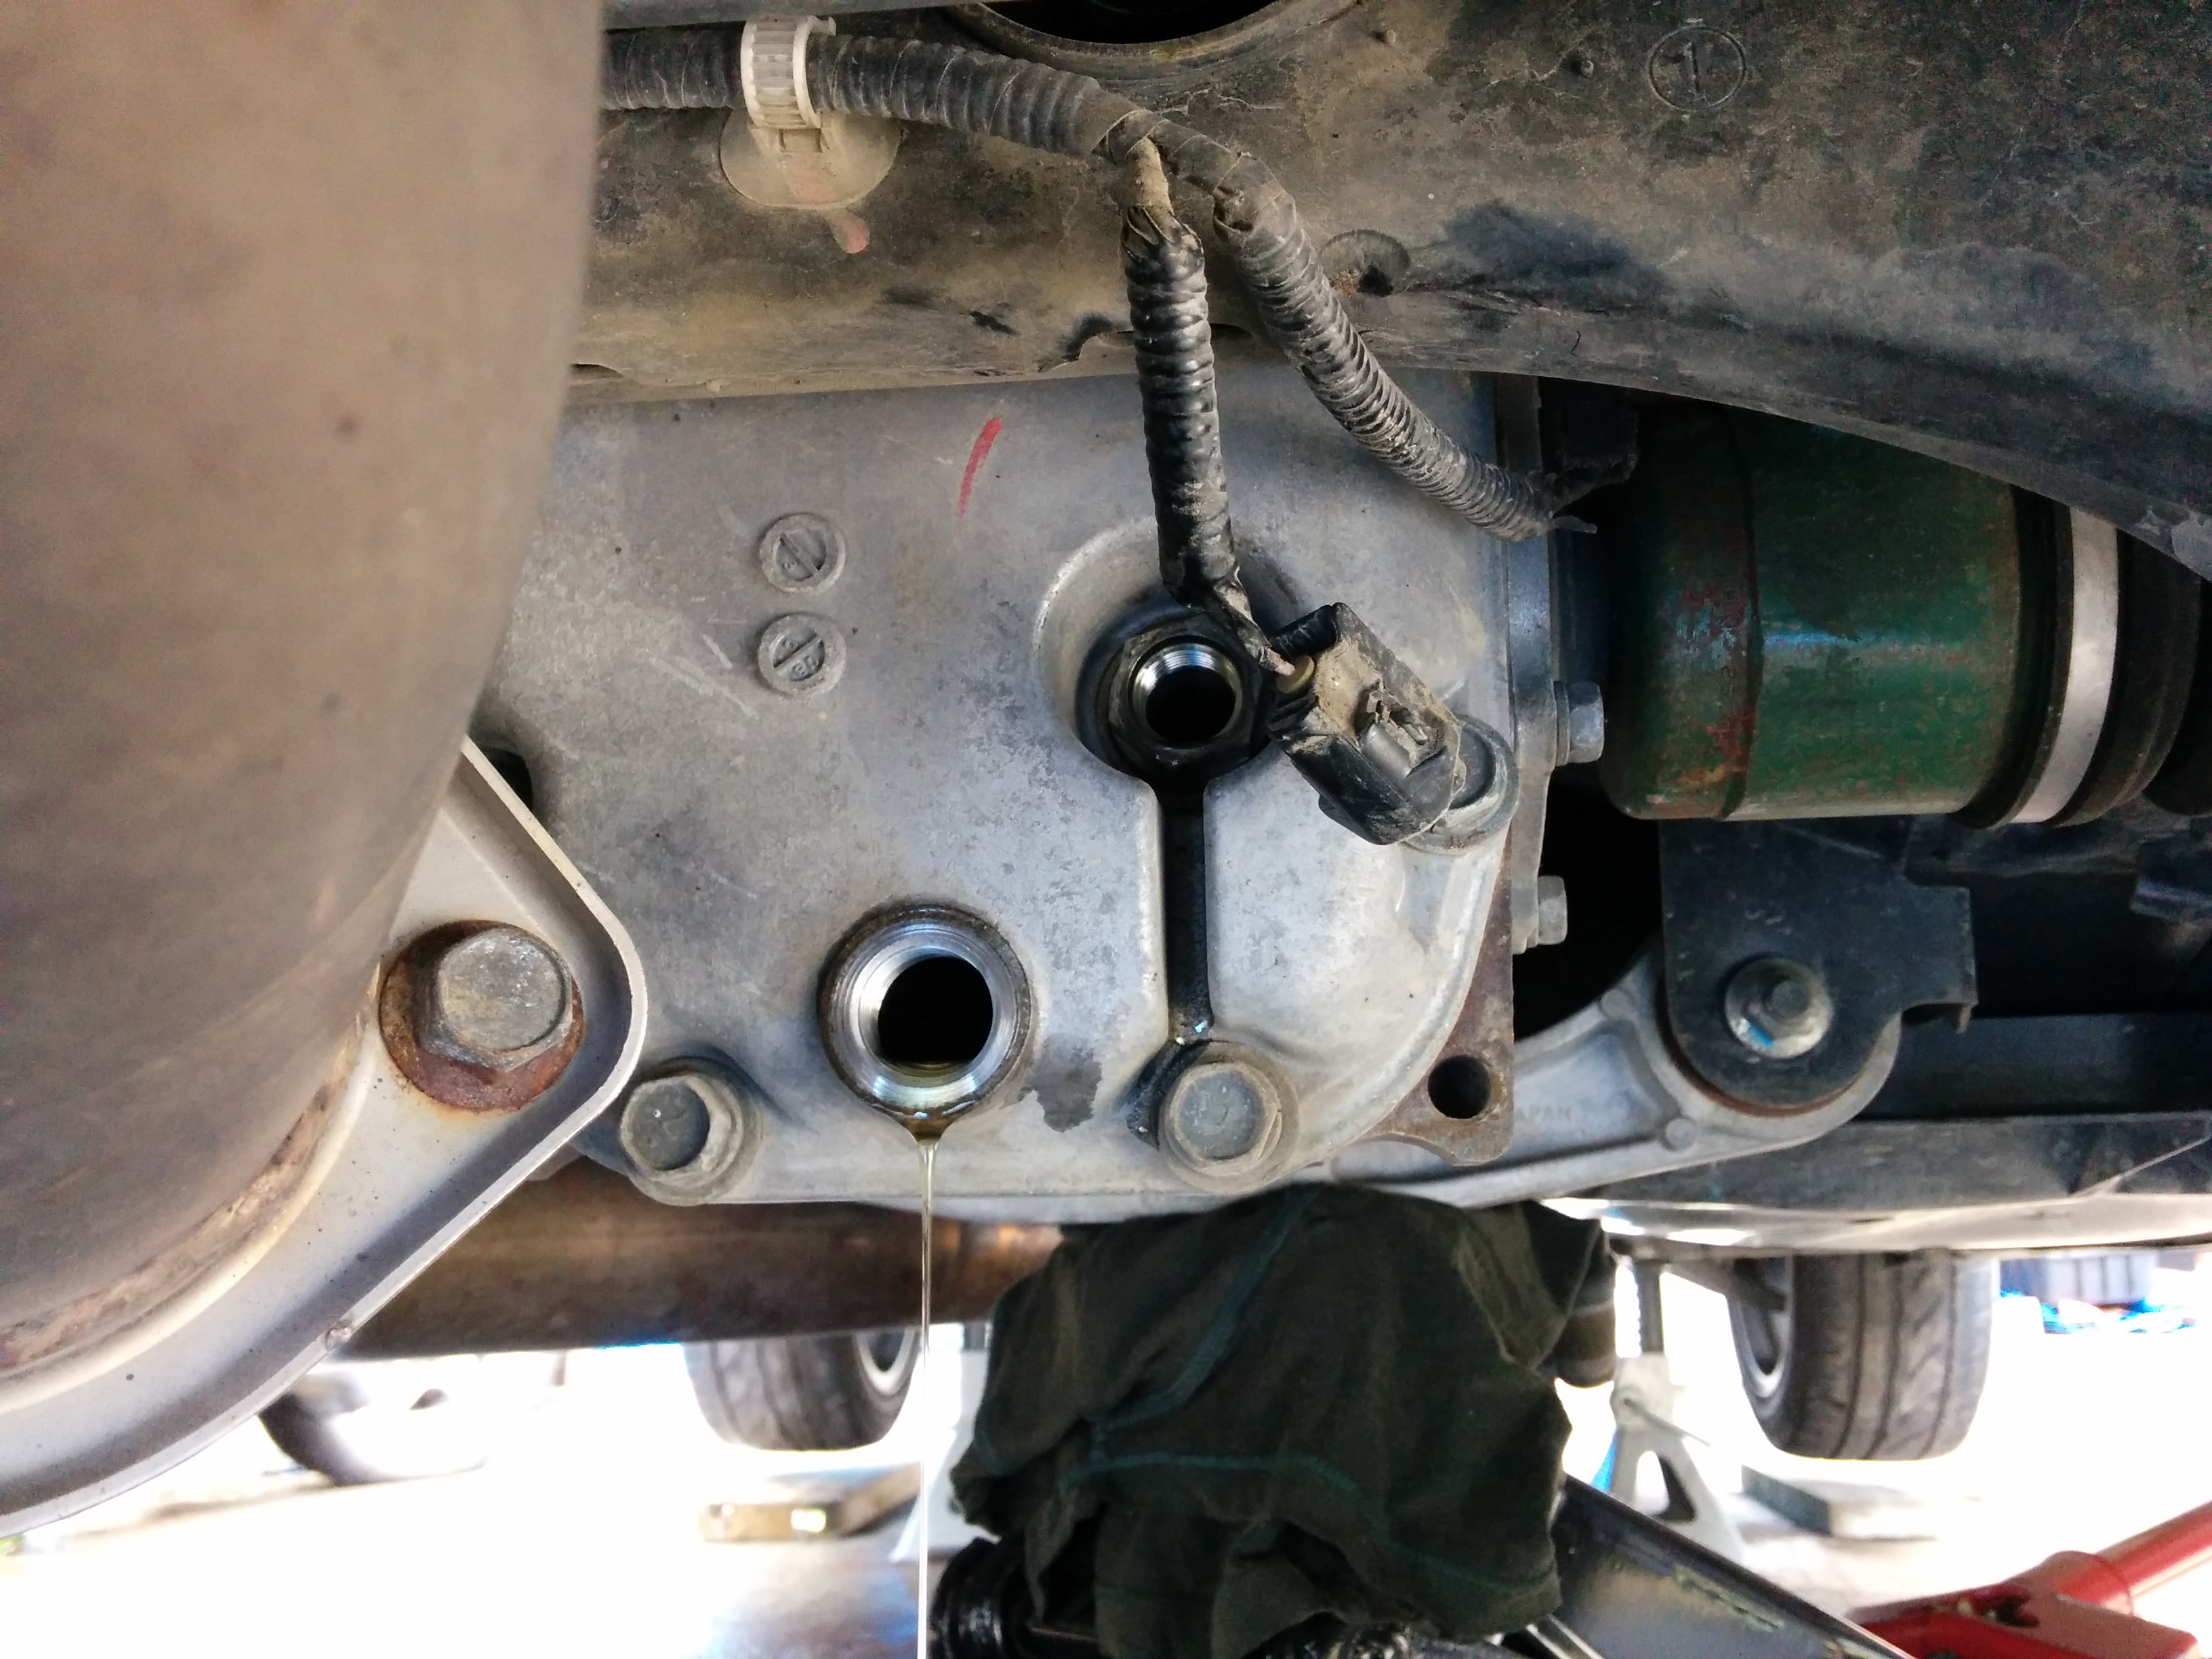
Here are plug and the sensor:
To fill oil:
Remove either 22mm nut with the sensor or sensor itself (19mm deep socket). I didn’t had 22mm deep socket so I removed the sensor. It is better to remove 22mm nut with the sensor as it is easy to over-tighten the sensor itself.
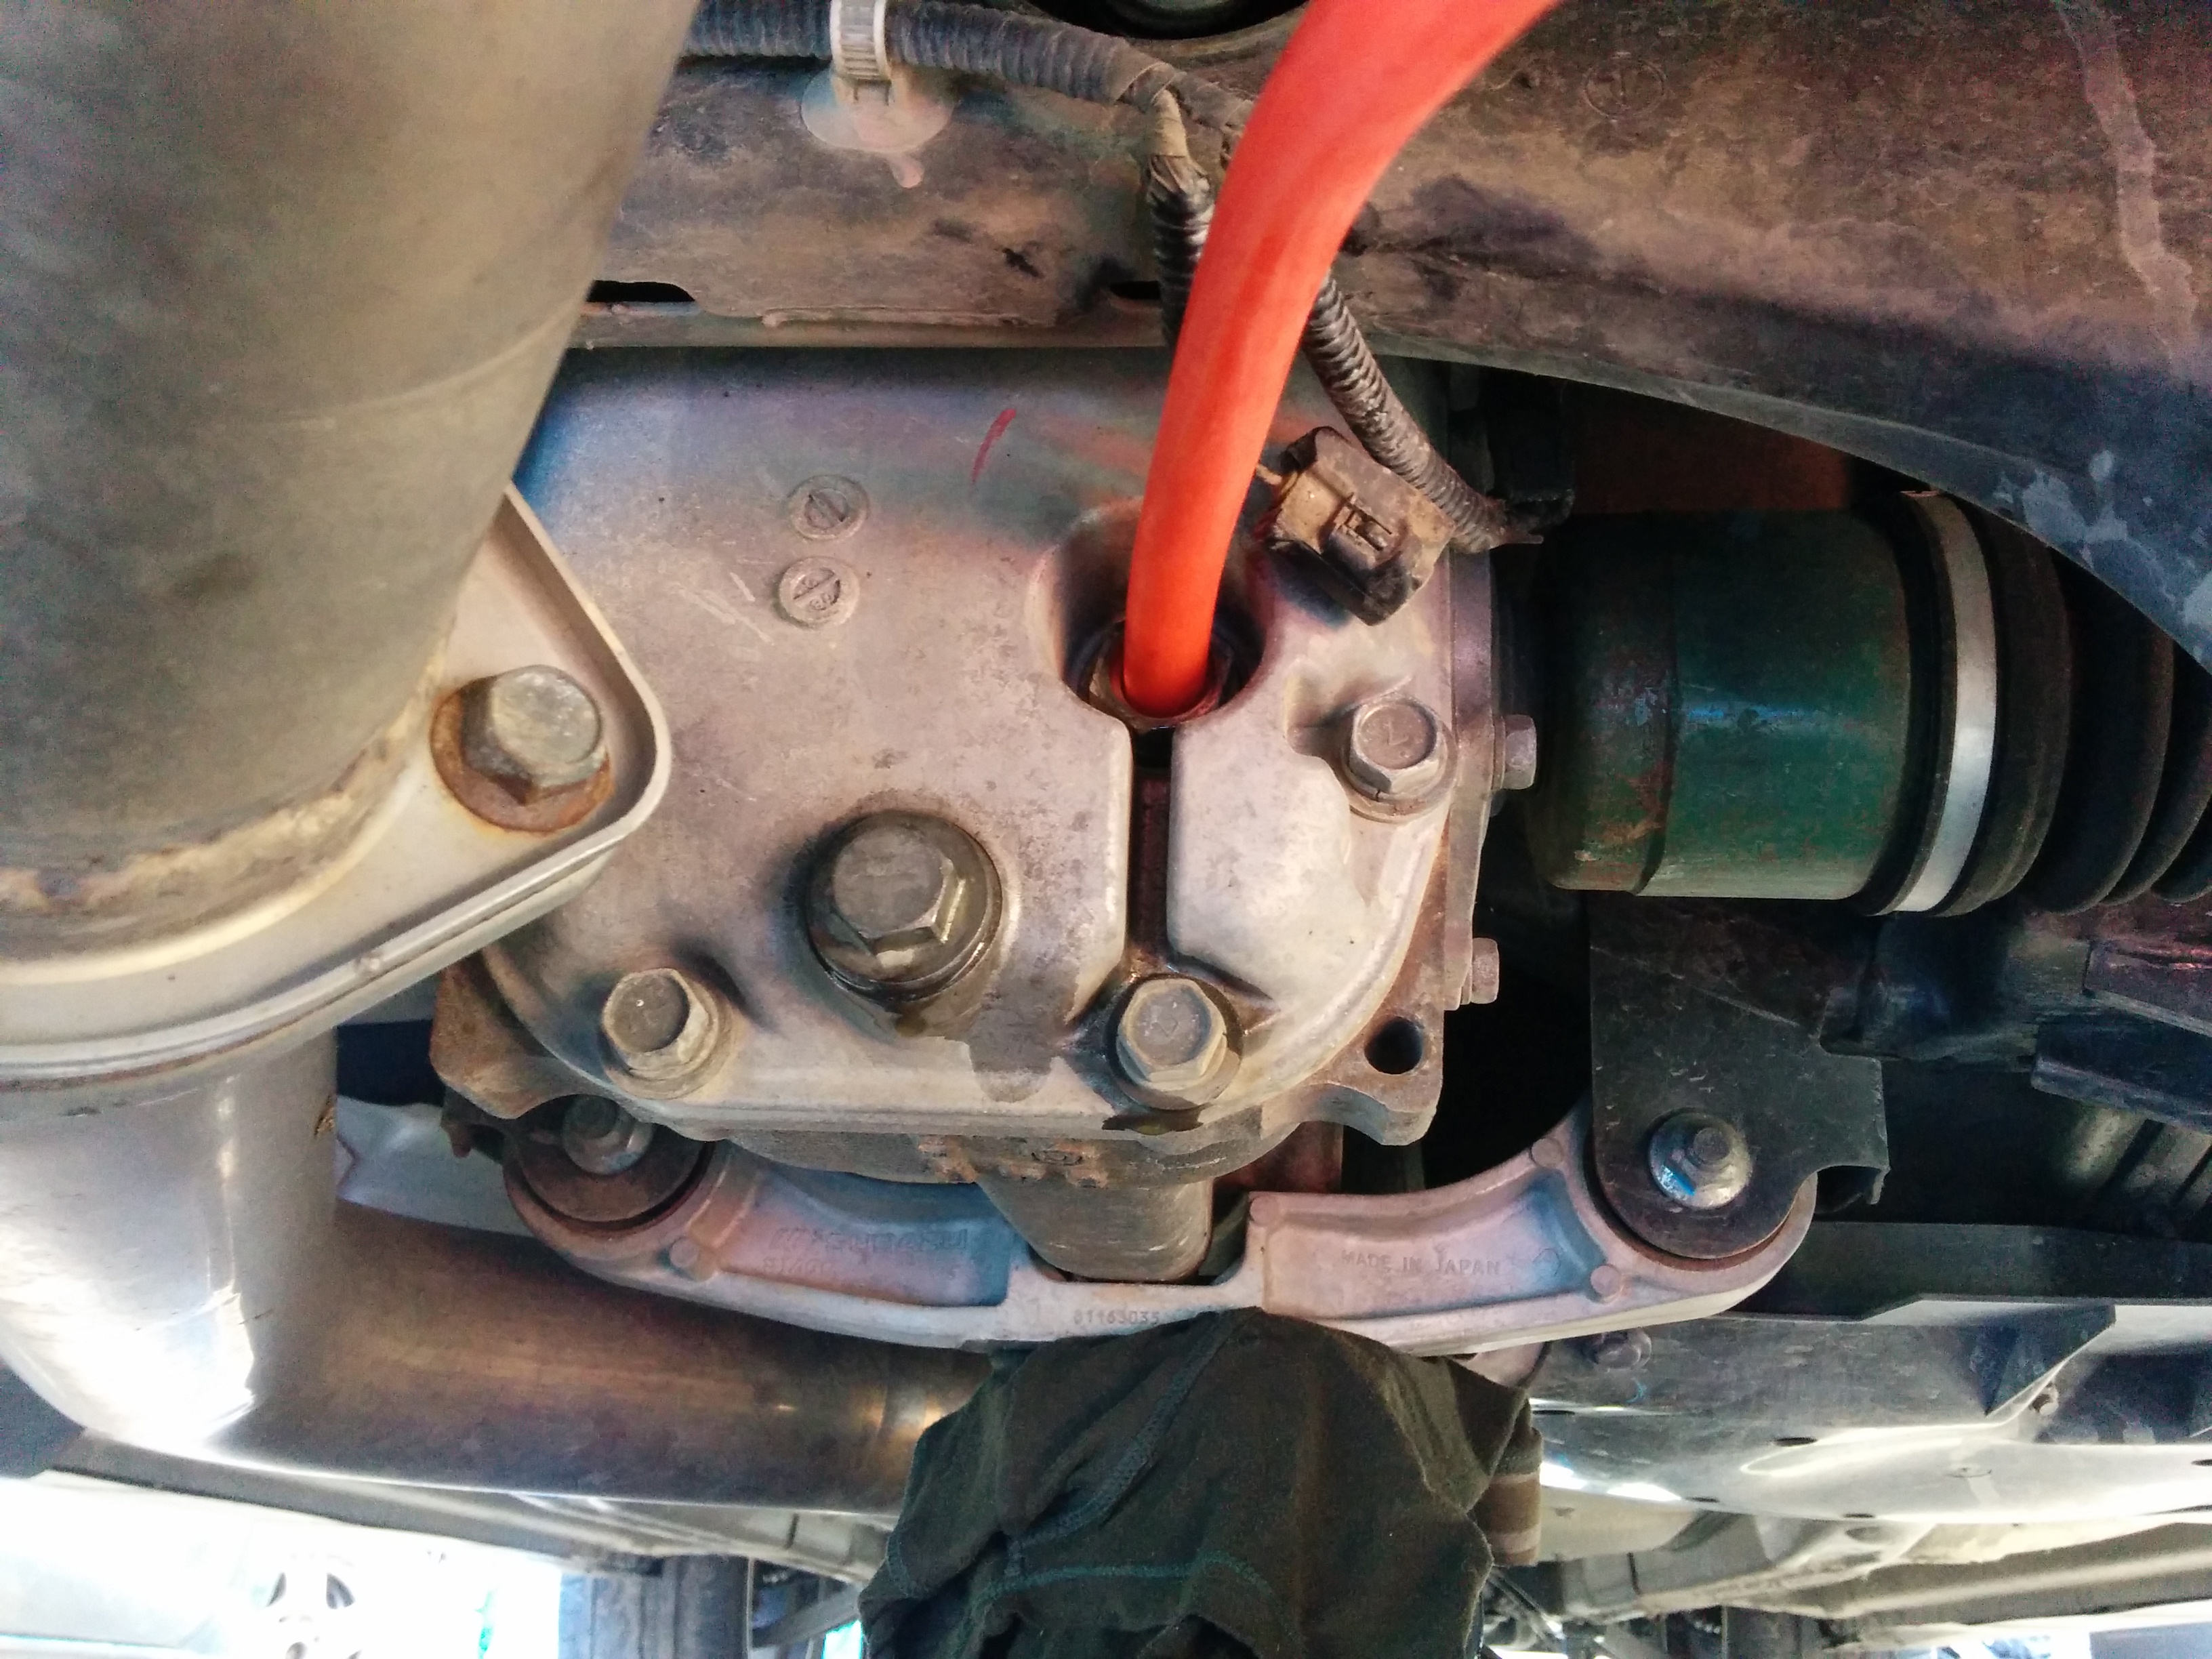
plug the drain hole and pump in the oil via temperature sensor hole, until it starts overflowing.
Remove the hose and let the excess oil drain.
Torque settings I use (found on internet):
- 50Nm drain plug
- 50Nm 22mm sensor nut
- 10-20Nm??? sensor (not very tight!)
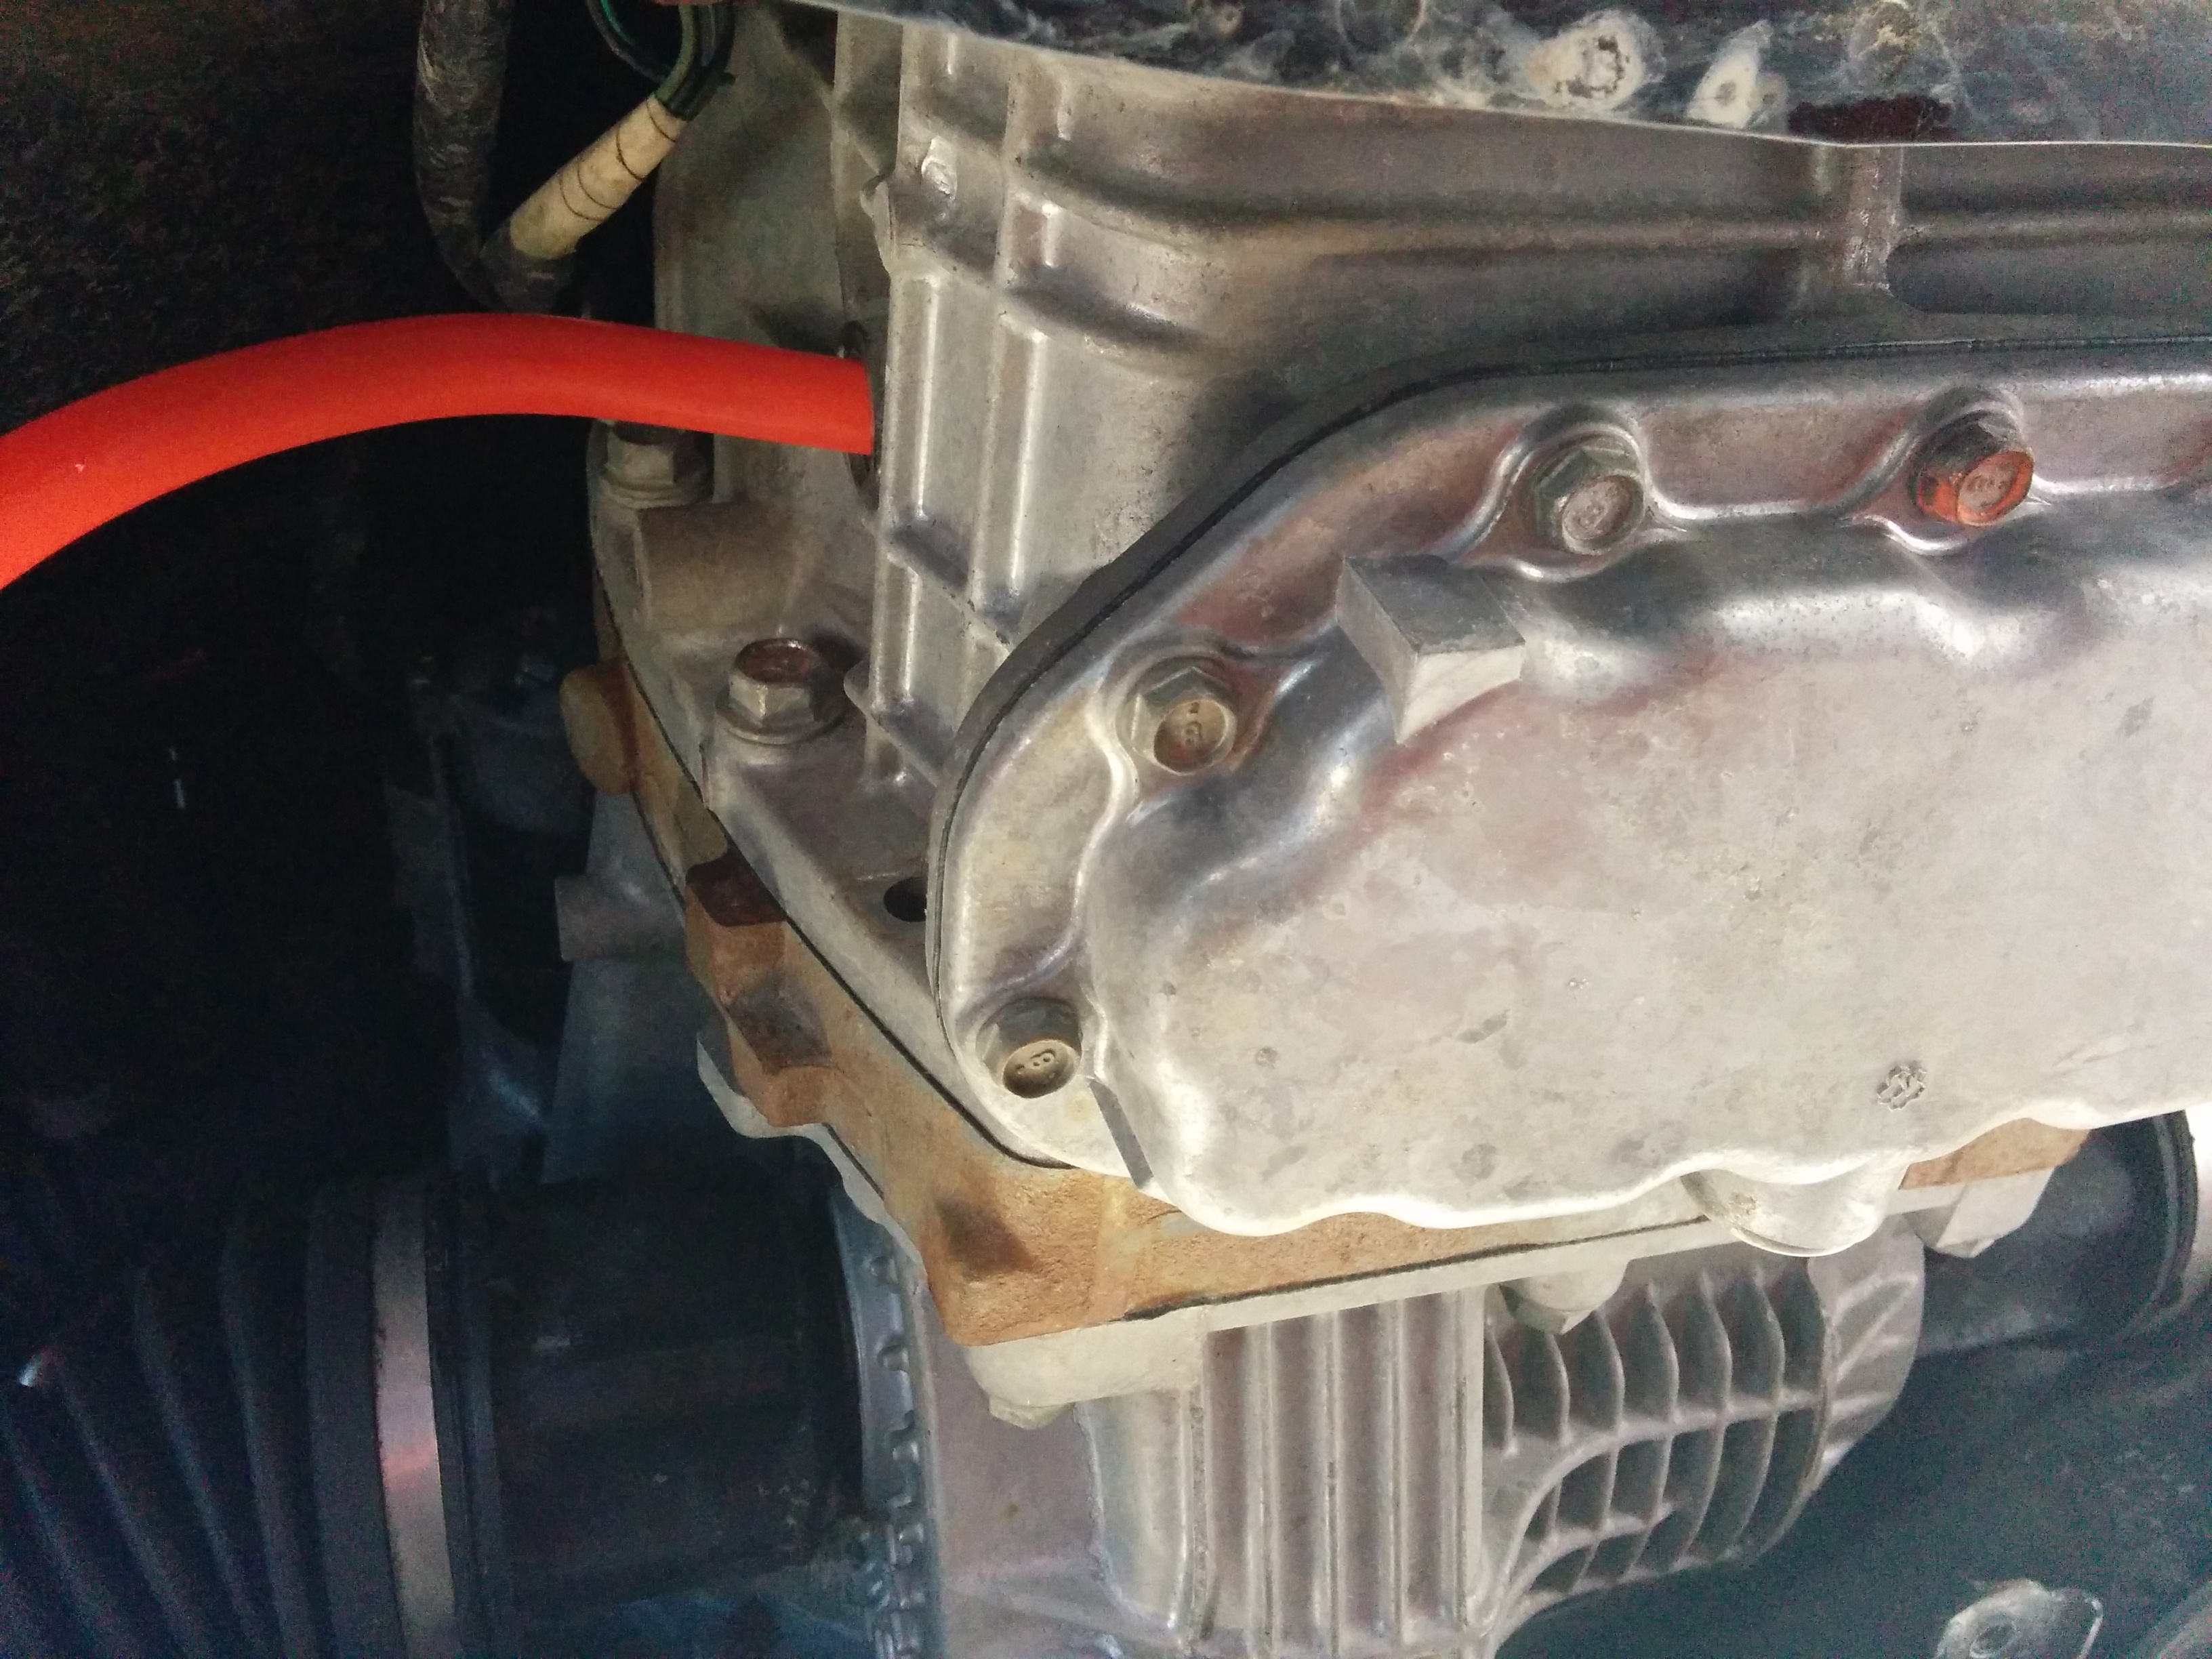
Gearbox and Front differential
A little bit harder job than rear diff…
Tools required:
- T70 Torx bit (cannot do without it).
- H10 Hex bit
- 12mm socket
- flat screw driver or some other device to remove clips (finger nails?)
Hand pump or syringe like device
Assuming the car is already on axle stands and levelled..
Remove the plastic guard (few clips and 2 12mm bolts at the front).
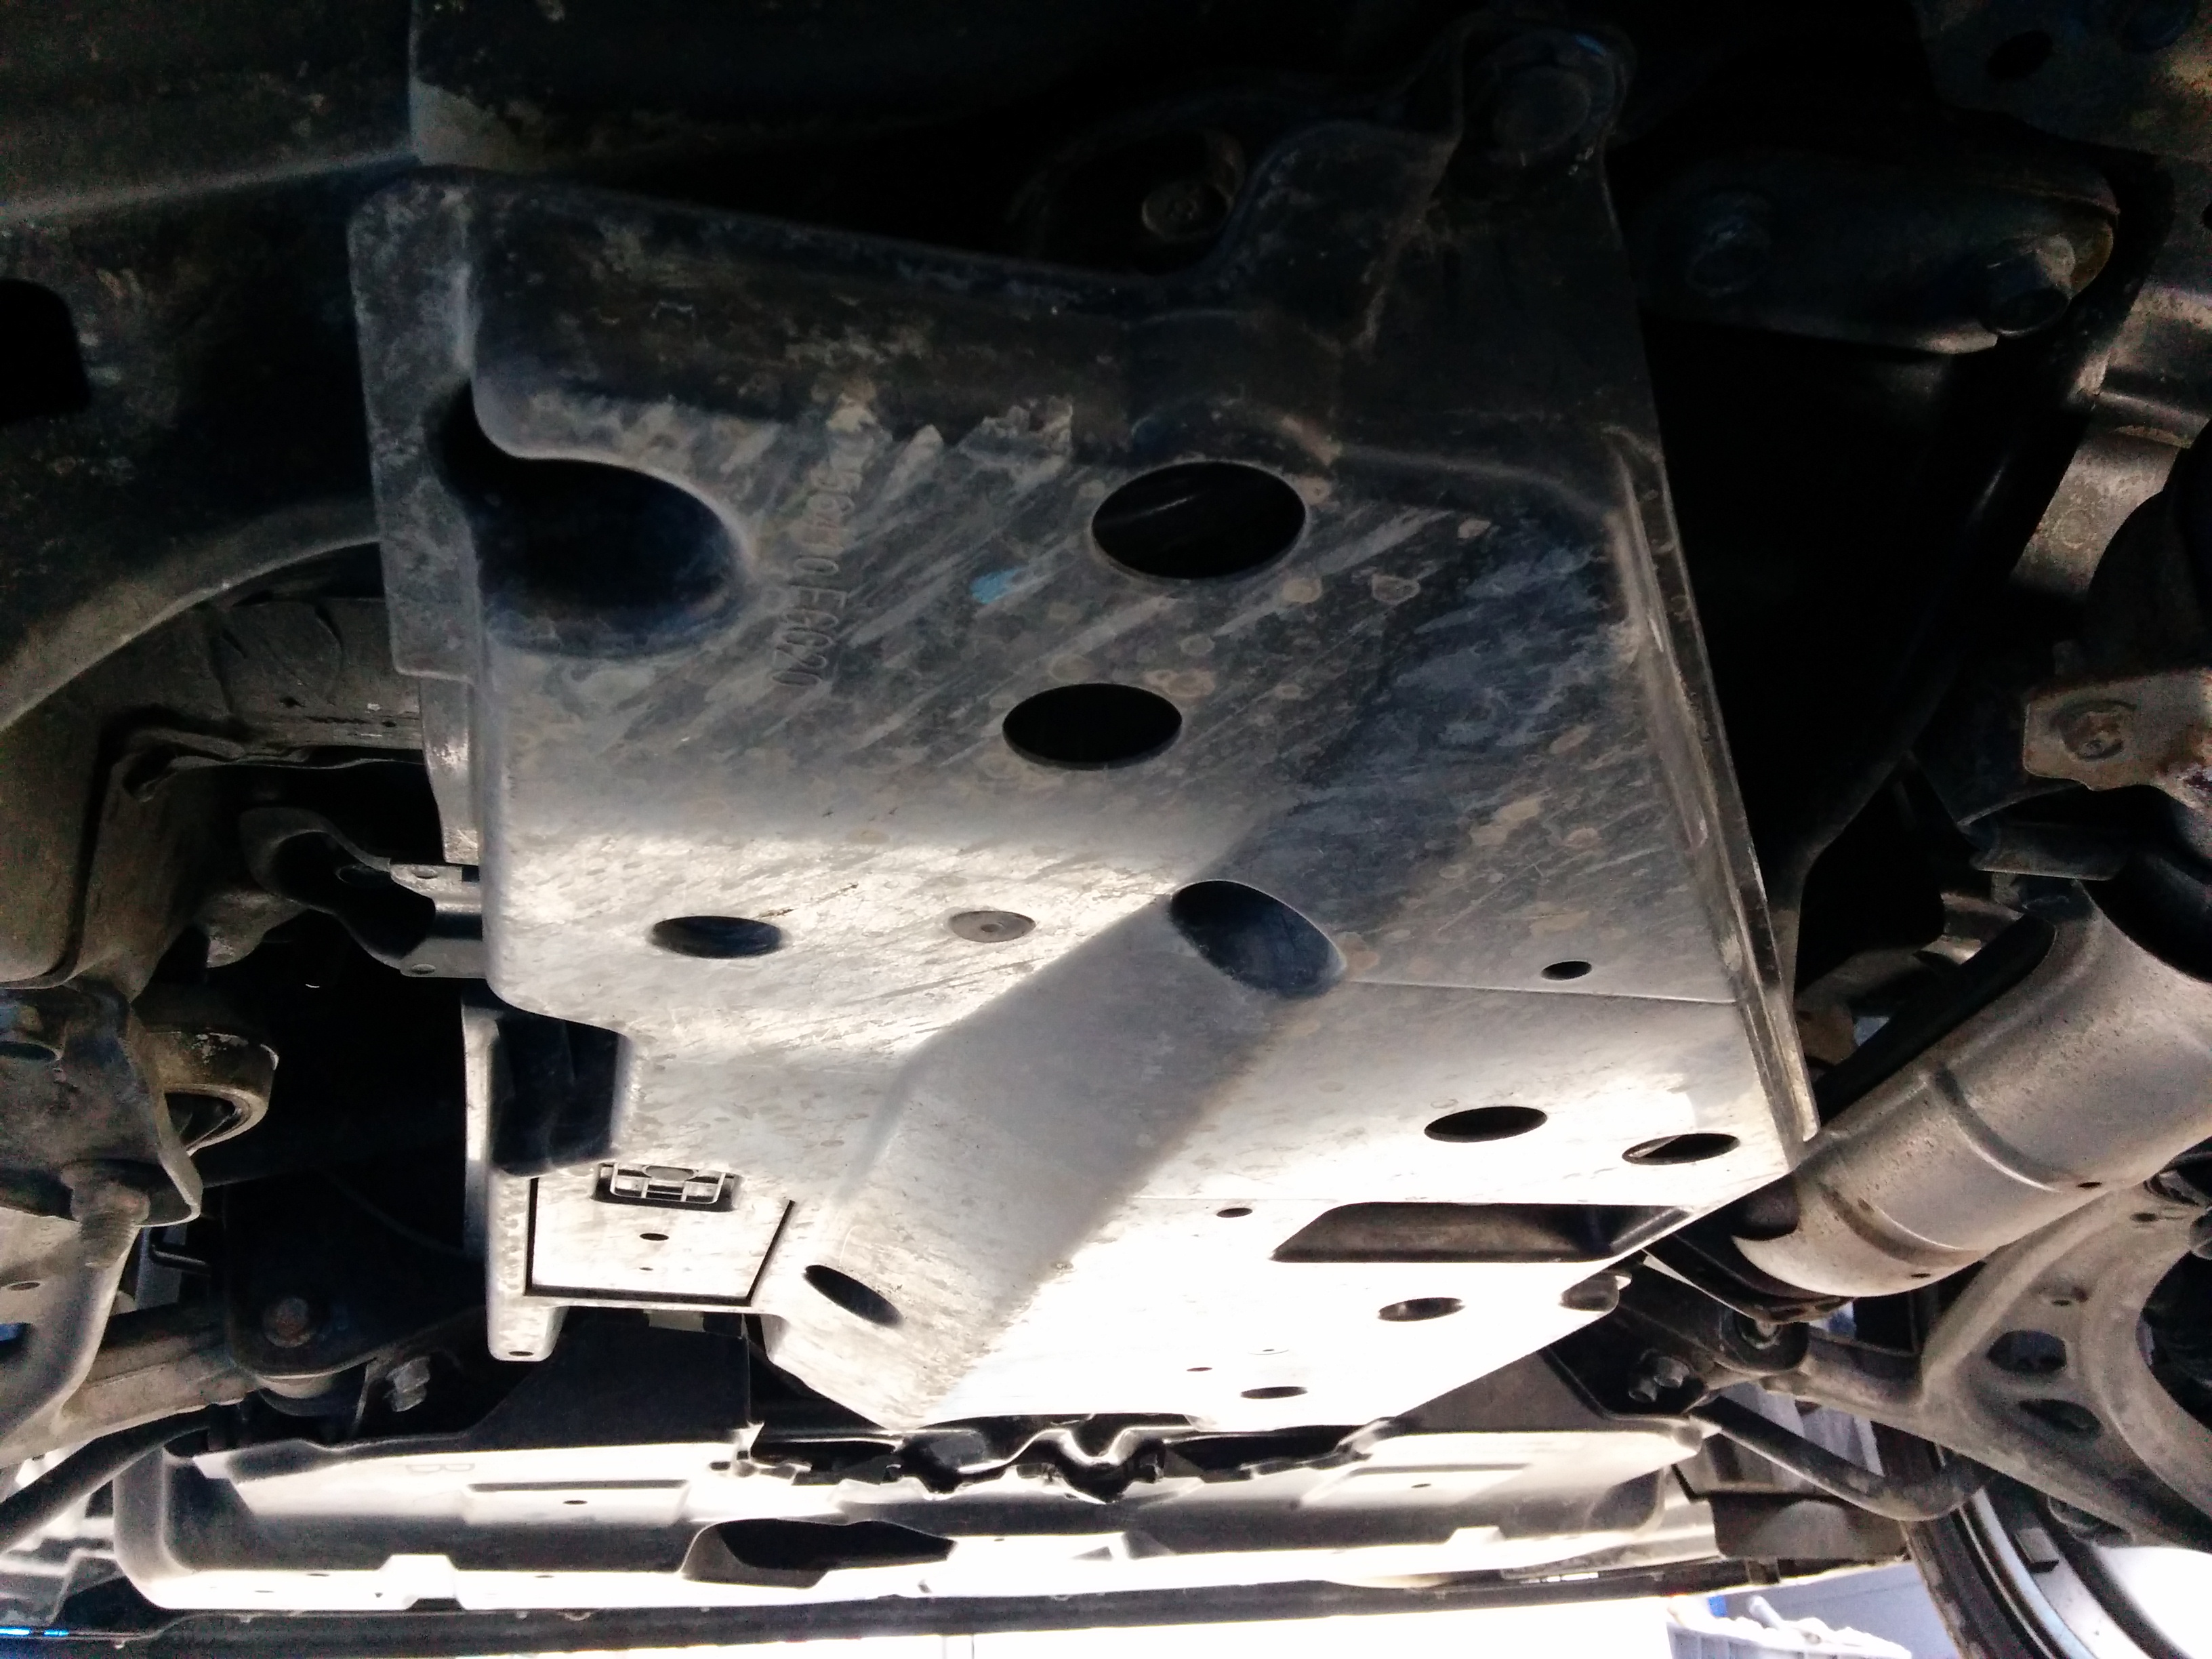
Although it is possible to change oil without removal (there is an inspection window), I removed the guard as it made easier to do so.
To drain oil:
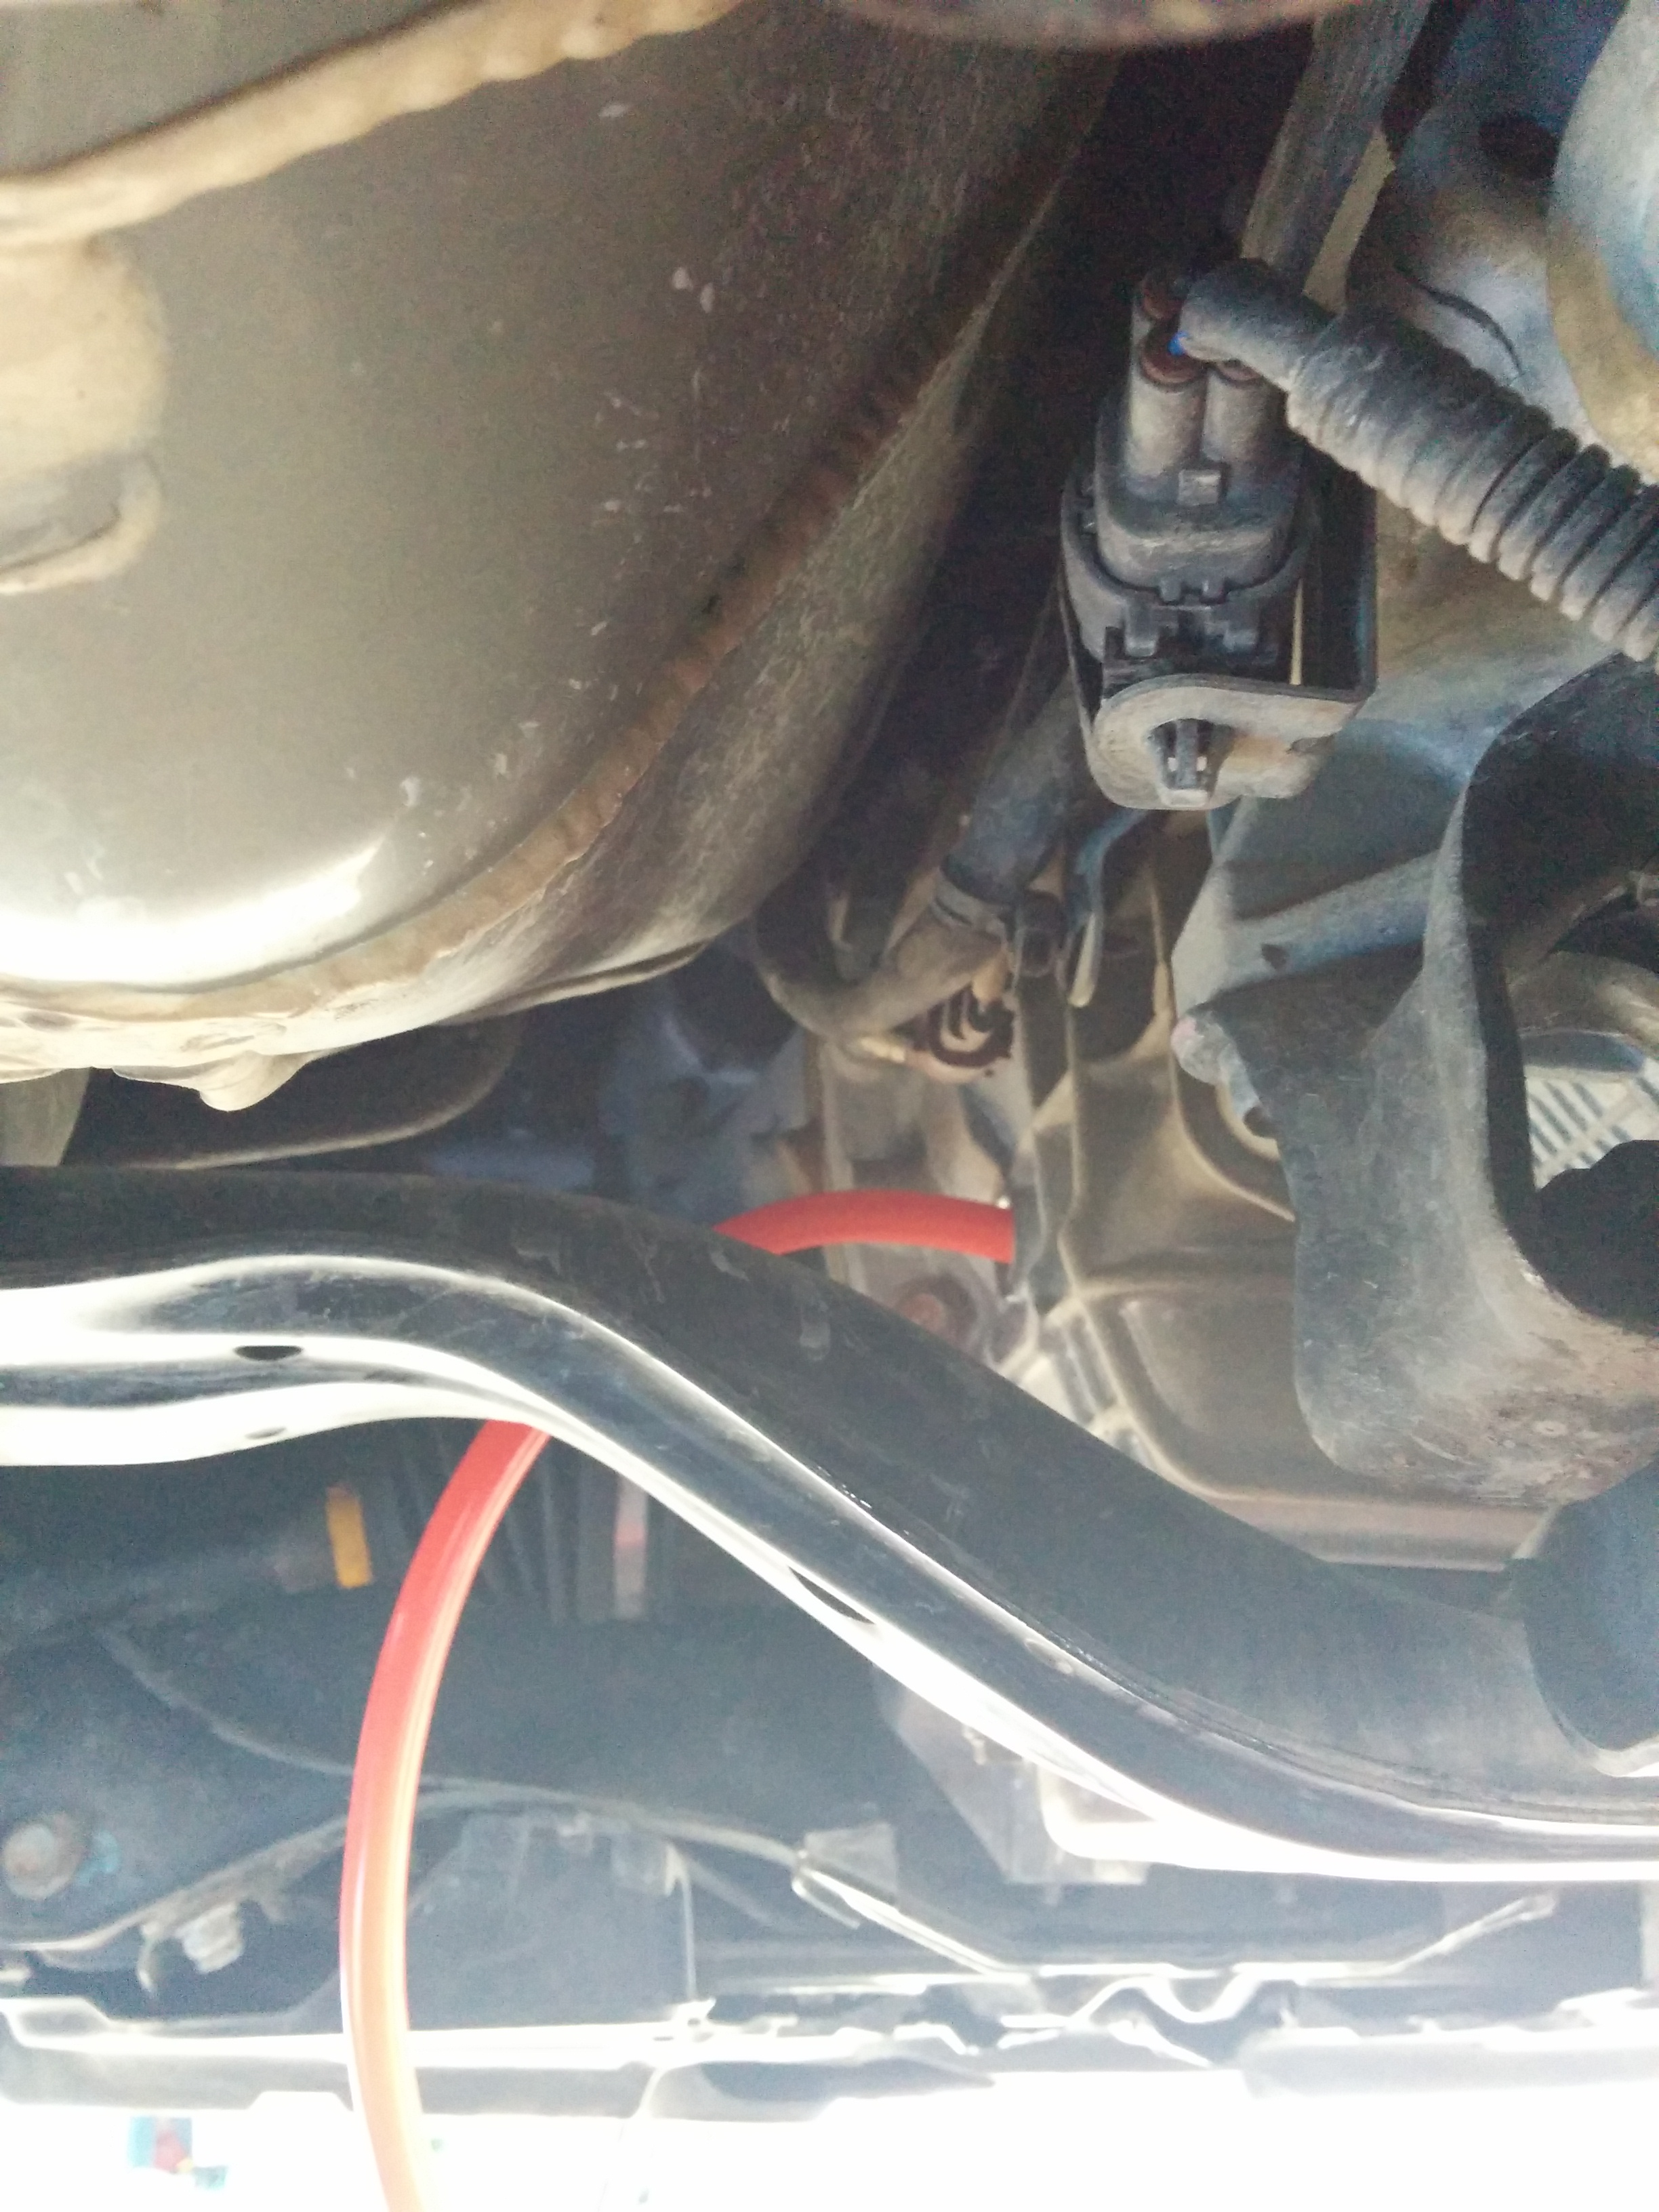
There are two drain plugs, one for front diff (T70) and another for gearbox itself (H10):
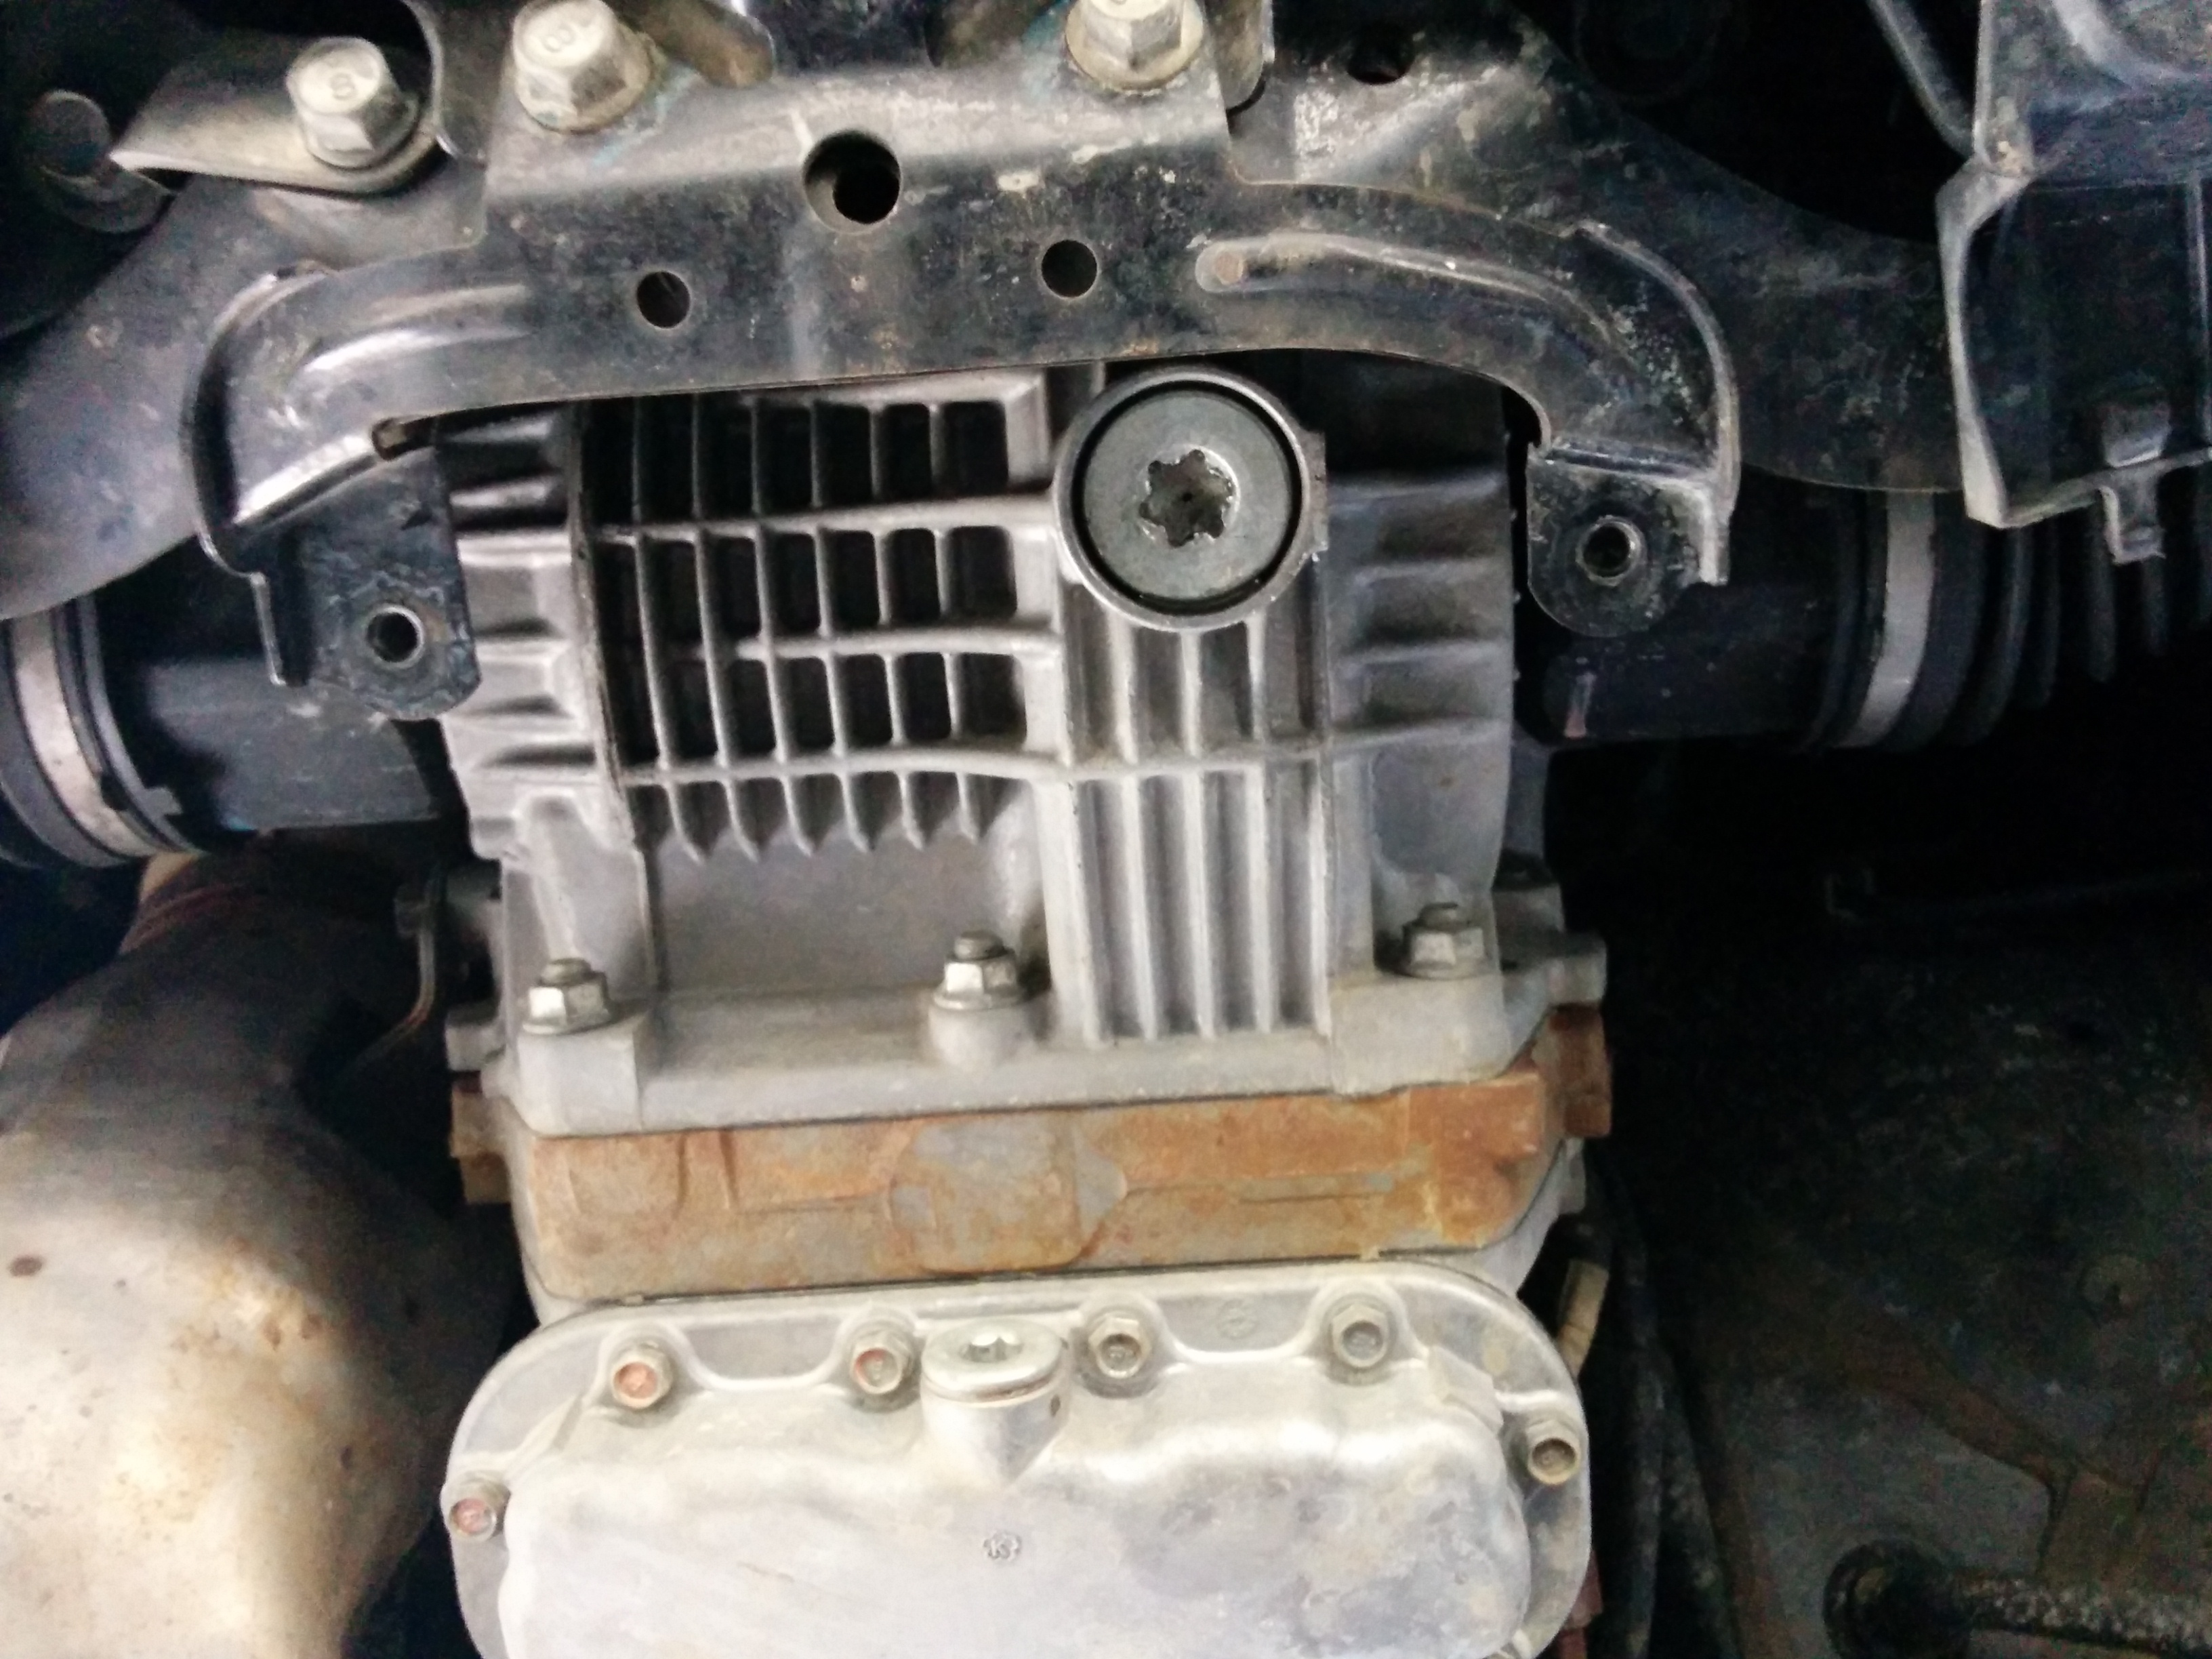
Both of the drain plugs have to be removed.
Here are all plugs removed:
To fill oil:
Tighten both of the drain bolts.
Torque settings:
- T70 Plug 70Nm
- H10 Plug 50Nm
Unlike previous STIs the GRB STI does not have dipstick. Some might think this makes it worse, I think otherwise, as I don’t have to remove inter-cooler to change gear oil. To get correct amount of oil one must fill through side filler plug while the vehicle is levelled.
Here is the said filler plug (H10):

Using hand pump (or otherwise), oil is filled until it overflows through the filler hole:
another angle:
Once oil is overflowing remove filler tube and allow it to drain.
Tighten the filler plug to 50Nm.
Bolt/Clip on the plastic guard.