While I was fixing indecisive heater control servo in a Toyota Ist, I discovered a wiring horror left a by a wire-twisting moron:
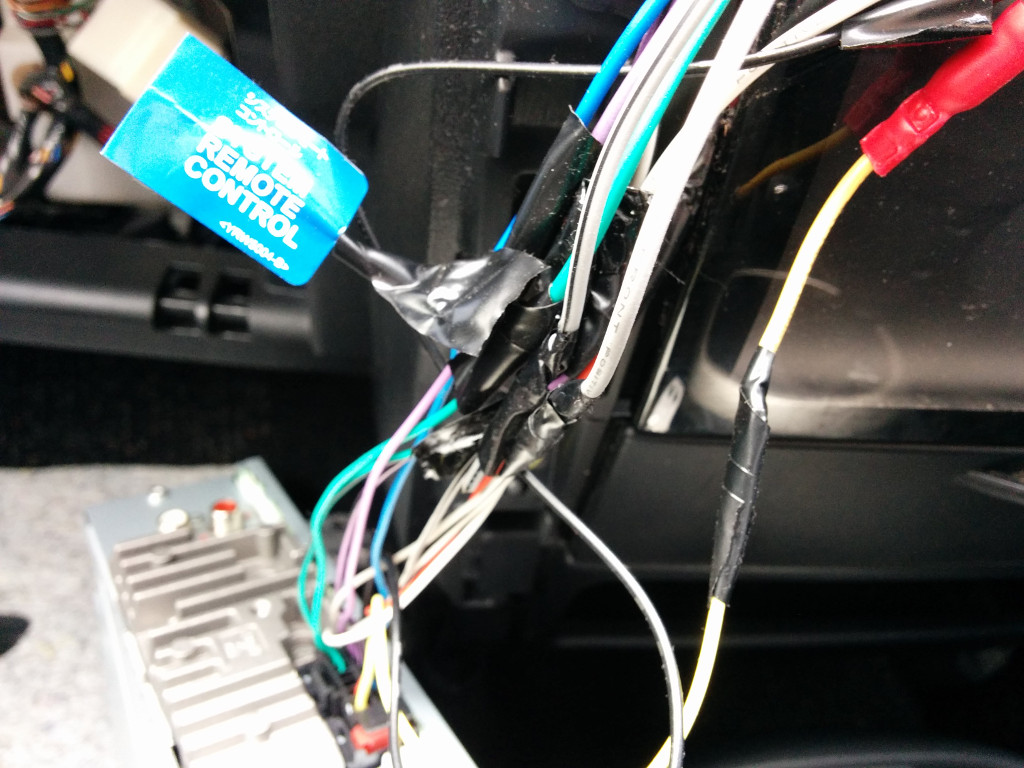
Continue reading Head unit wiring clean up after wire-twister
While I was fixing indecisive heater control servo in a Toyota Ist, I discovered a wiring horror left a by a wire-twisting moron:
Continue reading Head unit wiring clean up after wire-twister
This is a continuation from here.
Here is the complete script that can reset any given Hikvision camera with firmware of up to 5.3 (allegedly).
The security through obscurity aspect of it, and inability to reset the camera without contacting the Hikvision support under normal circumstances puts me off the Hikvision hardware entirely.
There is an obvious problem with contacting Hikvision support, no way they will provide support for cameras bought from Aliexpress. Since password reset is not under owner’s control, it means that owner does not technically own the camera.
This script will discover the Hikvision cameras (both via UDP and magical frame 0x8033) on local L2. You can also specify to reset a camera with a specific MAC address (although it is not too difficult to modify it to own all the cameras, but I purposely left that bit out).
The script is a bit crude and inefficient (too many byte to ASCII conversions).
The reset code algorithm was lifted off here: https://www.ipcamtalk.com/hik-pw-reset.php. I had to “pythonise” it from javascript.
TL;DR: do not buy Hikvision cameras as the official password recovery involves Hikvision support, while “hackers” can own your camera once they get L2 access to your network.
ILDVR INC-MH40D06 or hacking cheap chinese camera part 2 (or unbricking the camera via uBoot).
While was poking around, I managed to brick the camera.
I tried to change the /etc/password on rootfs, unfortunately due to nature jffs2 small changes to file system are not quiet possible if there is not enough space of erase block size increment (in this case it was 64k).
I moved away udevadm to be able to change /etc/passwd only to find I could not move it back or change the /etc/password anyway.
Any attempt led to No space left on device. I put this to my lack of experience with jffs2. At that stage I knew camera was bricked. I saved udevadm binary which I moved away via wget (I moved it to the /mnt/flash/web/browse/ which made it accessible via http). I confirmed it was bricked after reboot (no networking due to unable to mount the flash partitions, as udev was not setting up the block devices in /dev).
Now, I knew that not everything was lost, since I still had uBoot working.
Specifically there was tftp tool to upload/download memory chunks to tftp server.
Since I am using Ubuntu I installed tftp server:
apt-get install tftpd-hpaIt took me awhile to figure out how to read and write to flash (the give away was sf probe 0;sf read 0x82000000 0x50000 0x2b0000;bootm 0x82000000 as bootcmd).
To map the flash memory into a specific address in RAM of specific offset of flash memory (flash address) and specific length (flash partition size):
sf read $MEMORY_ADDRESS $FLASH_OFFSET $SIZEI use the default address of 0x82000000 (no idea how it is determined normally, I guess it is high enough not to interfere with uBoot?).
For Flash Offset and size I used data from cat /proc/mtd
If these things are unknown I guess it is possible to infer them from bootcmd or by dumping the whole flash and then binwalk (I haven't tried this).
the /proc/mtd looked like this:
dev:    size   erasesize  name
mtd0: 00050000 00010000 "boot"
mtd1: 002b0000 00010000 "kernel"
mtd2: 00200000 00010000 "rootfs"
mtd3: 00b00000 00010000 "data"
Rest is simple arithmetic:
The partition I was after was mtd2 (rootfs), so the offset worked out to 0x50000+0x2b0000=0x300000 (mtd0 + mtd1) the size is 0x20000.
To map the mtd2 to memory I ran following:
sf probe 0
sf read 0x82000000 0x300000 0x200000
Note: sf probe 0 needed to initialise flash.
I changed the ip address/netmask and tftp server address via this command (my tftp server is on 192.168.1.2):
set env ipaddr 192.168.1.200
set env serverip 192.168.1.2
set env netmask 255.255.255.0
Then I put the mapped flash via tftp to the tftp server:
tftp 0x82000000 rootfs 0x200000Once I had the image I loaded into mtd device emulation on local machine. This is where erasesize comes handy (found in /proc/mtd earlier): 0x10000 = 64KiB.
To setup mtd device on a linux box you need to do the following:
modprobe mtdram total_size=2048 erase_size=64
modprobe mtdblock
modprobe jffs2
dd if=/var/lib/tftp/rootfs of=/dev/mtdblock0
mkdir /tmp/target
mount -t jffs2 /dev/mtdblock0 /tmp/target/
You might need to install mtd and jffs2 related packages: apt-get install mtd-utils
If it complains about "wrong superblock" while attempting to mount jffs2 most likely you got size/offset wrong when you ran sf read.
Once you have file system mounted copy it into a directory for future manipulations.
In the copy I fixed the /etc/passwd. I copied in the udevadm binary that I moved away.
Then I repacked the directory back into jffs2 image:
mkfs.jffs2 -r ~/rootfs_ipcam -e 64 -n -m size -o /var/lib/tftpboot/rootfs_fixed
Only to find out that the image turned out to be larger then the target size of 2MiB. I guess they used proprietary tools to build their jffs2 to cram it right into 2MiB. I was off by 140KiB or so. I managed to reclaim space by removing mkfs.fat and e2fsck (since this particular camera does not have physical SD-Card slot). Alternative was getting all partitions and re-shuffling the layout (relatively easy, but tedious).
Once I had the image built I confirmed that was OK by mounting the same way as original image.
The final step was downloading new image via tftp and flashing it:
tftp 0x82000000 rootfs_fixed
sf erase 0x300000 0x200000
sf write 0x82000000 0x300000 0x200000
WARNING: Don't get the size/offset wrong as you will have bad times!
So here I am poking at ILDVR INC-MH40D06 only to discover more and more security issues.
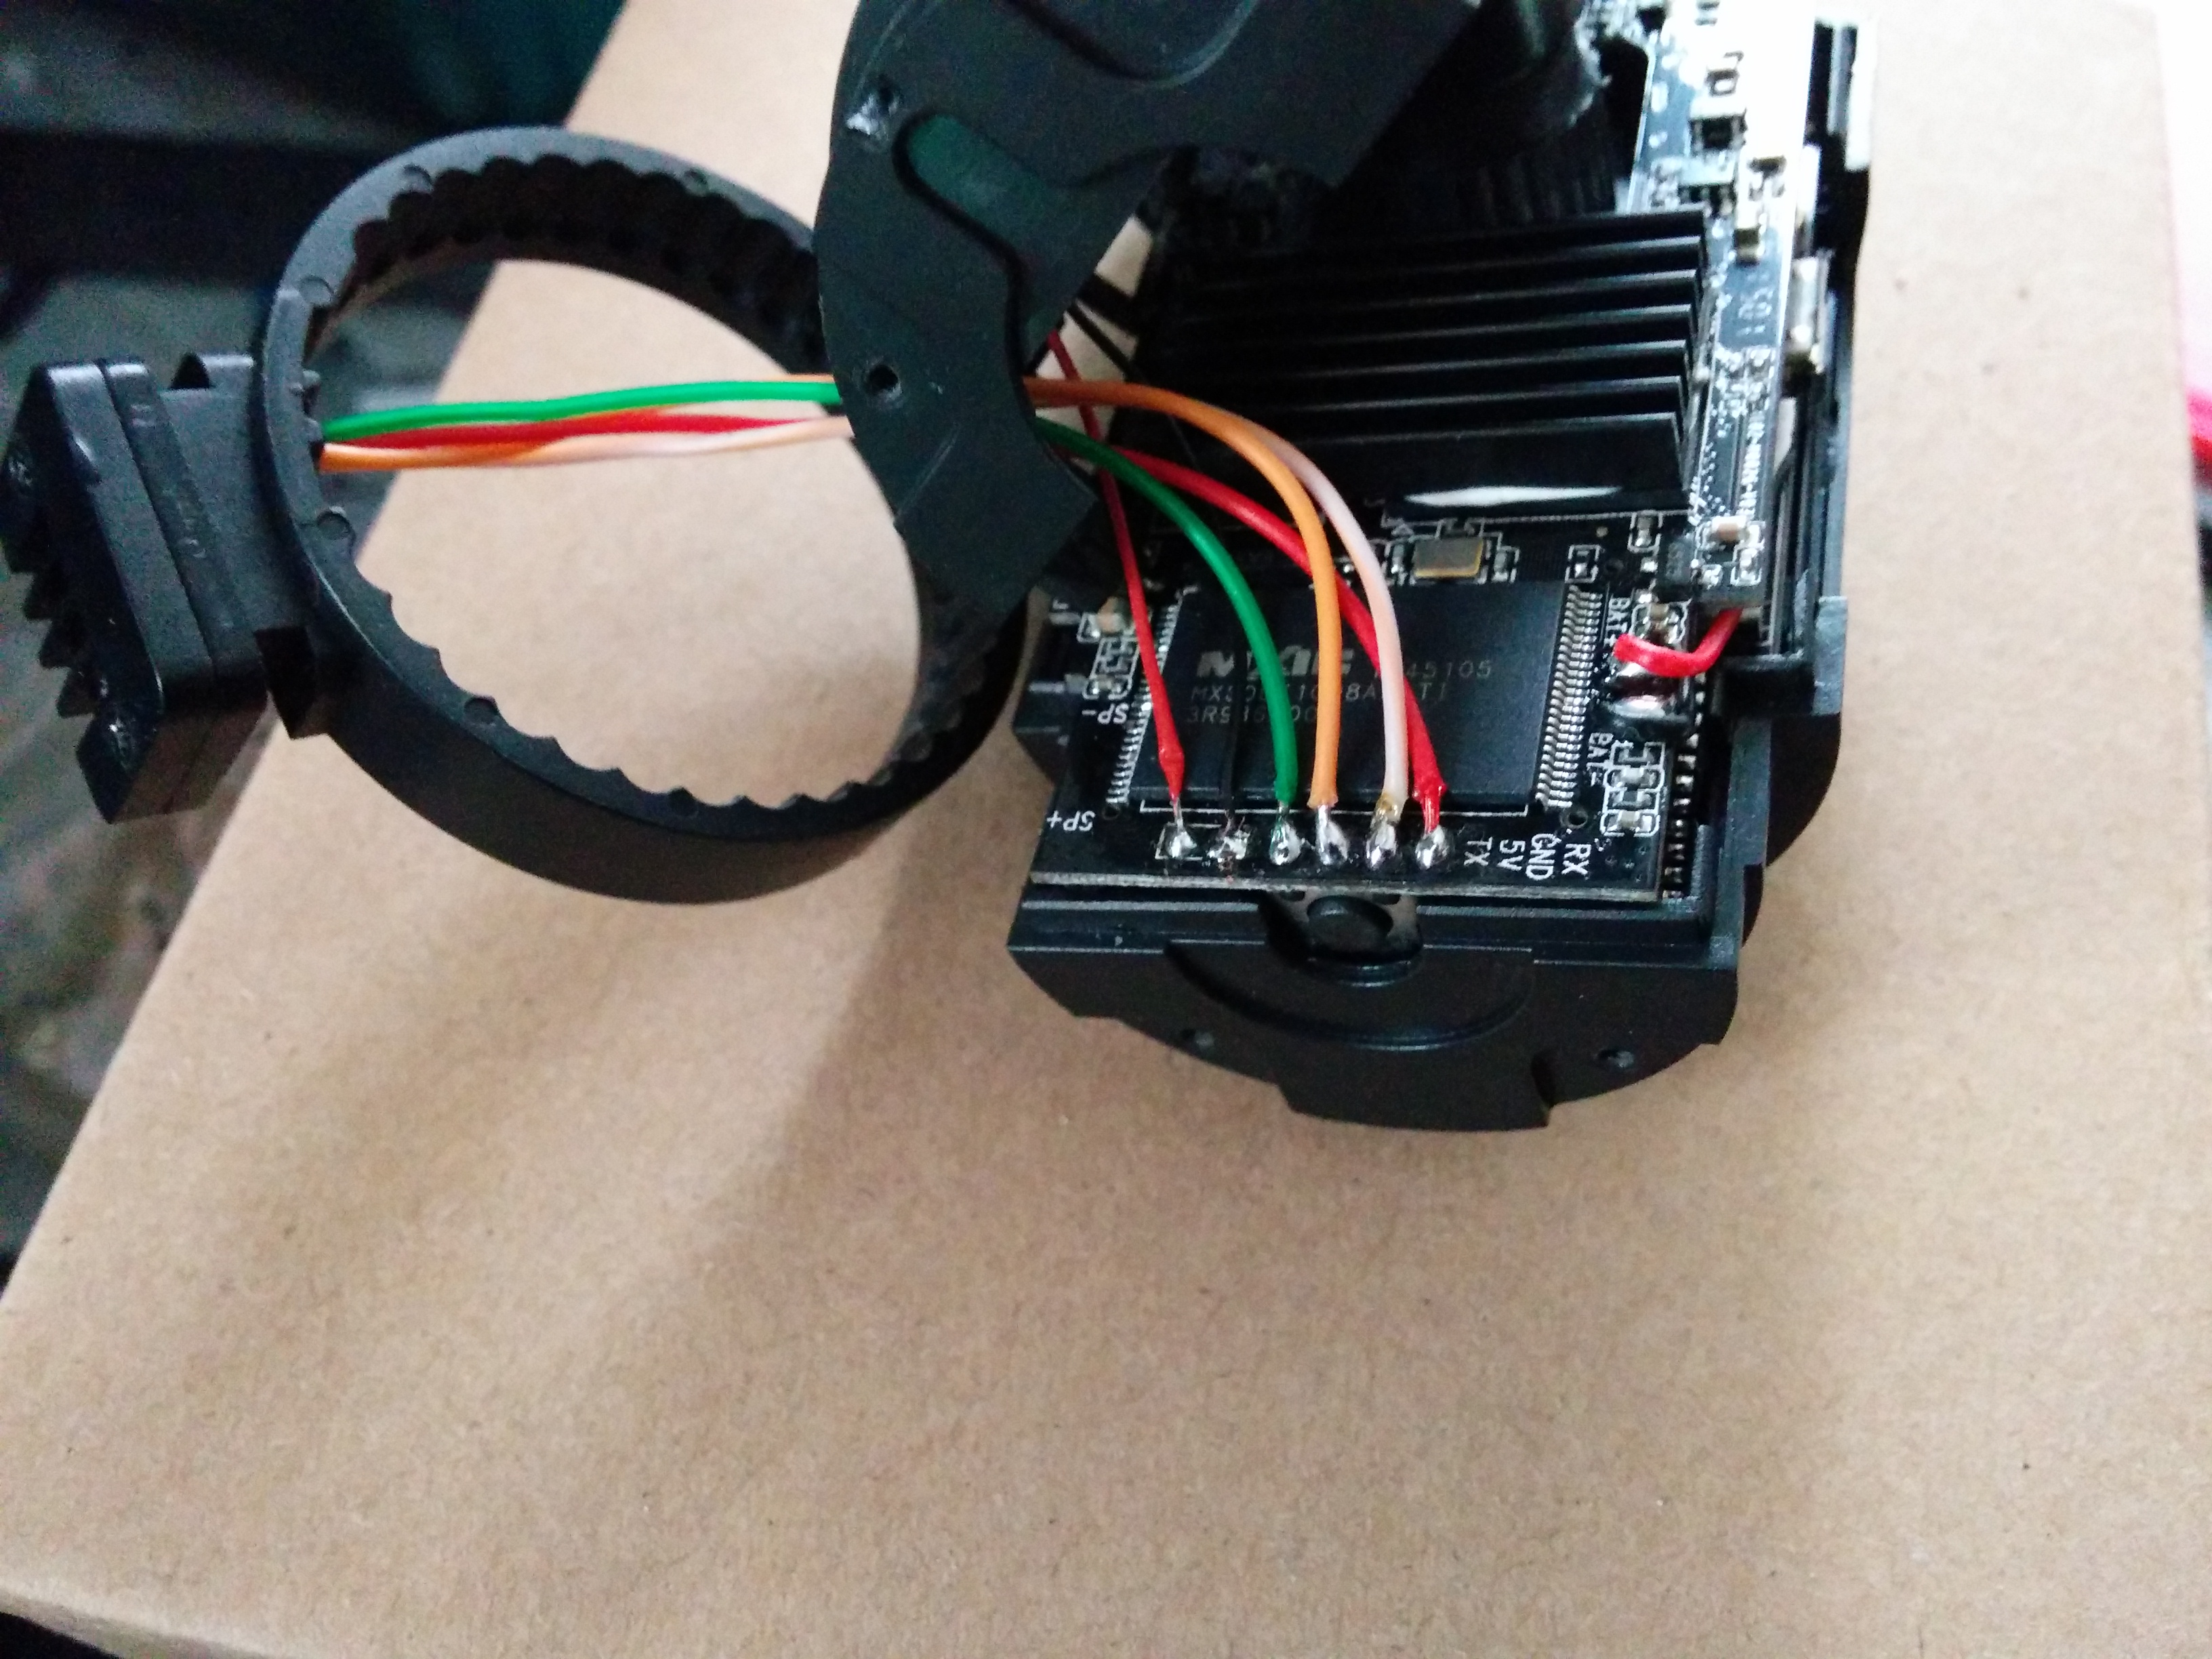
So, Why my second mini0806 was always crashing?
Turns out to be it was the internal cable after all.
Update: it was still crashing (differently), so cable was not the ultimate problem. I didn’t figured out the problem as camera is dead now from a relatively soft drop.
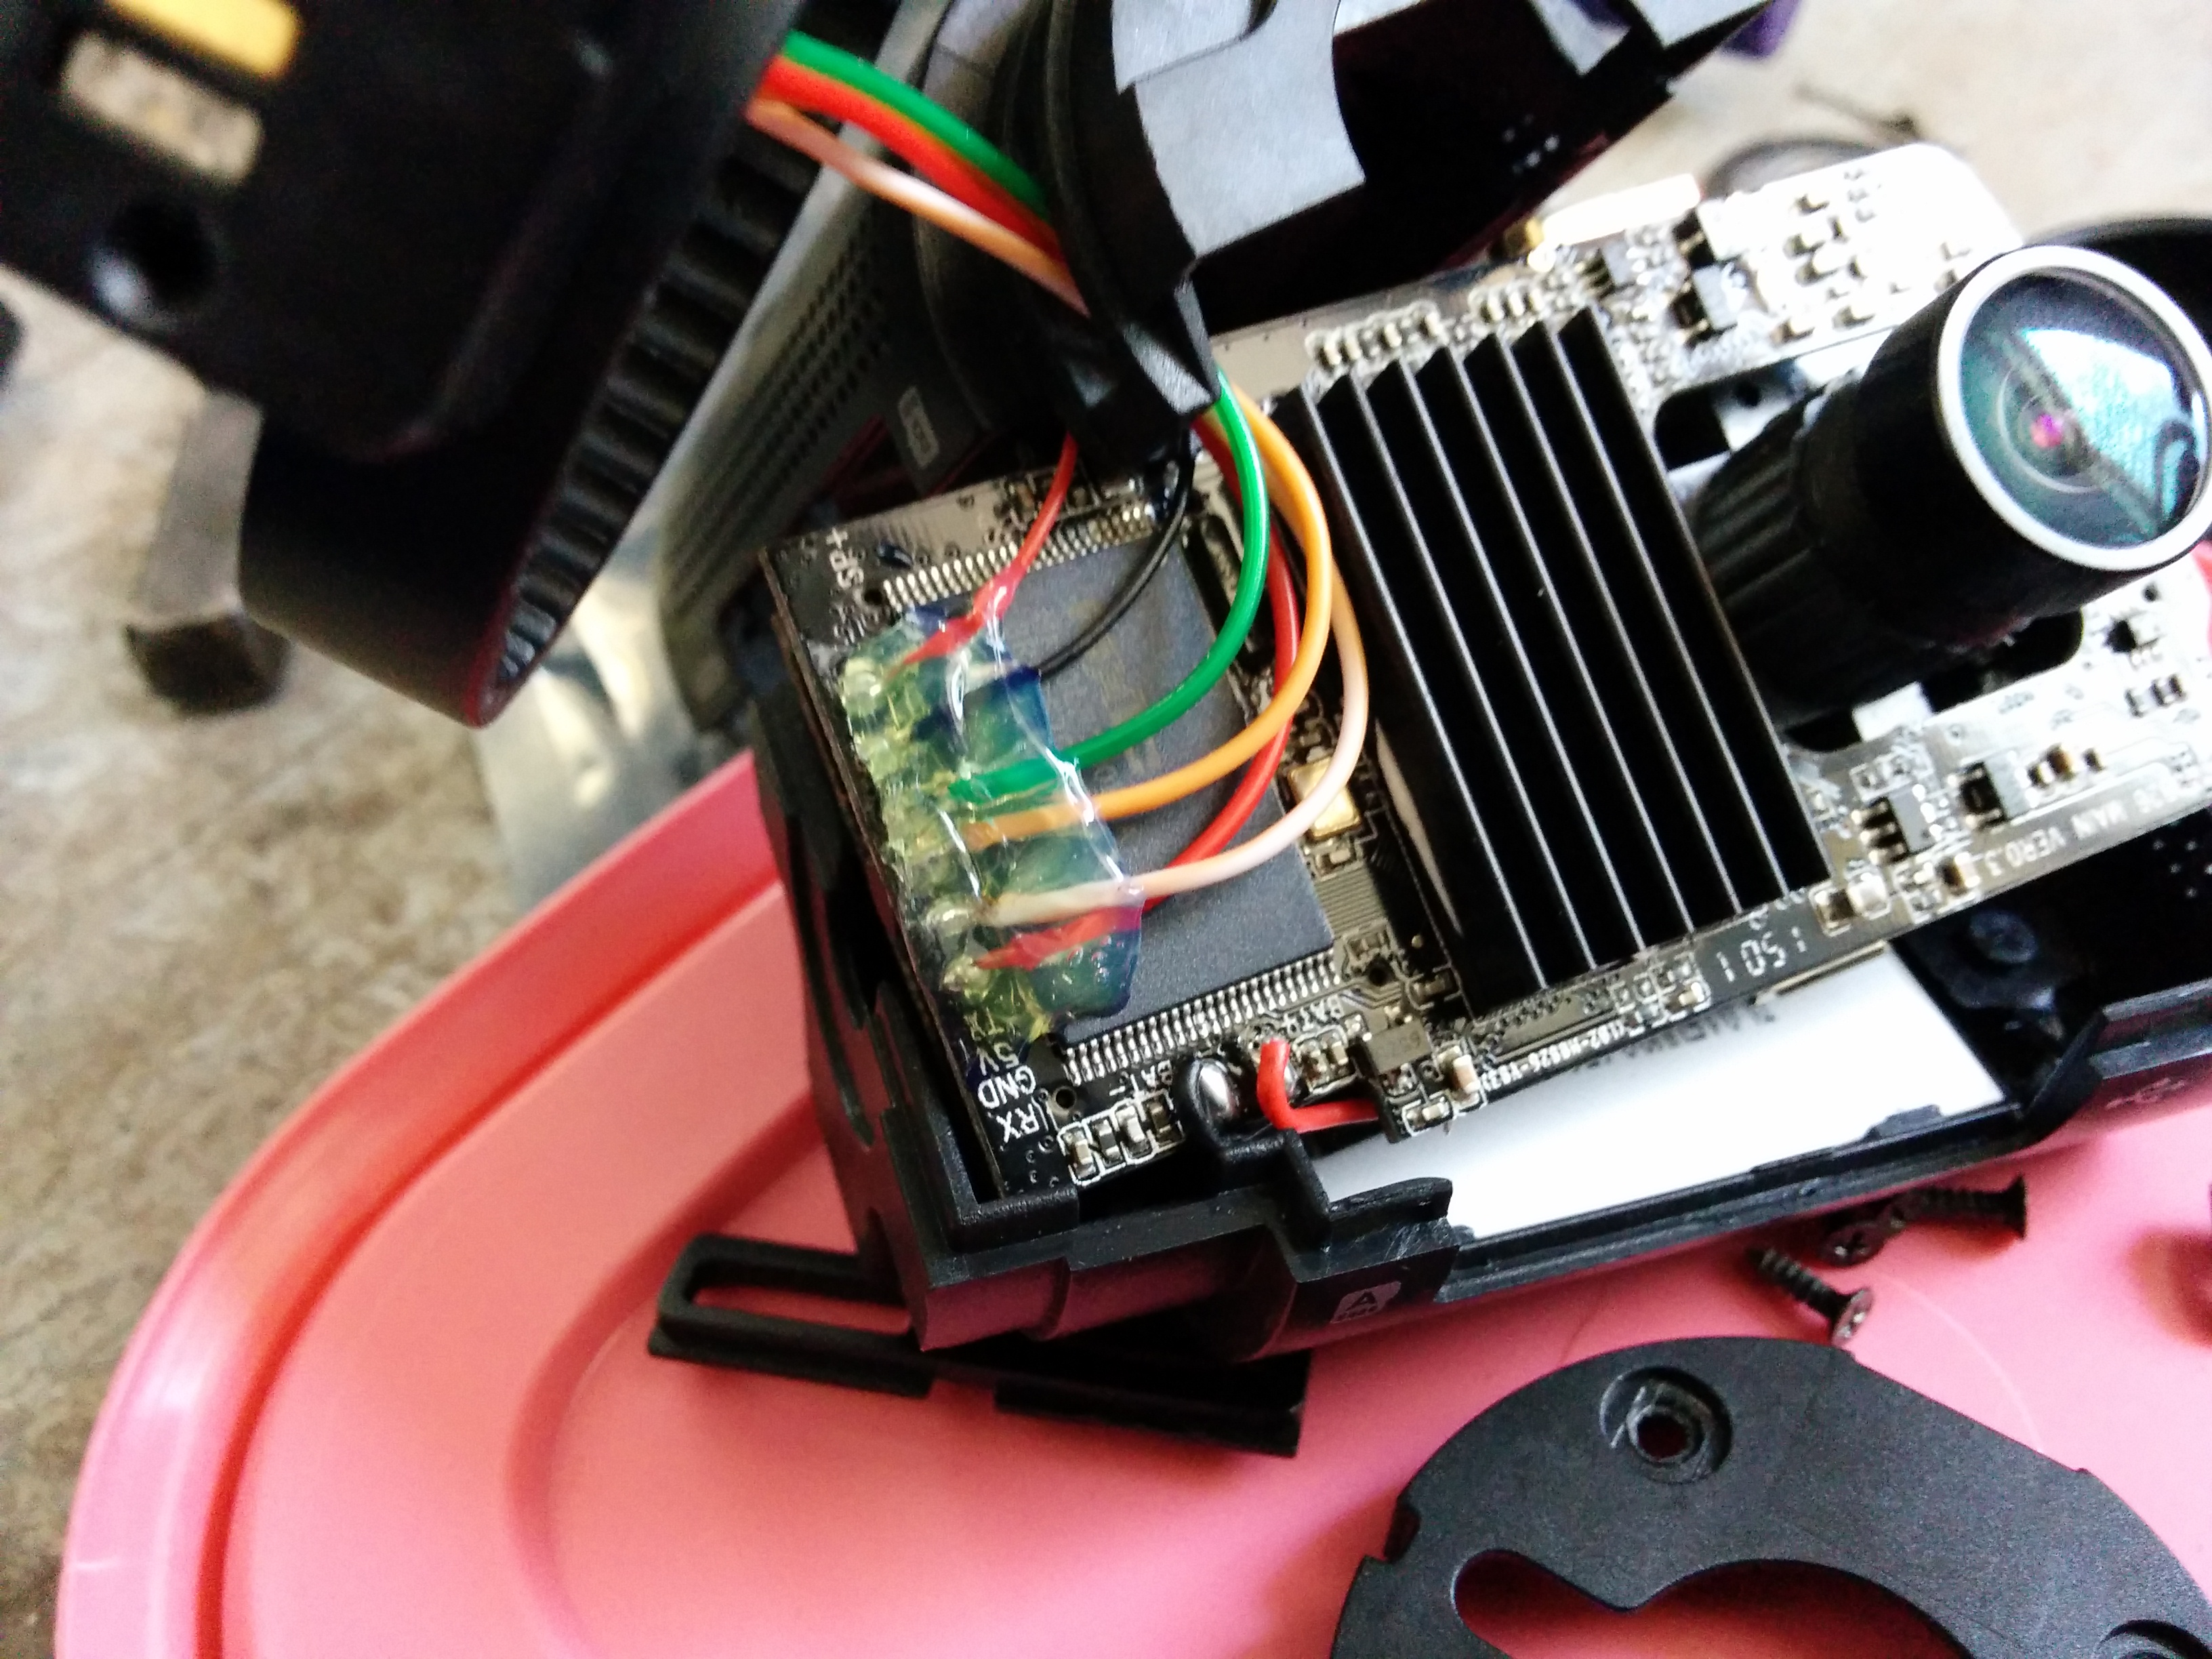
Here is the fix:

hot glue for a good measure:
The original cable:
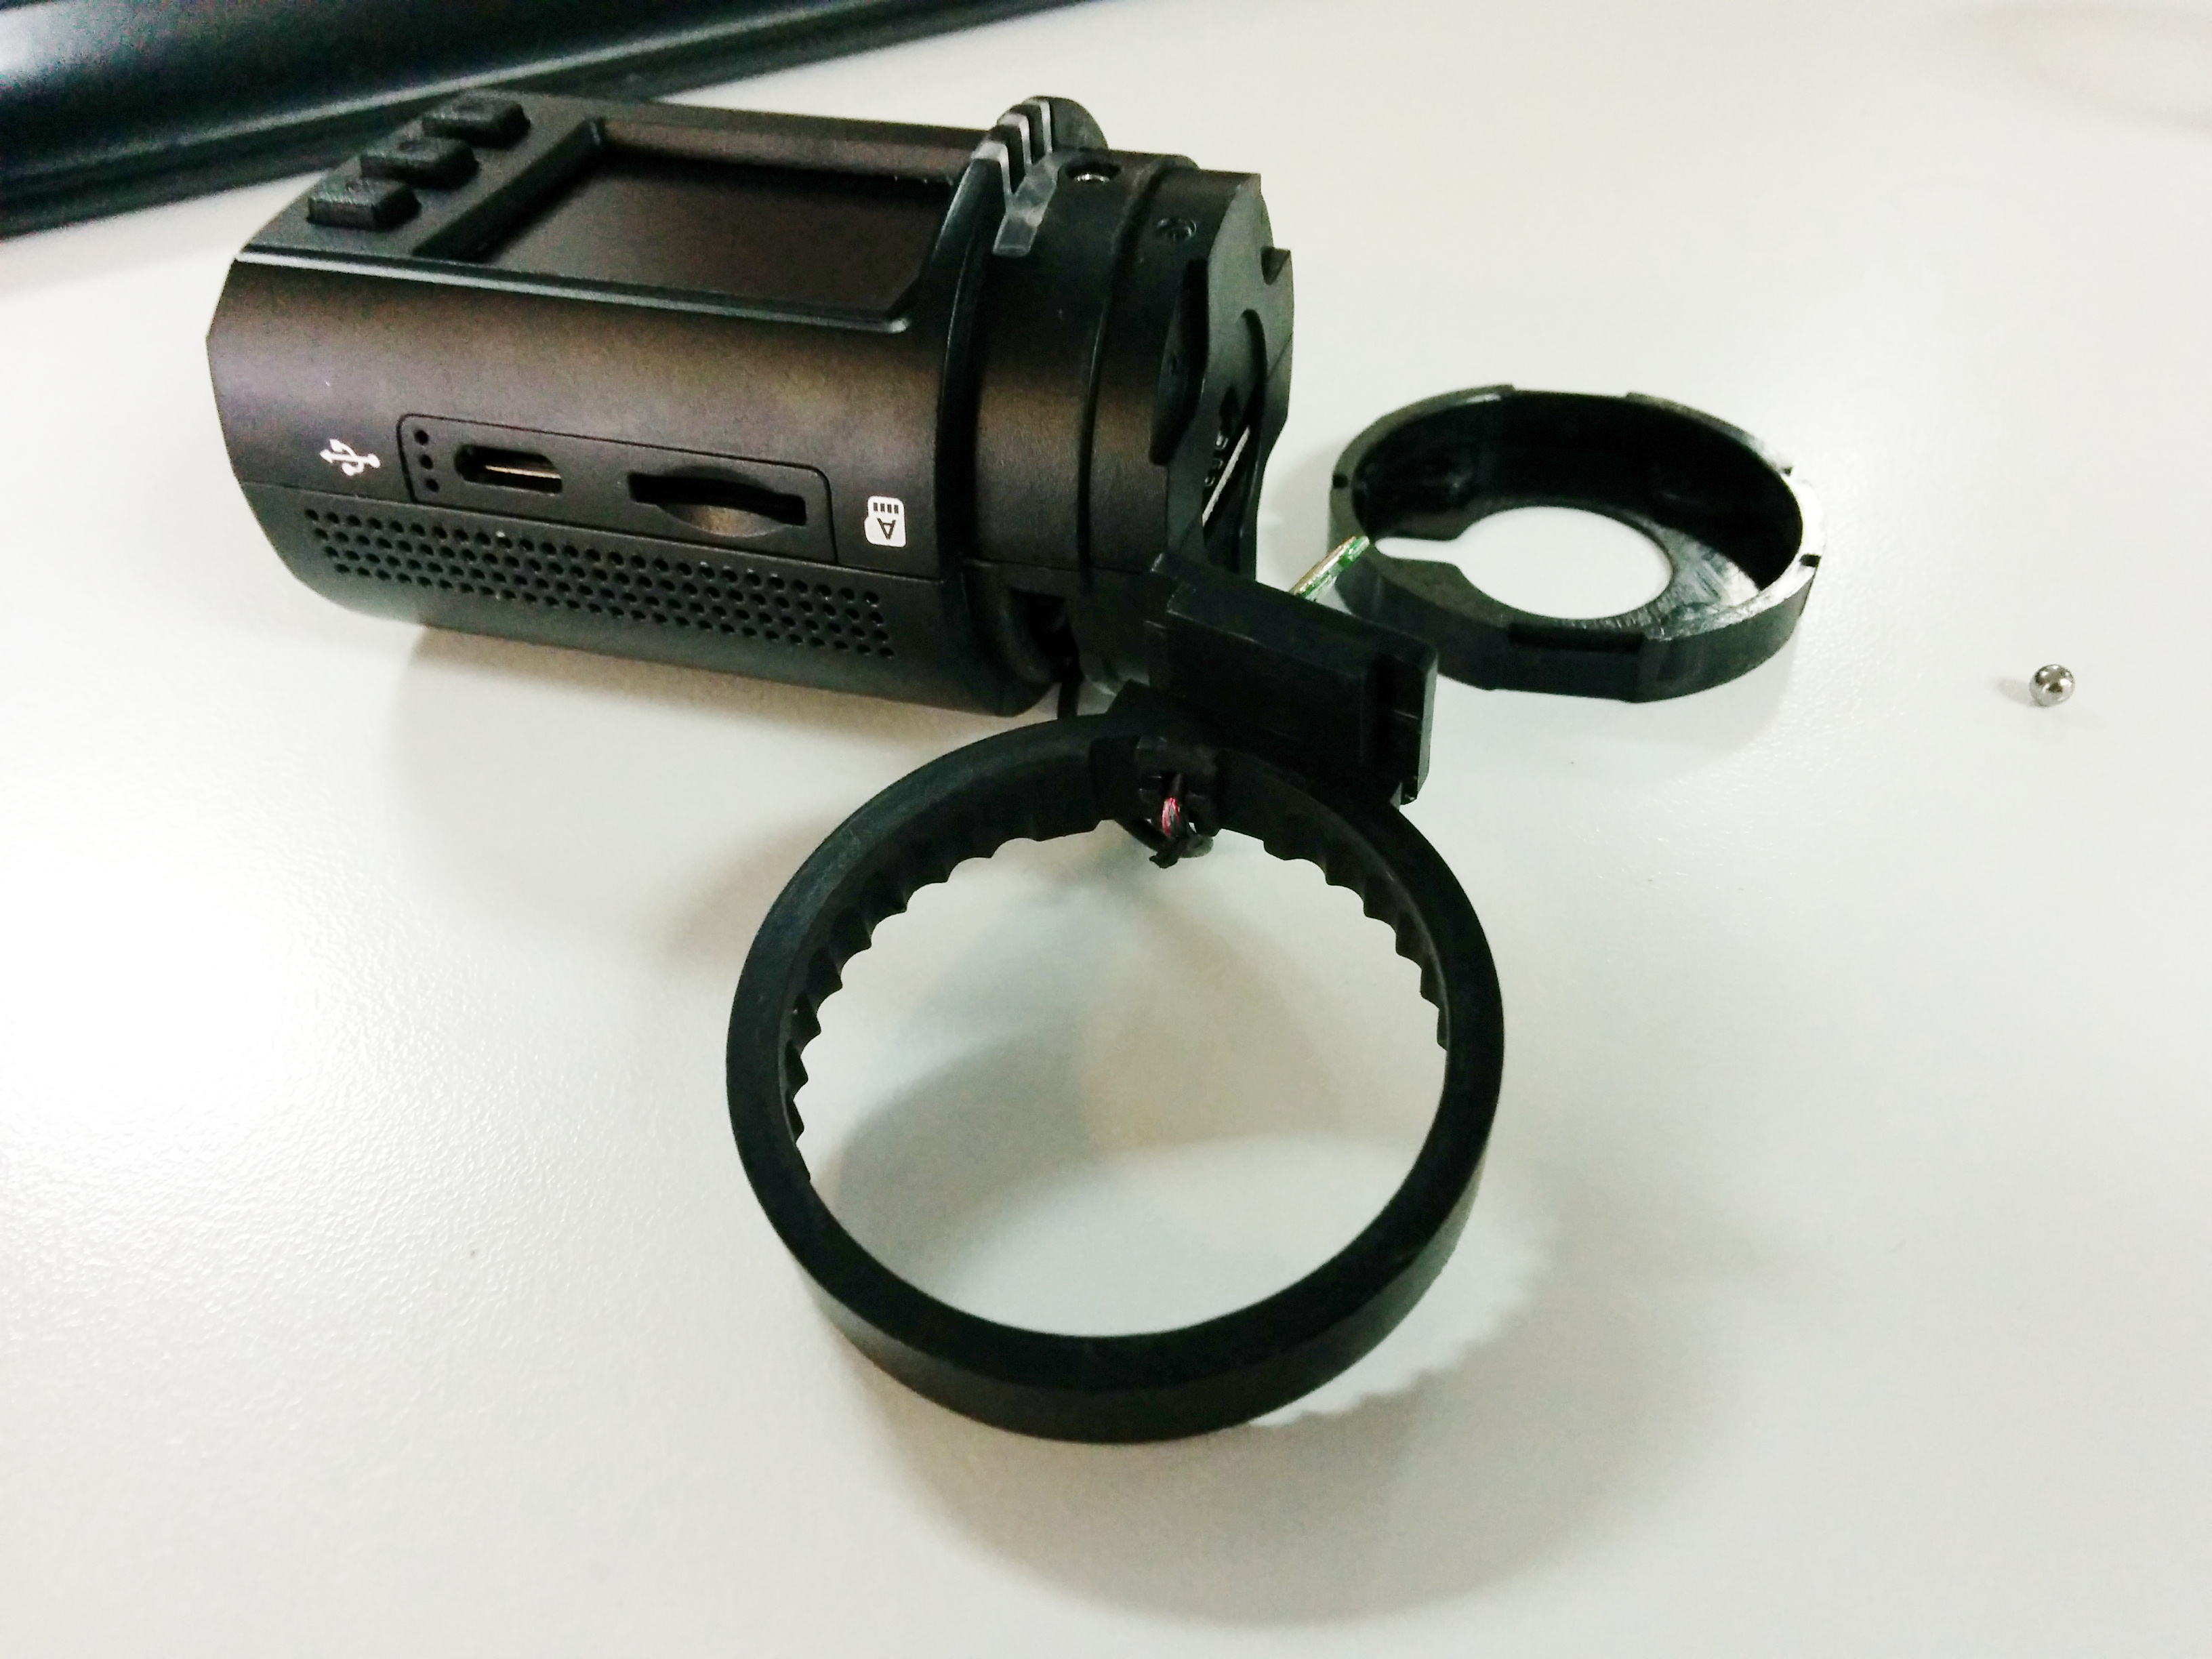
I used some telephone/Cat5 cable due to lack of better alternative, it works good now.
I also noticed a peculiar thing: card slot A and slot B have different read/write speeds.
Not sure if this is optimal, as I am not a “web” developer, here is a dynamically generated simple HTML5 page:
<!DOCTYPE html>
<html>
  <script type="text/javascript">
function sVideo(){
    d = new Date();
    var streams = ["stream1","steam2","steam3","streamN","streamN+1"];
    var l = streams.length;
    for (var i = 0; i < l; i++){

        var vDiv = document.createElement("div");
        vDiv.style.position="relative";
        vDiv.style.cssFloat="left";
        vDiv.style.display="table-row";

        var vVideo = document.createElement("video");
        vVideo.id = streams[i];
        var source = document.createElement('source');
        source.src = 'http://example.com/video/'+streams[i]+'?t='+ d.getTime();
        source.type = 'video/webm'
        vVideo.appendChild(source);

        vVideo.play();
        vVideo.removeAttribute("controls");

        vDiv.appendChild(vVideo);

        var aDiv = document.getElementById("anchor");
        aDiv.appendChild(vDiv);
   }
}
  </script>
  <body onload="sVideo()">
    <div id="anchor" style="position:relative; float:left; display:table">
    </div>
  </body>
</html>
Here what it does:
For every stream in the list ‘streams’ it generates a div (the divs are arranged in a table), into which it places video block with stream source and type.
This page does not work with iOS because it does not support webm. On other hand it works perfectly fine on a shitty $50 android device. Actually it works everywhere except iOS (Linux, Windows, Android, FreeBSD and OSX).
I was given an iPad. I decided to try it out.
After multitude of accepts of EULA, filling out personal information (apple ID shit), silly security questions, I managed to get to “use” it.
First thing I did is to try out my CCTV feeds in Safari. These work everywhere (Linux, FreeBSD, Windows, OSX etc.), well everywhere except iOS.
Epic fail.
My CCTV feeds are simple HTML5 <video> tags with webm container and libvpx format. I feed them via ffserver/ffmpeg.
Very clean and efficient setup (here is the html/javascript example).
Shitty safari browser does not support webm. Installing “different” browser not going to help as any “different” browser is just a skin to the shitty safari. Apple does not allow alternative browsers.
So next option is to try mp4 container with h264 format, only problem is mp4 does not work with non seekable video.
You get this:
[mp4 @ 0x25185b0]muxer does not support non seekable outputEpic fail indeed.
So shall I try HLS? Good luck with that, I can’t even trouble shoot it because iOS is so castrated (view source? browser console? anything?)!
I didn’t get anywhere with HLS either (no idea how to test it without Apple envirnoment with some basic debugging tools).
Besides HLS is not a true video tag.
In reality Safary is a non-HTML5 browser and does not support HTML5. Because of the browser lock-in there is no way for iOS to support HTML5 (this should be illegal, it should be my choice what I run on my device). Thus iOS devices are stuck in stone age.
Reality distortion field is a real thing, there are some serious issues with iOS (FFS! At least support open/royalty free formats).
As far as I am concerned iPad and iPhone is a fucking toy, as because of the walled garden it limits usability of the device.
Because of this I will not willingly buy anything from Apple. Screw you Apple.
P.S. I installed Firefox for shits and giggles and it was a far cry from actual Firefox. Why they even bother, they only tar their image because of how shitty Firefox on iOS is (and no, there are no customisation or extensions)!
P.P.S. there is another way of making this work: play 10-30second videos with javascript loading them (while they are being generated on server). I might implement it once I get over it…
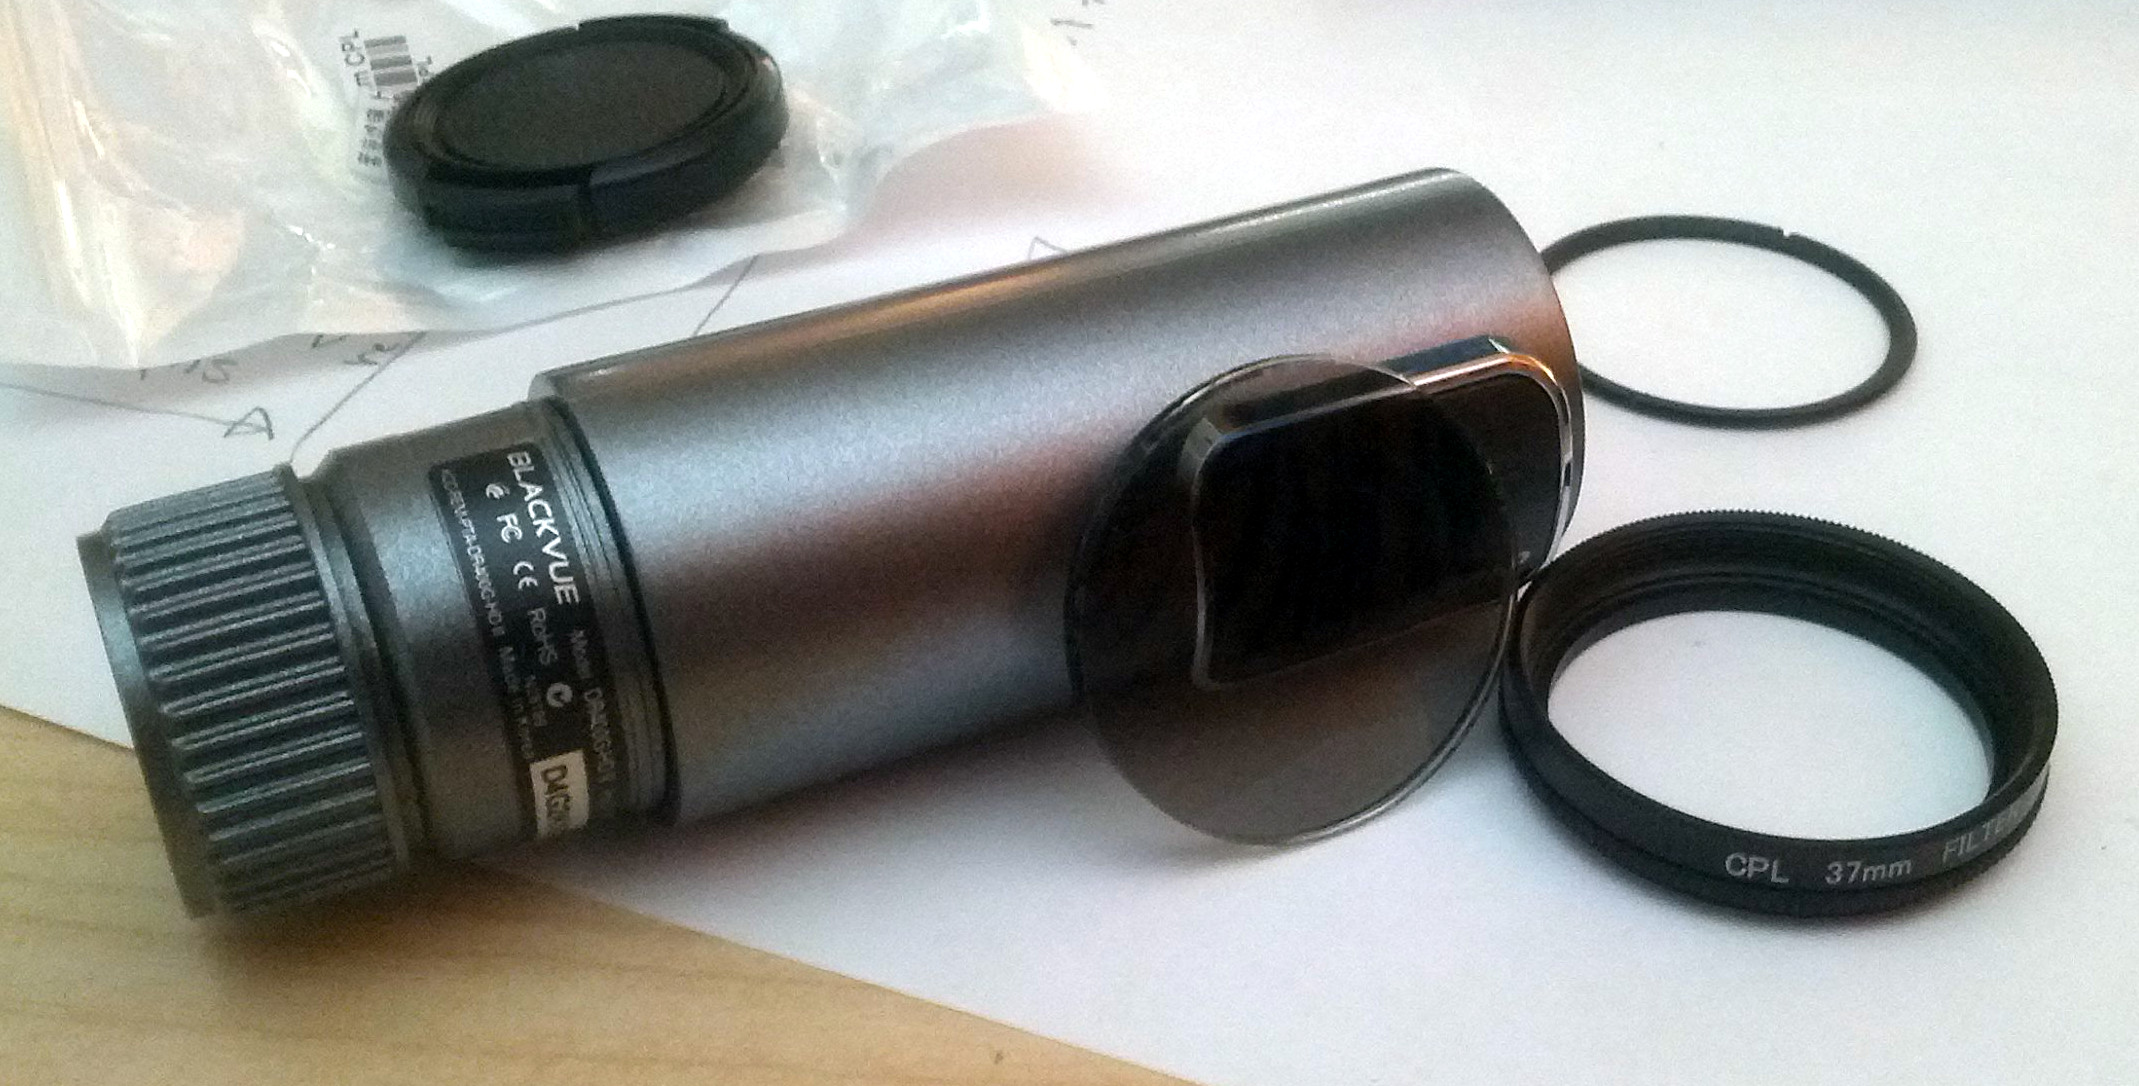
Adding CPL filter to Blackvue DR400G-HD II
There is no “standard” fitting CPL filter for Blackvue DR400G-HD II, so I decided to make my own.
I bought cheap CPL filter for GoPro for Aliexpress and modified it to “fit”.
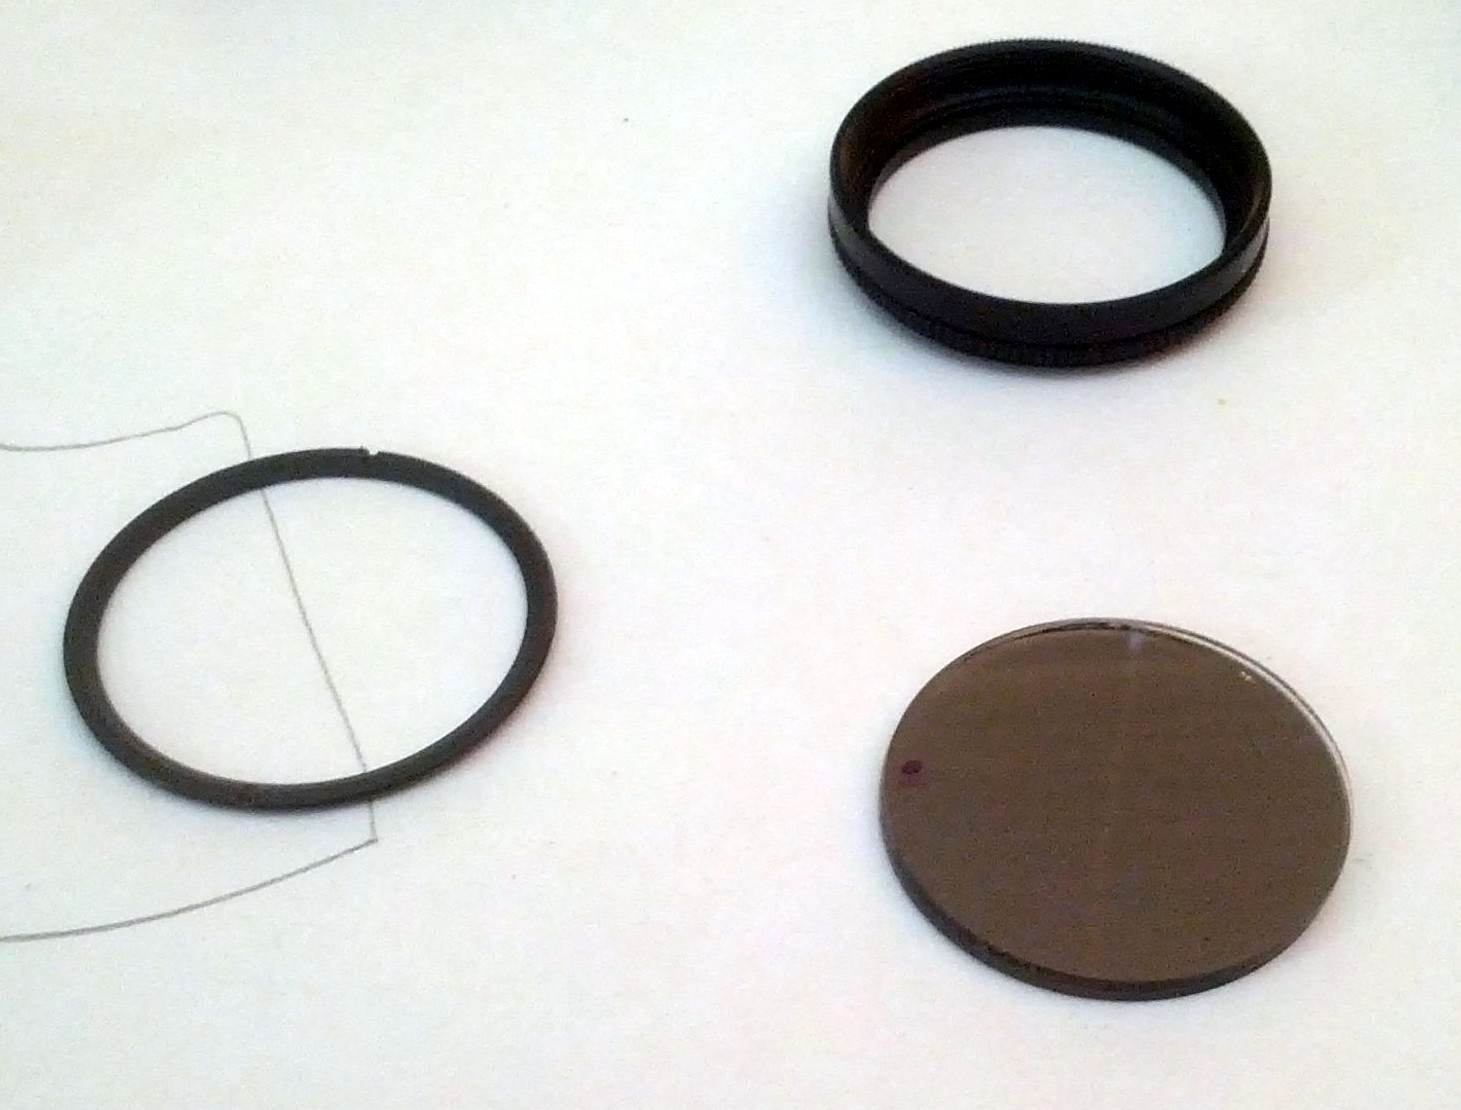
The filter glass can be extracted from metal ring by un-screwing inner ring:

Notice I have already marked “top” with marker. To determine “top” I simply sat in the car with sun high and rotated the CPL filter (make sure you have front and back correct) so there is no glare.
Here is the glass out (make sure you keep track of top and front).
Test fit:
Since the filter was too large (it would interfere with windscreen), I decided to grind it into this shape:
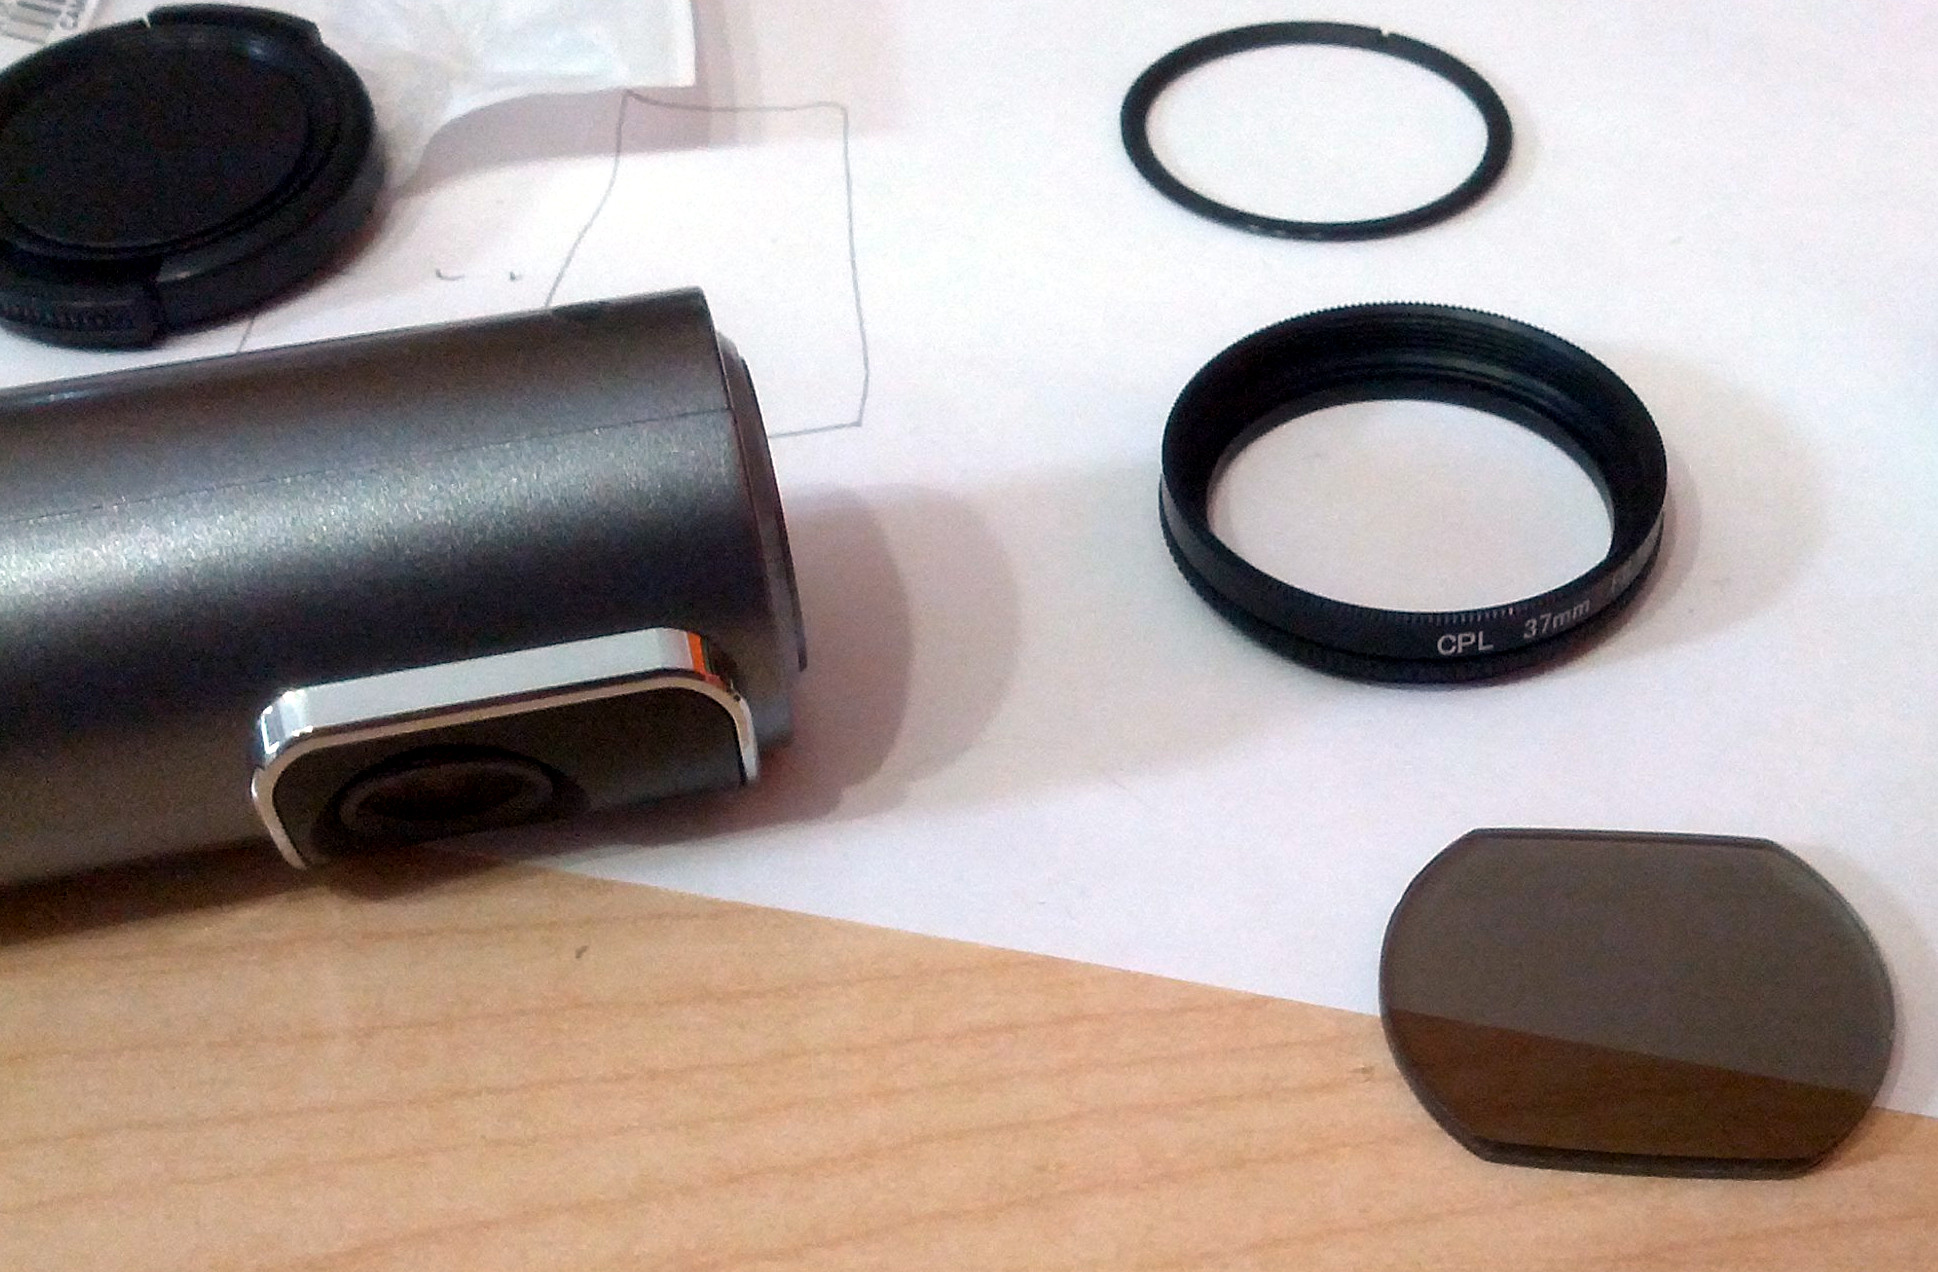
Grinding is a slow process involving slow orbital sanding with water (P400 or so). Don’t rush it or glass will crack (or the inner filter melt).
Test fit post grind:

Glued with dab of hot glue:
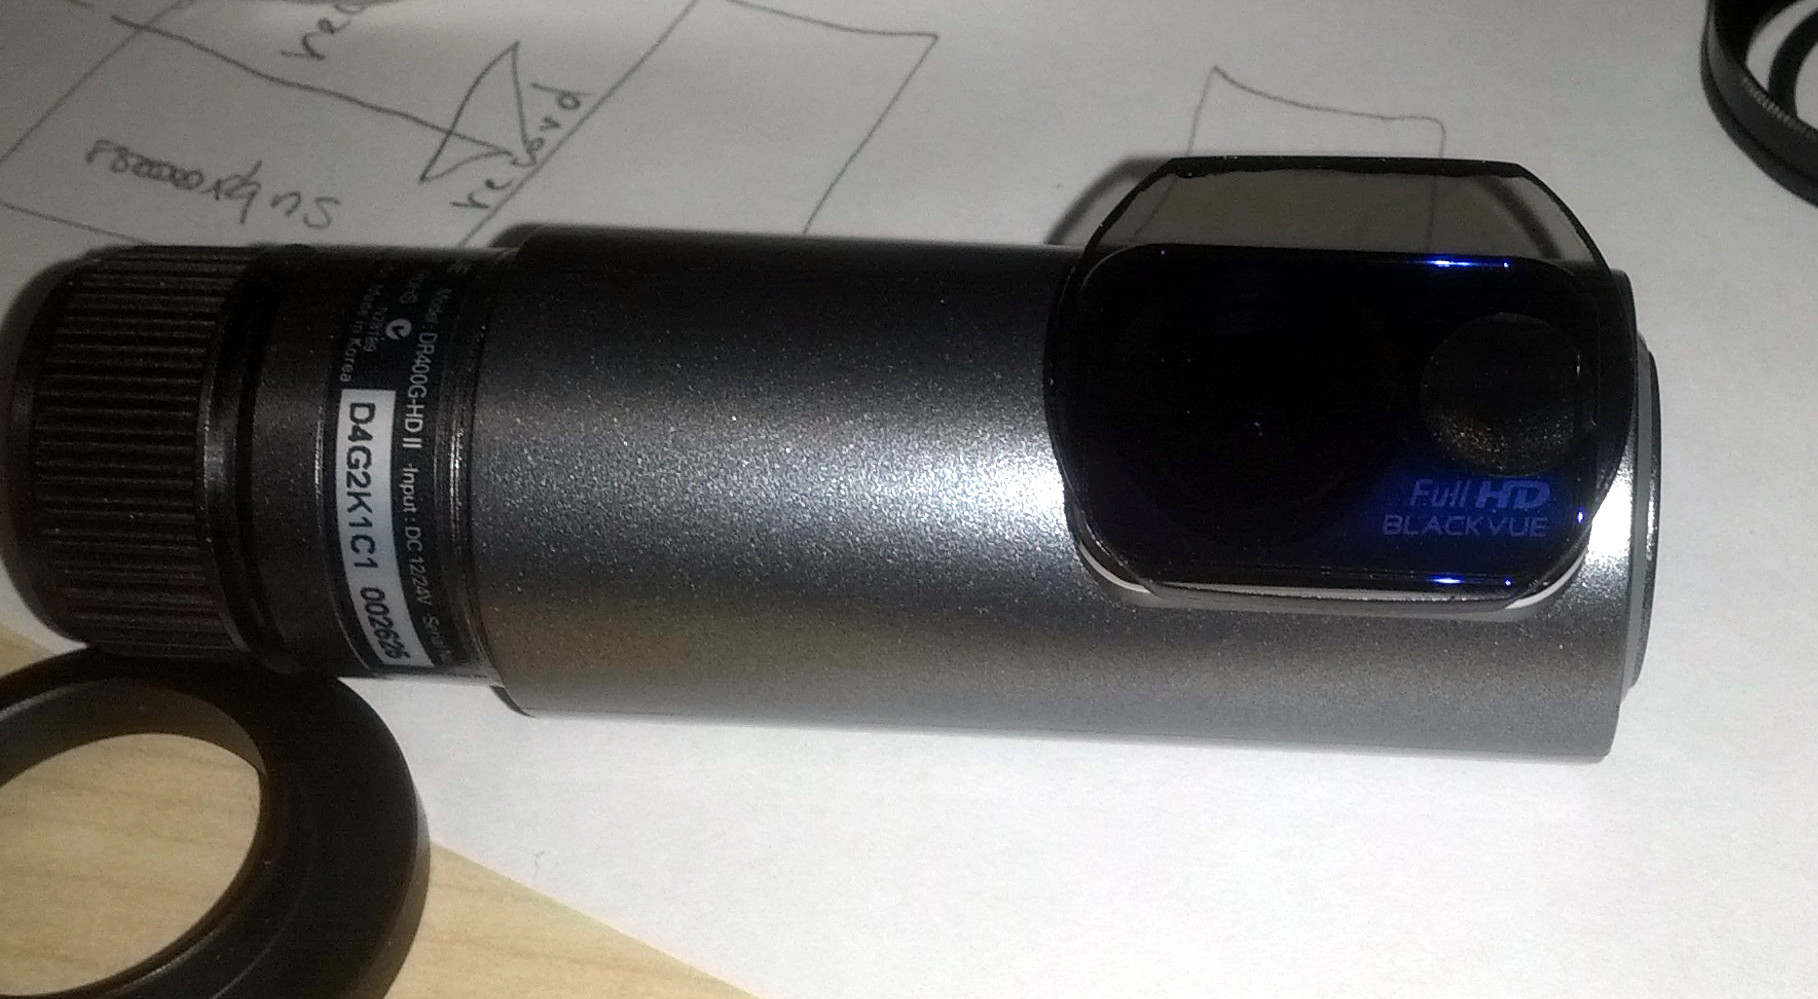
Note: in hot climate I recommend replacing hot glue with quality double sided moulding (thick) tape, as once the camera gets to about 60-70’C the glue will soften and lens will slide.
Friend of mine was in Russia when power spike took out her laptop.
Laptop ran out of the battery and would not run on the AC power.
She used local (Russian) repair company to get it “fixed” (for exuberant amount of money).
Unfortunately the repair company could not get it fixed completely due to lack of components, they only managed to make it only work on AC power (no battery).
They also managed to lose bunch of screws…
I was curious what was “fixed” so I opened it up.
Here is the “fix”:
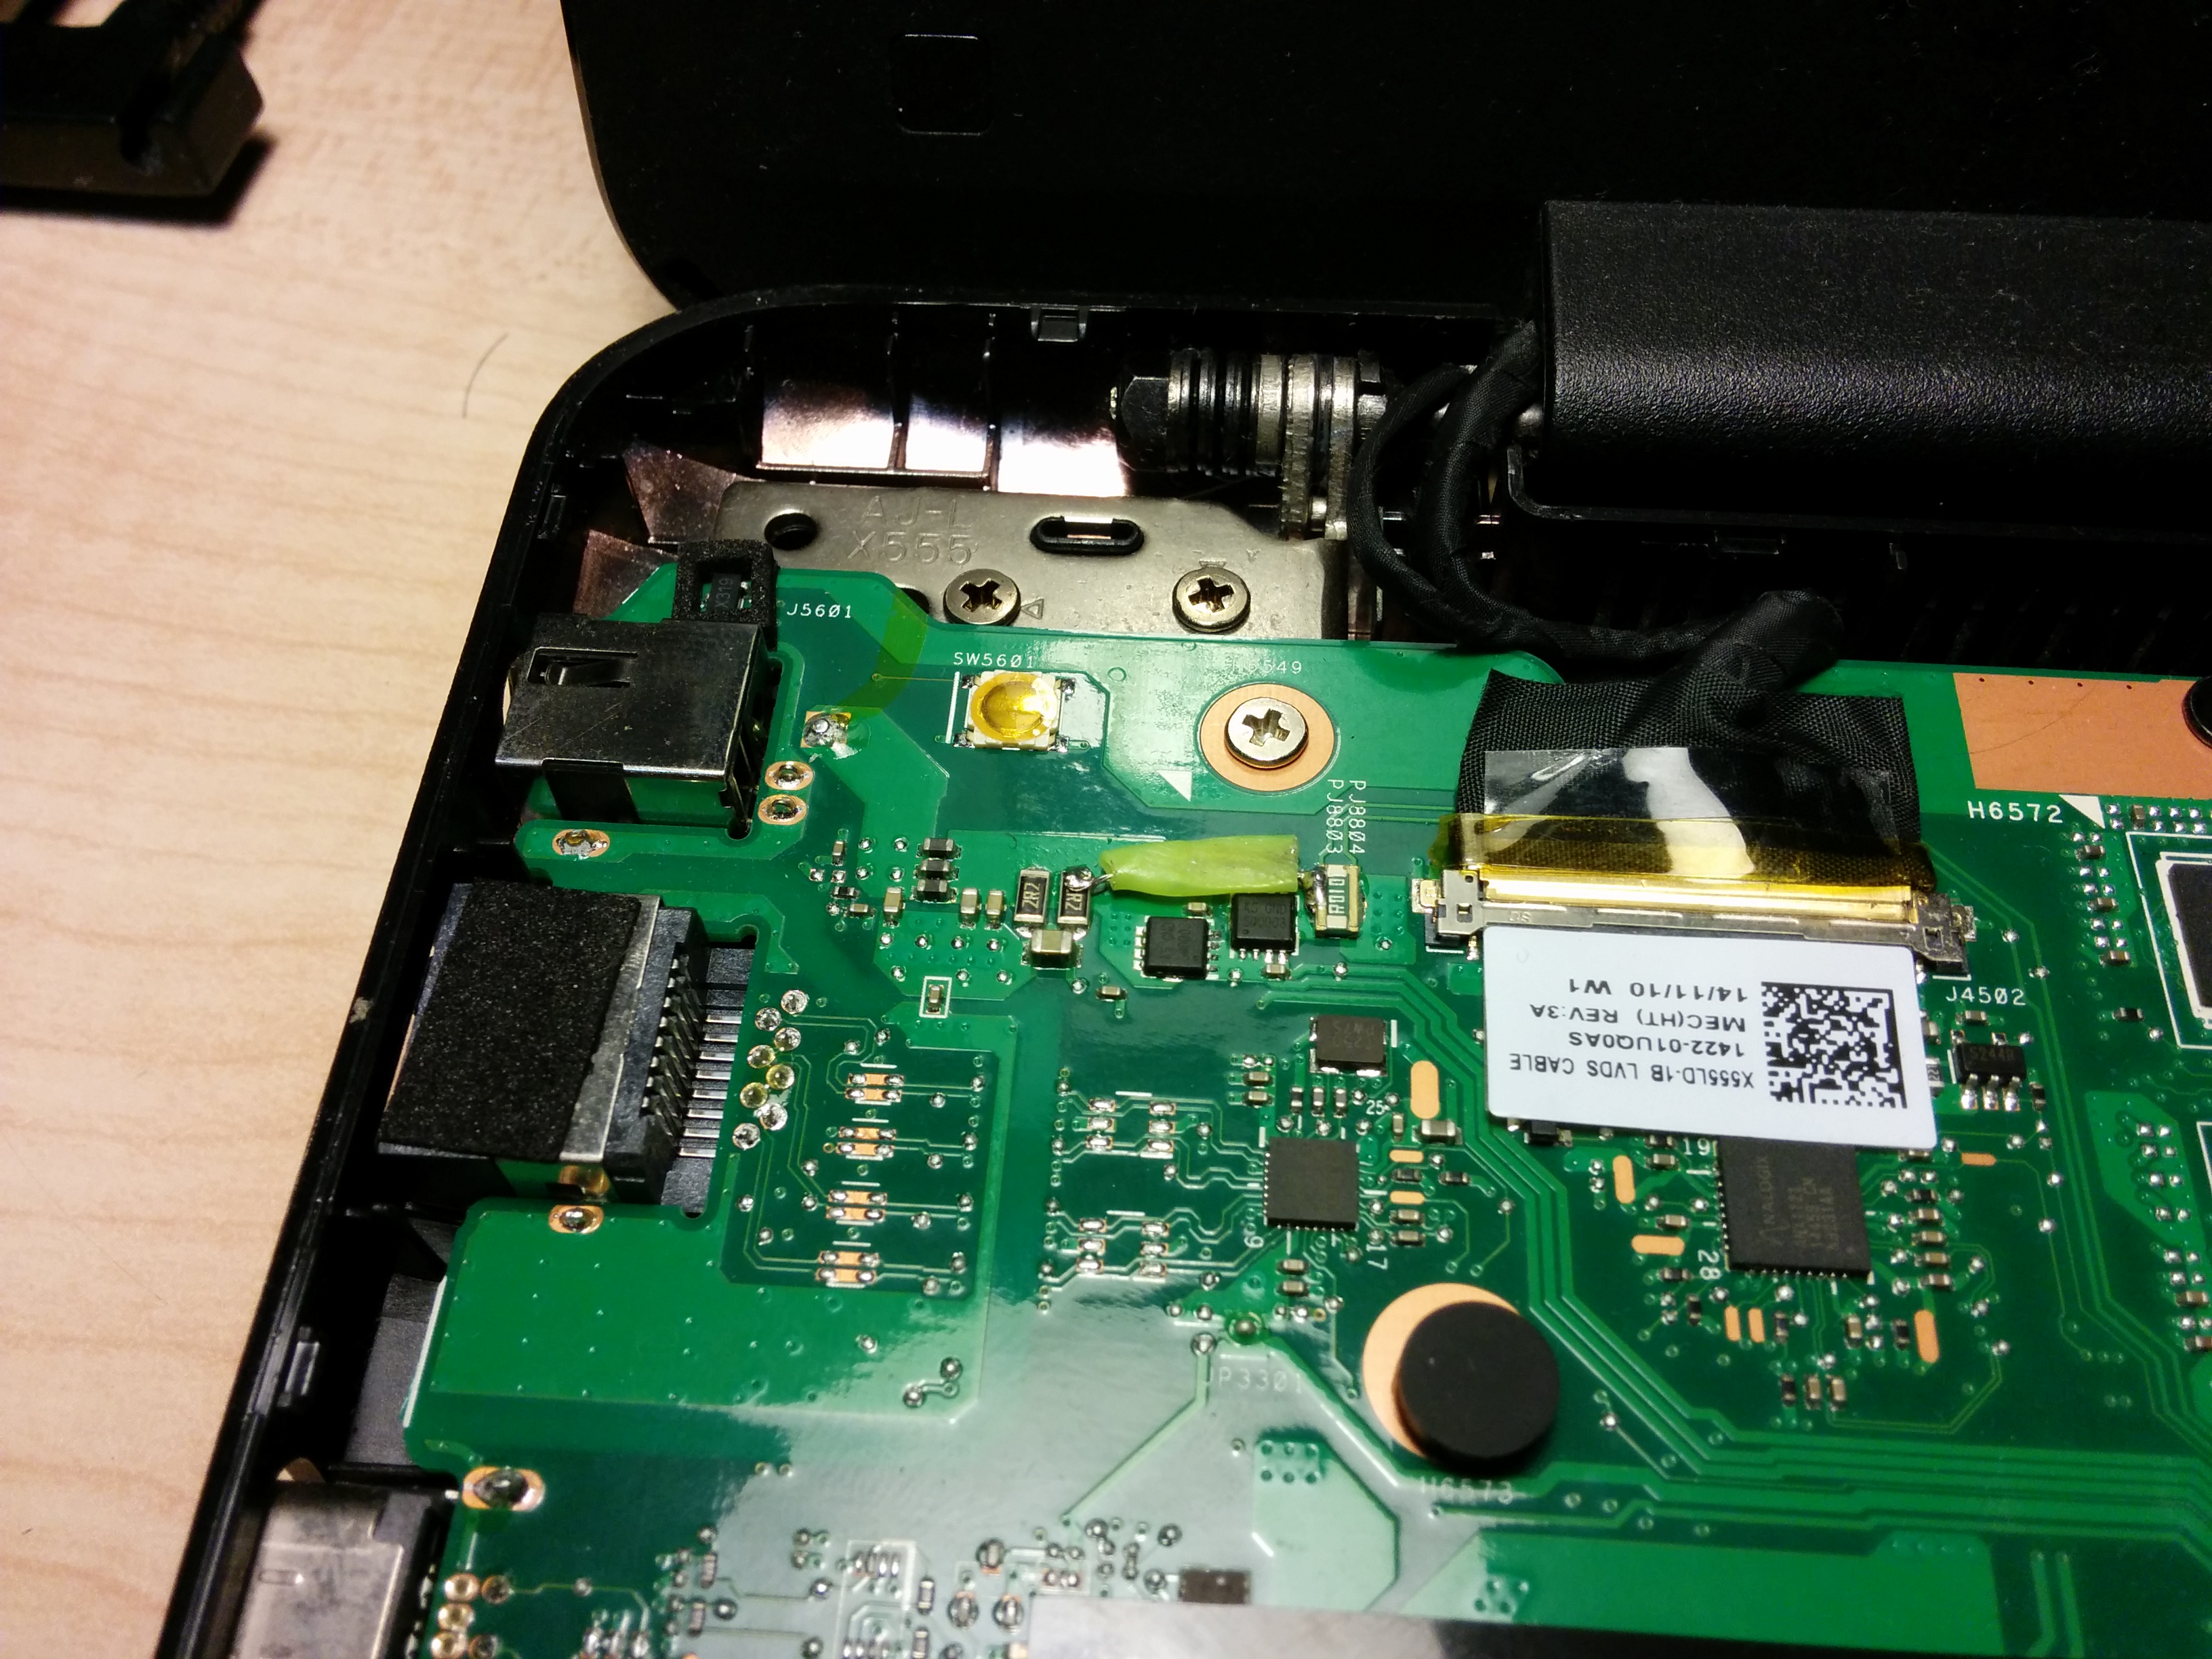
At that time I was not familiar with the laptop circuitry, so I removed the fix and looked up the components underneath.
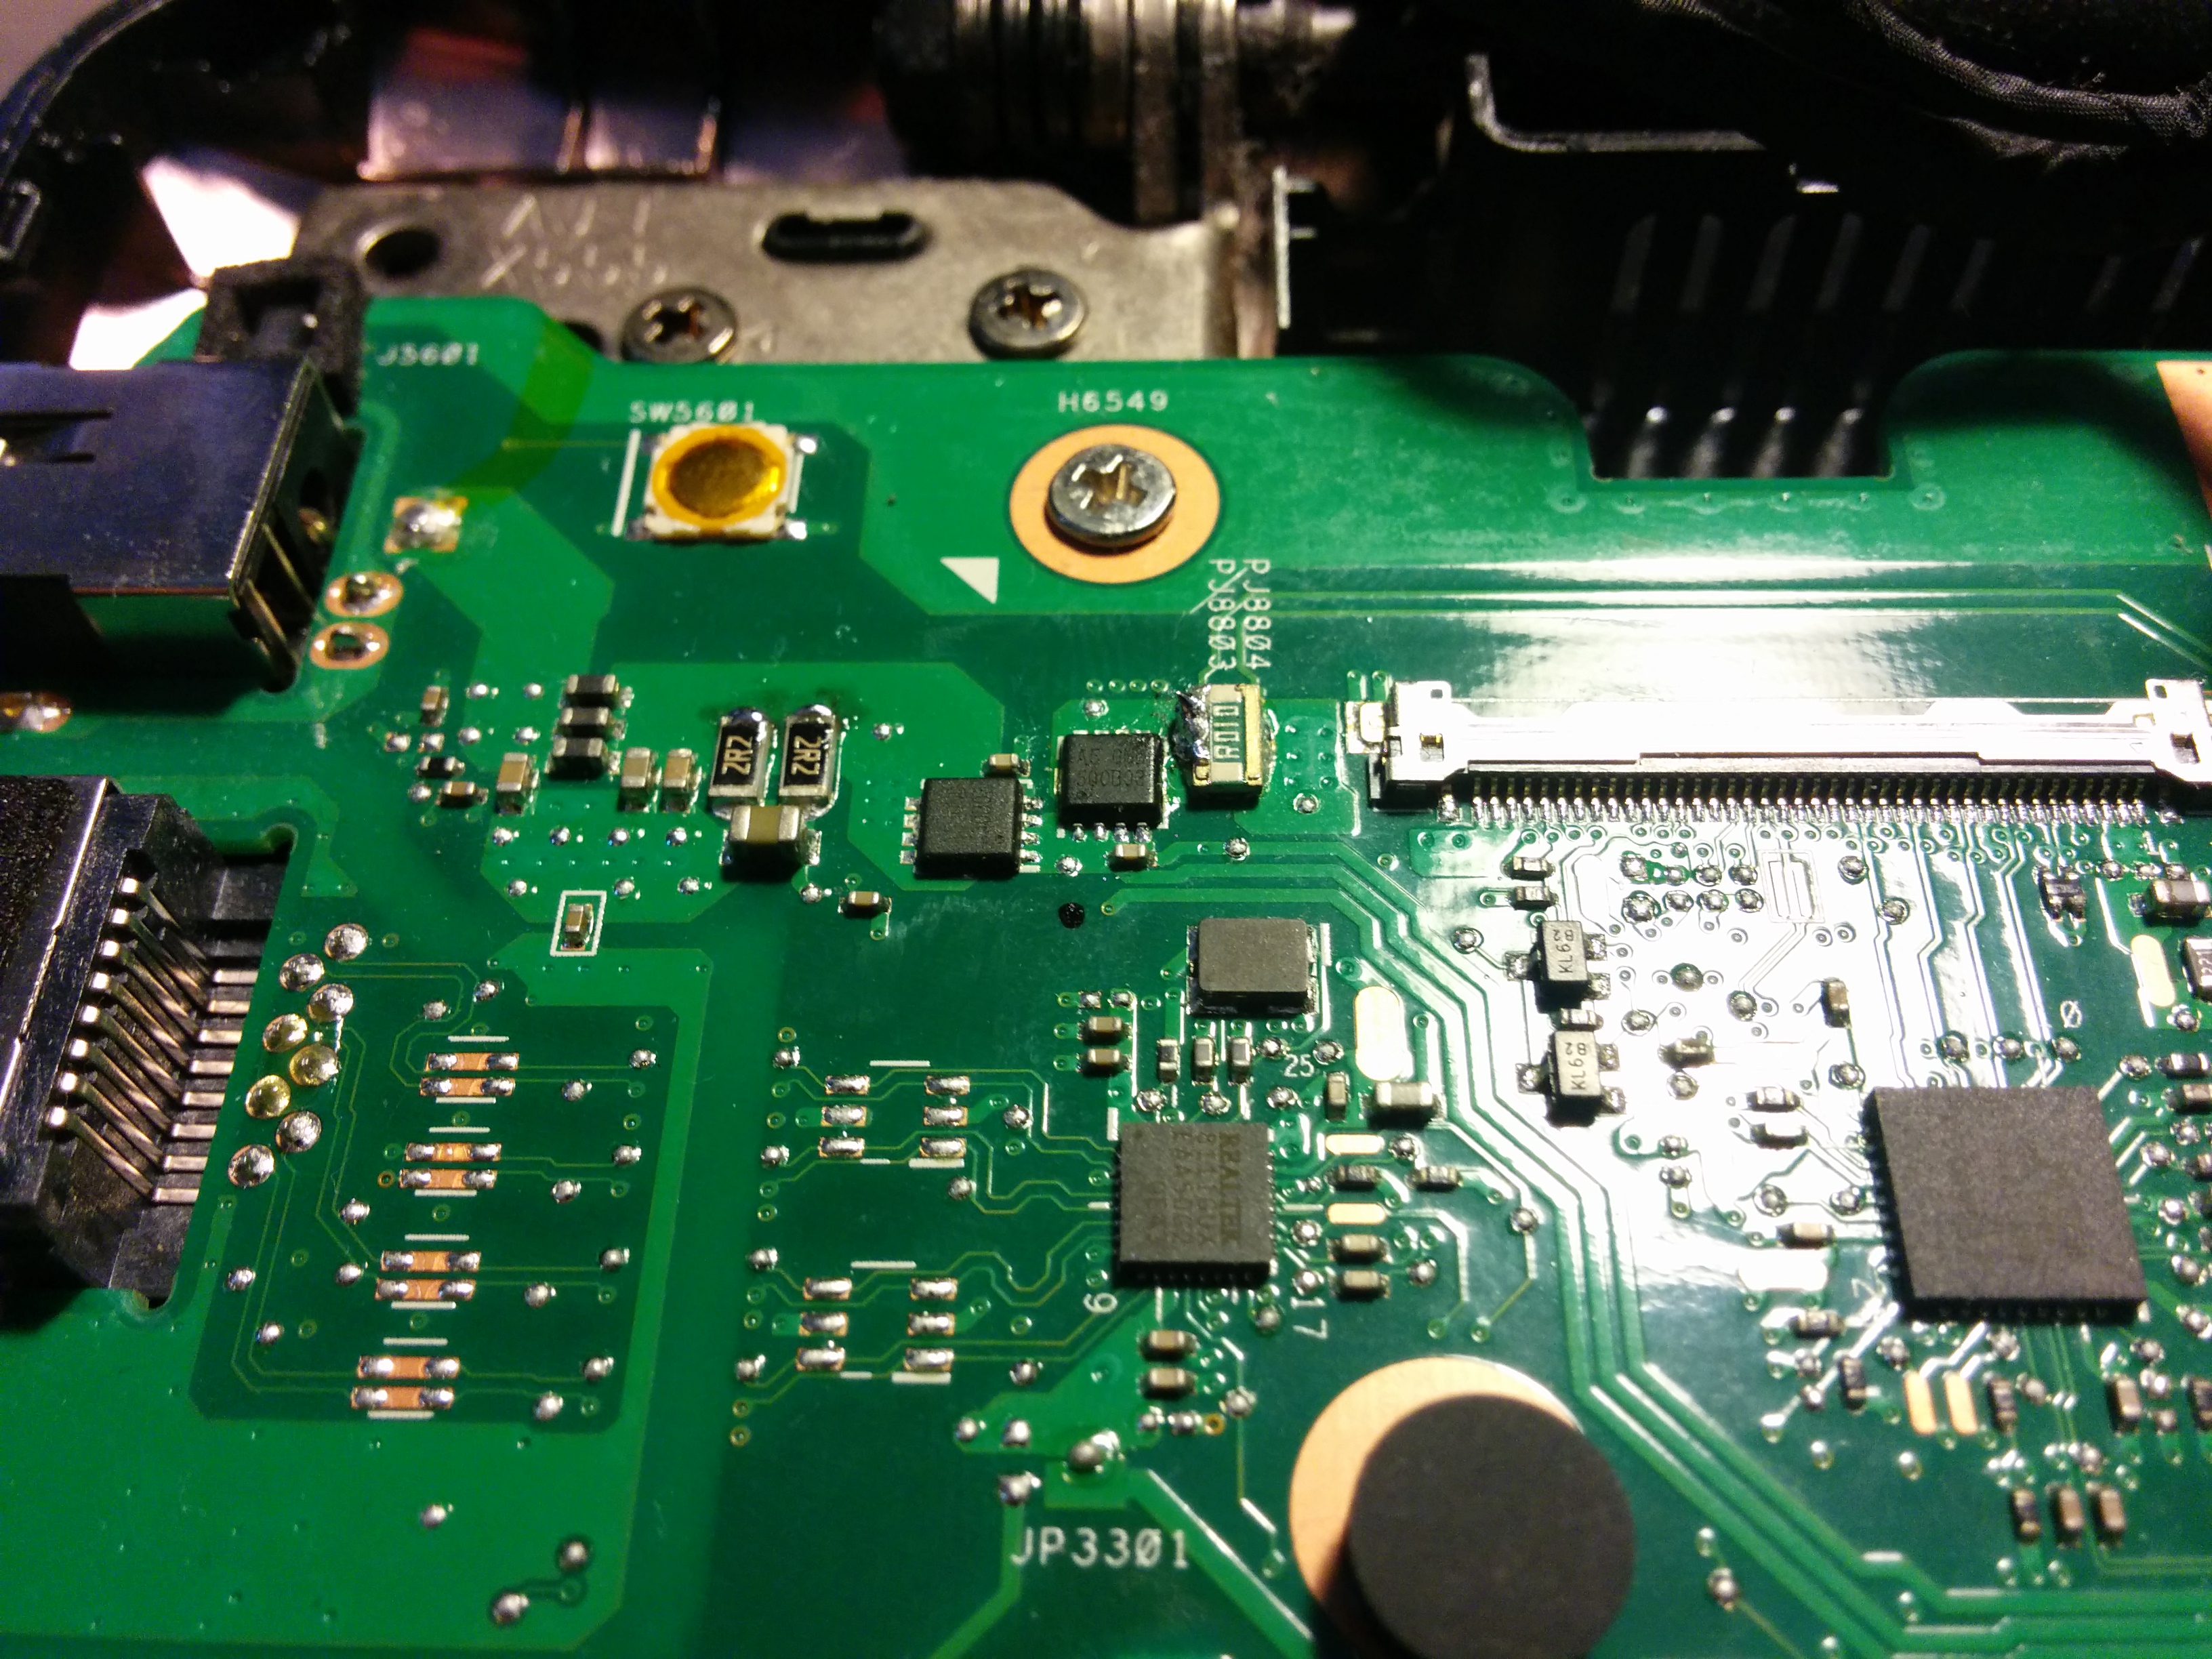
Those little “chips” are labelled as A5GND.
After some googling I found that they are N channel power MOSFETs.
I checked the continuity between drain and source on both of the MOSFETs I found one being completely shorted (blown internal diode?).
Best source of information I could find on them is a thread some obscure Russian notebook repair forum.
Looking on Aliexpress for “A5 GND” results in lots of P2003BEA hits.
Correlating with the forum post above, I found this data sheet for P2003BEA.
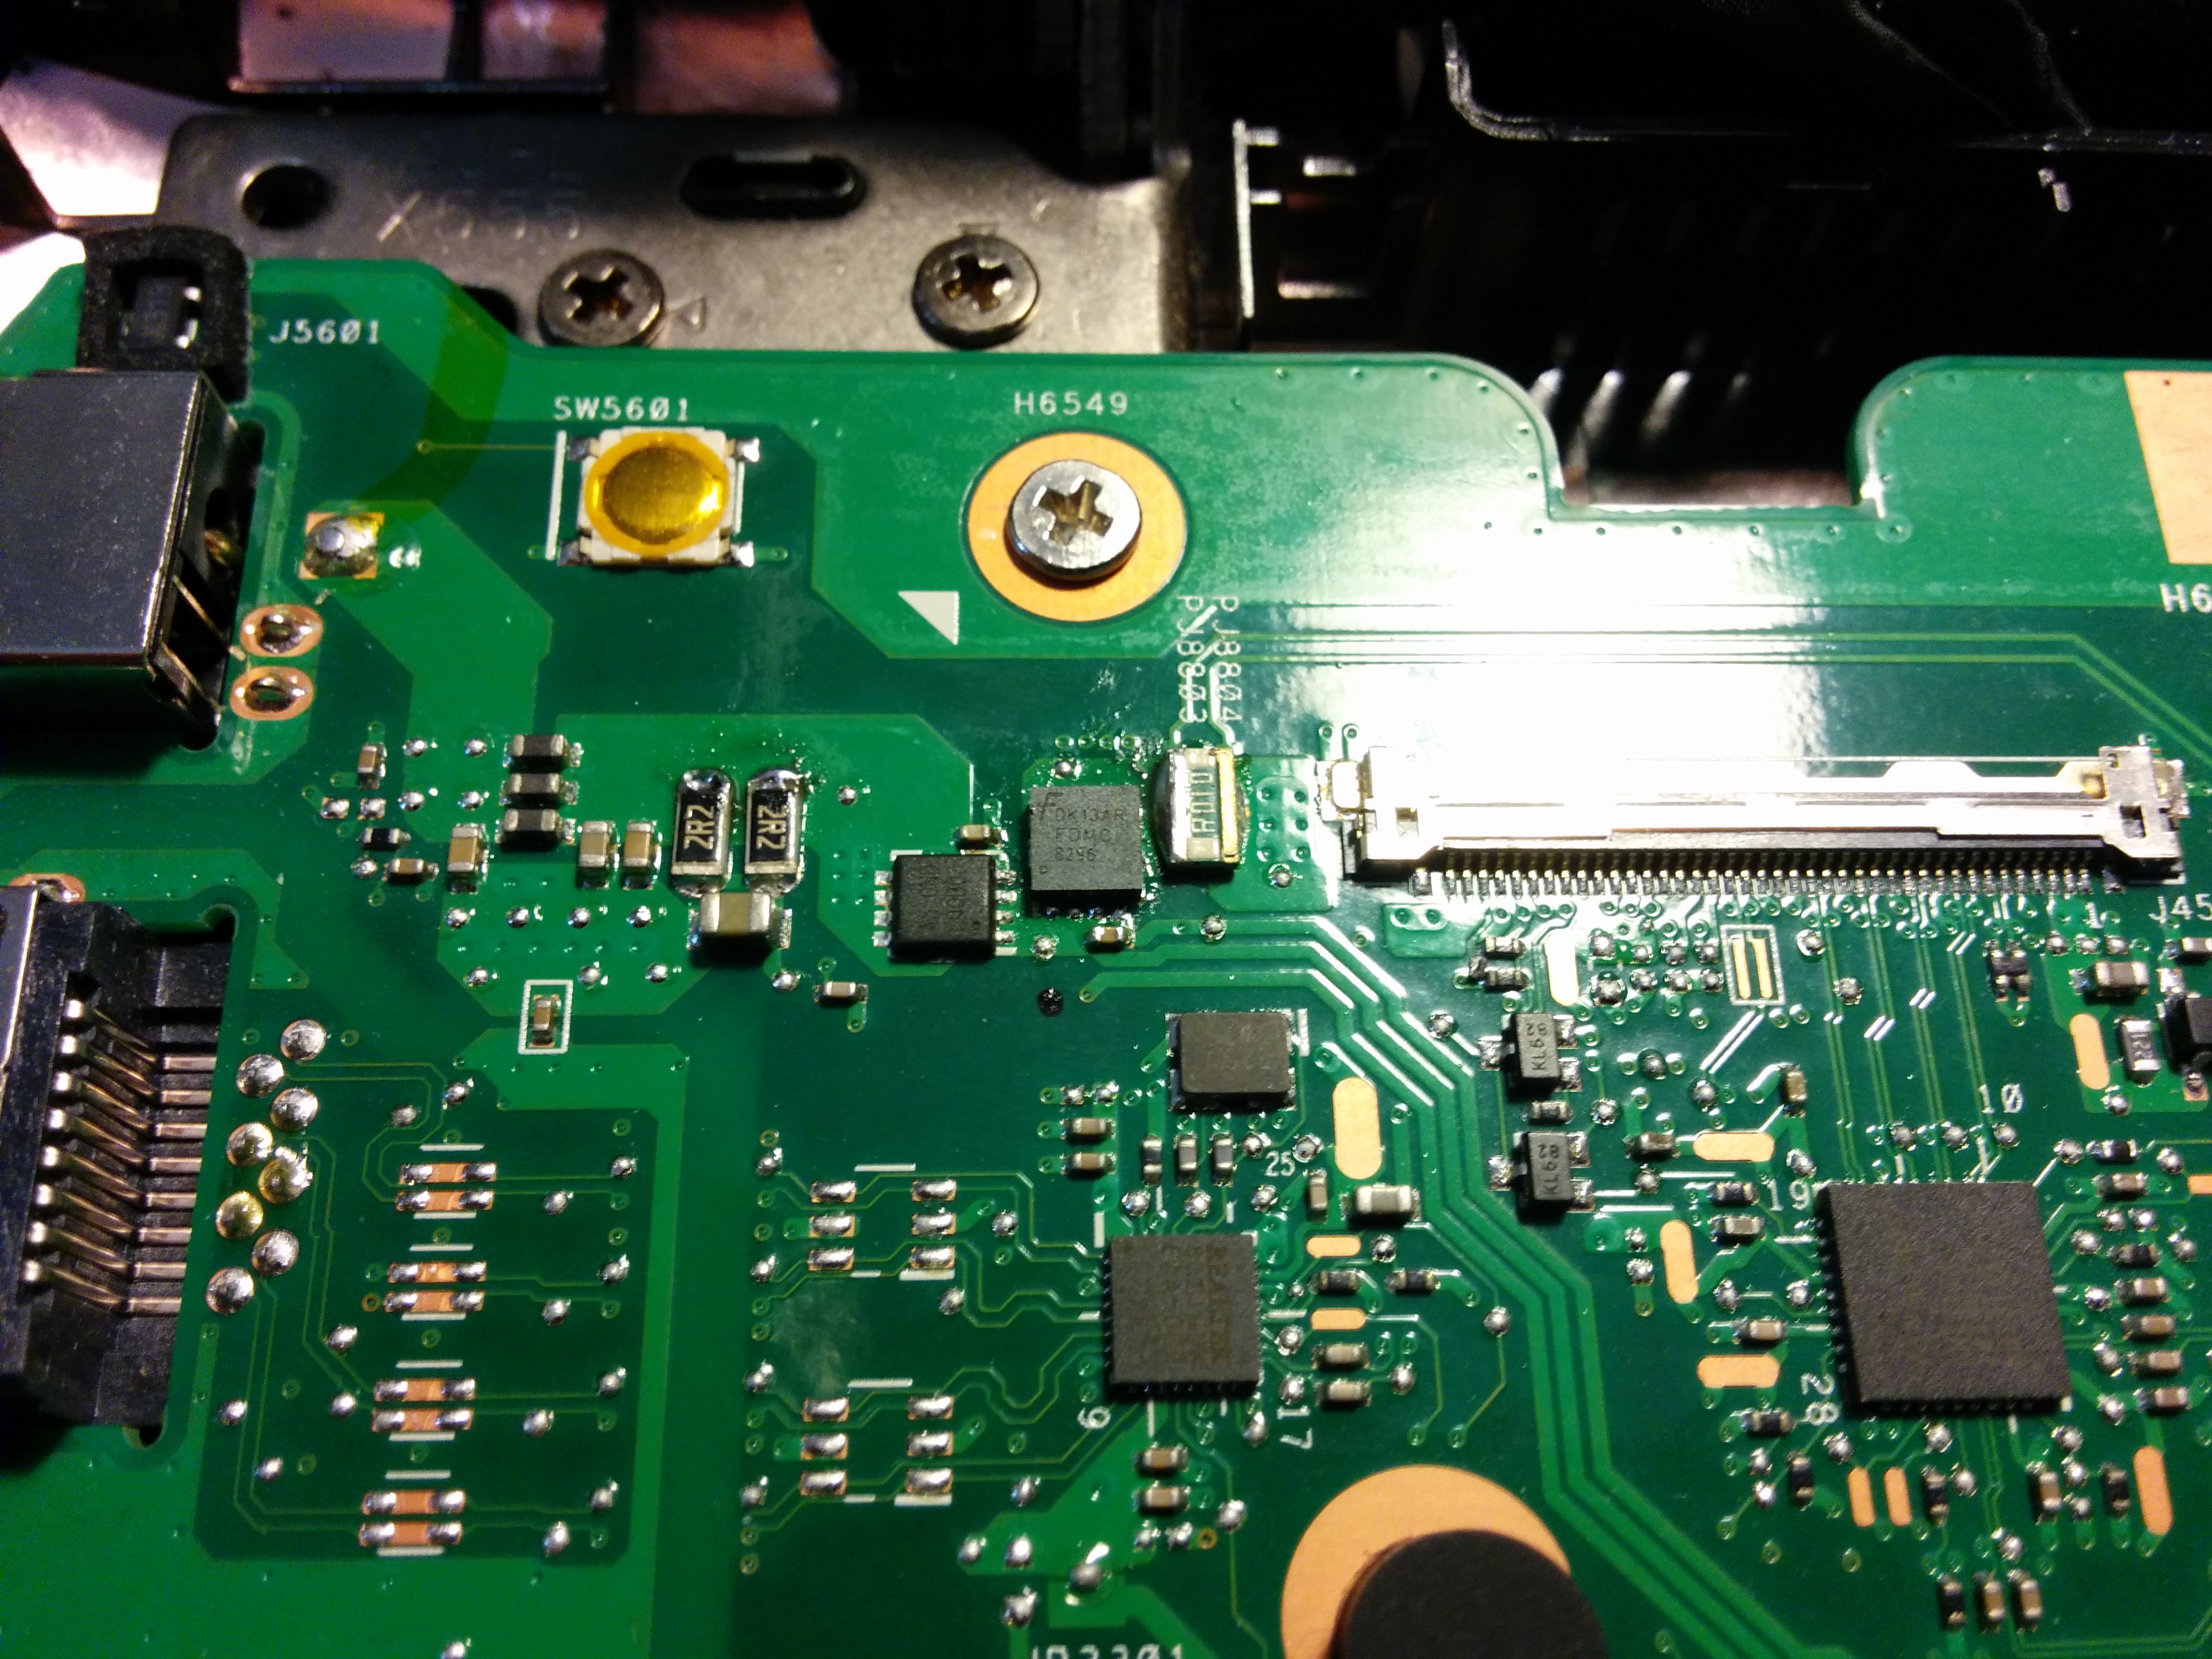
I settled for FDMC8296 as the replacement as it has better rDS and almost double of maximum current while being available through eBay (for about $10).
I was curious what was the purpose of these two MOSFETs, so after convoluted searches, I stumbled upon this document: BQ24735
Simply put those two MOSFETs are power source selector switches (AC, BATT, or both).
To fix the fix (temporarily) I replaced the dodgy wire bridge with more solid bridge (while I was waiting for hot air gun and transistors to arrive):
I bought a cheap ($55NZD) air gun on ebay, as I am not planning to do these fixes very often, model: GONGJUE 8018LCD.

After 3 weeks I received both items: 5x FDMC8296 and a heat gun.
Here is the temporary fix removed and the MOSFET de-soldered:

After removal, I made a solder blob on top of the pad and contacts (to dilute original solder and create new “balls”). The excess was removed with a suction gun.
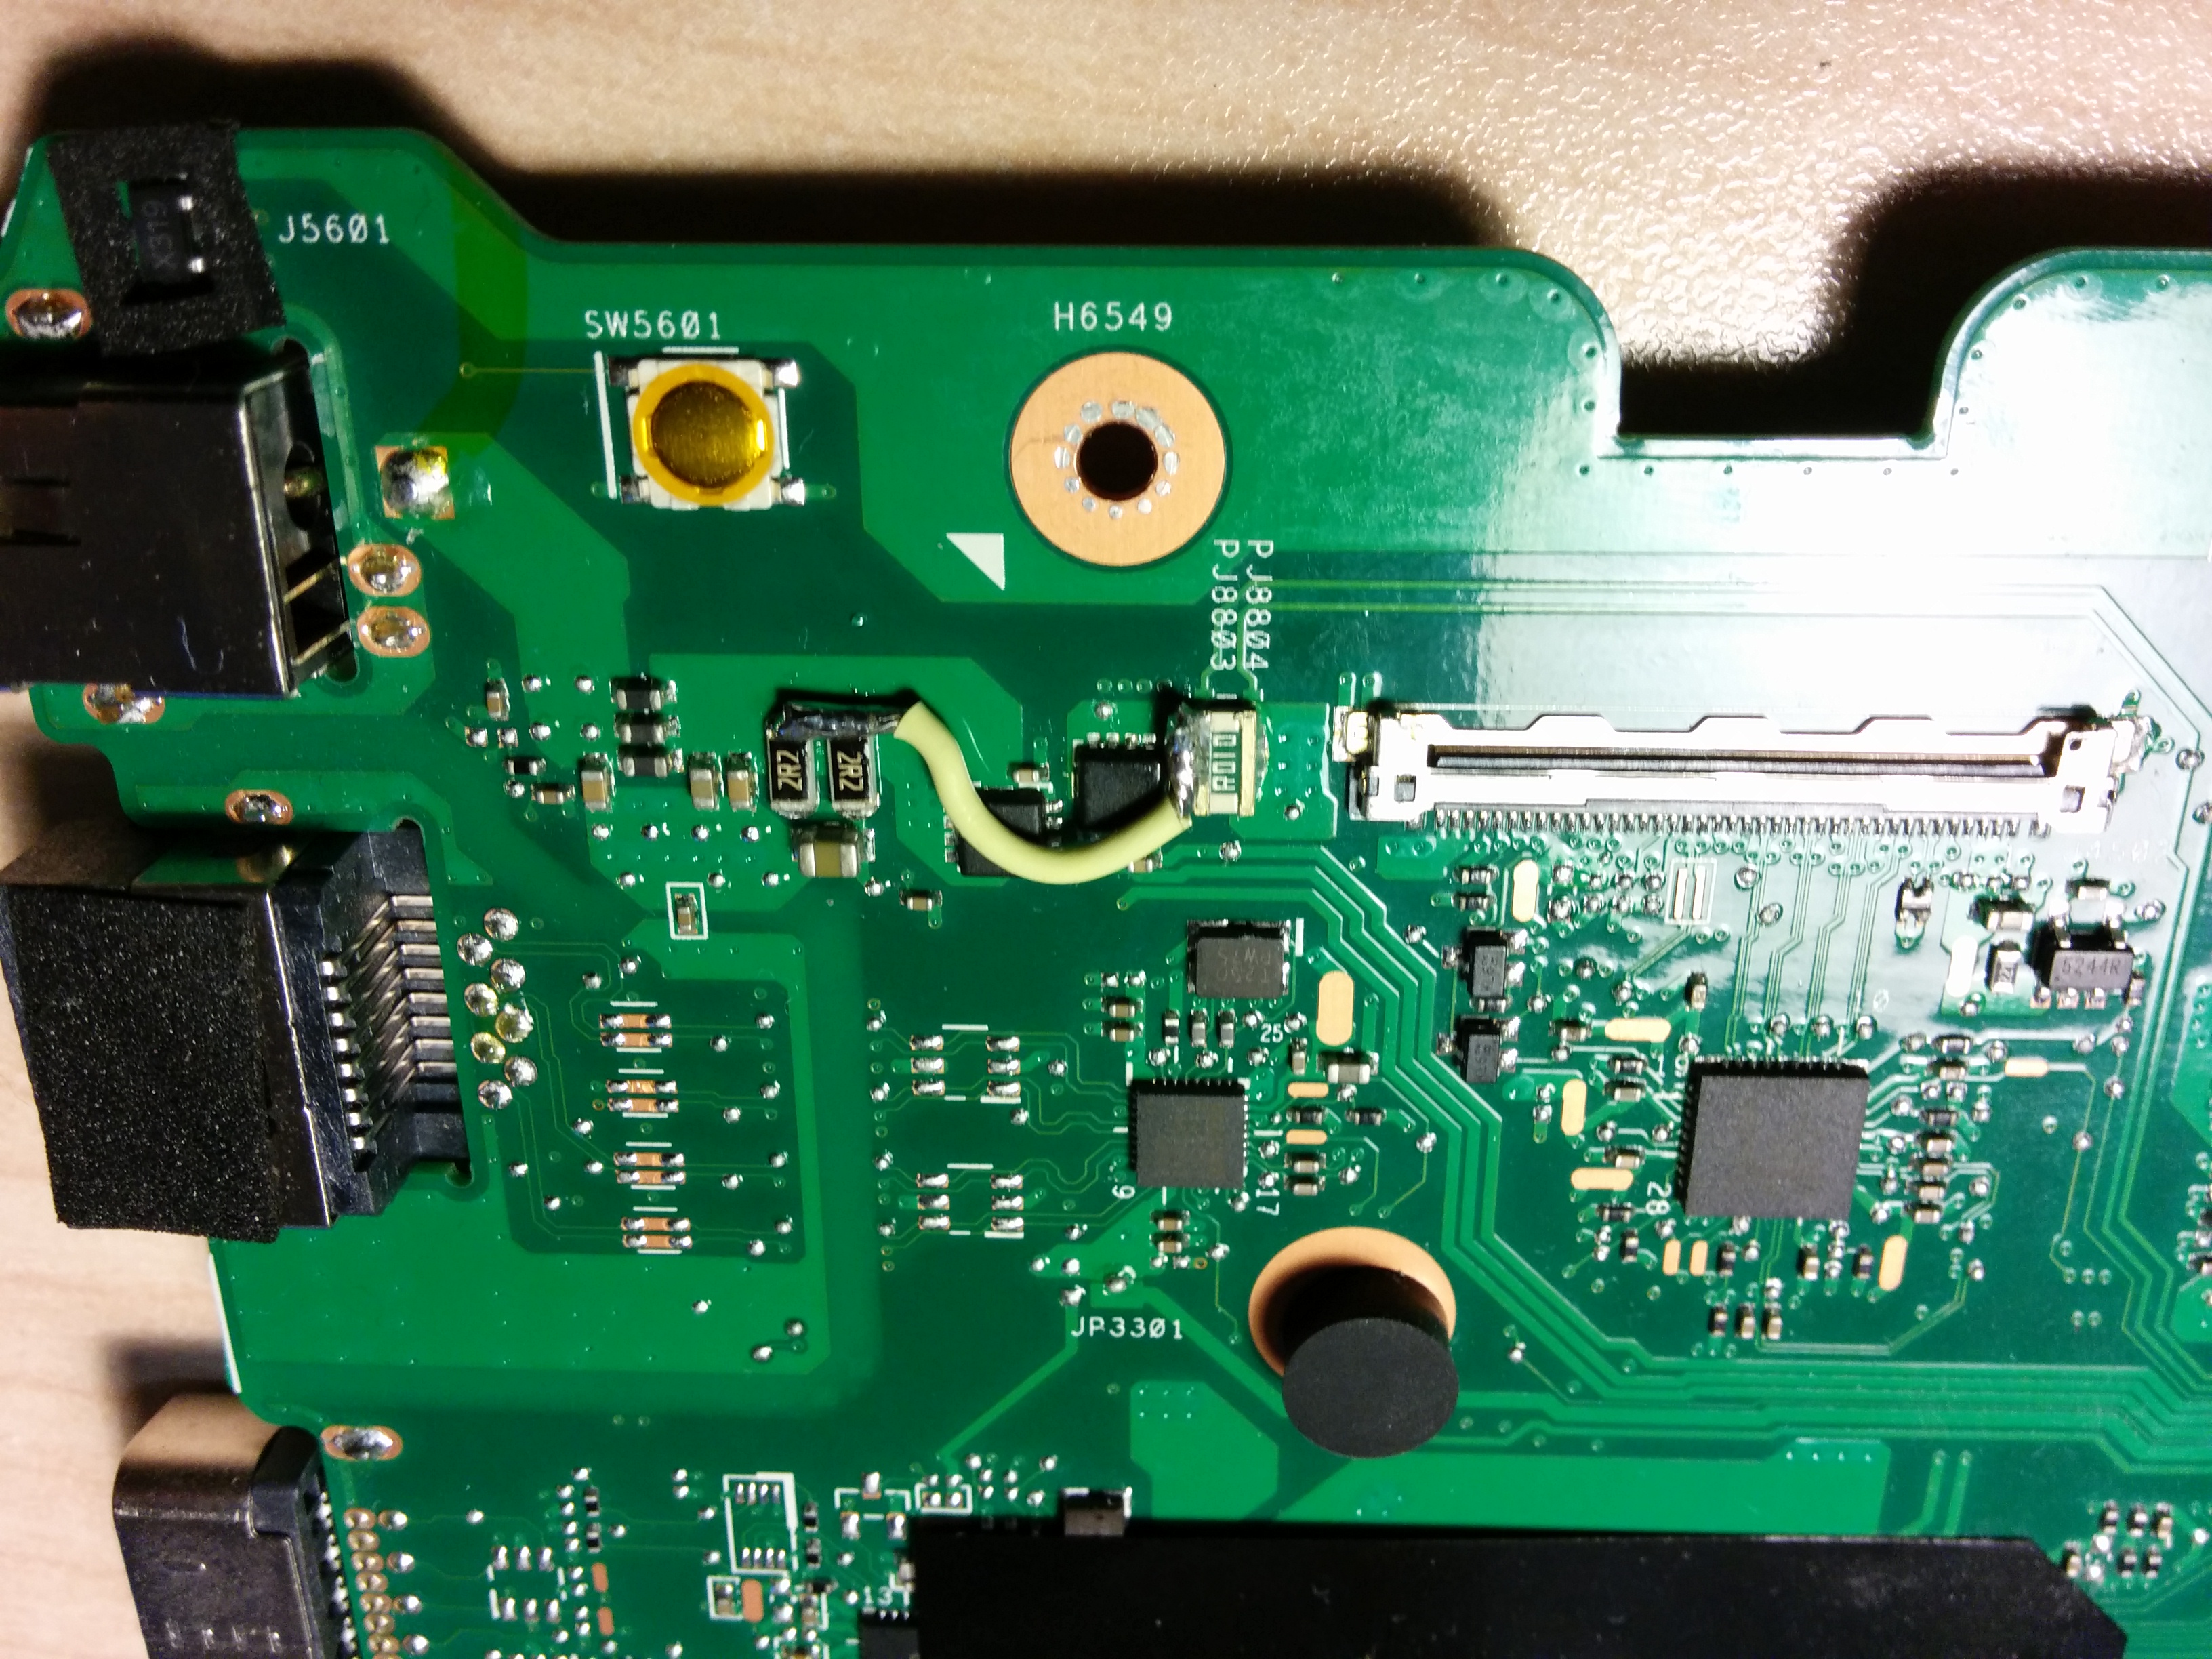
Here is new MOSFET placed (not soldered yet):
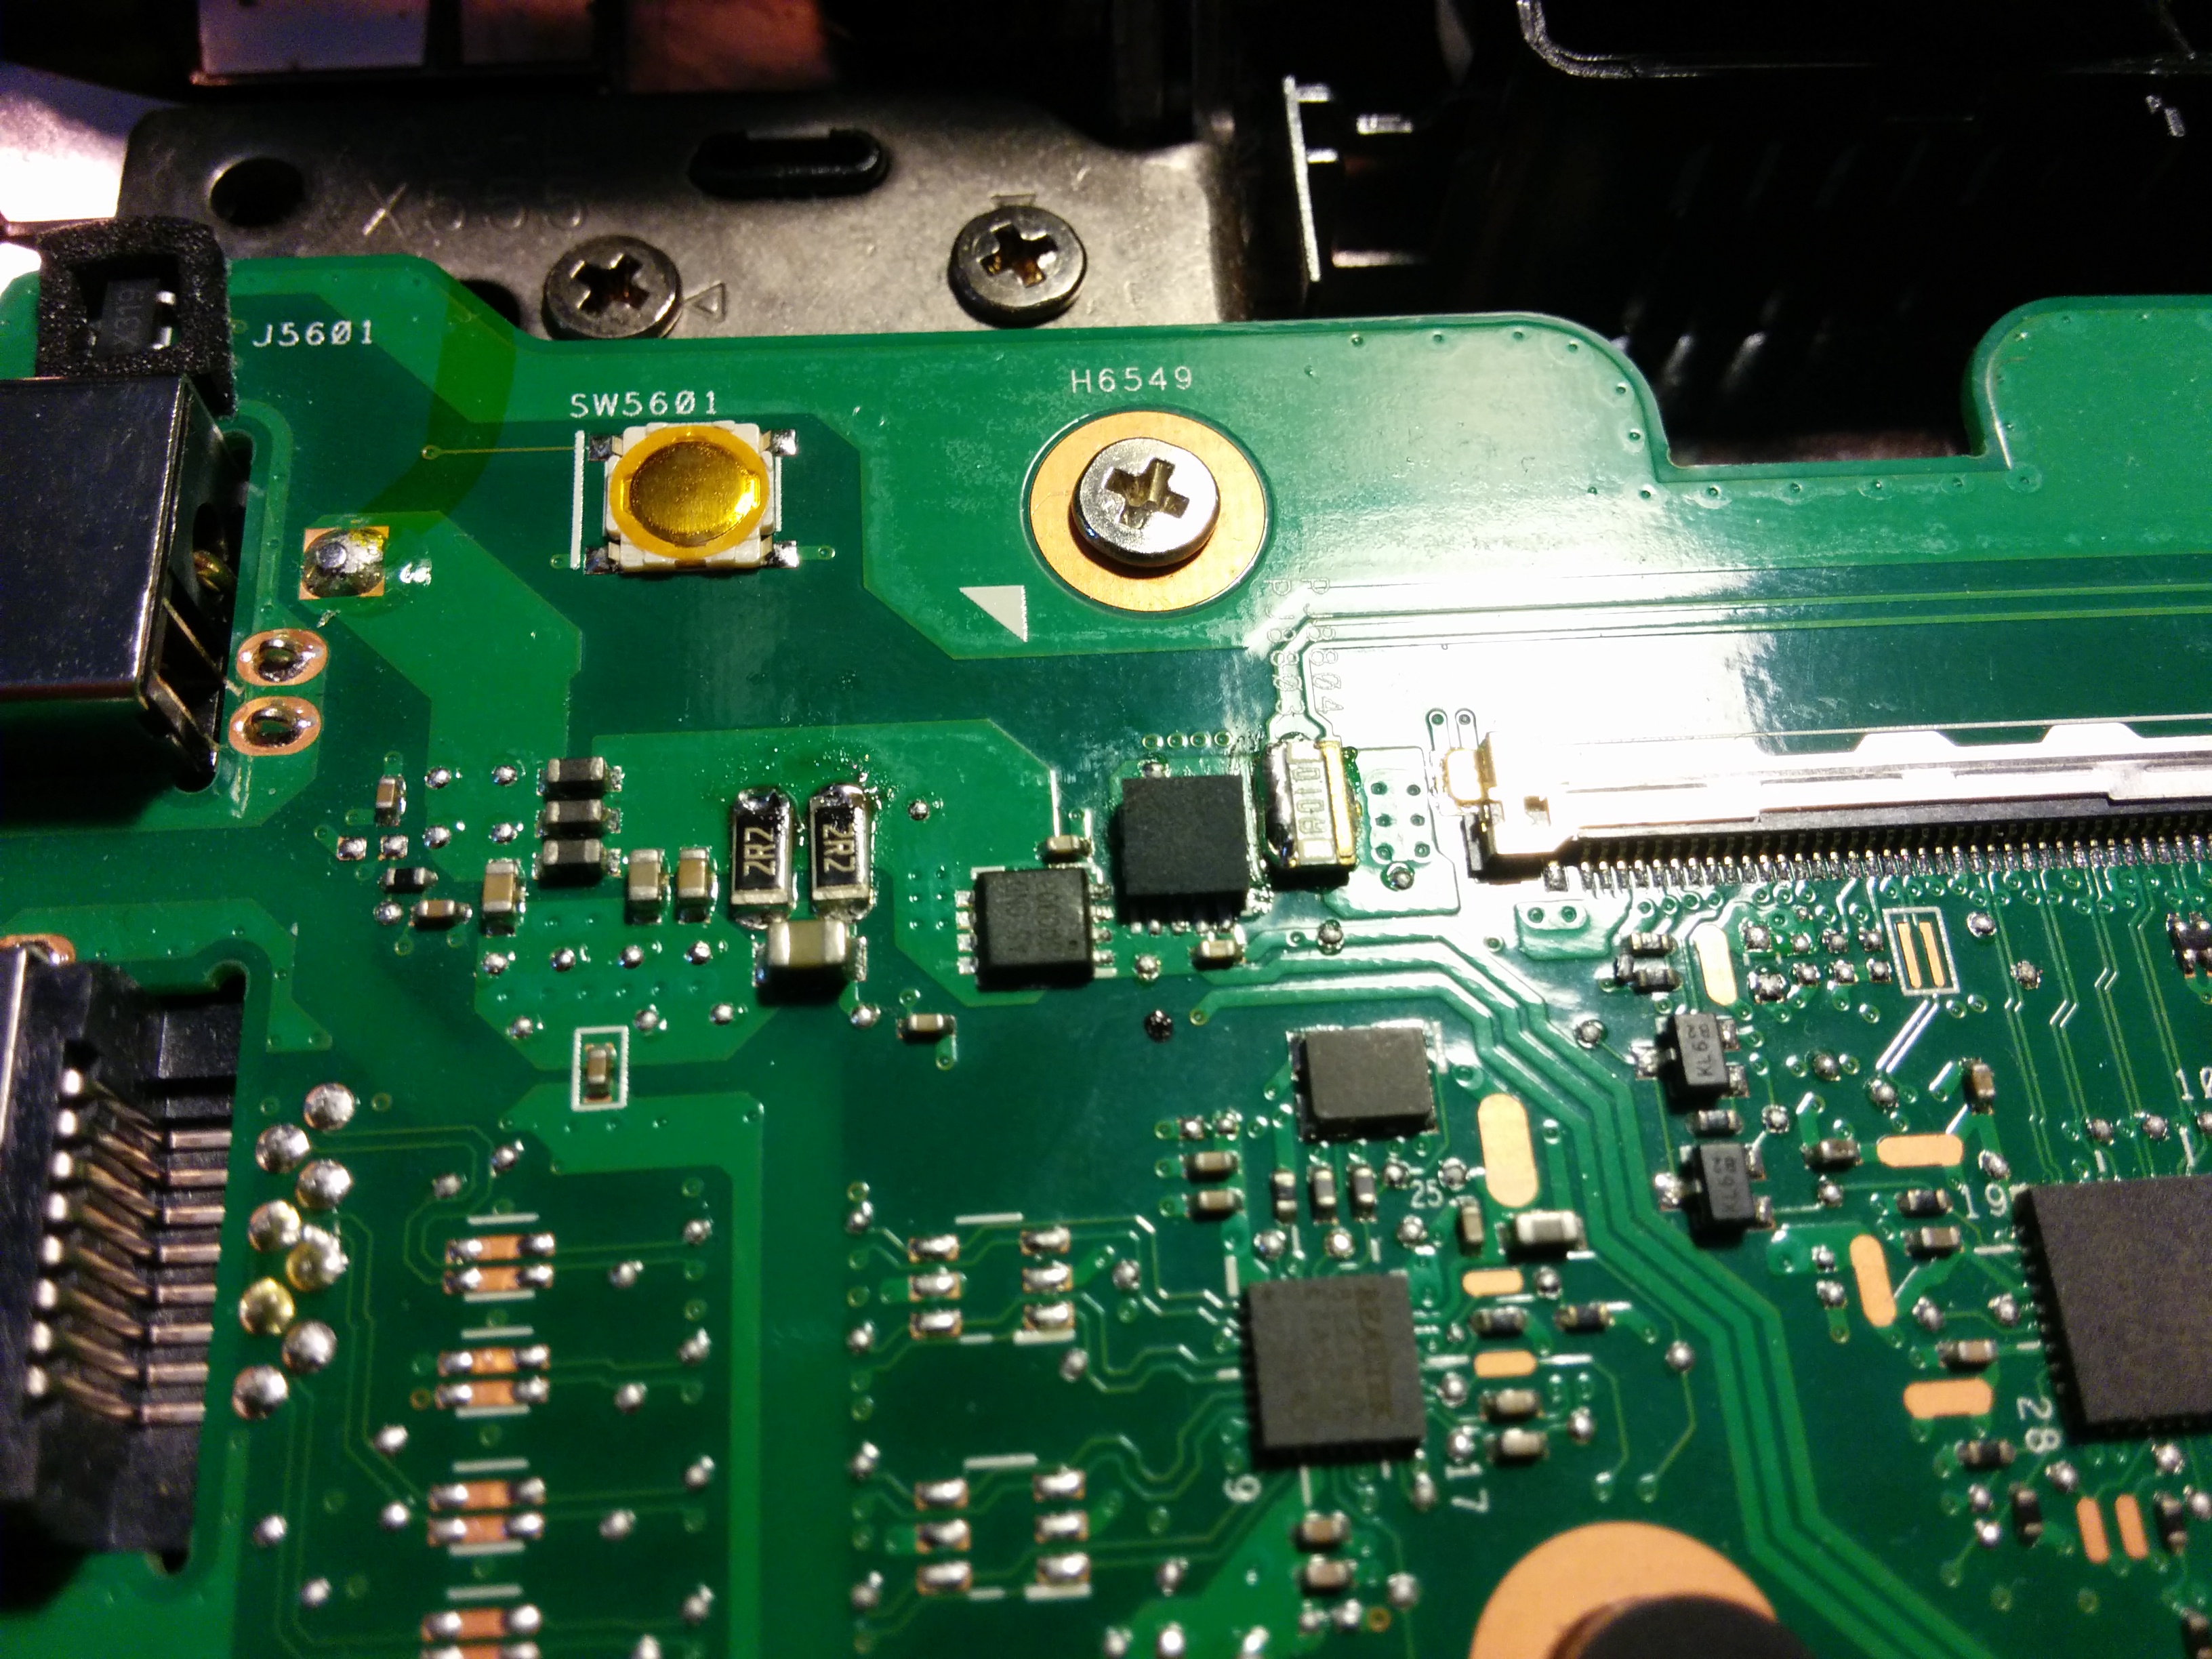
And here it is soldered:
The hot air gun (aka heat gun) was a bit pain in the ass to use: the temperature setting is useless, the smallest attachment is also useless. So I set it to “half” heat, and “3/4” air flow with second smallest attachment, which did the job. The trick was to hold the transistor in place with a screwdriver so it is not blown away. It takes about 10-20 seconds for it to be soldered.
After quick continuity and diode checking I powered up laptop to find it charging the batter. After an hour or so the laptop was operating normally.
On side note I would probably never buy ASUS laptops, as the build quality is shocking.
P.S. for OCD types, yes I cleaned up the resistors that were used for the bridge.
When new disk is added to the Linux virtual machine, sometimes the machine does not detect it.
If you know which SCSI host the disk is added simply issue this command:
echo "- - -" > /sys/class/scsi_host/hostX/scan
Replace ‘hostX’ with appropriate host.
If unsure which SCSI host then quick and dirty way is simply scan all of them:
for host in /sys/class/scsi_host/*; do echo "- - -" > $host/scan; done
To rescan for disk size change do following:
echo 1 > /sys/block/sdX/device/rescan
Where ‘sdX’ is the disk that has been resized.