SJG Forester – tracking down noisy wheel bearings

Our Forester has developed a noise that is similar to a turbo-prop aircraft. This is not the first time it did, as the front bearing have been recently replaced.

Unfortunately this time the noise was not as directional as with the front wheel bearings. The whole cabin was filled with roar above 70km/h, and sometimes it appeared that the noise would come from the front.

Continue reading SJG Forester – tracking down noisy wheel bearings

Testing an engine knock sensor with multimeter and a hammer

No, I am not suggesting to hammer the knock sensor ;).

Recently I was diagnosing a very intermittent error code 52 (knock sensor open/closed circuit) on a 4AFE powered Toyota Corolla.
I needed a way to test the actual functionality of the knock sensor in a garage.

From my understanding a typical knock sensor is pretty much a condenser microphone. So measuring resistance of it pretty much meaningless beyond finding a completely stuffed one. The repair manual suggest that the resistance of one should be above 1 MOhm, as it should be, as it is a capacitor.

One requirement for this kind of crude testing is having a multimeter that does capacitance testing in the nF range.

The particular knock sensor I was testing measured at about 6-7nF (temperature dependant) sensor alone, or ~7.5nF with the wiring.

The test is very simple, I have unplugged the sensor from the ECU, plugged one probe form the multimeter (set to Capacitance range) to the pin for the knock sensor on the ECU plug, and another on chassis/earth/ground. Then I knocked on a random bolt on the engine block and watch the measurment:

This resulted an increase of the capacitance for each knock (to over 8nF).

Another test that is not on the video, is basically using rattle gun on a bolt. This produced over 1.5nF increase.

I have also tested the sensor outside in a vice while heating it up with heat gun to 120 degrees C. The capacitance increased by ~2nF during heating. The sensor responding in similar way as above to light knocks on the vice anvil.

Alternative and more sophisticated way of testing is hooking up sensor to the microphone input on a cellphone/Laptop/PC but that would involve butchering a 3.5mm jack.

Modifying rear fog light into a functional second set of stop and park lights on a Forester SJG

For some silly reason a JDM Forester XT (SJG) comes with a single rear fog light on right side (and a dummy on left side).

I am amazed that these rear fog lights are not disabled during compliance. They are useless, annoying and illegal in NZ.
Too many times I was stuck behind an oblivious BMW driver in rain only to be blinded by their rear fog lights.
In my opinion these people who drive with rear fog lights should be fined.

So, the rear fog light got to go.

Continue reading Modifying rear fog light into a functional second set of stop and park lights on a Forester SJG

Beware of fake Philips HID Bulbs!

I decided to replace the 6300k HID bulbs on one of my cars, with more sensible 4300k OEM solution.

I came across reasonably priced Toyota Genuine Bulbs on trademe.co.nz (NZ ebay type of thing).

The particular bulbs I was after were D4R, or Toyota Genuine Part 90981-20015 (alternatively Philips 42406).

They were priced (~$80NZD) similar to Genuine Philips 42406 in USA (~$50USD), so seemed to be reasonable. The Toyota Genuine are after all Philips 42406 in TGP box.

When I tried to fit the bulbs I noticed they were extremely tight. Then I looked closely and did some googling.

Continue reading Beware of fake Philips HID Bulbs!

Replacing timing chain tensioner on a 1NZFE

Since day one of our ownership of this particular 1NZFE powered Toyota IST the engine was a bit on louder side.
Previously all my other cars had timing belts and I put it down to simply being a “feature” of chain.
After more family and friends upgraded their cars to xNZFE, it was clear that this engine was slightly louder in chain department then the rest (especially in the mornings).

One day after coming back from a holiday I started the car only to be greeted by loud chain slapping noise.

OMG! My wife’s car turned into a Nissan!

I decided to exorcise the Nissan out of it by replacing the chain tensioner and guides.

Below is how I did it, not necessary the “correct” way. This process took about 6 hours, good chunk of it was spent on cleaning the surfaces.
It was pretty much like replacing timing belt, except with way more RTV.
Over all I replaced two oil pump O-rings, front crank seal, valve cover gasket, both chain guides and chain tensioner.

In retrospect I prefer timing belts as opposed to timing chains, especially considering that the tensioners still fail on chains occasionally.

Interesting notes:

  • Old guides were PA66, new guides are PA46 (improved)
  • Old tensioner had larger oil hole than the new tensioner.
  • In hand old tensioner functioned correctly, but while fitted it would skip.
  • For some reason Toyota decided it is great idea to incorporate water pump flange into front cover. This creates a potential of RTV failure and leakage of coolant into sump. It also requires pump removal when removing front cover. It would saved me 2 hours if the pump was not part of the front cover.
  • The oil pump is mounted on front cover, thus requiring two O-rings for inlet and outlet.
  • One of those O-ring was completely flat, possibly leaking oil. It is hard to tell if the O-rings seated properly when fitting the cover.
  • For the crank pulley Toyota gone away from woodruff key in favour of tiny hollow pin.
  • The 10mm cover bolts and water pump bolts torqued at 11Nm. The 12mm cover nut and bolts torqued at 24Nm. The crank pulley went in hella-tight with crappy rattle gun and on top with some hammer on spanner action (It should be 128Nm). The tensioner and guides bolts are torqued to 9Nm.
  • I used Threebond grey RTV. The manual specified two kinds of RTVs for water pump and the rest of the cover, good luck buying two Toyota genuine RTV tubes ;).

Slack Before and After:

Continue reading Replacing timing chain tensioner on a 1NZFE

Toyota Vitz RS and its disappointing throttle response

Recently we got a nice 2005 Toyota Vitz RS (NCP91) with a manual transmission.

It is great car in all aspects except power delivery and throttle response is pathetic.

We already have 1NZ-FE powered car in the family – Toyota IST and unlike the Vitz RS it is not that pathetic (in fact it is kind of fun to drive).
Yes, I have driven multiple Vitz RS and they were all asthmatic.
So what is so different between IST and RS? IST happens to have cable driven throttle, while RS has drive-by-wire.

Here is where Toyota screwed up and completely ruined the car: they made throttle map to emulate steam roller.

If I was Toyota I would not stick RS badge on the car, it is not a hot hatch simply because it lacks in engine department. Vitz RS should have came out with 1ZZFE at least.
What is even worse they decided to stick this anaemic throttle map on top. As if the car was not boring enough.

After consulting google and various forums I had two minor mod options:

1) Stick a throttle controller
2) Stick a throttle body off 1ZZFE.

I decided to go for second option as it is transparent from end user point of view. There are a few minor hurdles with this mod.

Continue reading Toyota Vitz RS and its disappointing throttle response

Mysterious clicking noise inside dash of a Toyota Ist

Do you have annoying clicking (similar to seeking CD player) sound coming from inside of your Toyota dash, sometimes only happening at set heater temperature setting? It could be “indecisive” heater control servo.

Below is how I fixed the noise in a Toyota Ist (hint: it is was a problem with sliding contacts inside of the servo).
Continue reading Mysterious clicking noise inside dash of a Toyota Ist

JDM GRB STI: Rear diffrential – which type?

After conflicting information on the net I finally purchased el-cheapo endoscope camera and took some snaps of the differential.

Pictures are crap but enough to confirm that the diff is Torsen:

GRB_Diff00

GRB_Diff01

What you see is the helical gear shafts (I also confirmed that by spinning the wheel and observed the shafts spinning).
If it was clutch type it would had clutches, shims and cam mechanism visible instead.

In conclusion at least my JDM GRB STI came with Torsen (and it does not look like it was after market installation as all the bolts and seals are pristine).

Replacing Transmission and Differential oil in GRB WRX STI

The oil:
For gearbox/front diff and rear diff I use Motul Gear 300:
IMG_20150919_102308

Oil Volume:

  • Gearbox and front diff: 4.1L
  • Rear diff: 1.1L

Requires 6L to purchase (or 4L can + left overs from last time), about $250 NZD for Motul Gear 300.

Before start make sure that car sits on four axle stands, and is levelled.
It is good idea to replace all the drain plug washers at same time.


Rear differential:

Relatively easy job.
Tools required:

  • Jack
  • 4x axle stands
  • 17mm socket
  • 19mm deep socket or 22mm deep socket
  • Hand pump or syringe like device

Assuming the car is already on axle stands and levelled…

To drain oil:

Remove drain plug (17mm bolt on the bottom).
Here is both drain plug and temperature sensor removed (used later for filling).
IMG_20150919_101334

Here are plug and the sensor:
IMG_20150919_101358

To fill oil:

Remove either 22mm nut with the sensor or sensor itself (19mm deep socket). I didn’t had 22mm deep socket so I removed the sensor. It is better to remove 22mm nut with the sensor as it is easy to over-tighten the sensor itself.
plug the drain hole and pump in the oil via temperature sensor hole, until it starts overflowing.
Remove the hose and let the excess oil drain.
IMG_20150919_102637

Torque settings I use (found on internet):

  • 50Nm drain plug
  • 50Nm 22mm sensor nut
  • 10-20Nm??? sensor (not very tight!)


Gearbox and Front differential

A little bit harder job than rear diff…

Tools required:

  • T70 Torx bit (cannot do without it).
  • H10 Hex bit
  • 12mm socket
  • flat screw driver or some other device to remove clips (finger nails?)

Hand pump or syringe like device

Assuming the car is already on axle stands and levelled..

Remove the plastic guard (few clips and 2 12mm bolts at the front).
IMG_20150919_101709
Although it is possible to change oil without removal (there is an inspection window), I removed the guard as it made easier to do so.

To drain oil:

There are two drain plugs, one for front diff (T70) and another for gearbox itself (H10):
IMG_20150919_105208
Both of the drain plugs have to be removed.

Here are all plugs removed:
IMG_20150919_110004

To fill oil:

Tighten both of the drain bolts.

Torque settings:

  • T70 Plug 70Nm
  • H10 Plug 50Nm

Unlike previous STIs the GRB STI does not have dipstick. Some might think this makes it worse, I think otherwise, as I don’t have to remove inter-cooler to change gear oil. To get correct amount of oil one must fill through side filler plug while the vehicle is levelled.
Here is the said filler plug (H10):
IMG_20150919_102121

Using hand pump (or otherwise), oil is filled until it overflows through the filler hole:
IMG_20150919_111400

another angle:
IMG_20150919_111346

Once oil is overflowing remove filler tube and allow it to drain.
Tighten the filler plug to 50Nm.

Bolt/Clip on the plastic guard.

Toyota CVT oil change

Changing transmission oil should be a simple process, but in case of Toyota CVT (2004 Toyota Vitz RS in this particular case) it is not very simple.

Yes, the drain plug is not really a drain plug.
Yes, the sump has to come out, and new gasket is needed.*

* Except I believe there is another way (quick and lazy) as the oil can be sucked out via the filler plug given the tube is rigid enough. I haven’t tried this method. It is lazy because you don’t inspect and clean the magnets, and you cannot tell the condition of the transmission beyond the oil condition.

Here you will find how I changed it (not necessarily 100% “by the book”, just applied common sense with some googling).
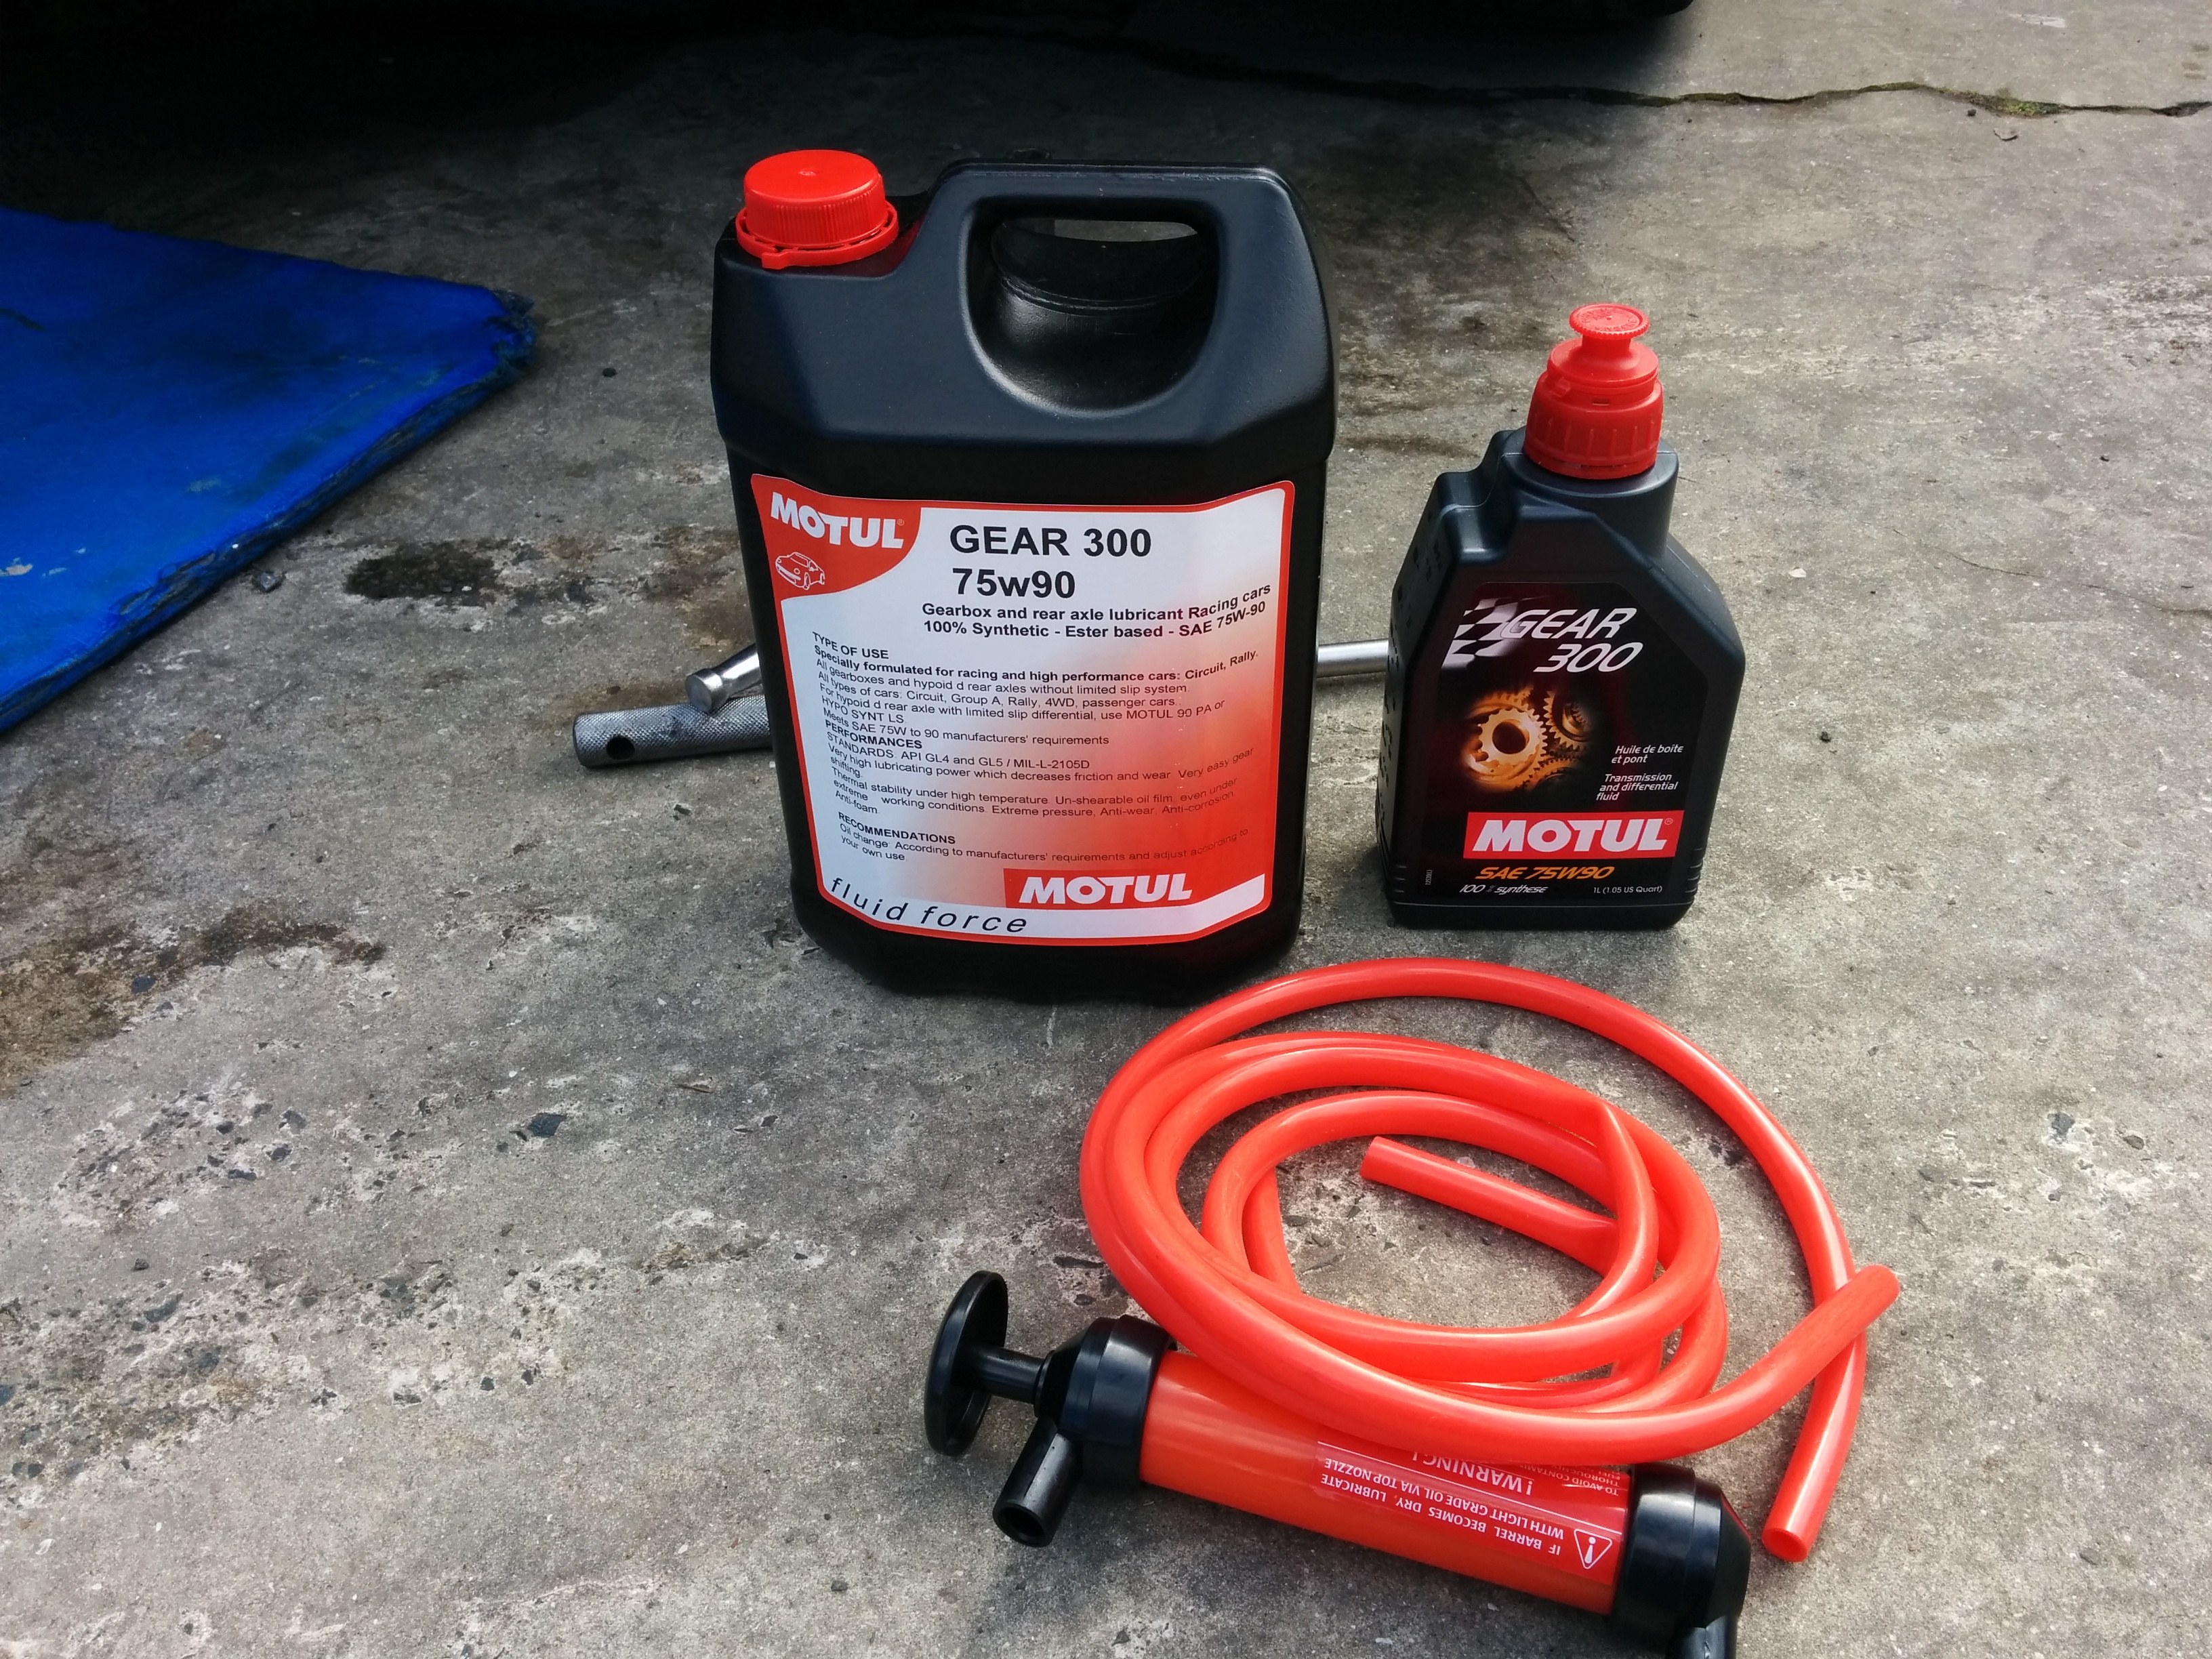
What is needed:

  • Jack
  • Axle stands
  • Oil tray
  • Funnel
  • ~12mm diameter, ~1m long hose (to attach to said funnel)
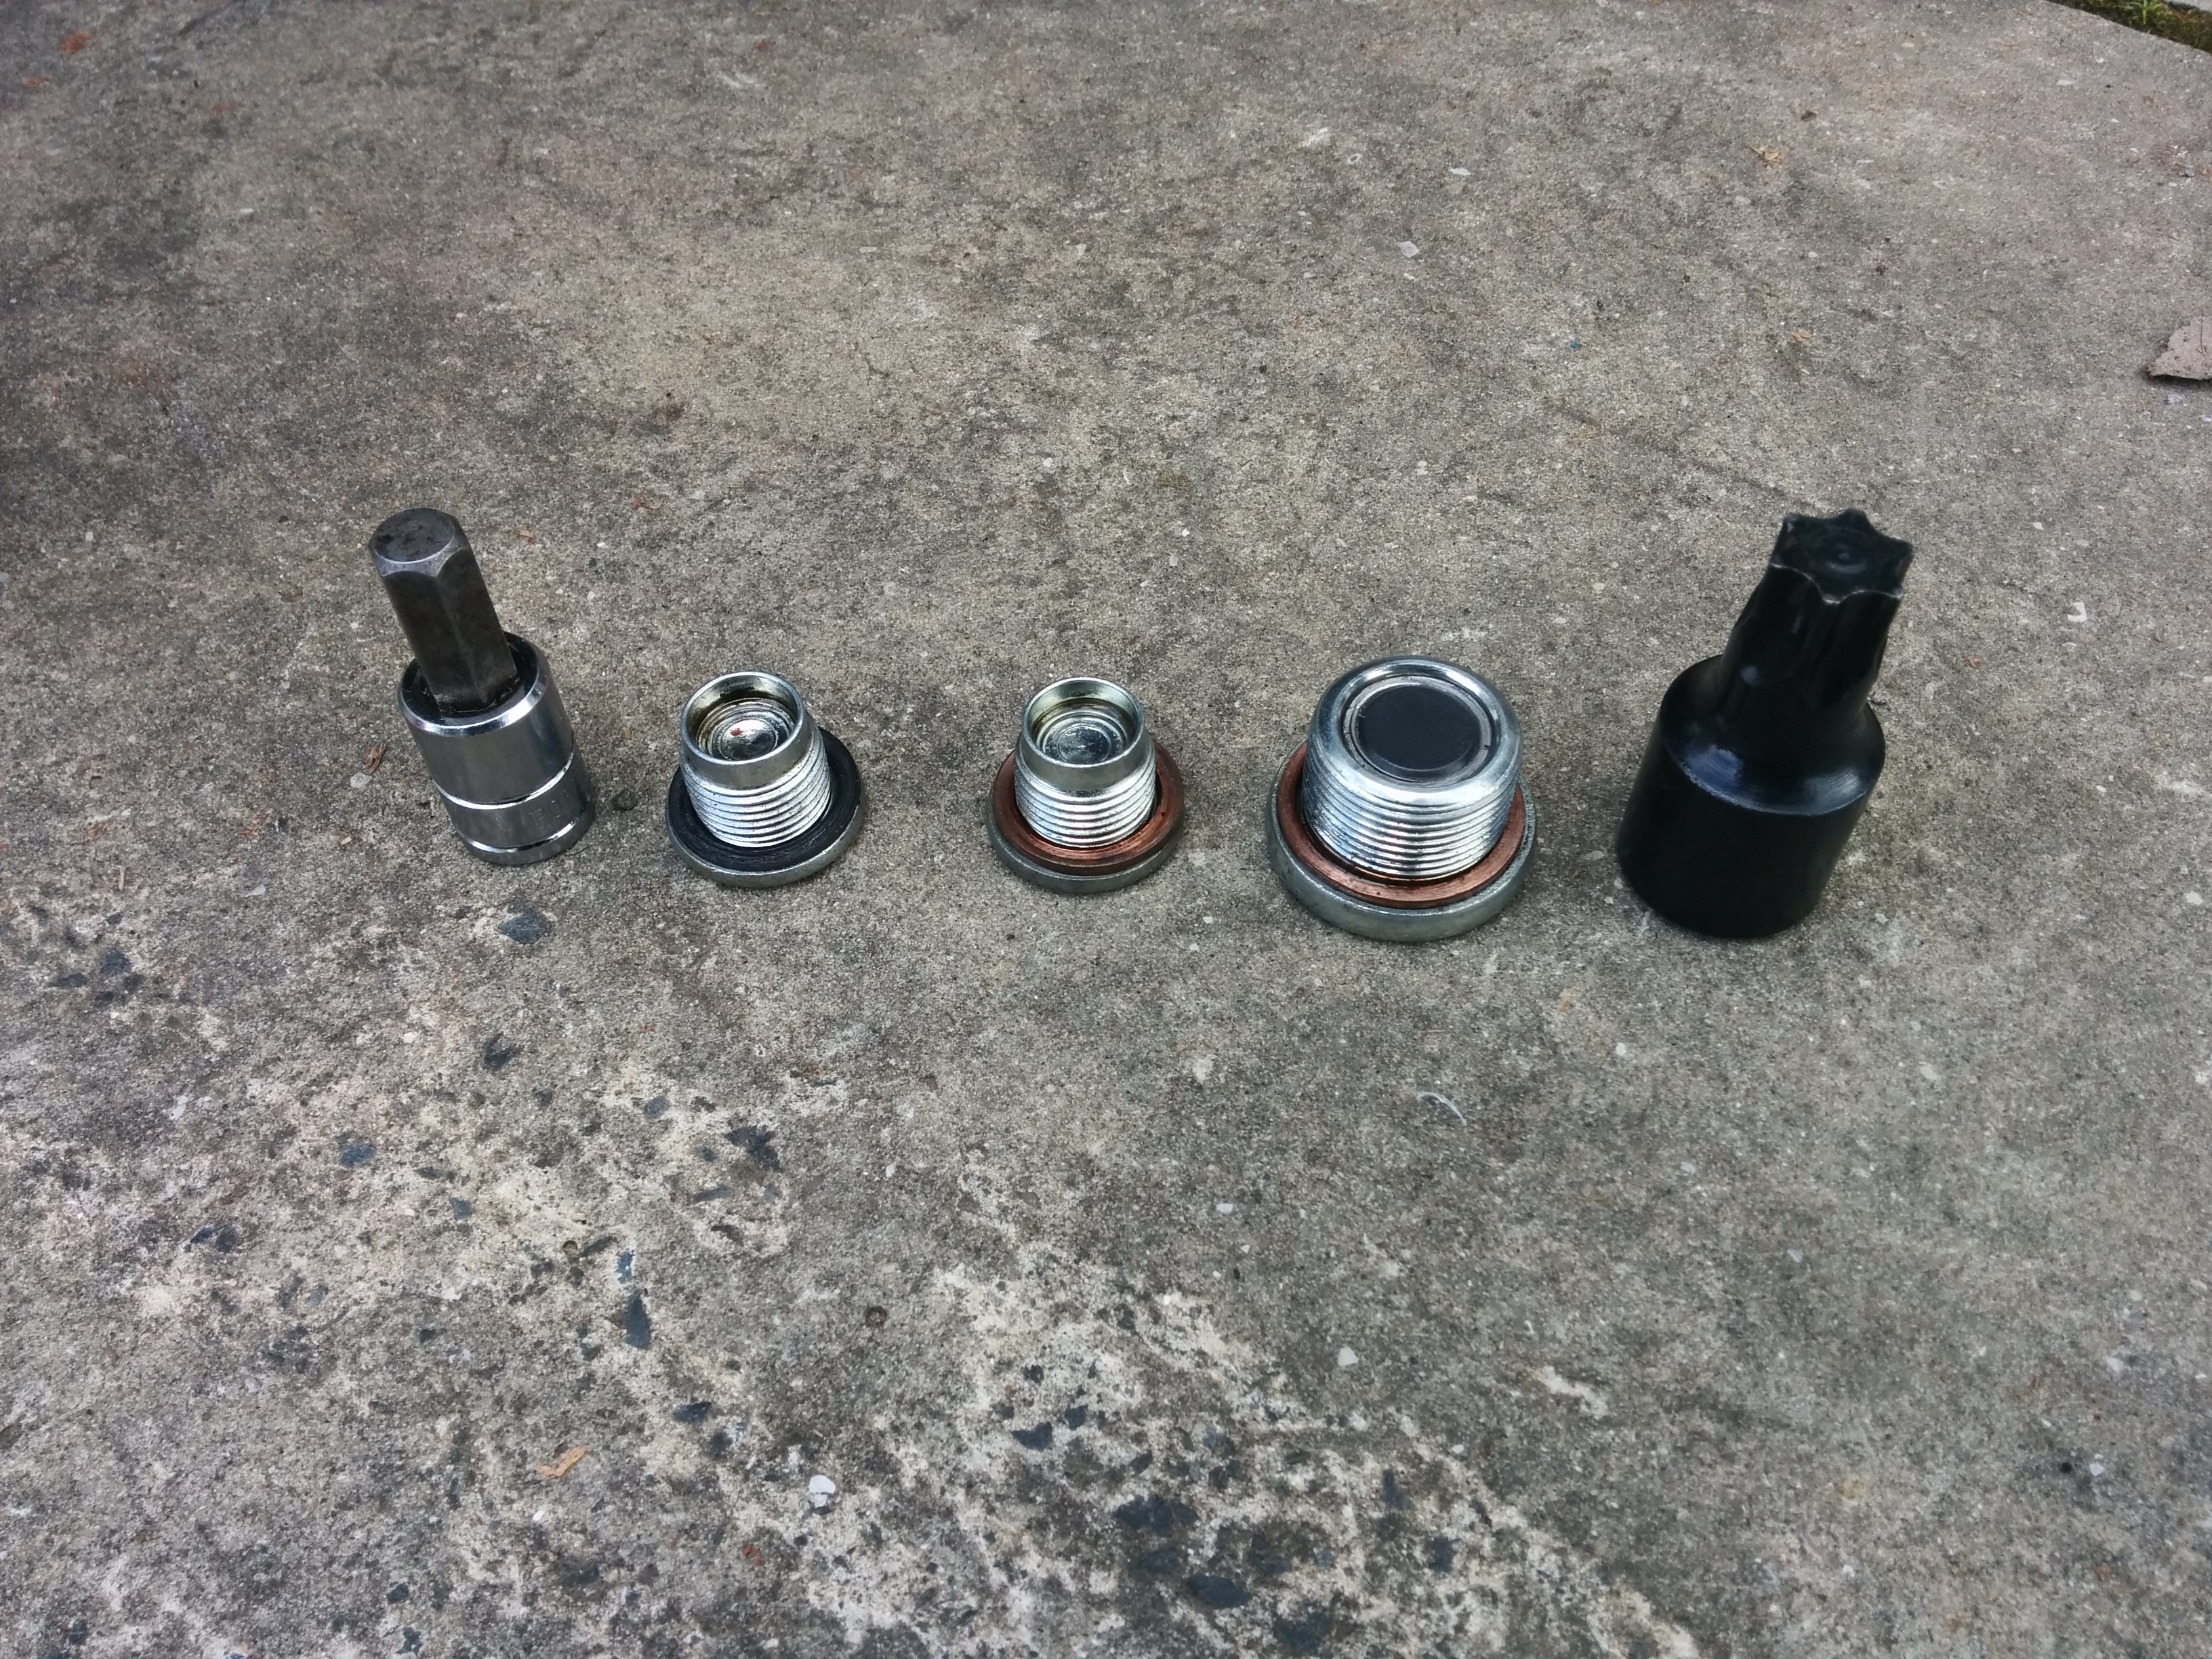
  • 6mm hex socket (for sump plug)
  • 10mm socket (for sump and filler plug)
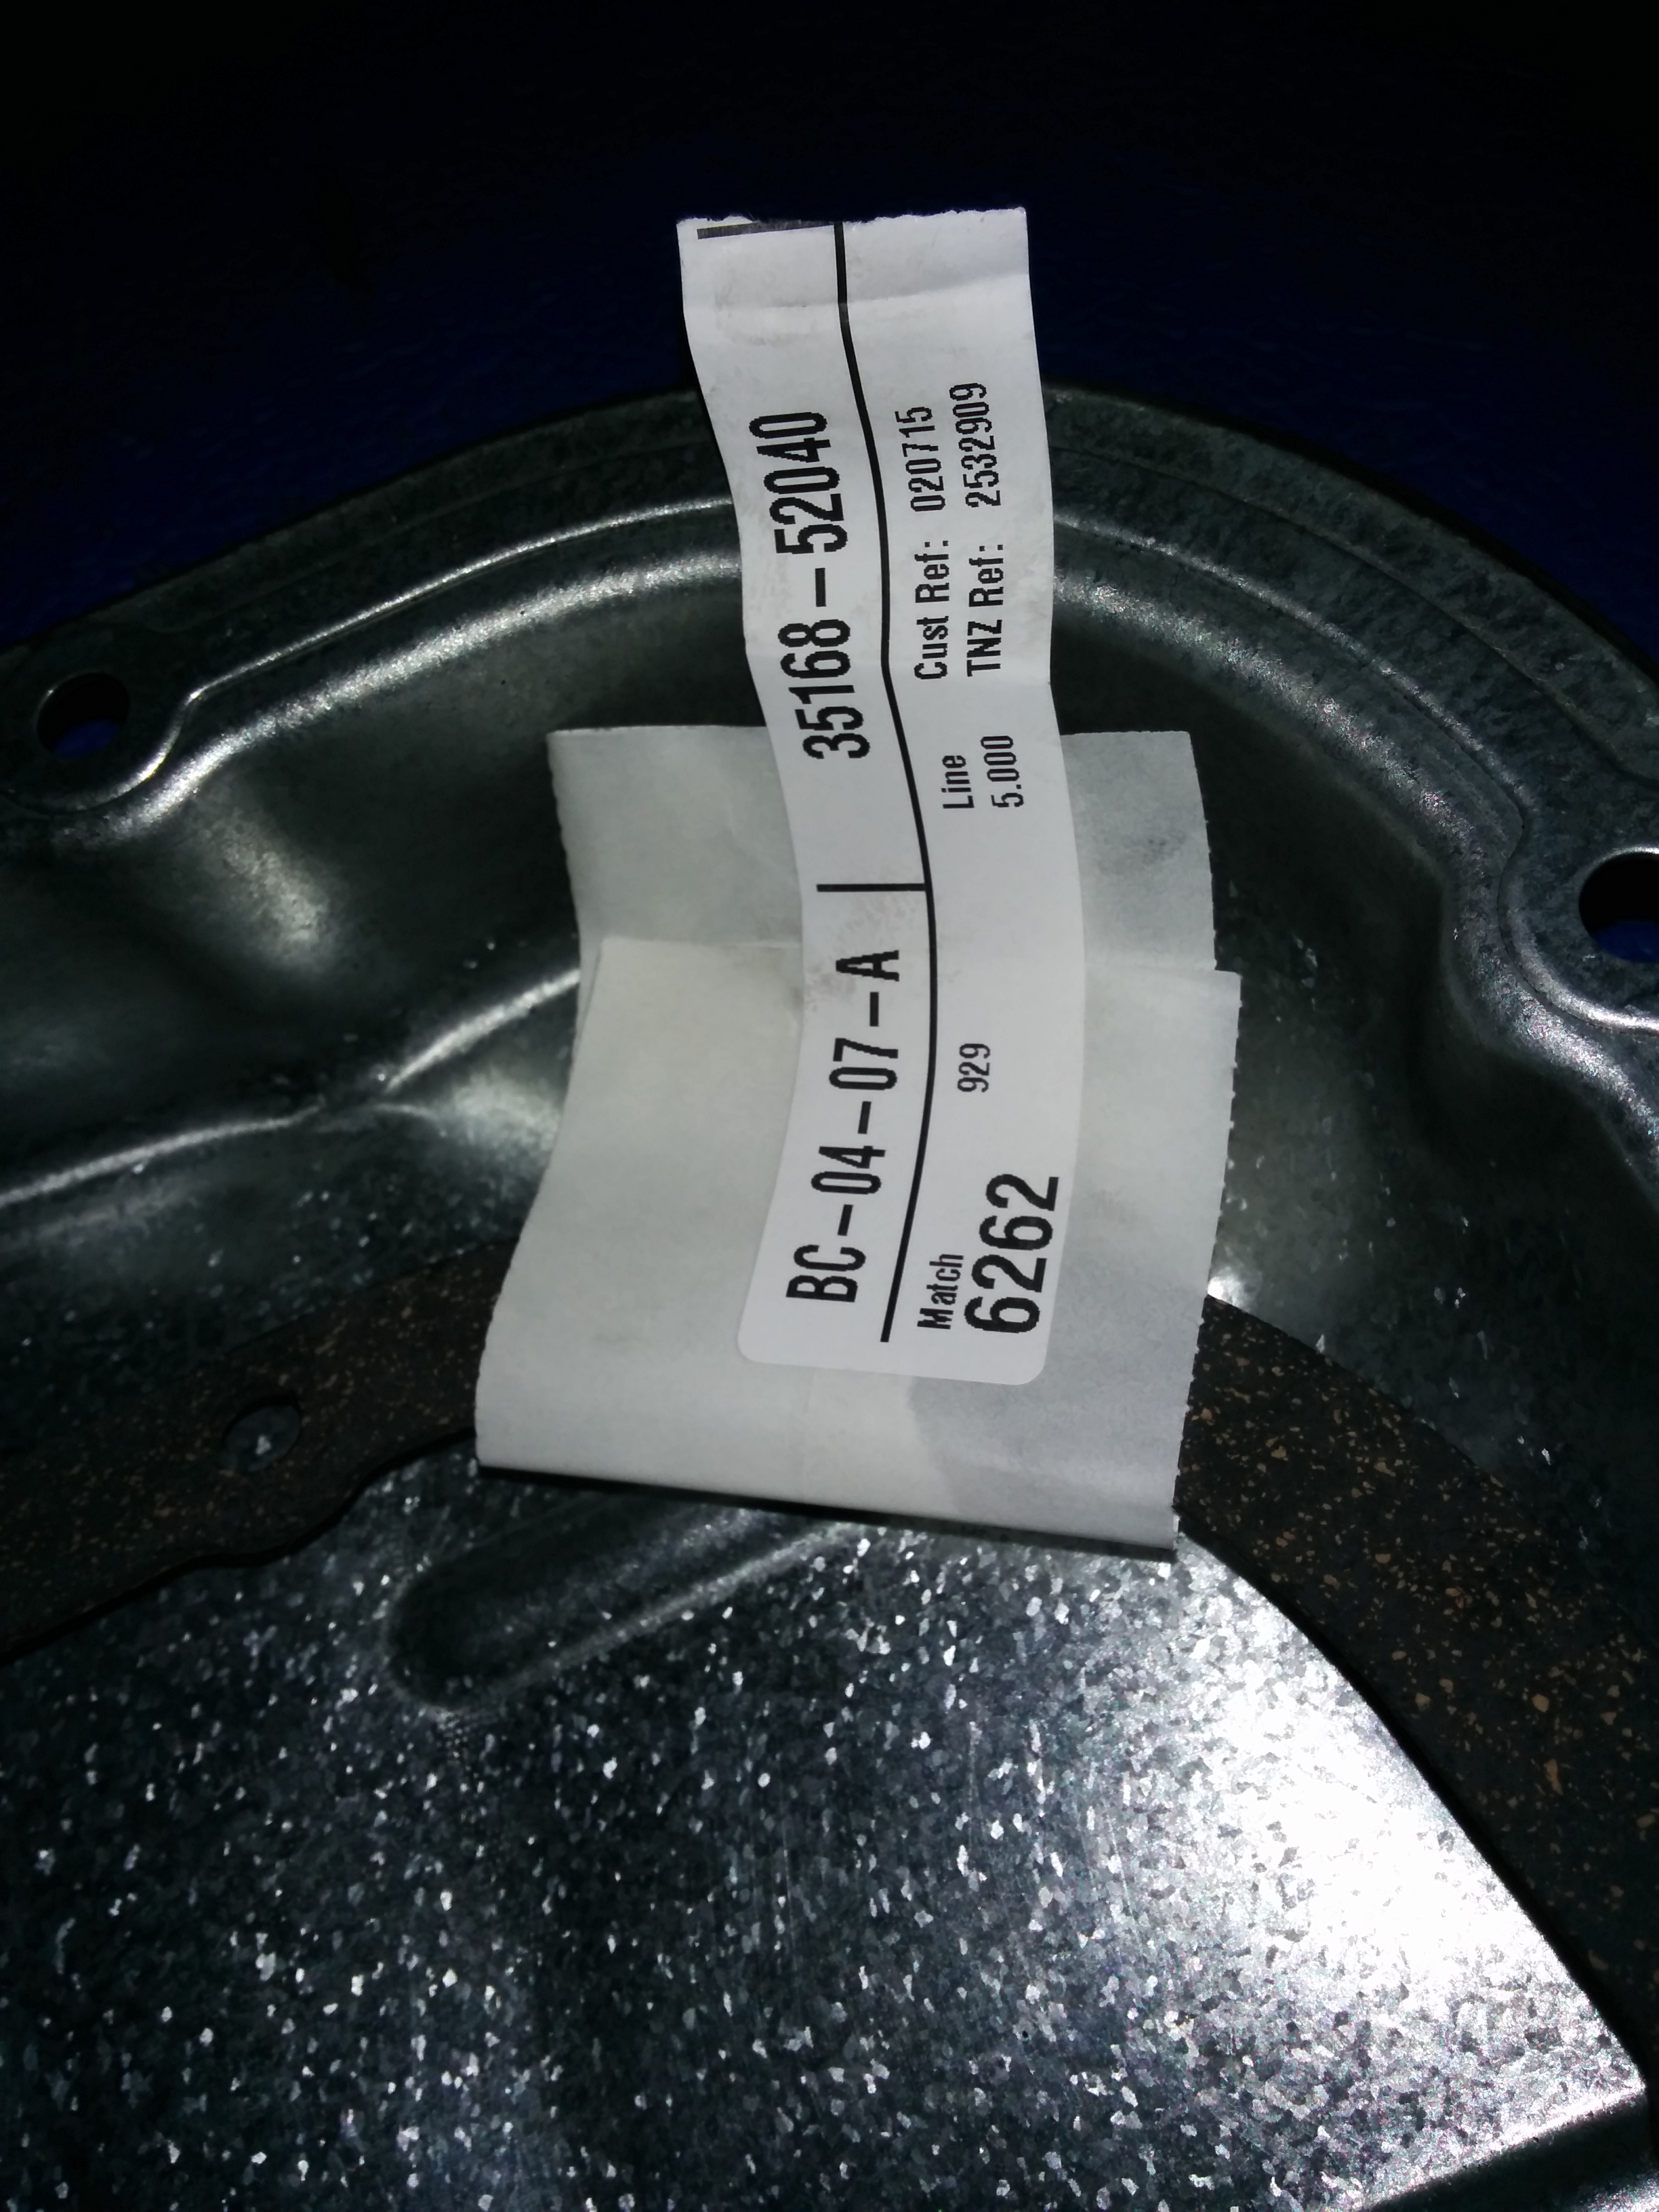
  • New sump gasket (p/n 39168-52040 for Vitz RS)
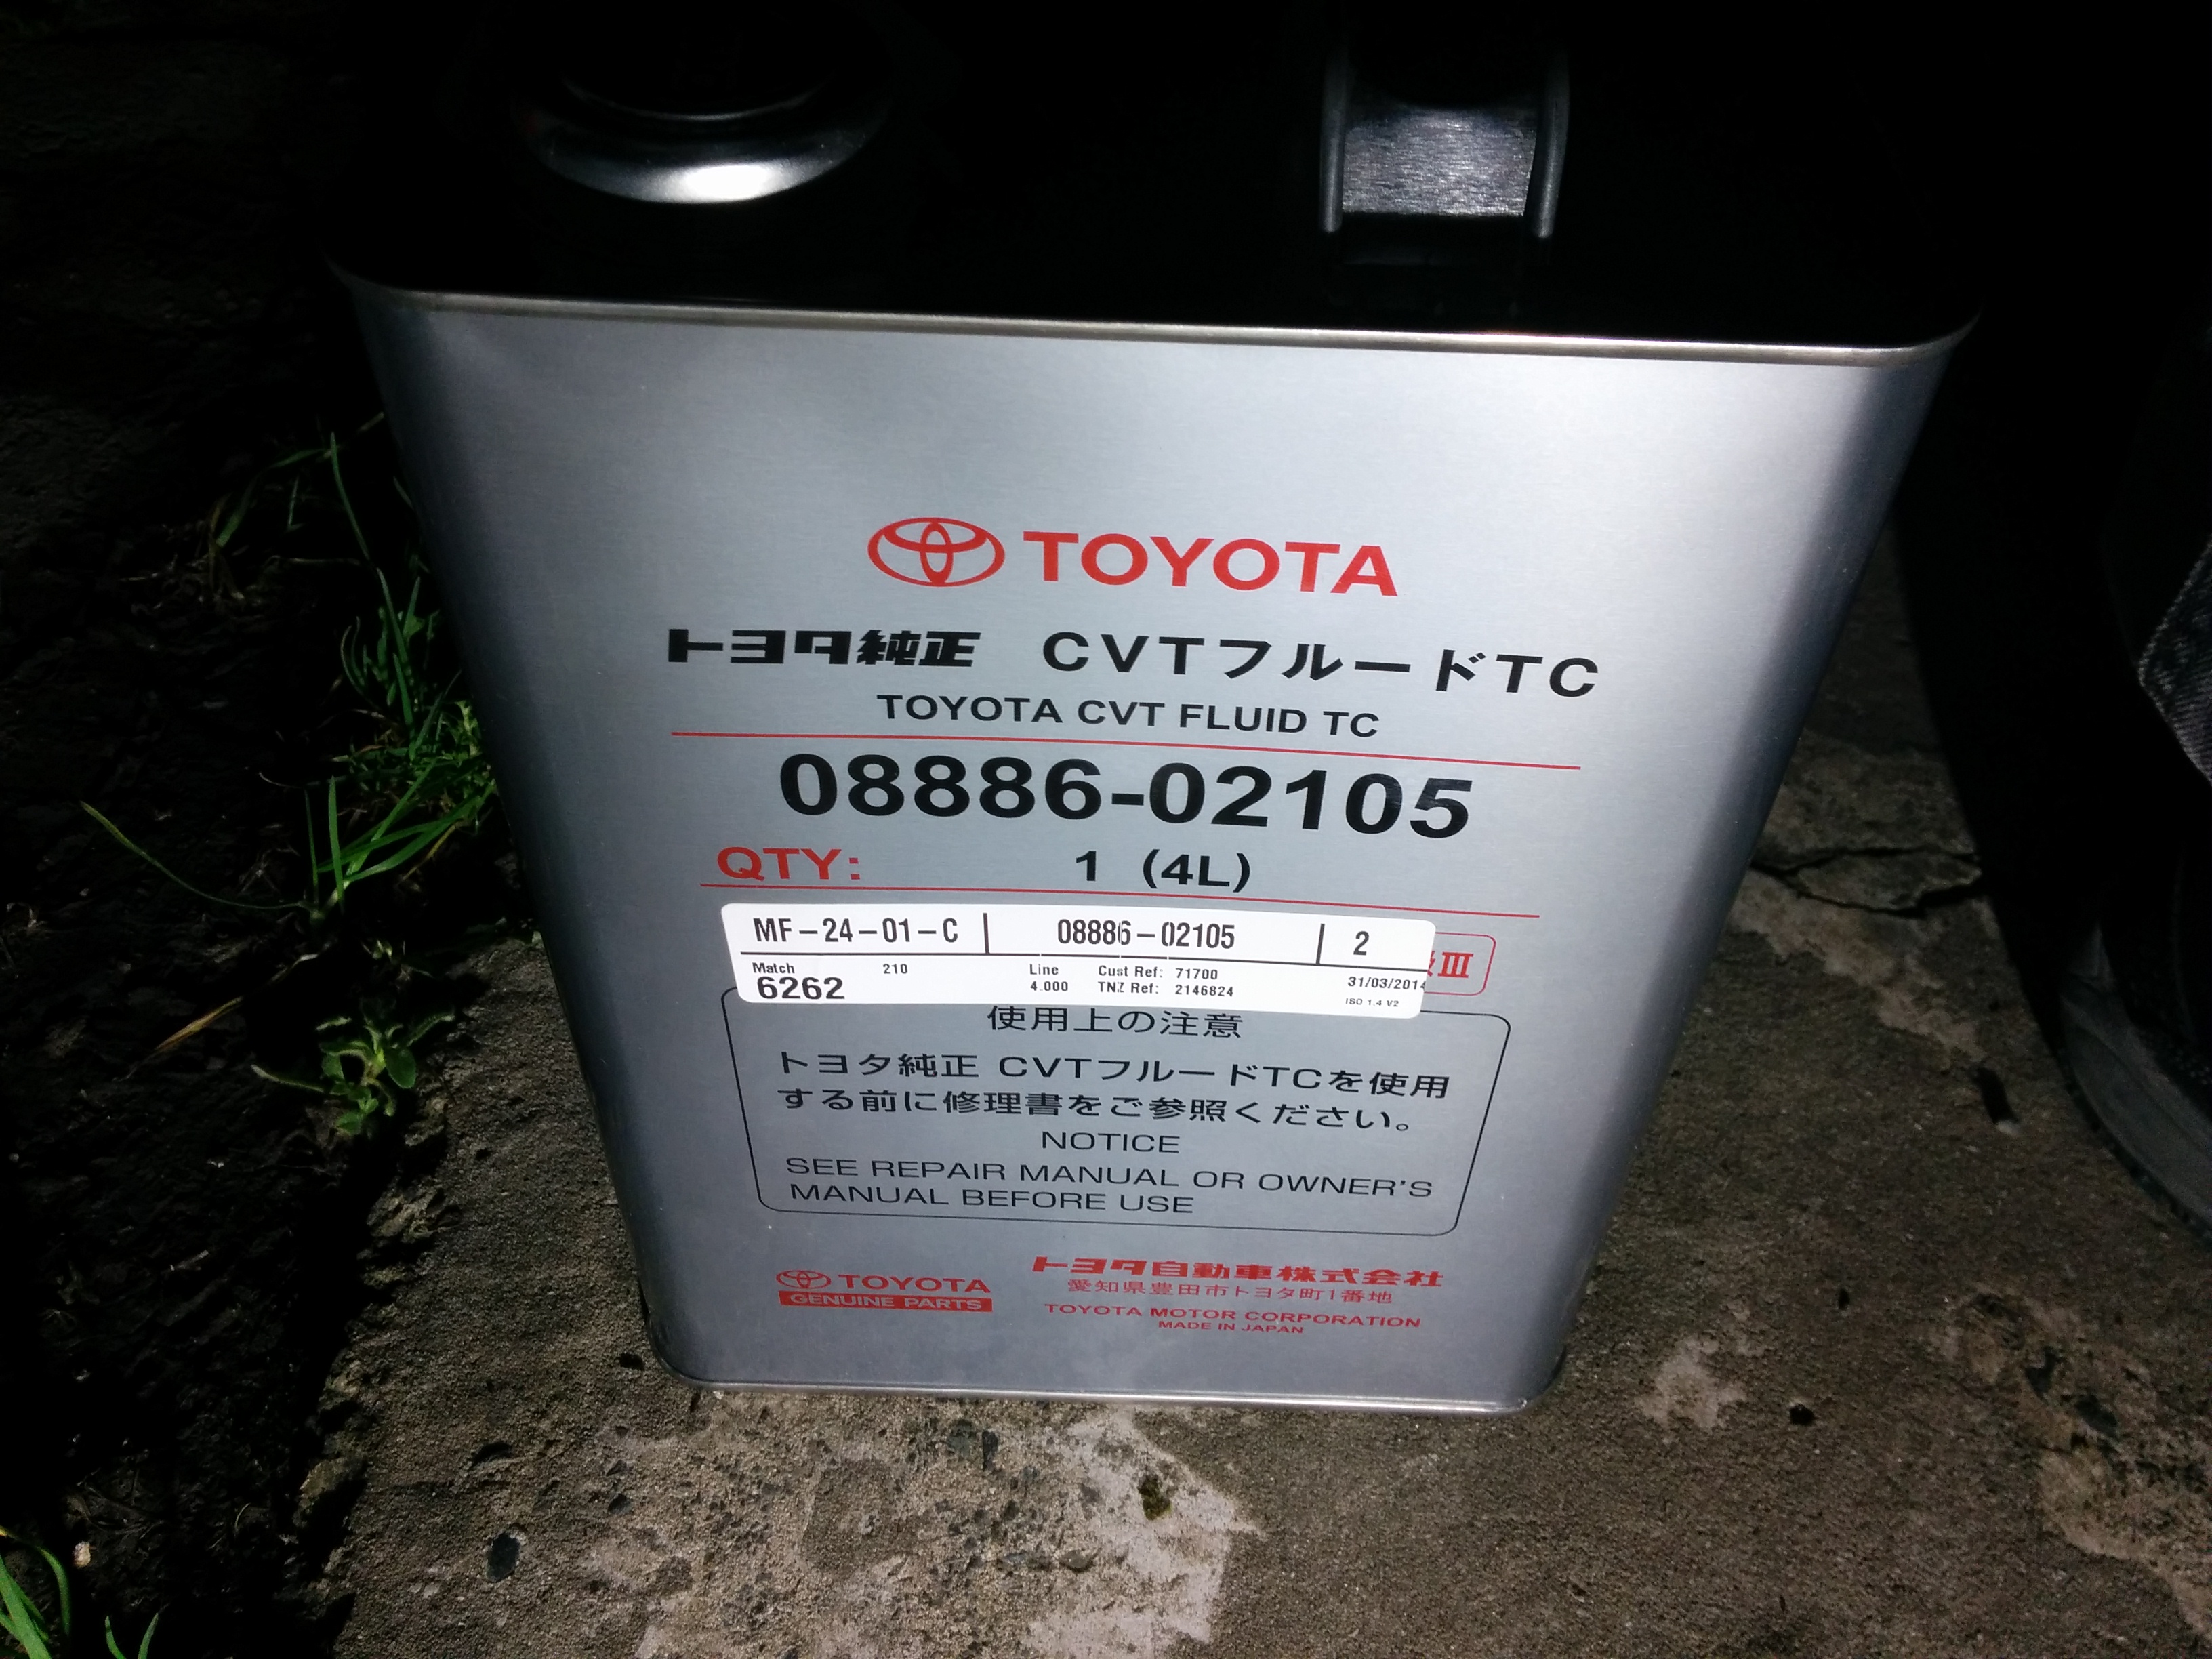
  • Toyota Genuine CVT Oil (p/n 08886-02105 for Vitz RS)
  • New sump plug washer

Toyota would not tell me how much oil is a normal fill. Basically I was told to put the same amount that came out. To figure out correct volume I drained old oil into an empty container and weighted it. Then I emptied old oil out and matched the weight (in same container +100g for spillage) with new oil. Basically I had about 2.8kg of oil (excluding 275g container weight) in the sump (about 3.2-3.5L depending on the temperature and spillage). It works out that oil must be just below the filler hole that I used.

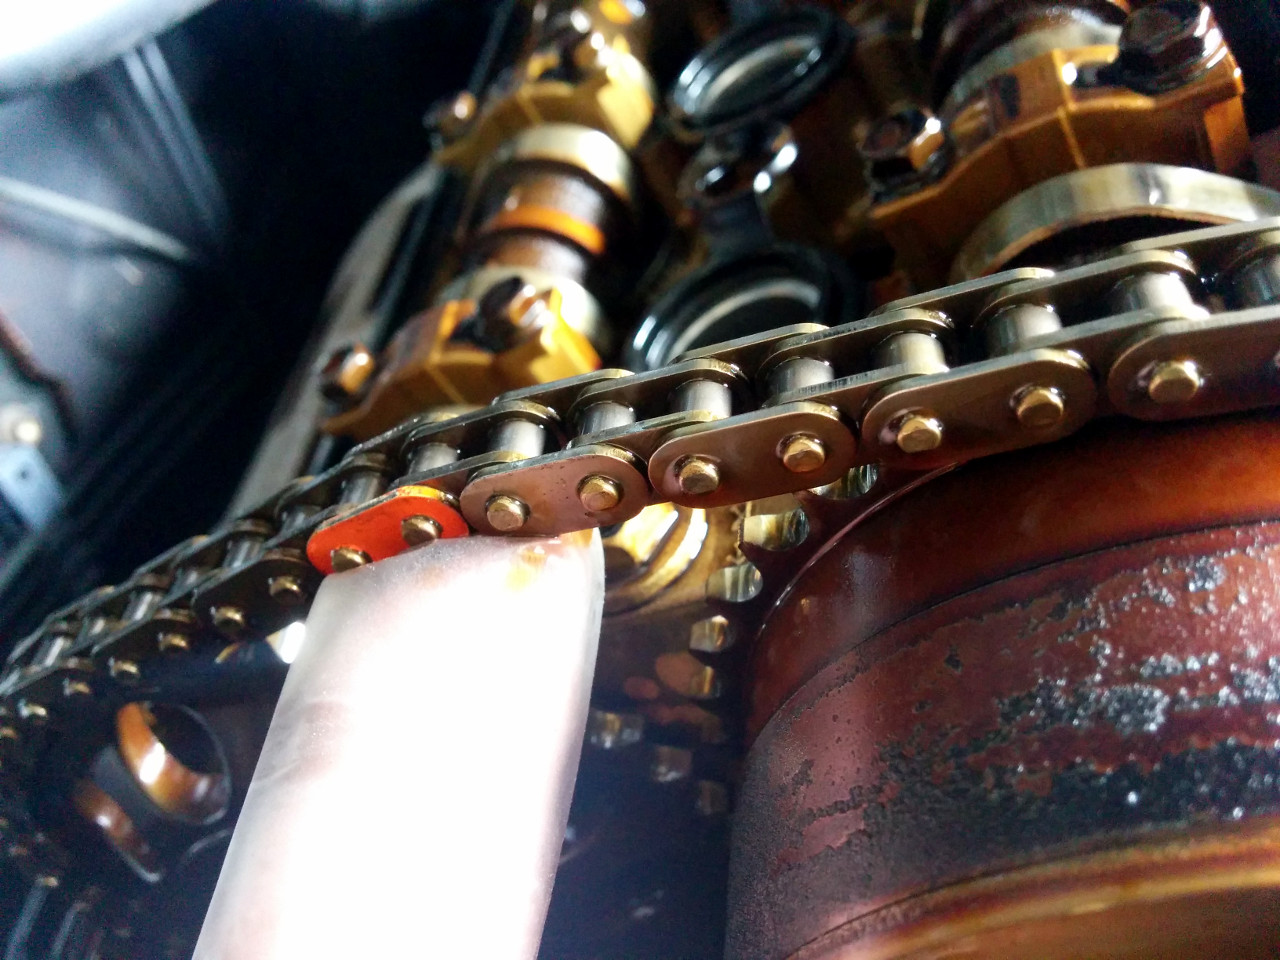
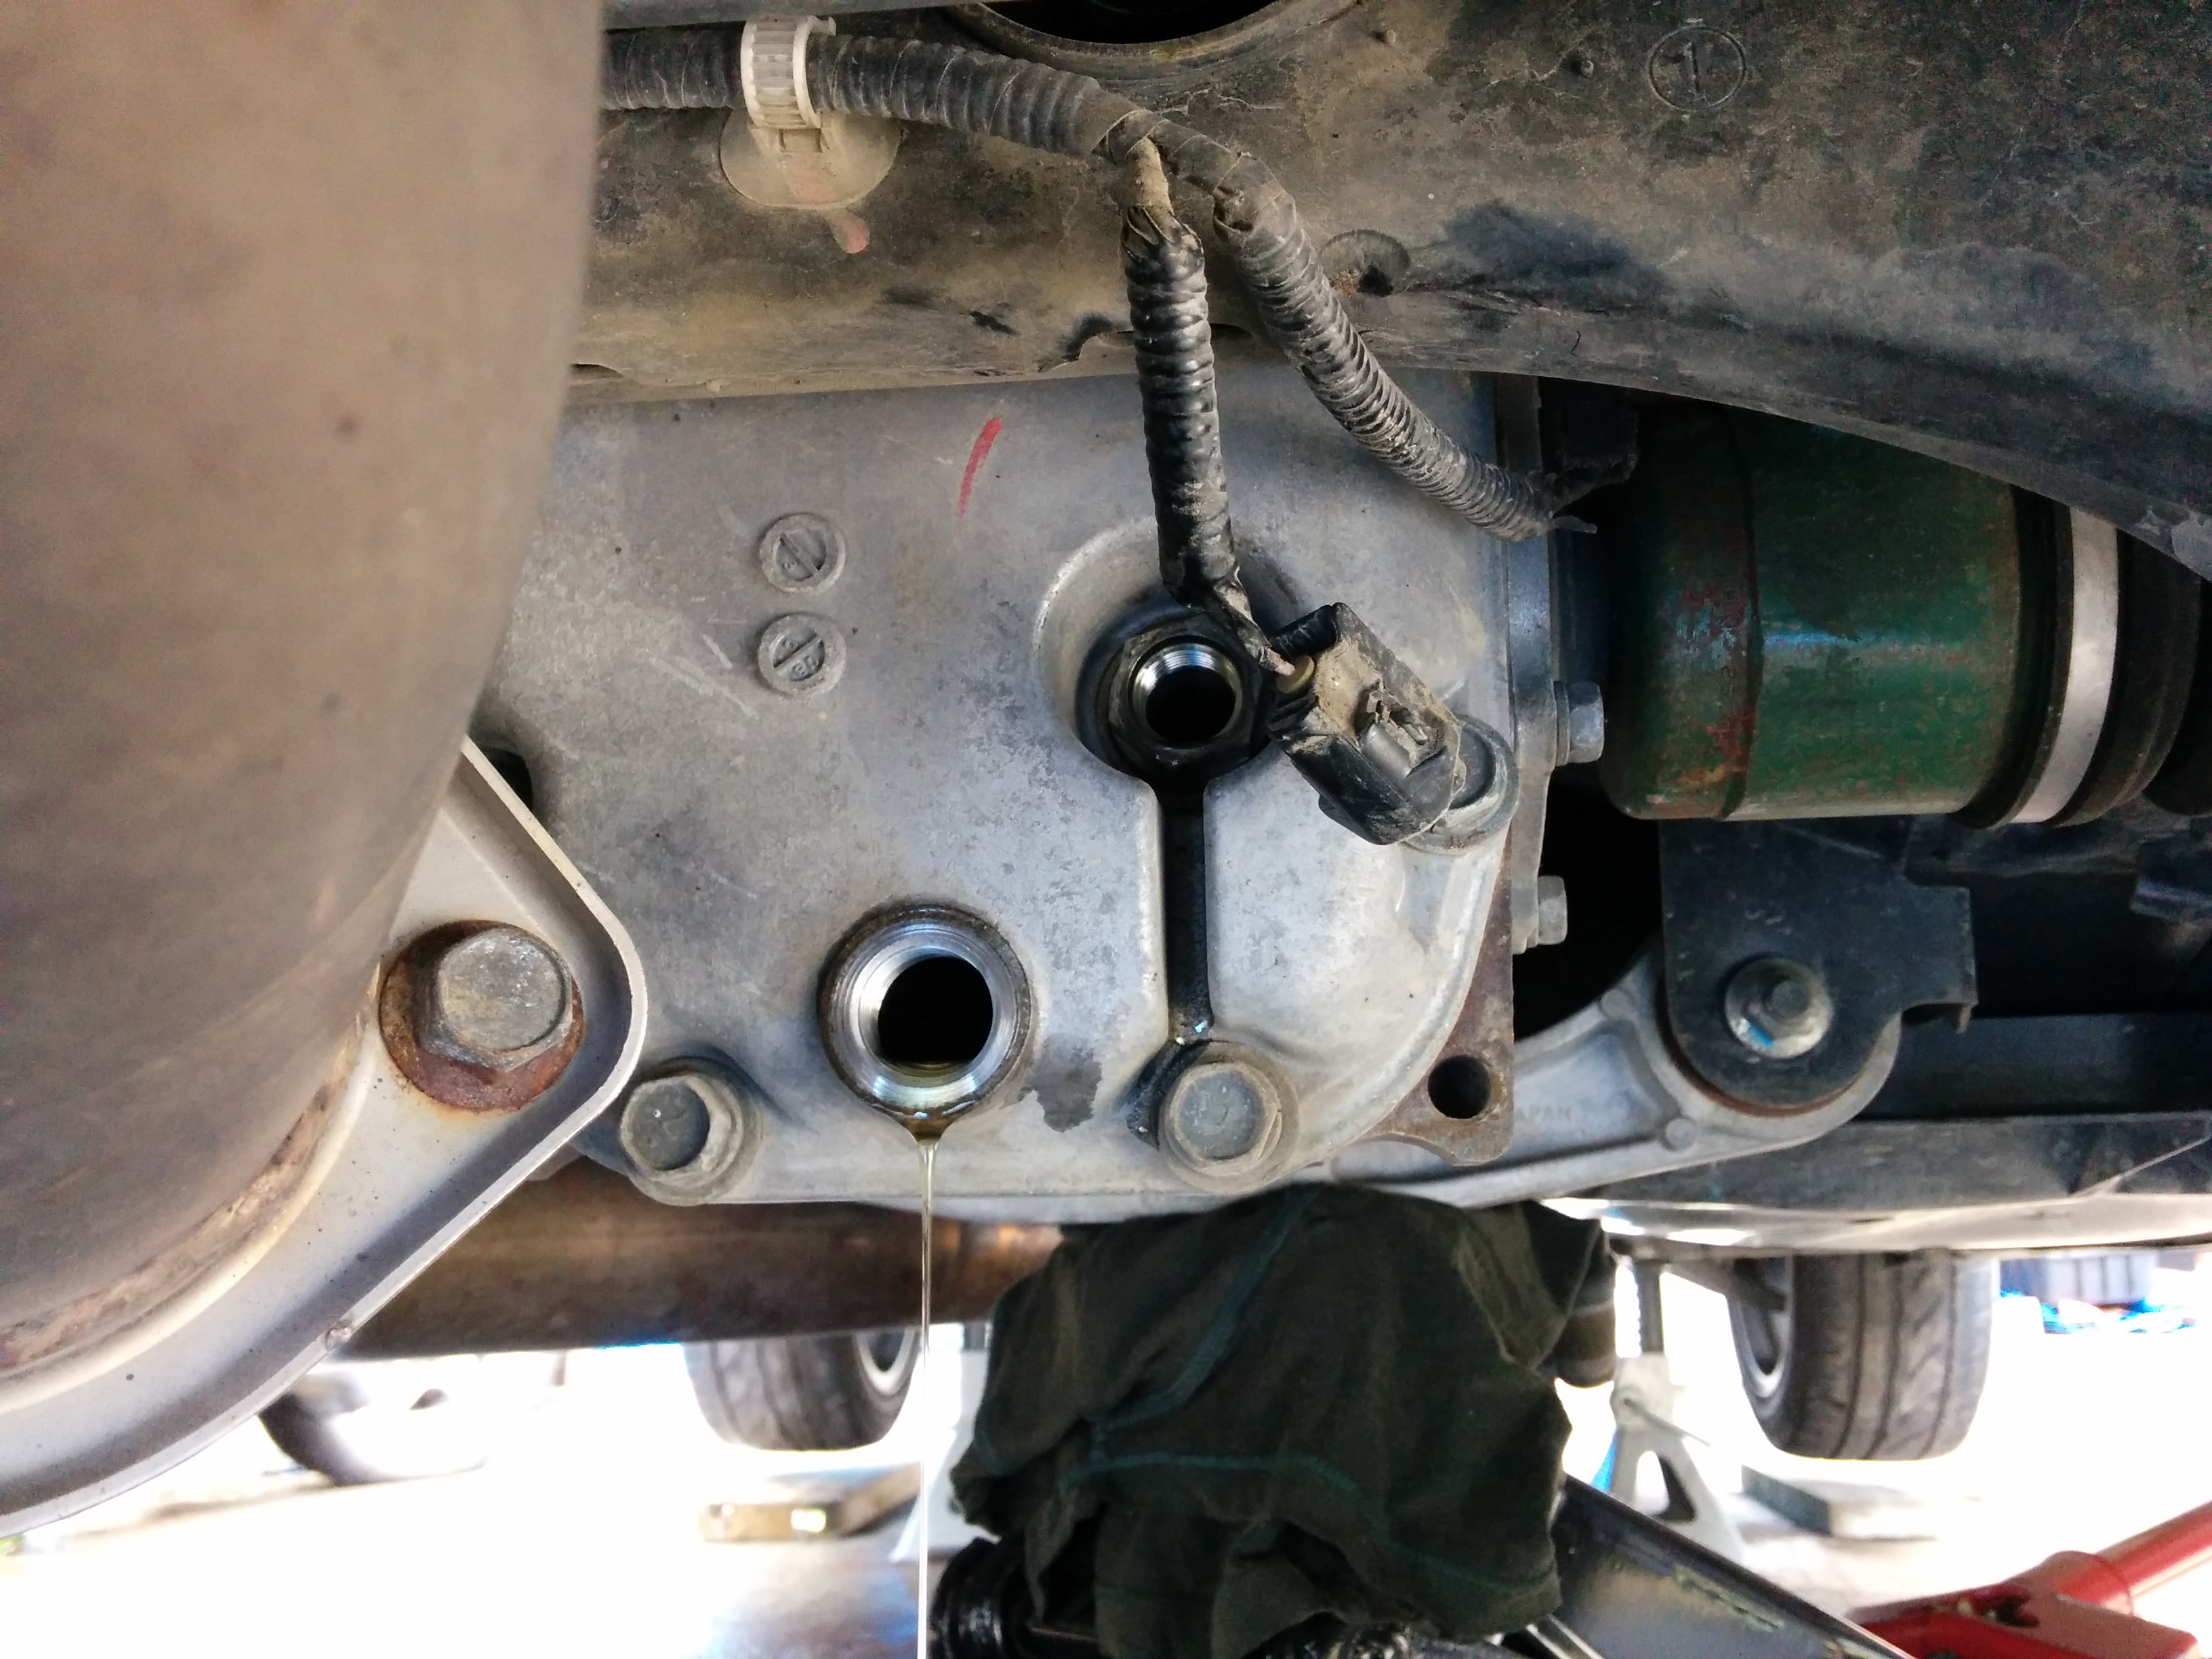
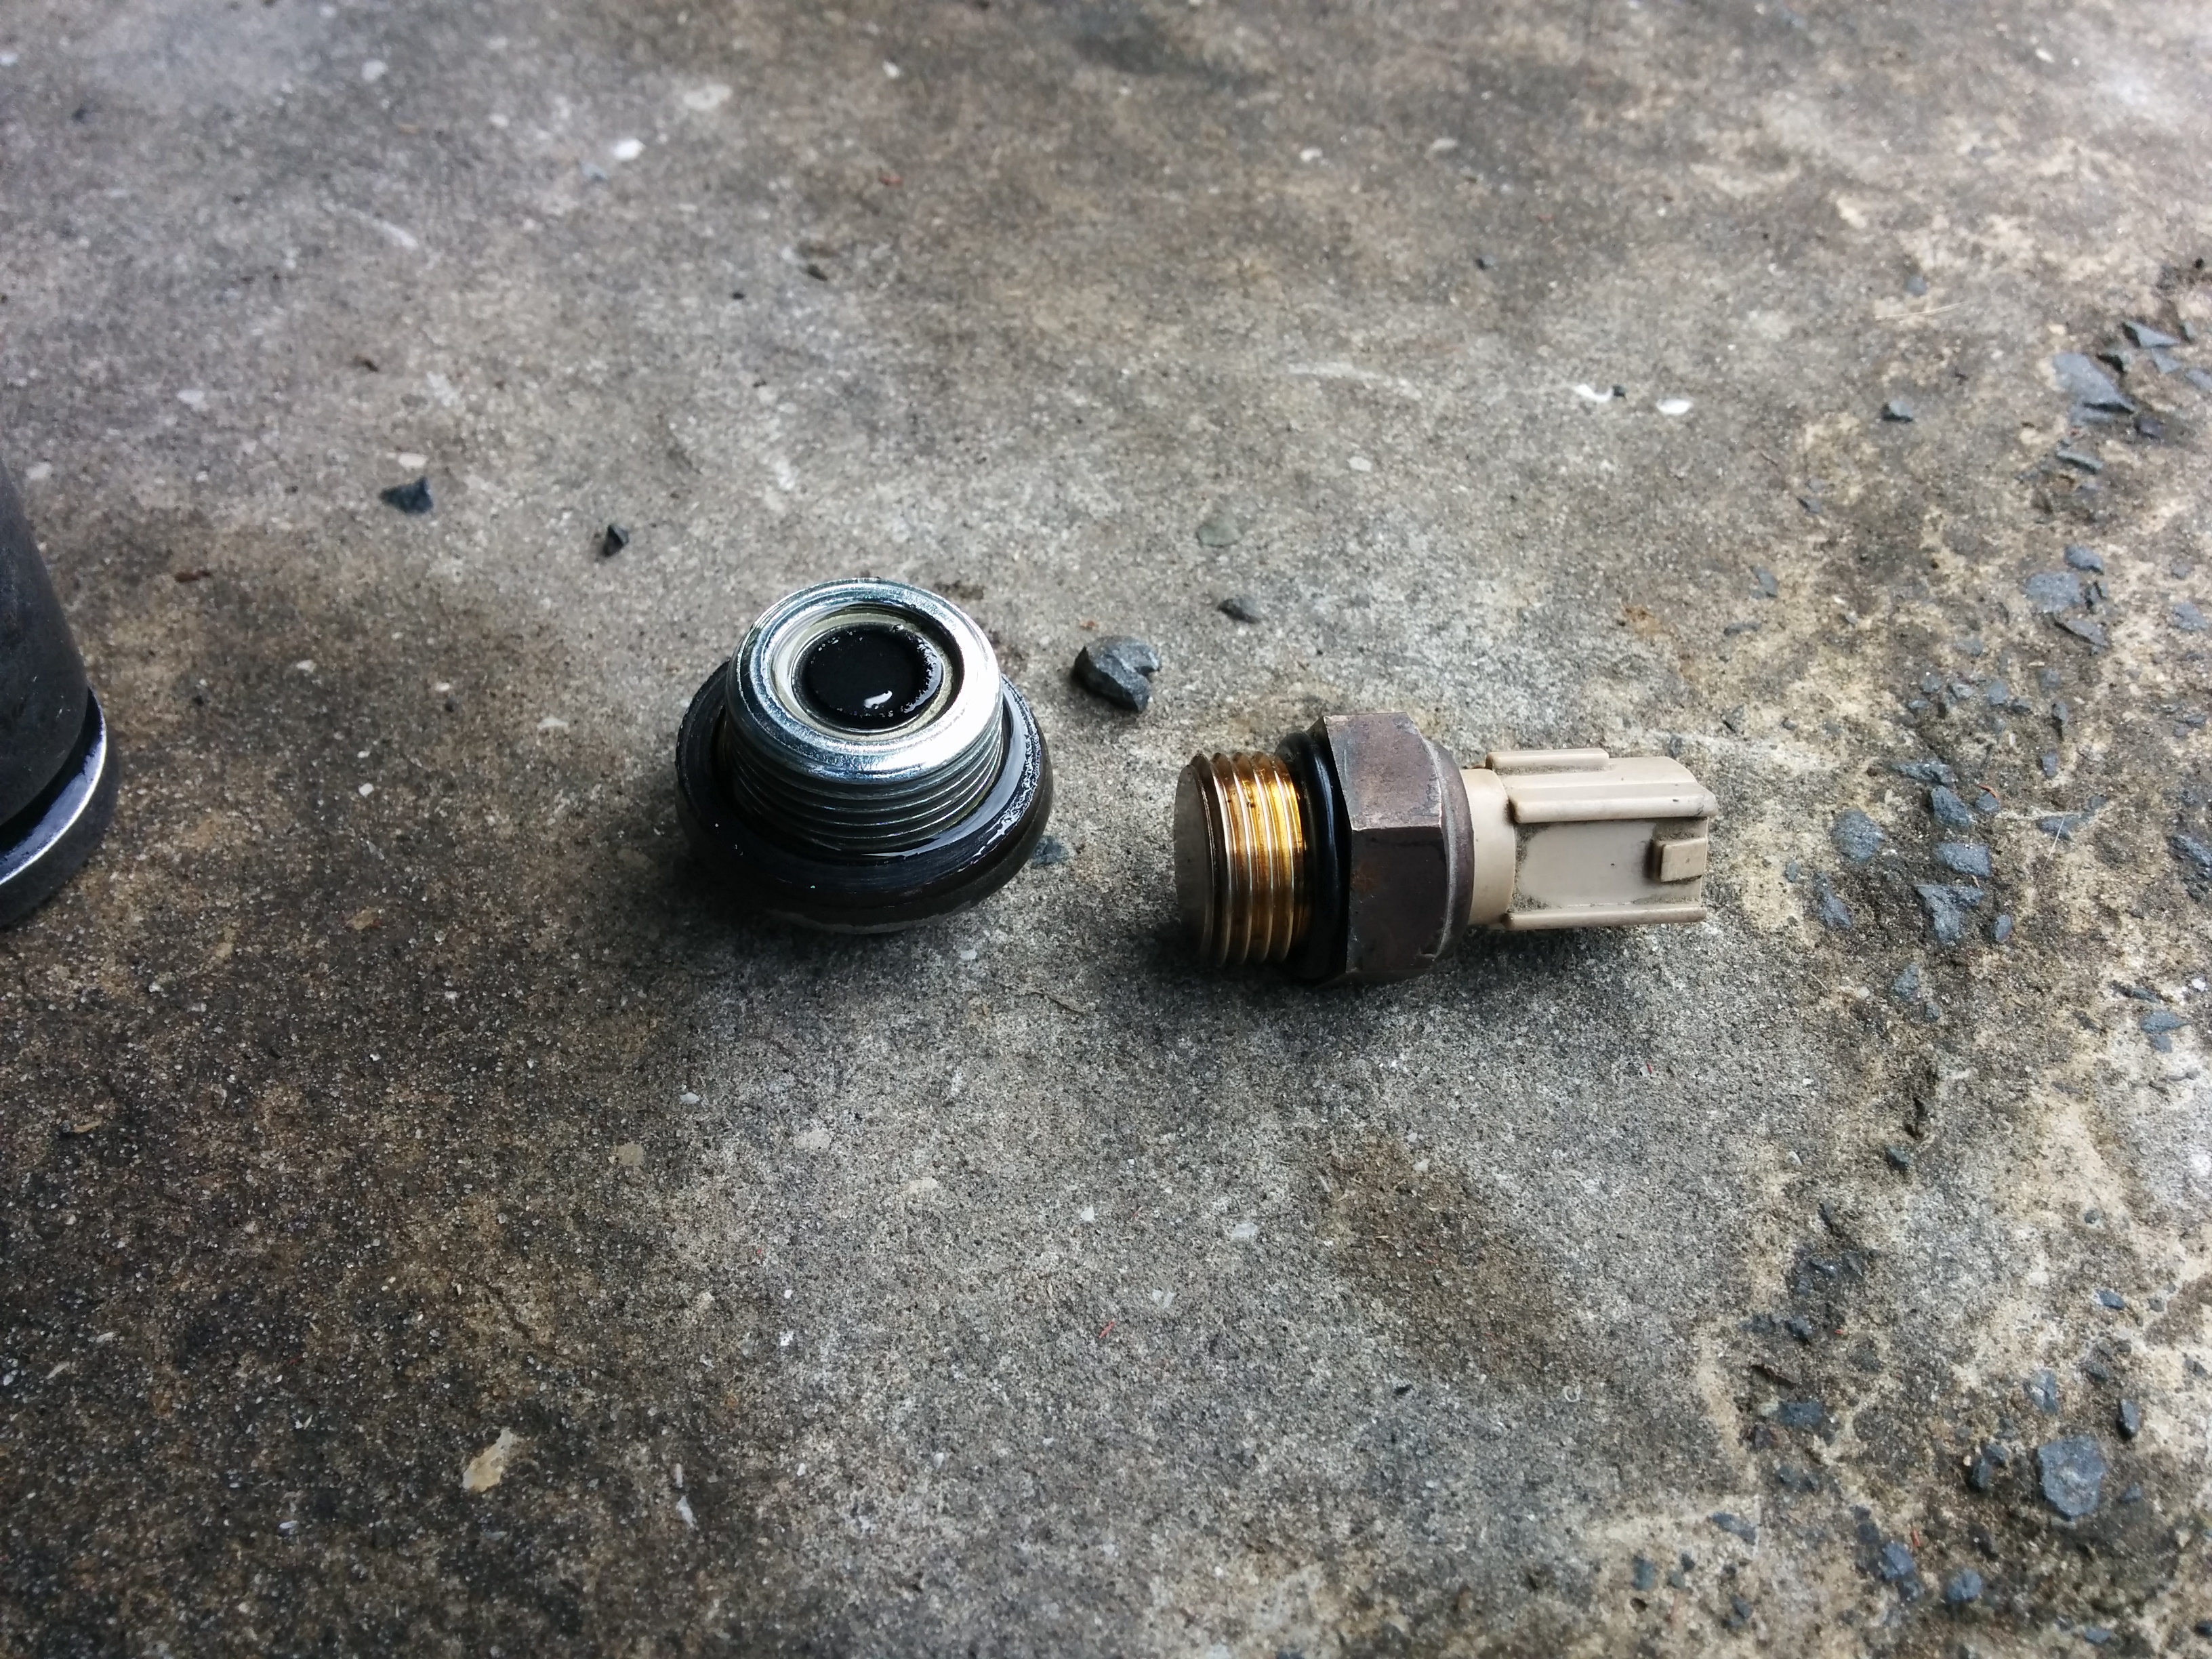
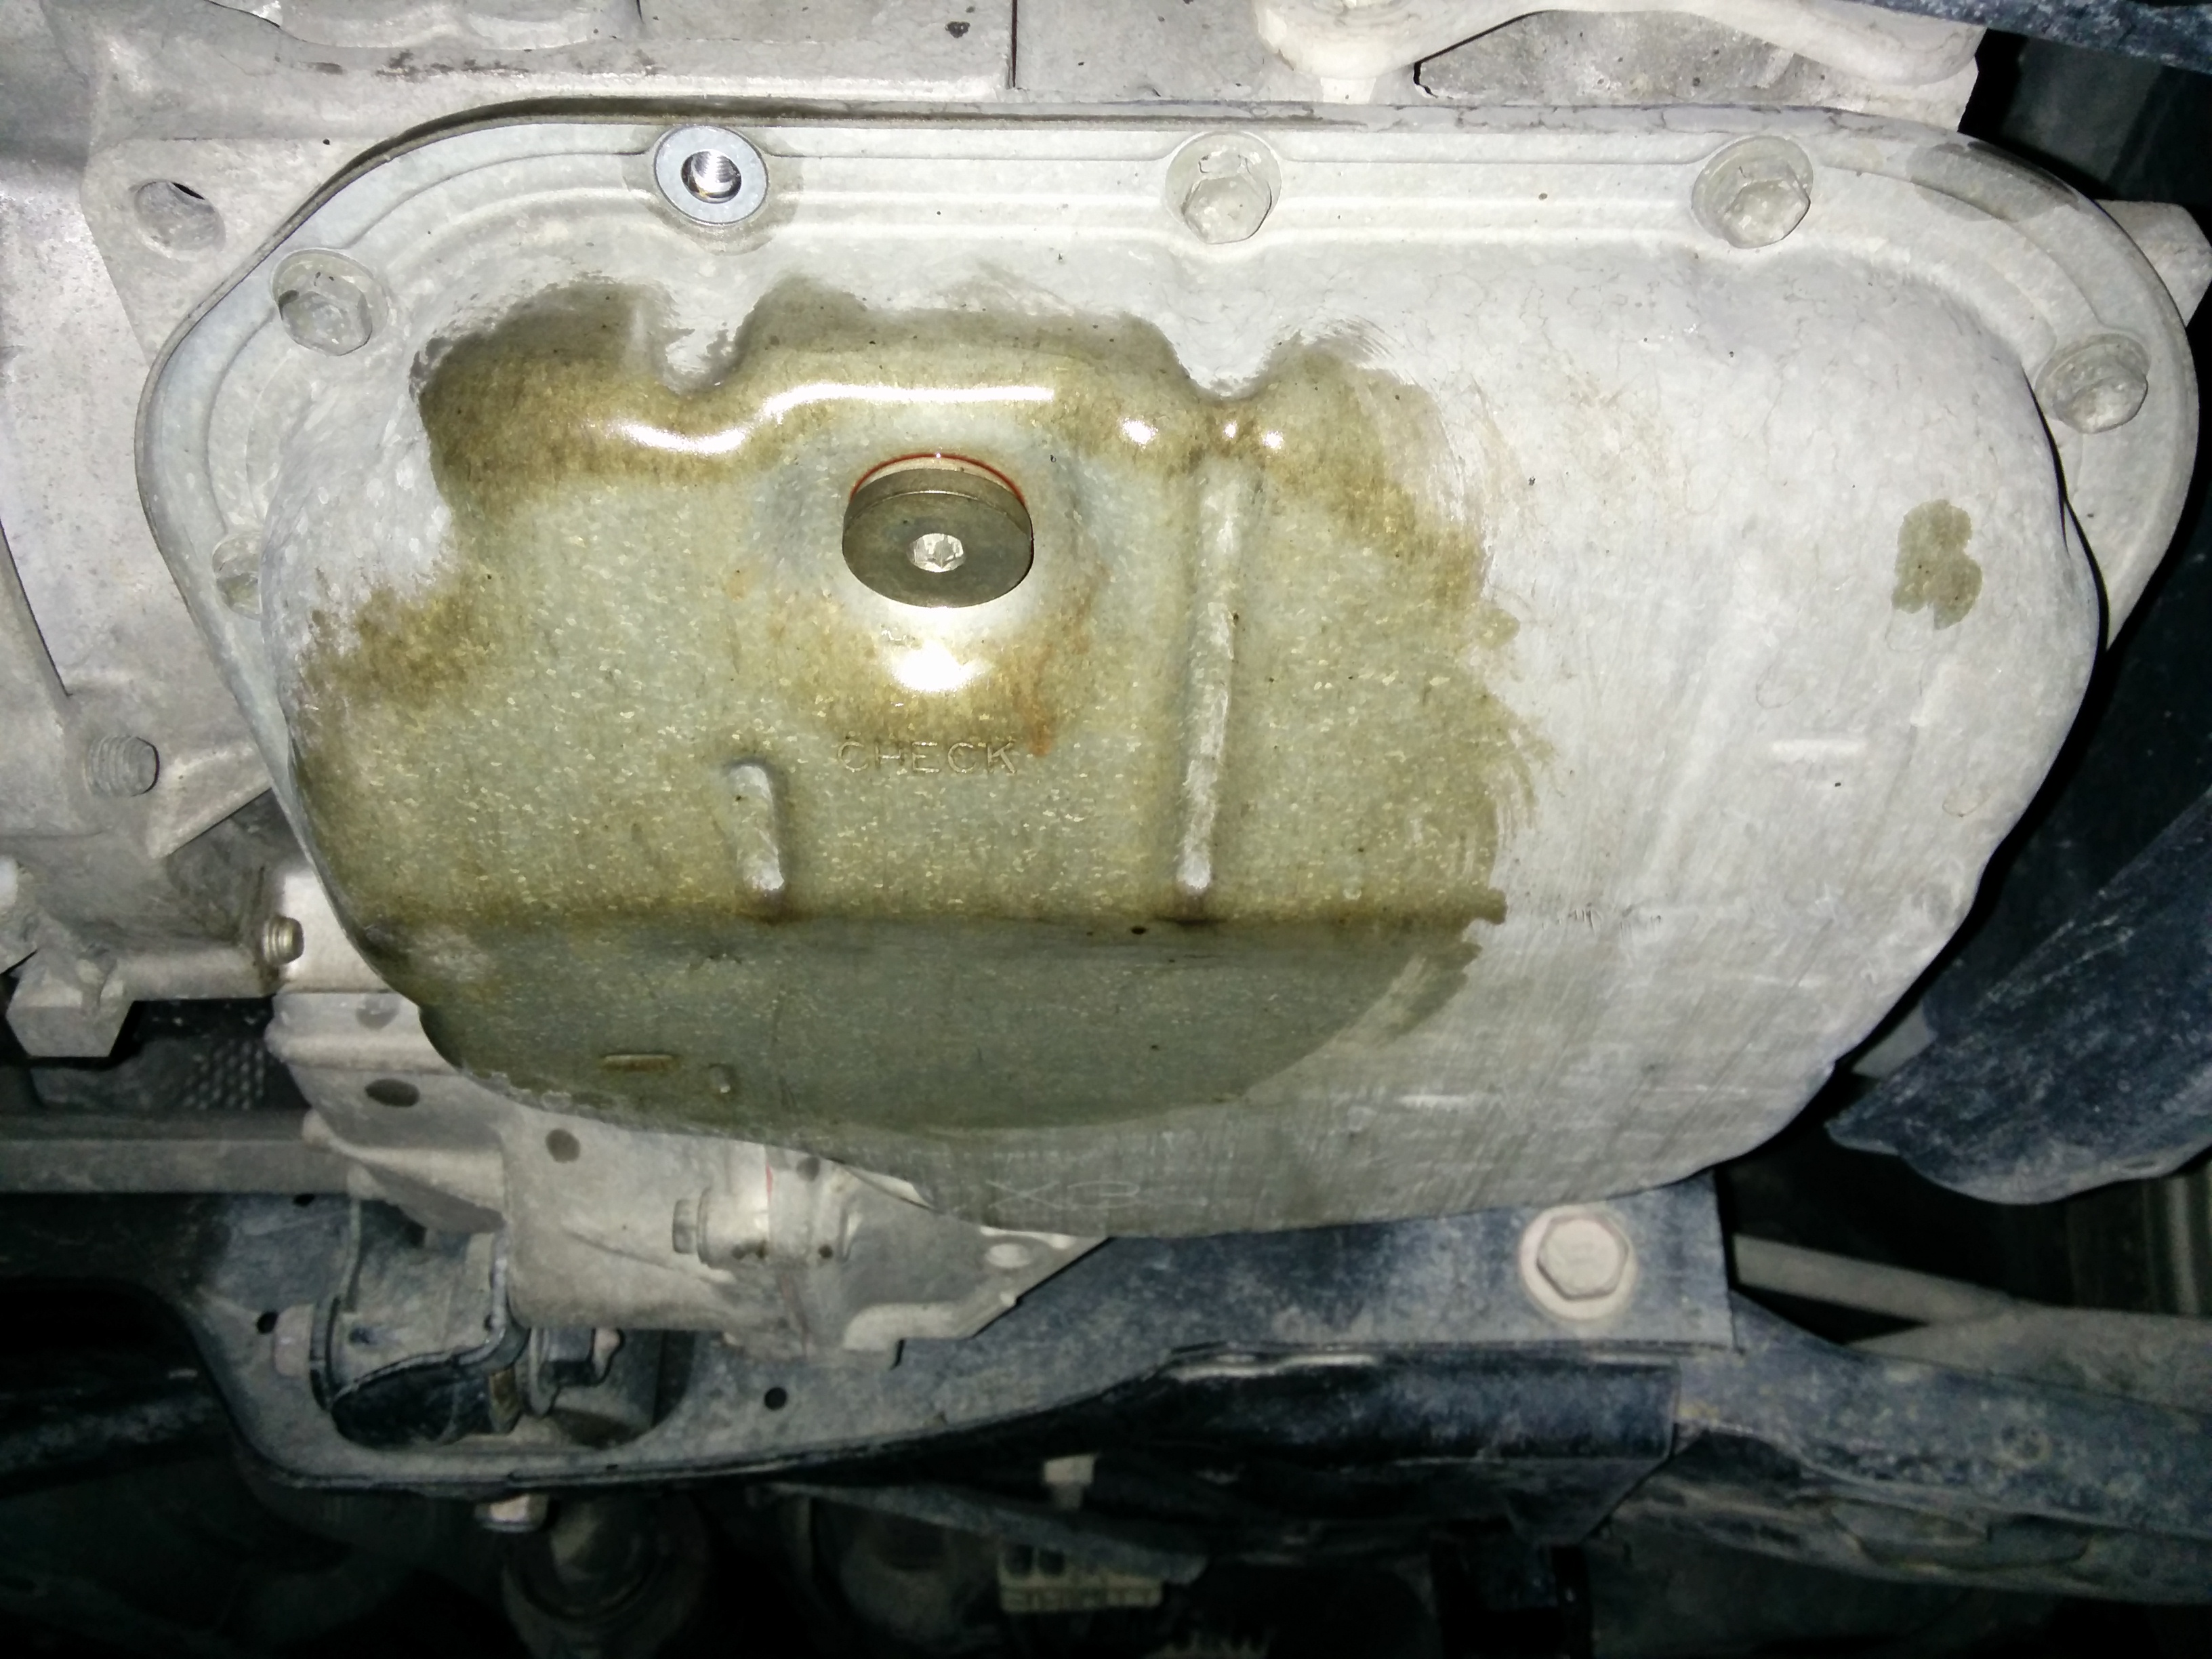
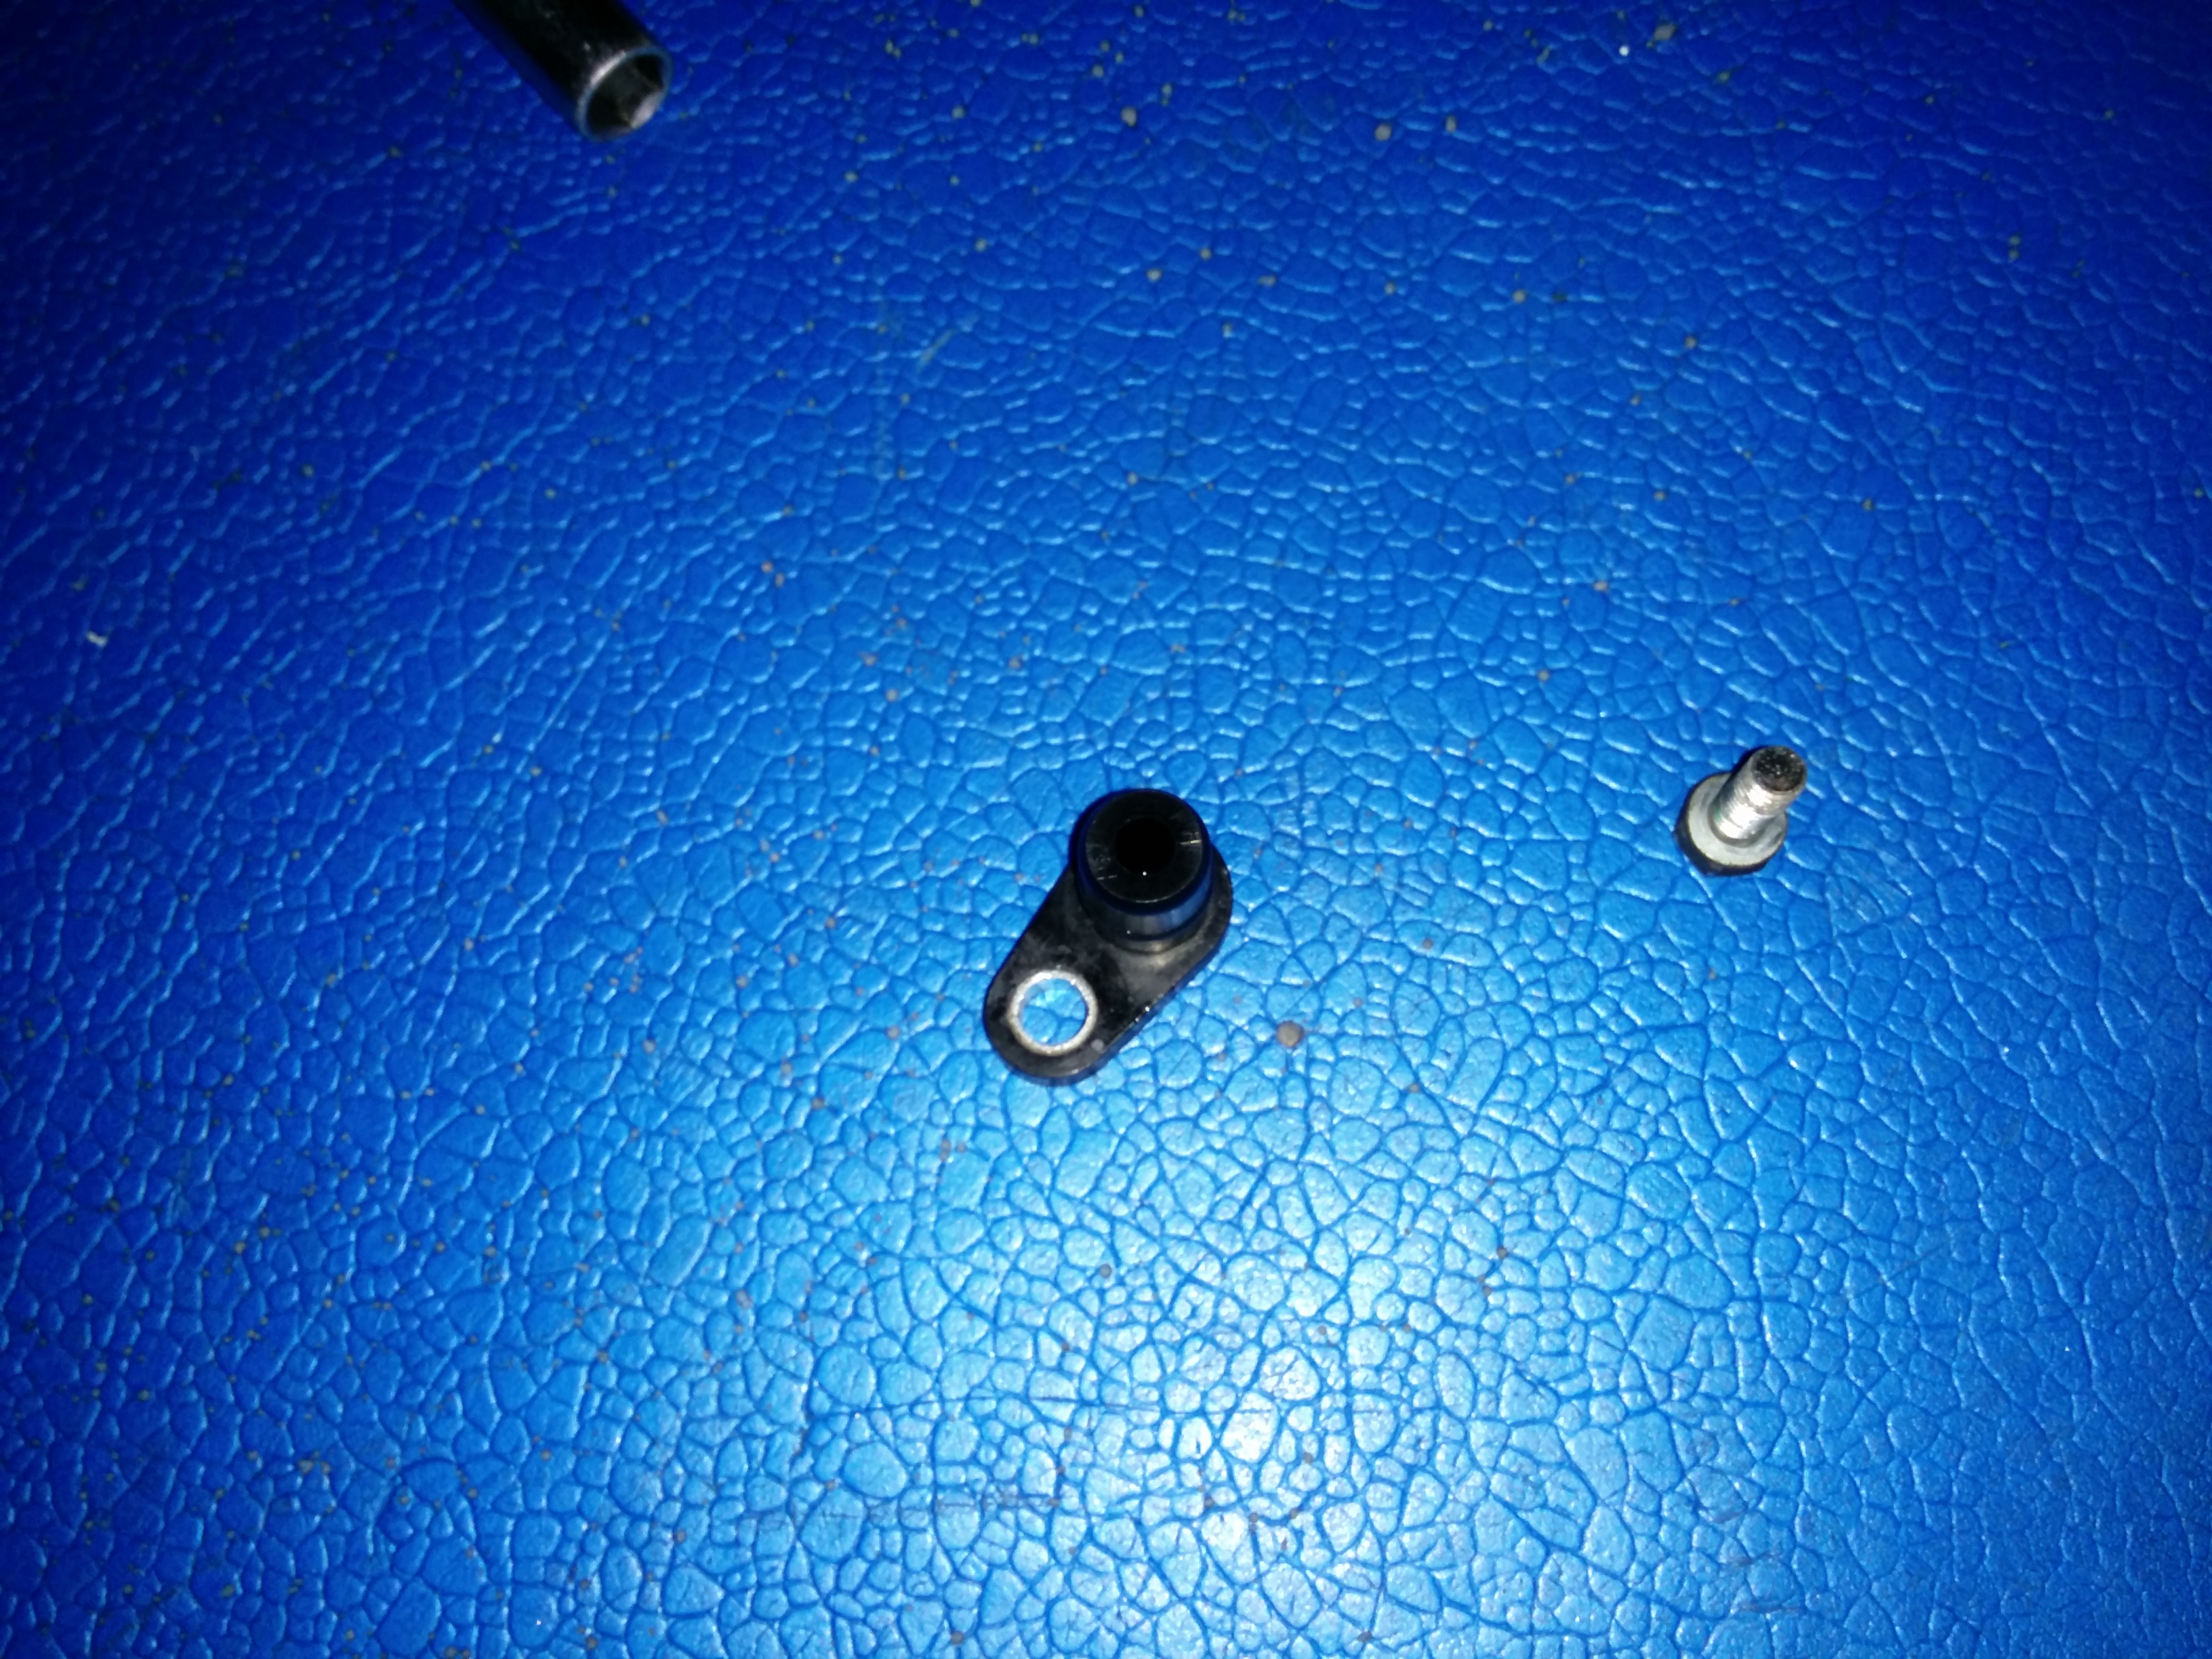
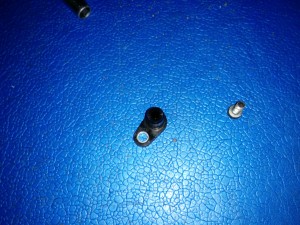
To drain the oil one needs to remove the sump “plug” (6mm hex).
IMG_20150725_182552

It is not a real drain plug as only about 200ml-300ml would come out. Once the fluid stops draining, use the same 6mm hex socket in the hole where the sump plug was, and gently unscrew the plastic tube. This time there will be about 1-1.5L of fluid coming out.

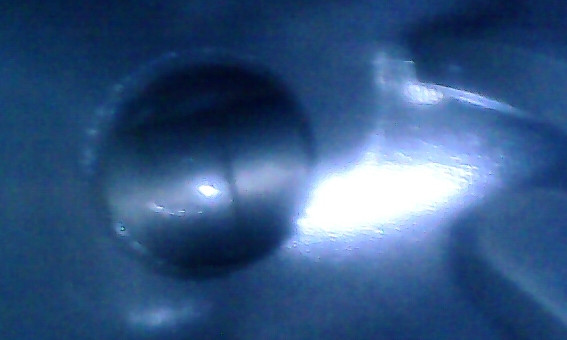
Here is the plastic tube that sits inside of the drain hole:
IMG_20150725_182709

By removing the plastic tube the oil level will become just below the gasket line, if the car is jacked up front up the fluid will be above the gasket line (about 200-300ml) on the far side of the sump (due to angle of the car). The spill can be avoided if the rear of the car is jacked up as well to make it levelled. I found this hard way.

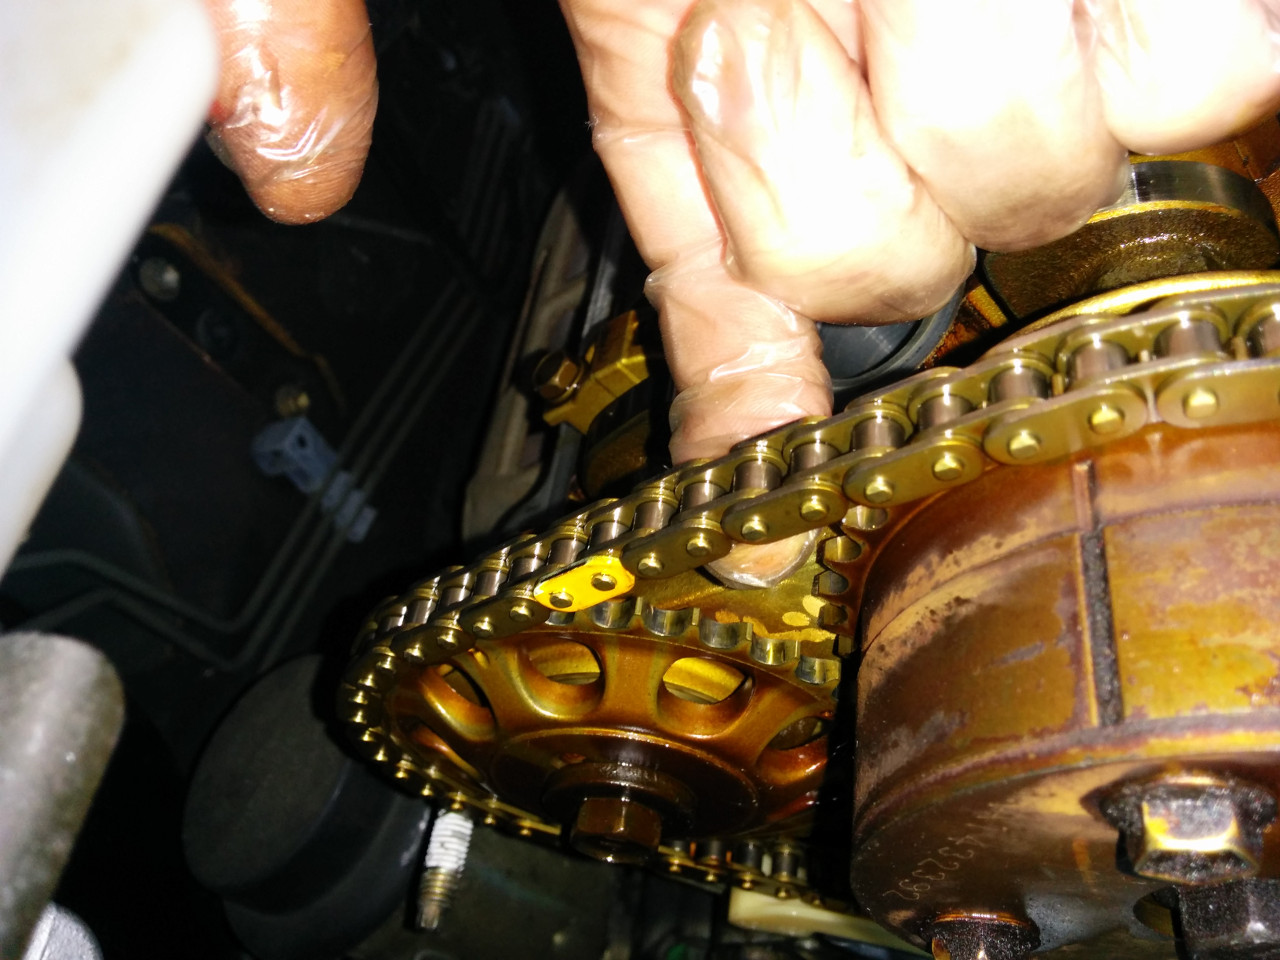
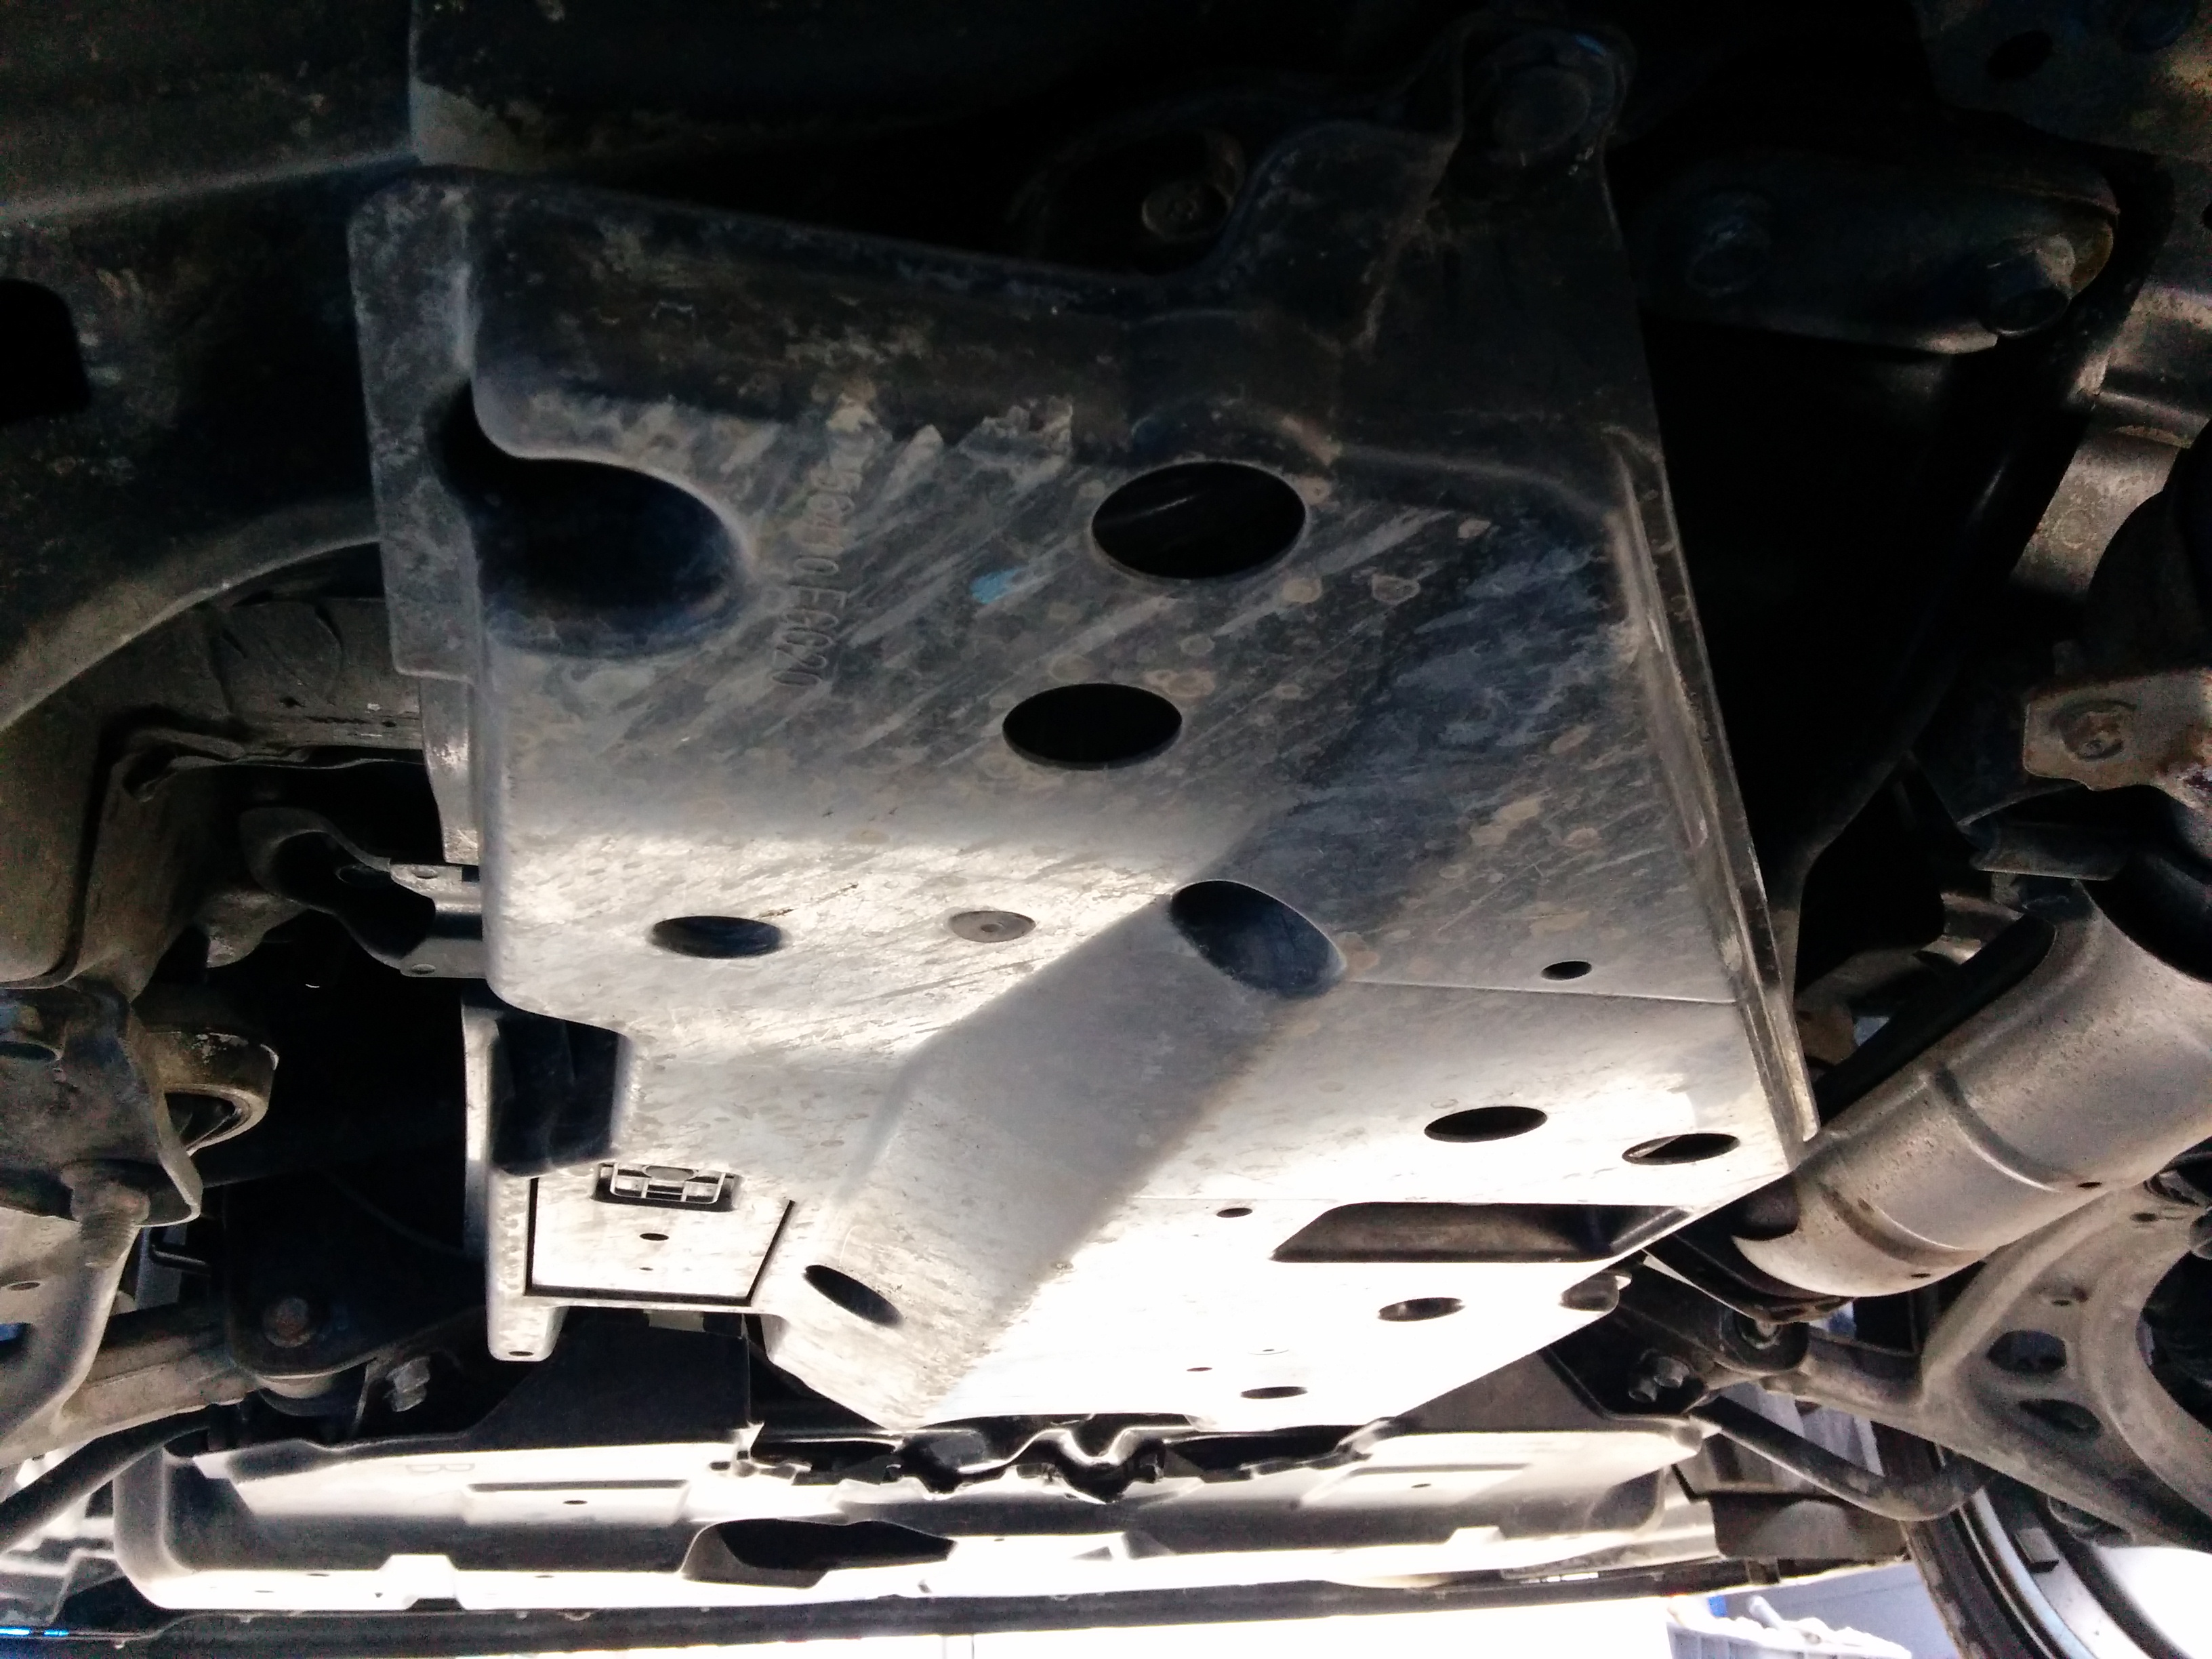
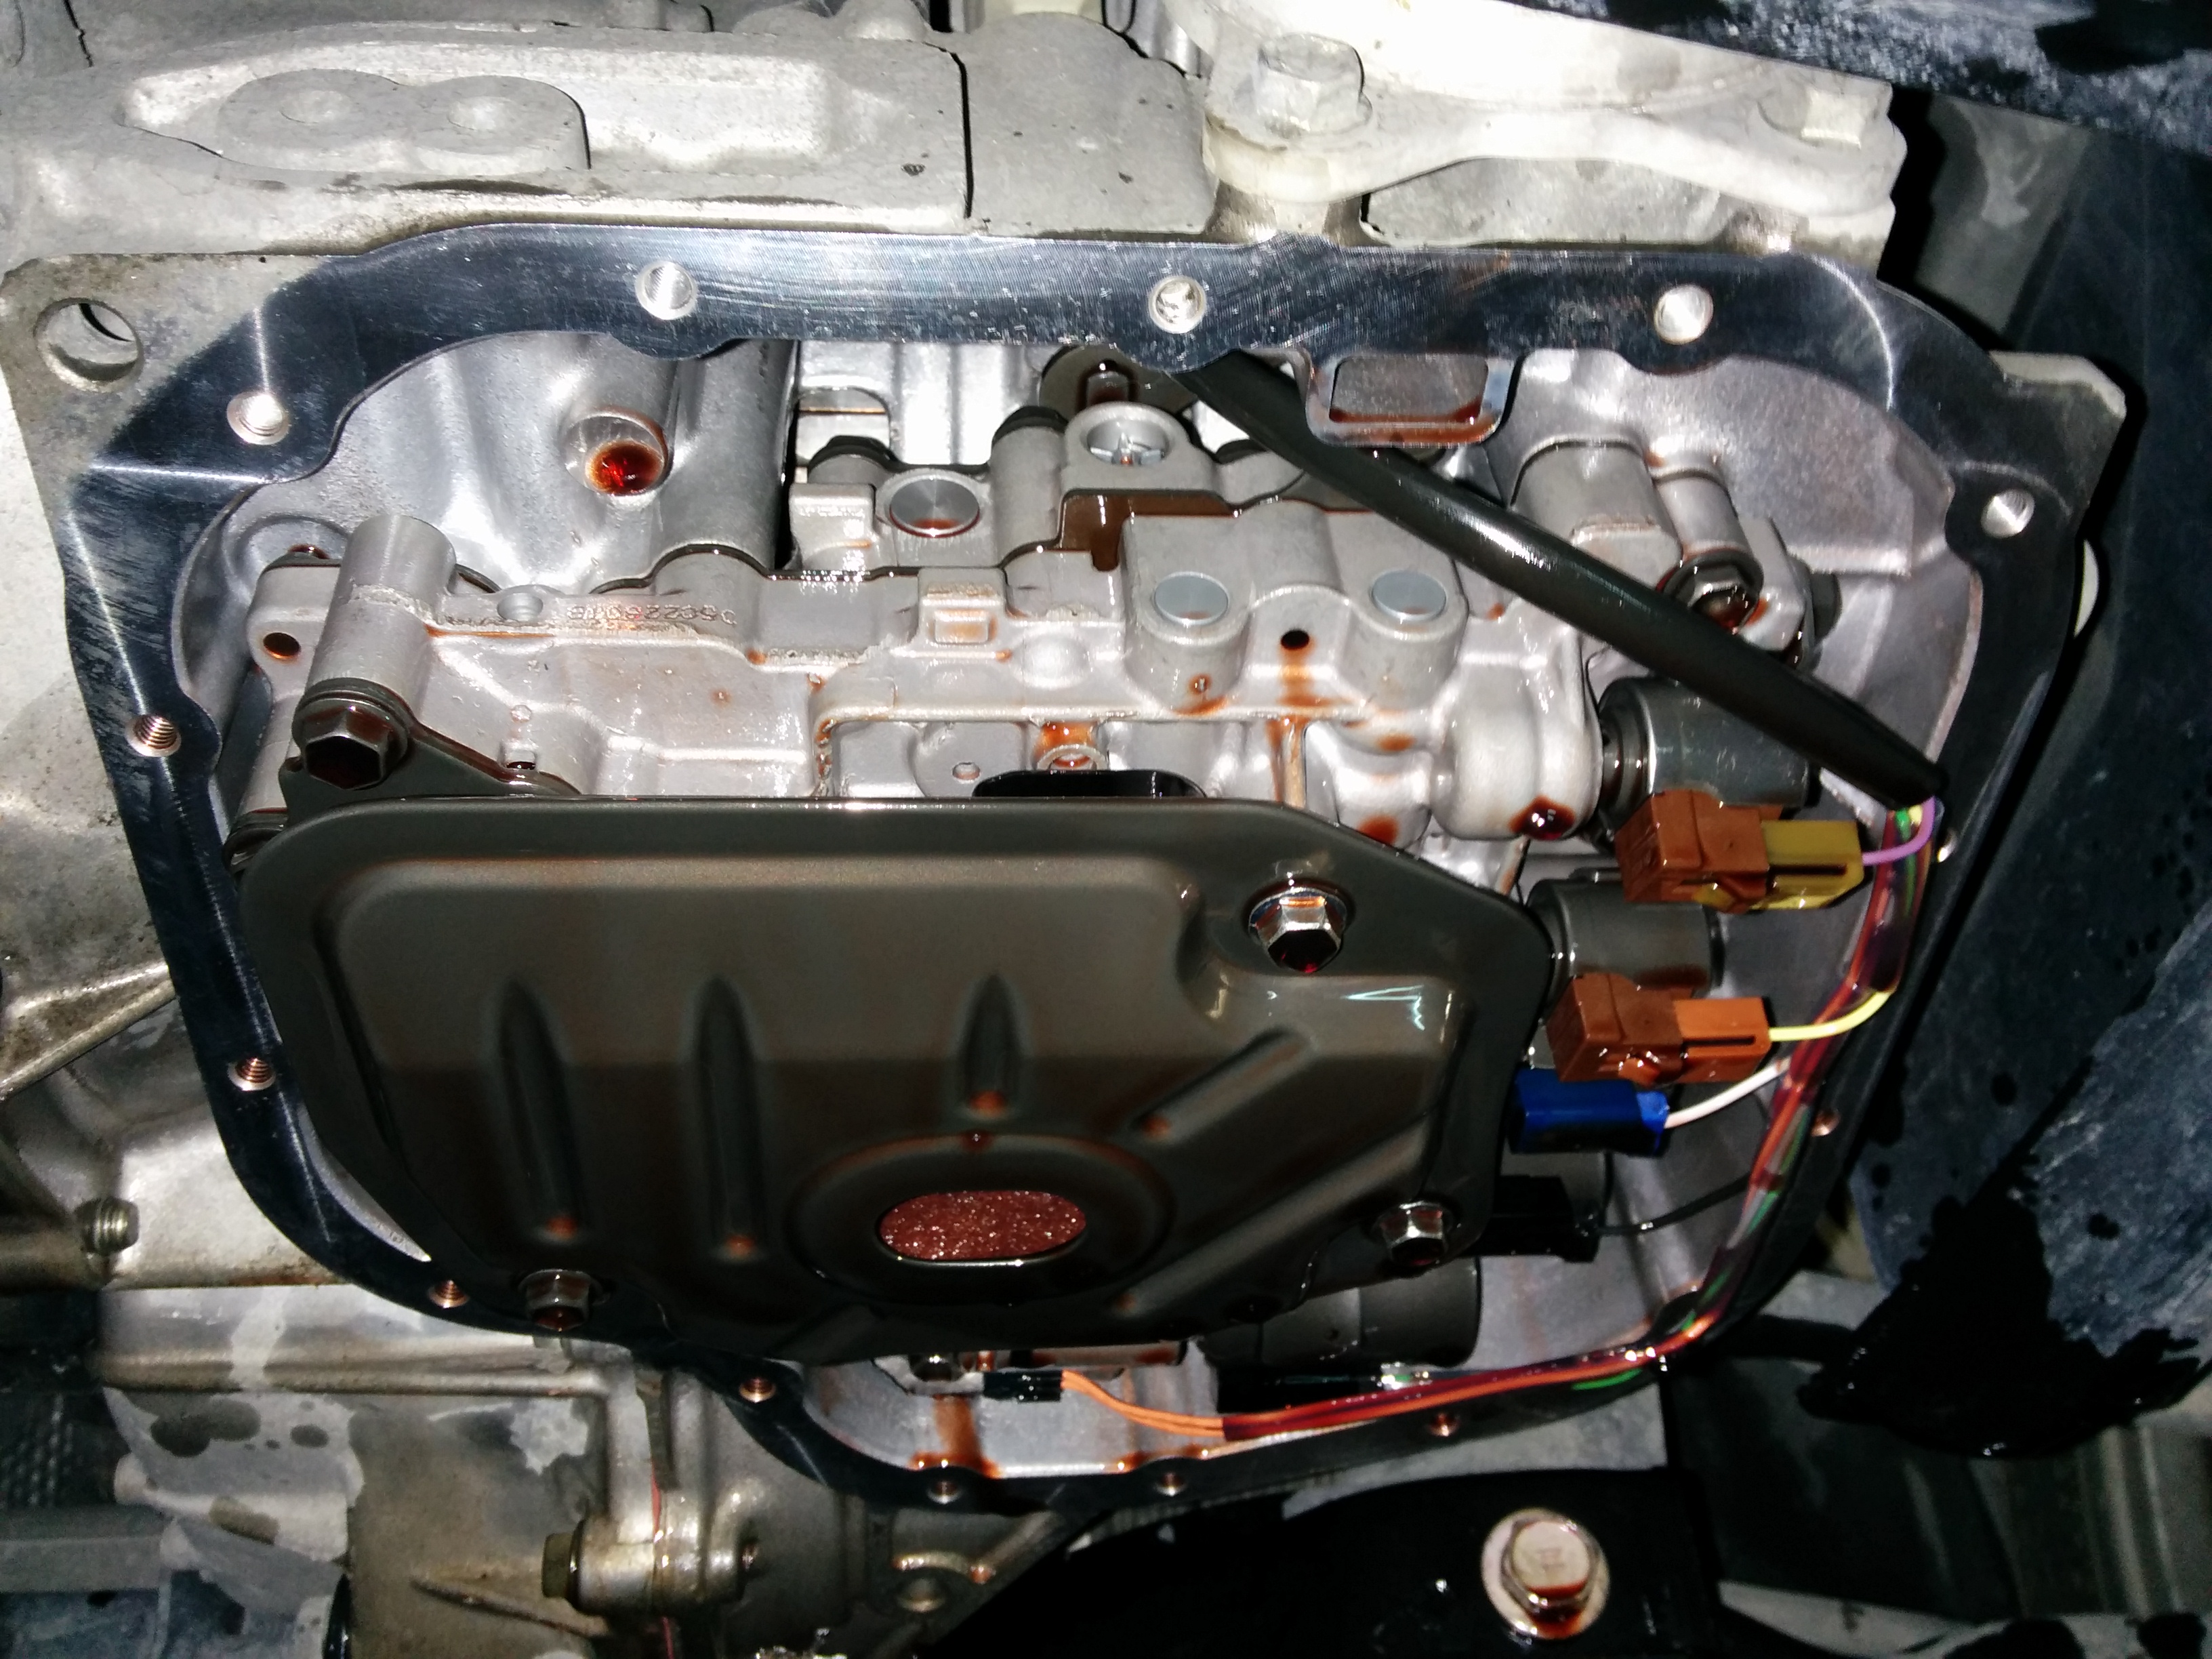
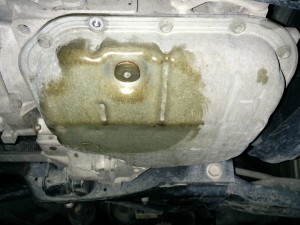
Once it is drained via sump plug, put the plug back in and unscrew 10mm bolts holding the sump. You will find the sump is “stuck” and will need a gentle pry to remove it. Watch out for oil as there is about 1L of oil left in the sump!

IMG_20150725_183302

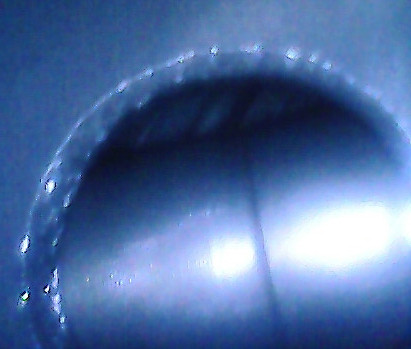
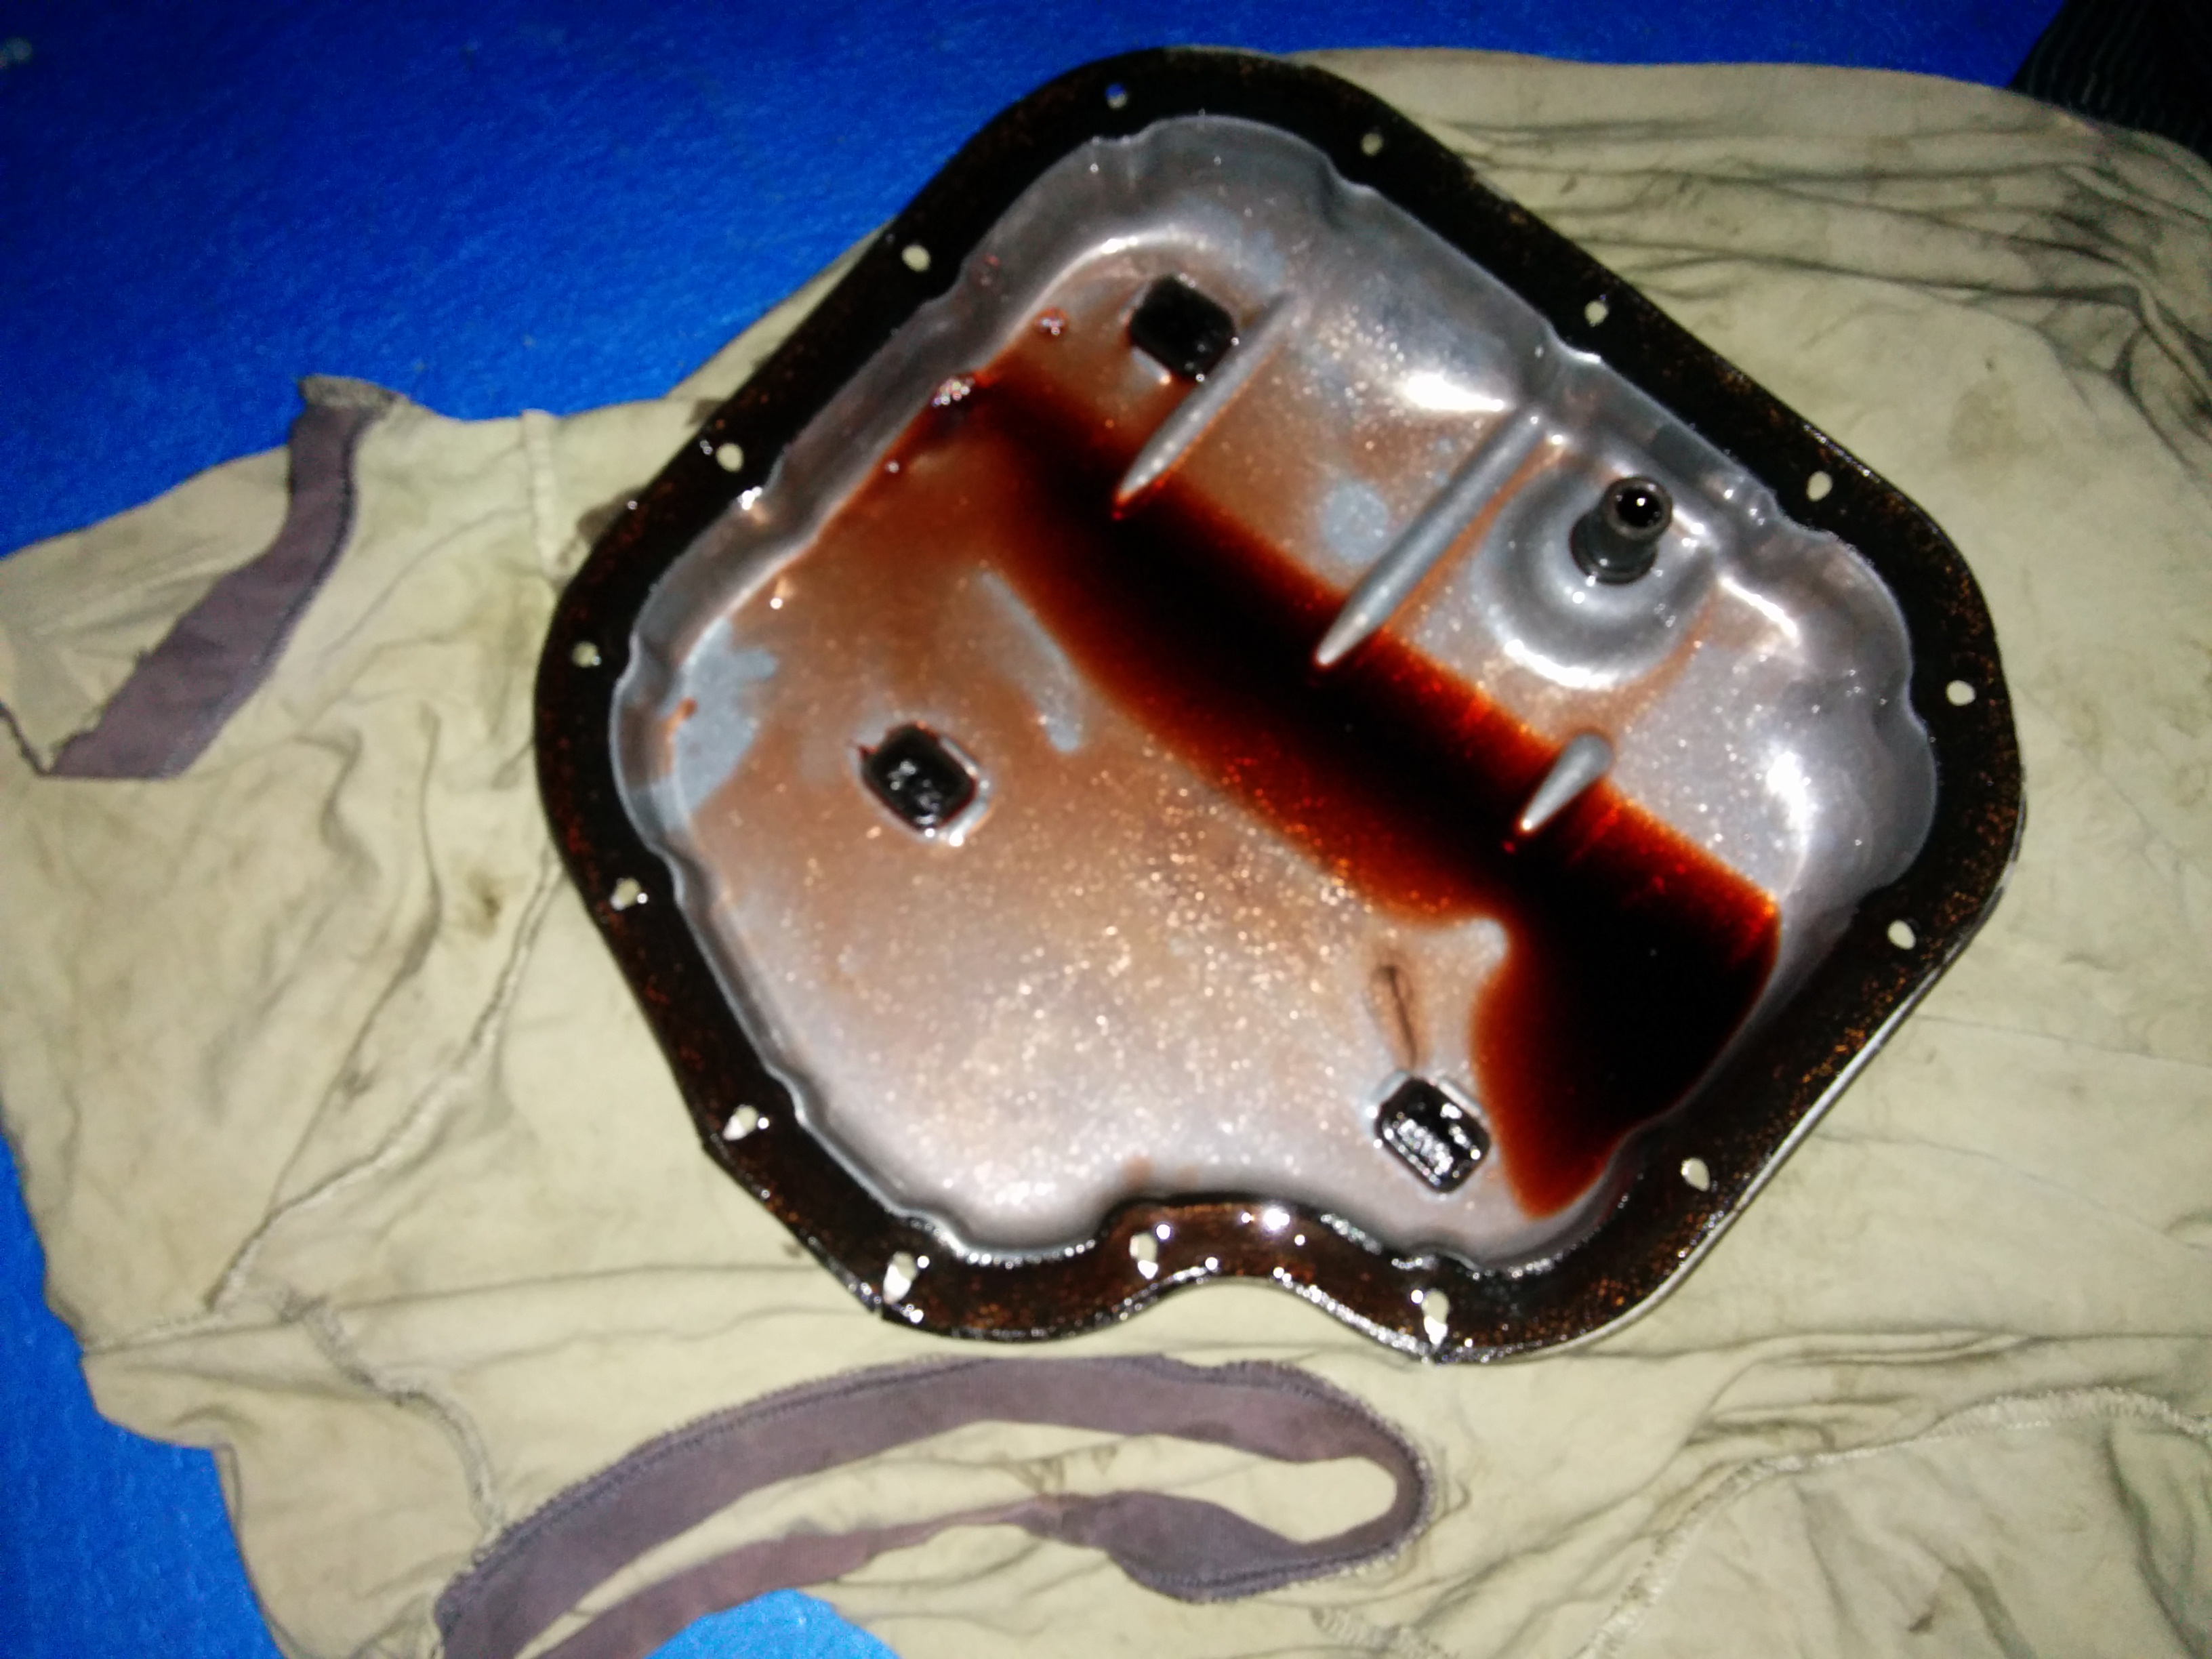
Clean magnets while the sump is out (they should have minimal amount of shavings):
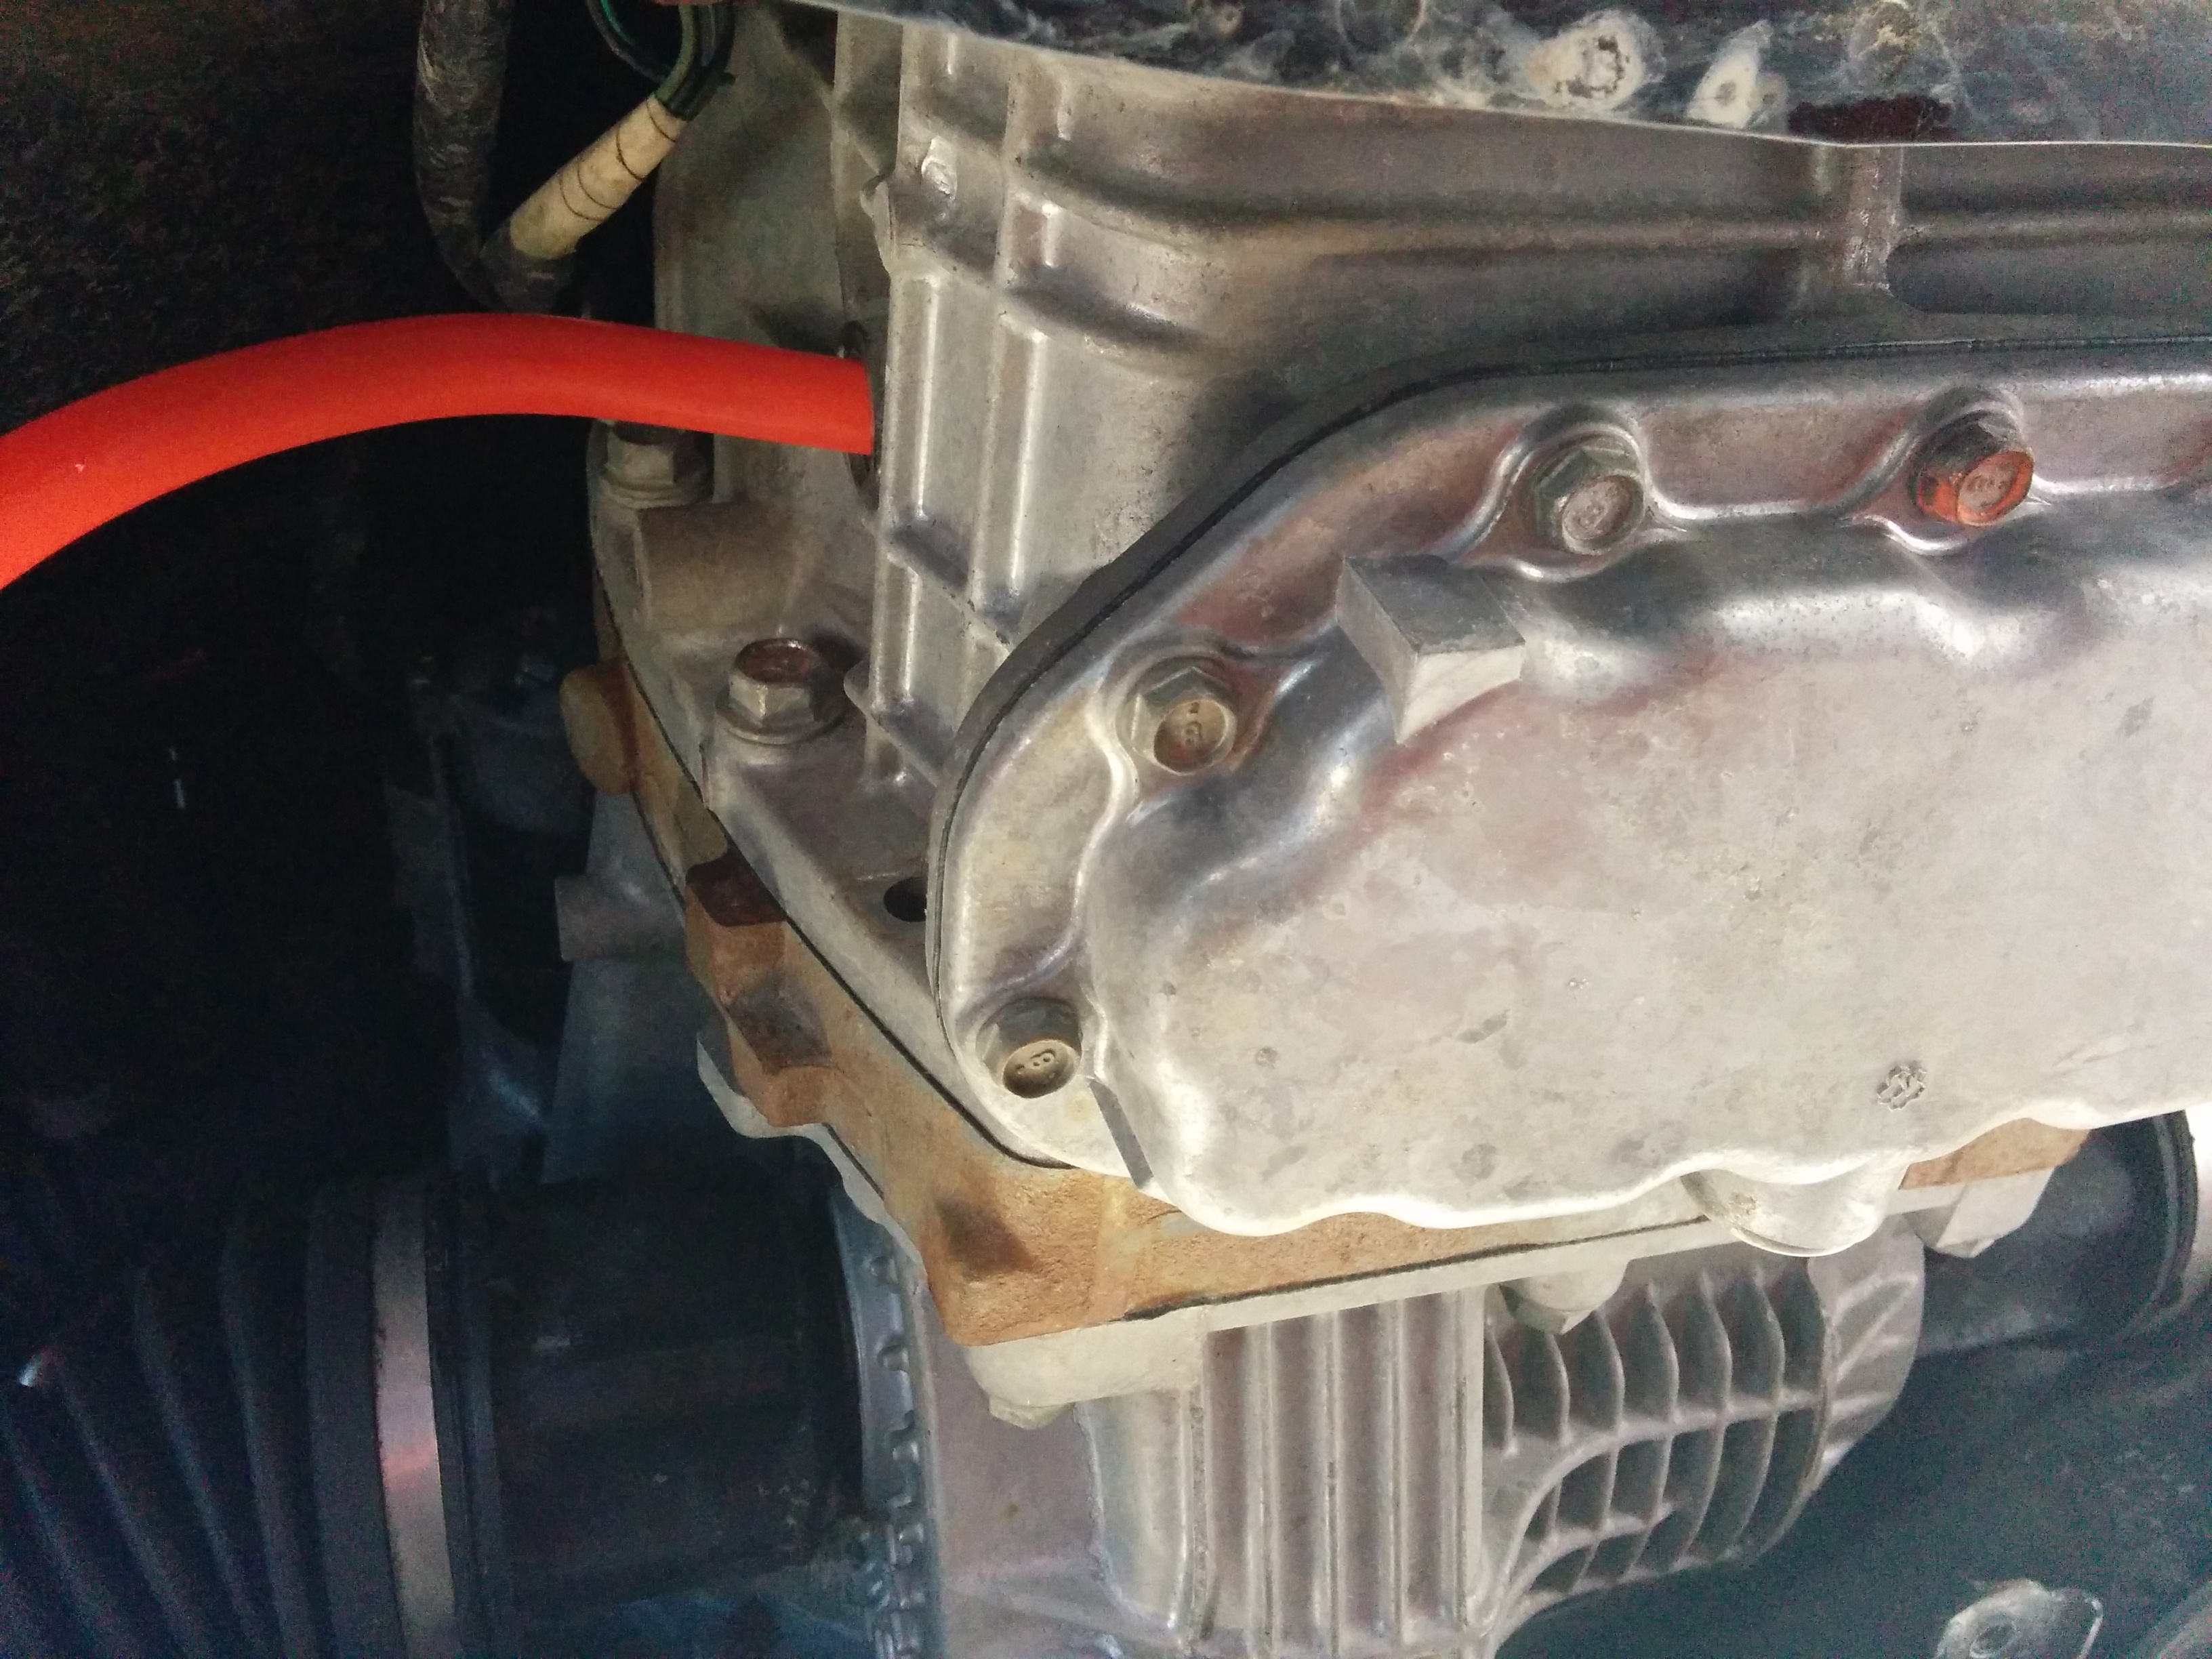
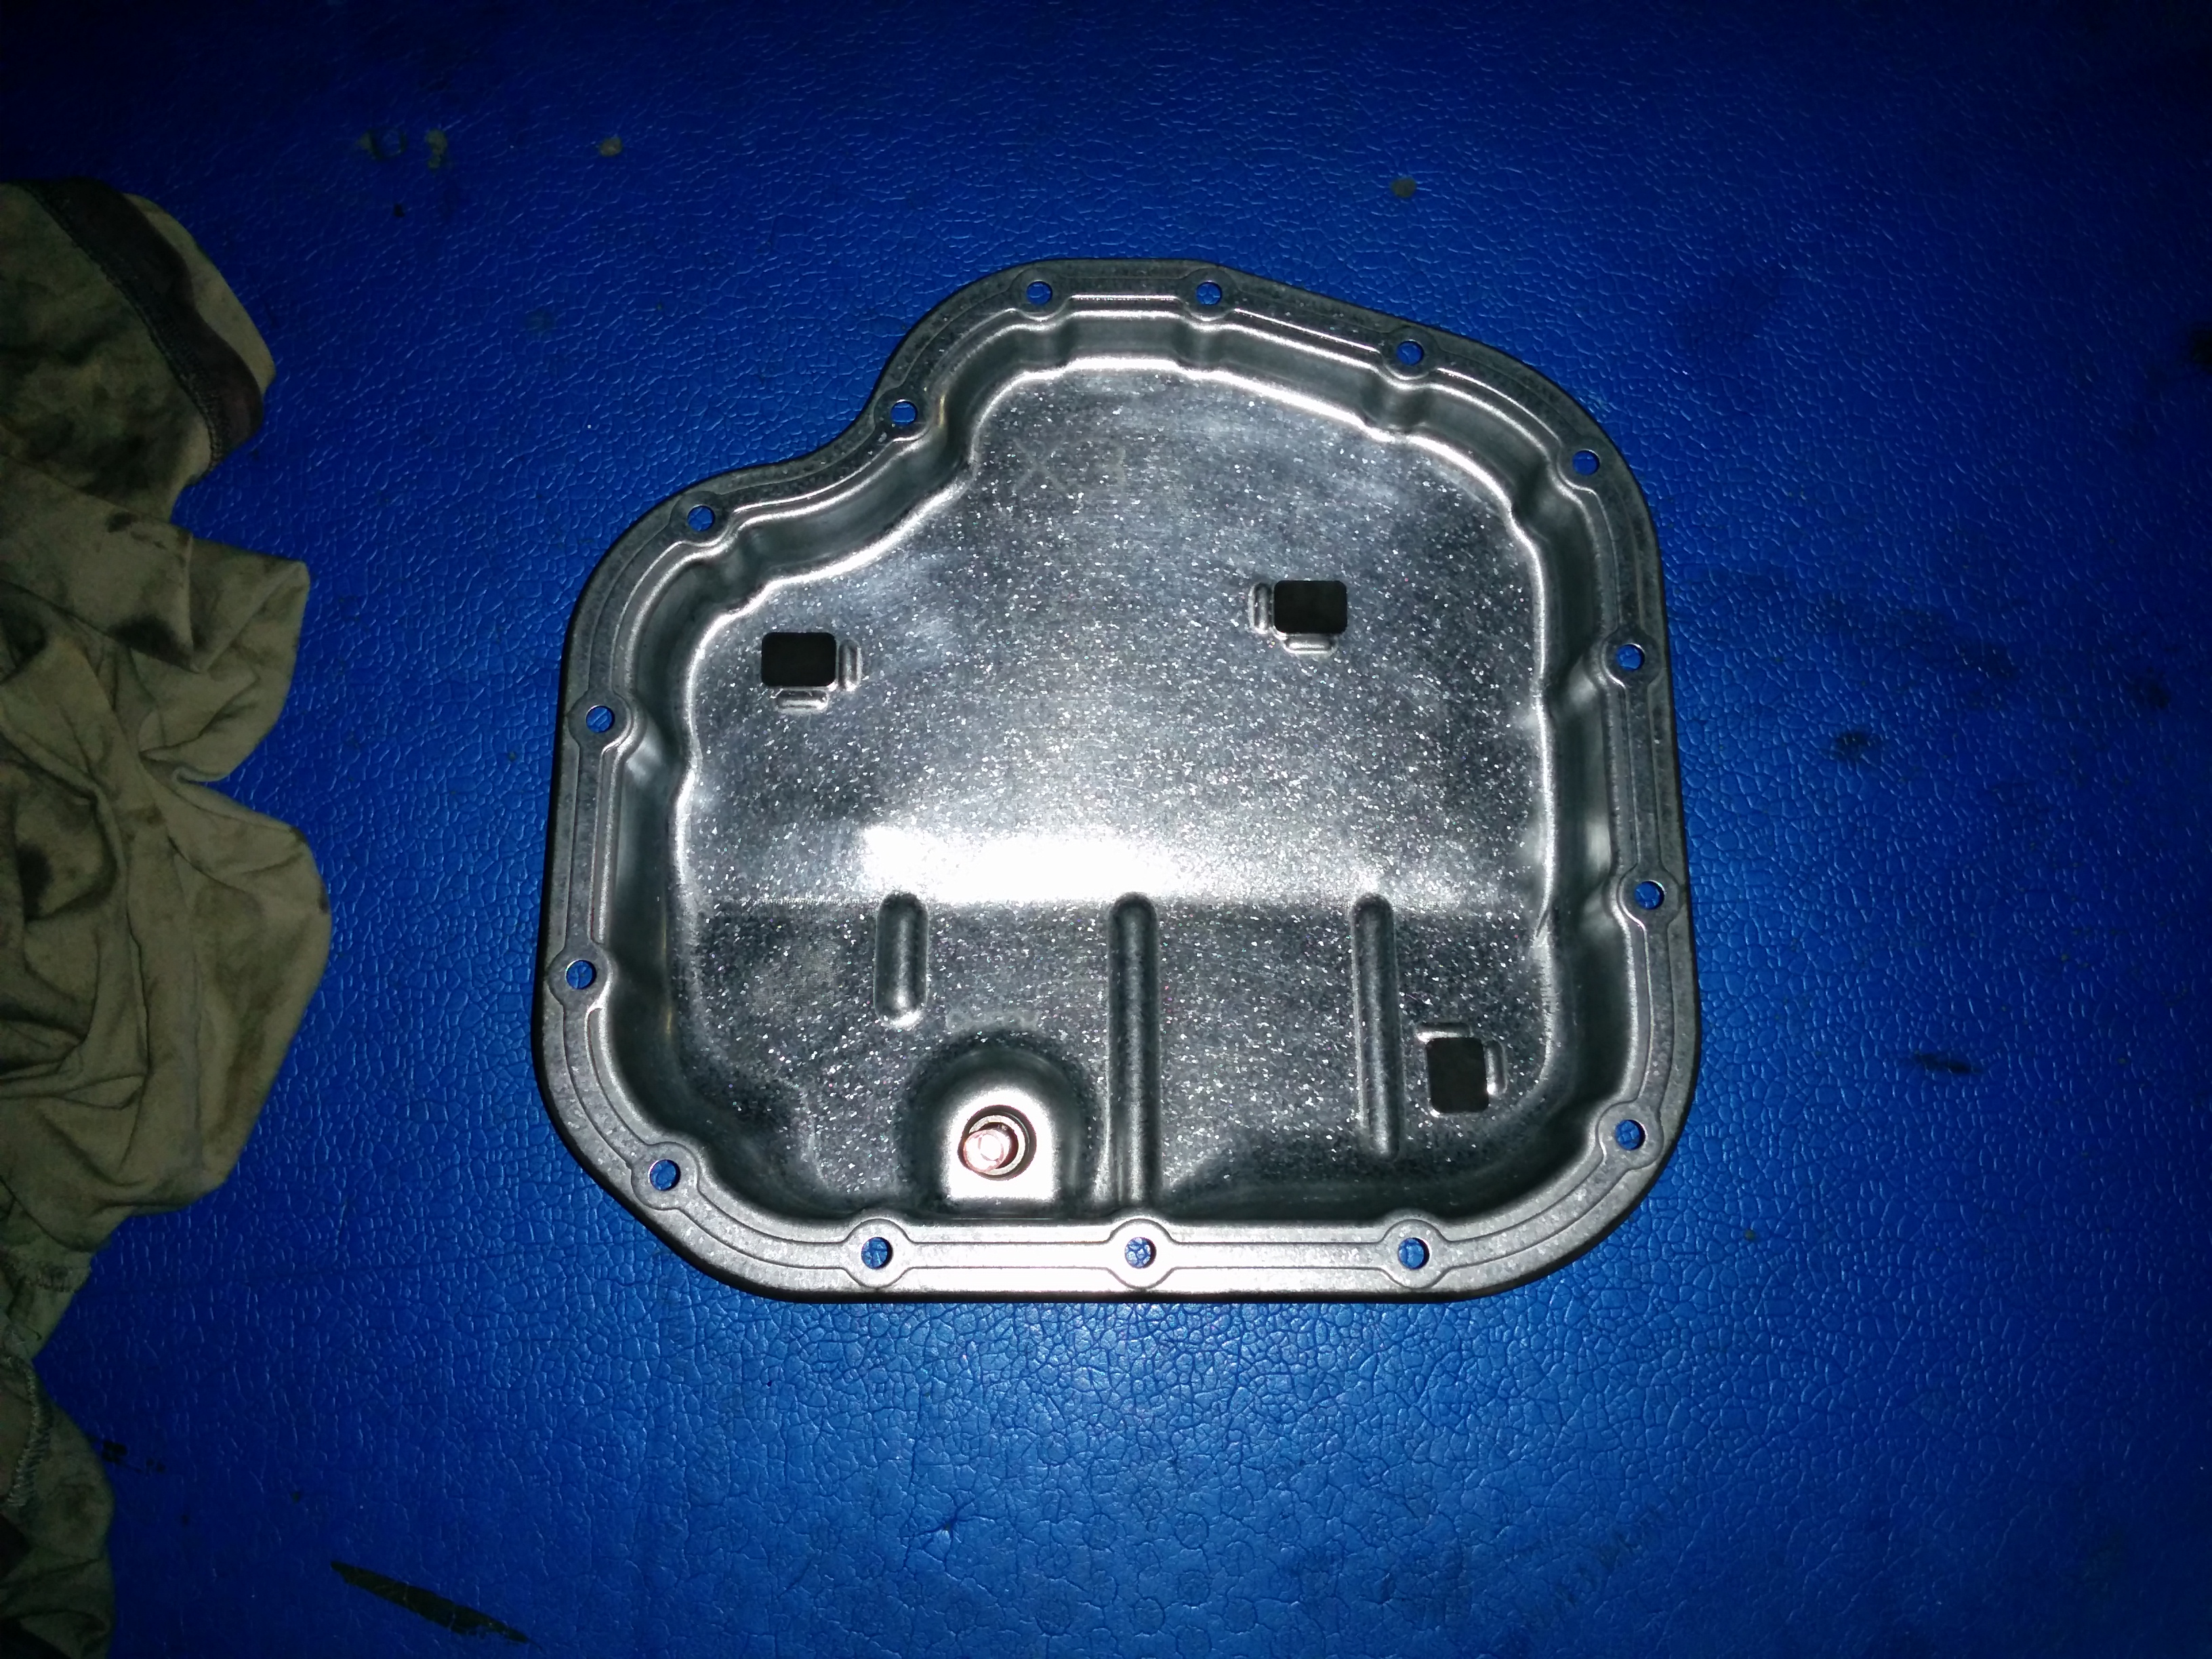
IMG_20150725_183930

New gasket:
IMG_20150725_184201

Make sure the mating surface is clean:
IMG_20150725_184413

Don’t forget to screw in the plastic tube! It goes in the same way it came out.
Check the condition of the strainer (should be clean).

The torque that the sump screws needed to be tighten to is very tiny (8-10Nm), I don’t have exact figure, but it should not be too different from other Toyota auto transmissions (hence the 8-10Nm figure), it must be done evenly. Do not over tighten, as the torque required is almost finger tight! I tightened it in multiple passes (allowing gasket to spread evenly). Best way to start once the sump is held by all screws, is to undo all screws so there is a play (sump can be pushed up) and tighten them in criss-cross pattern with very small torque evenly.

Oil comes in a metal tin can:
IMG_20150725_191052

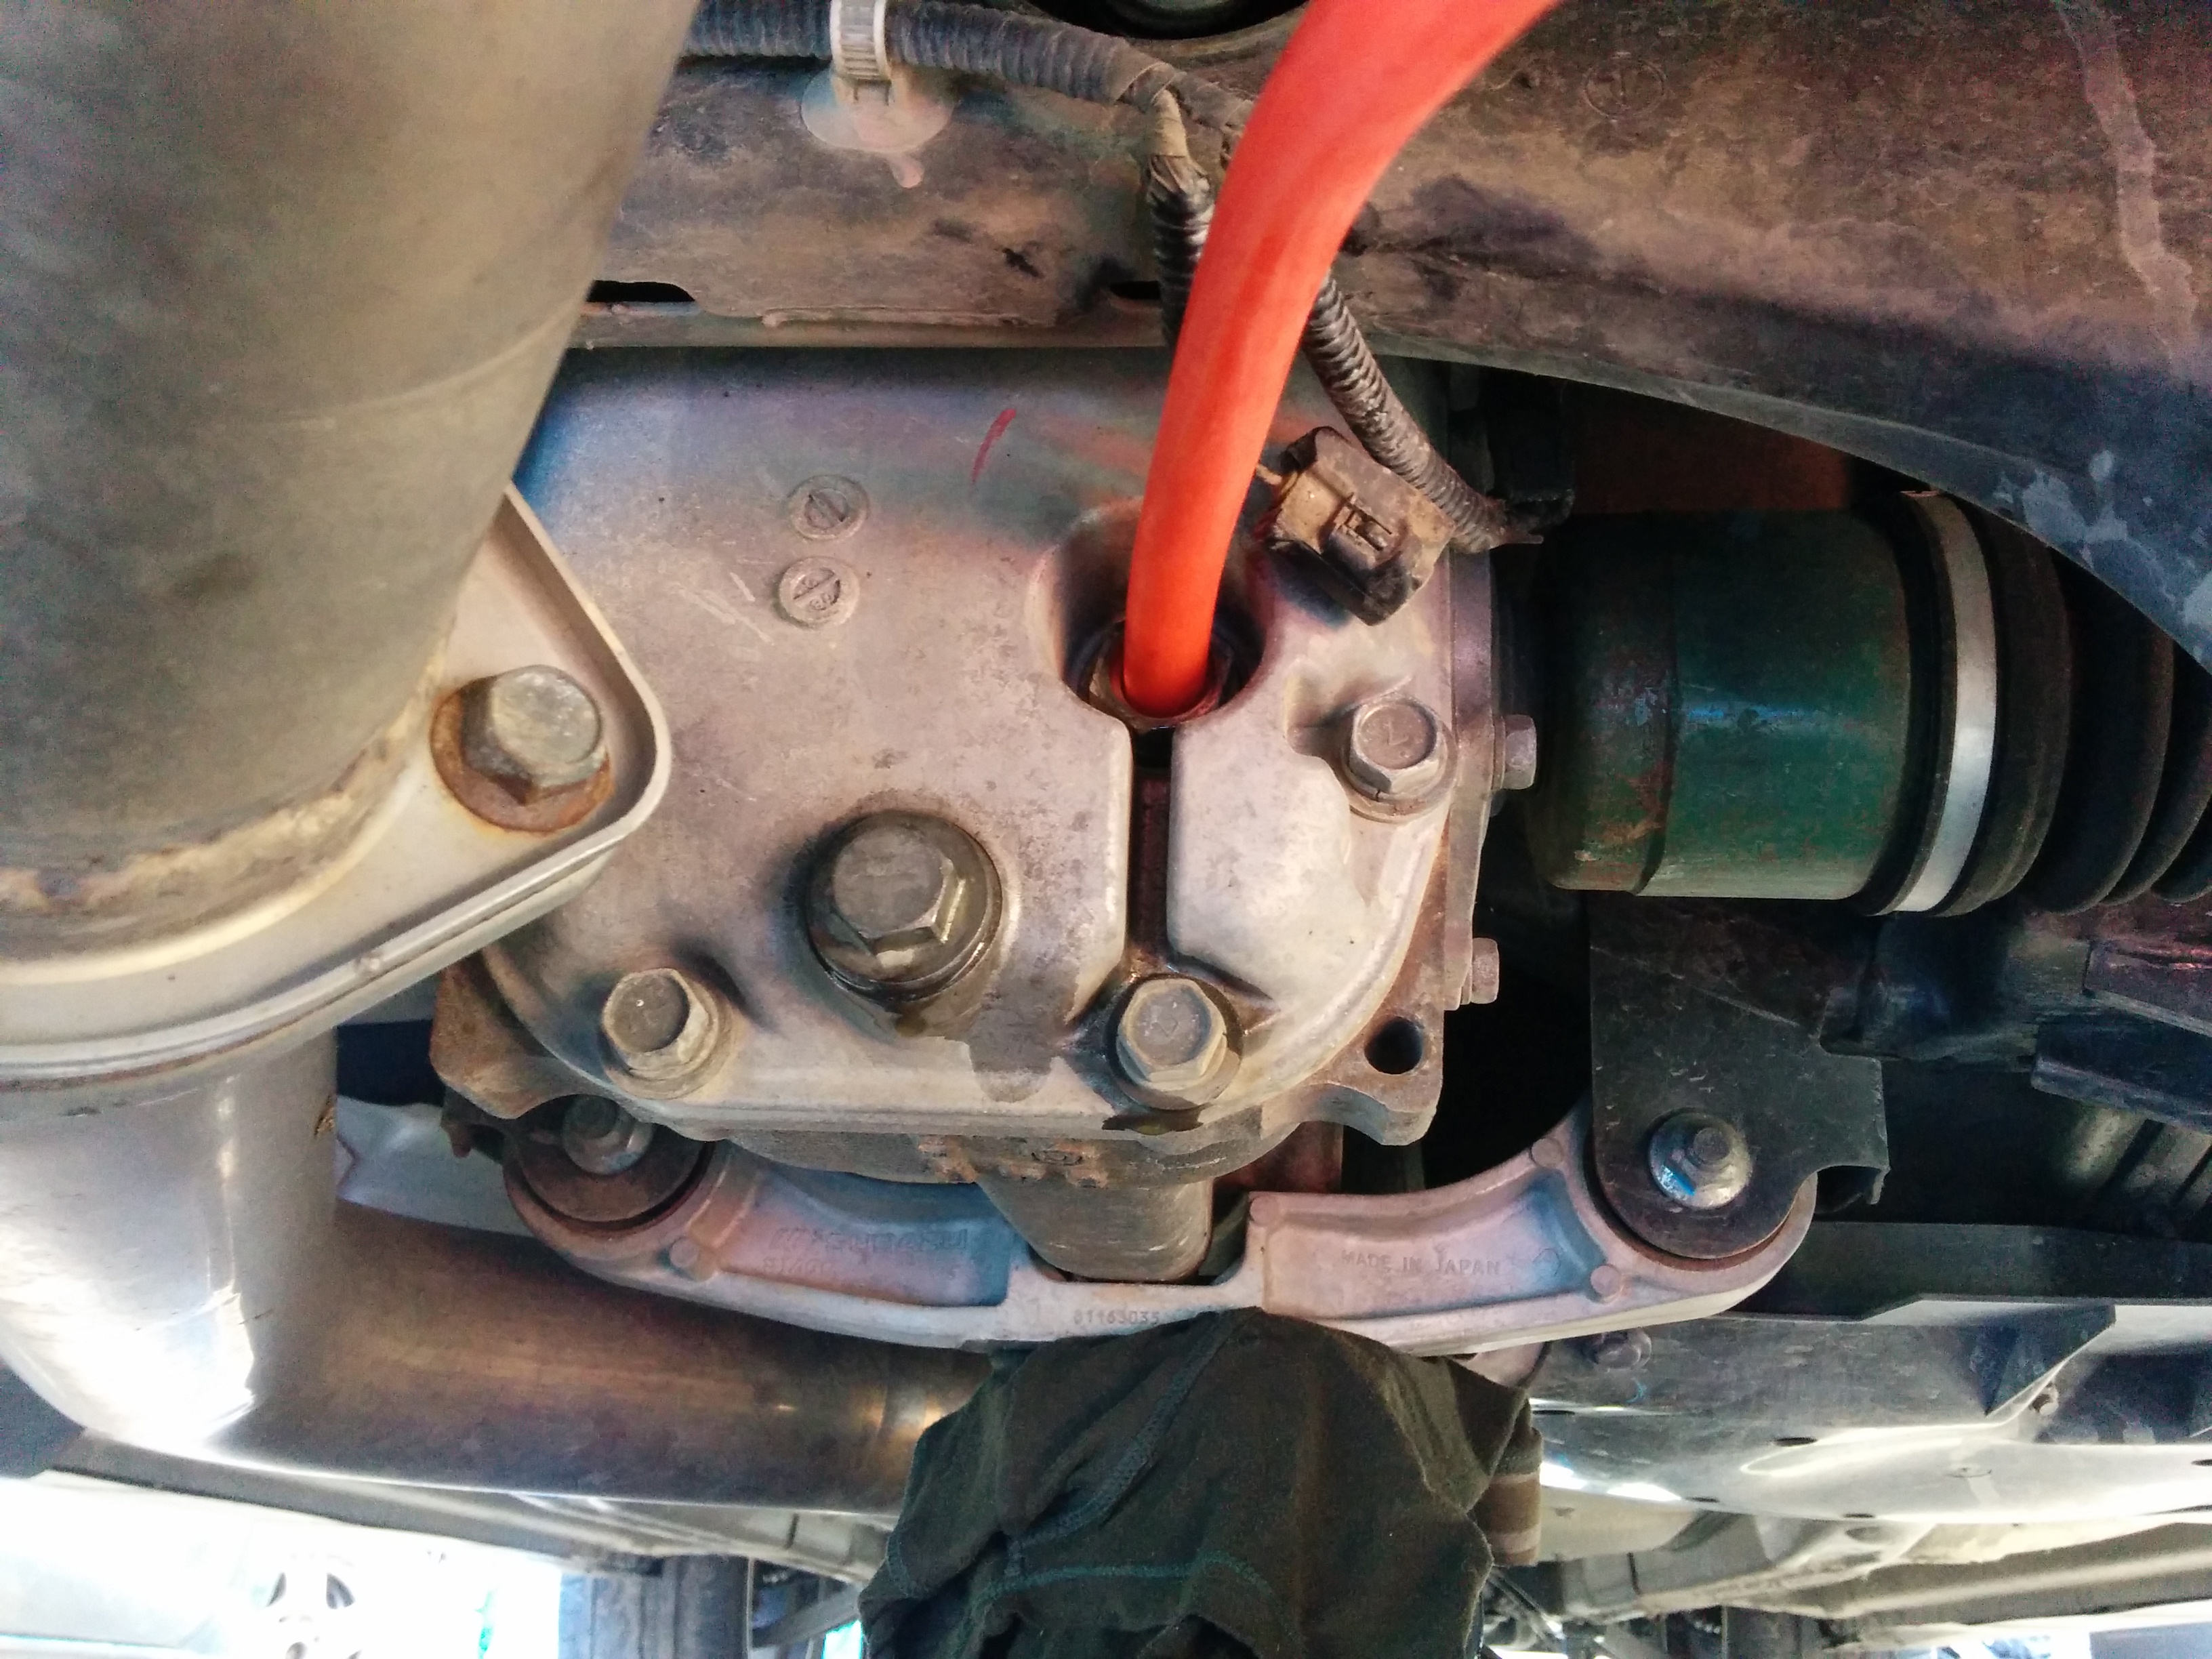
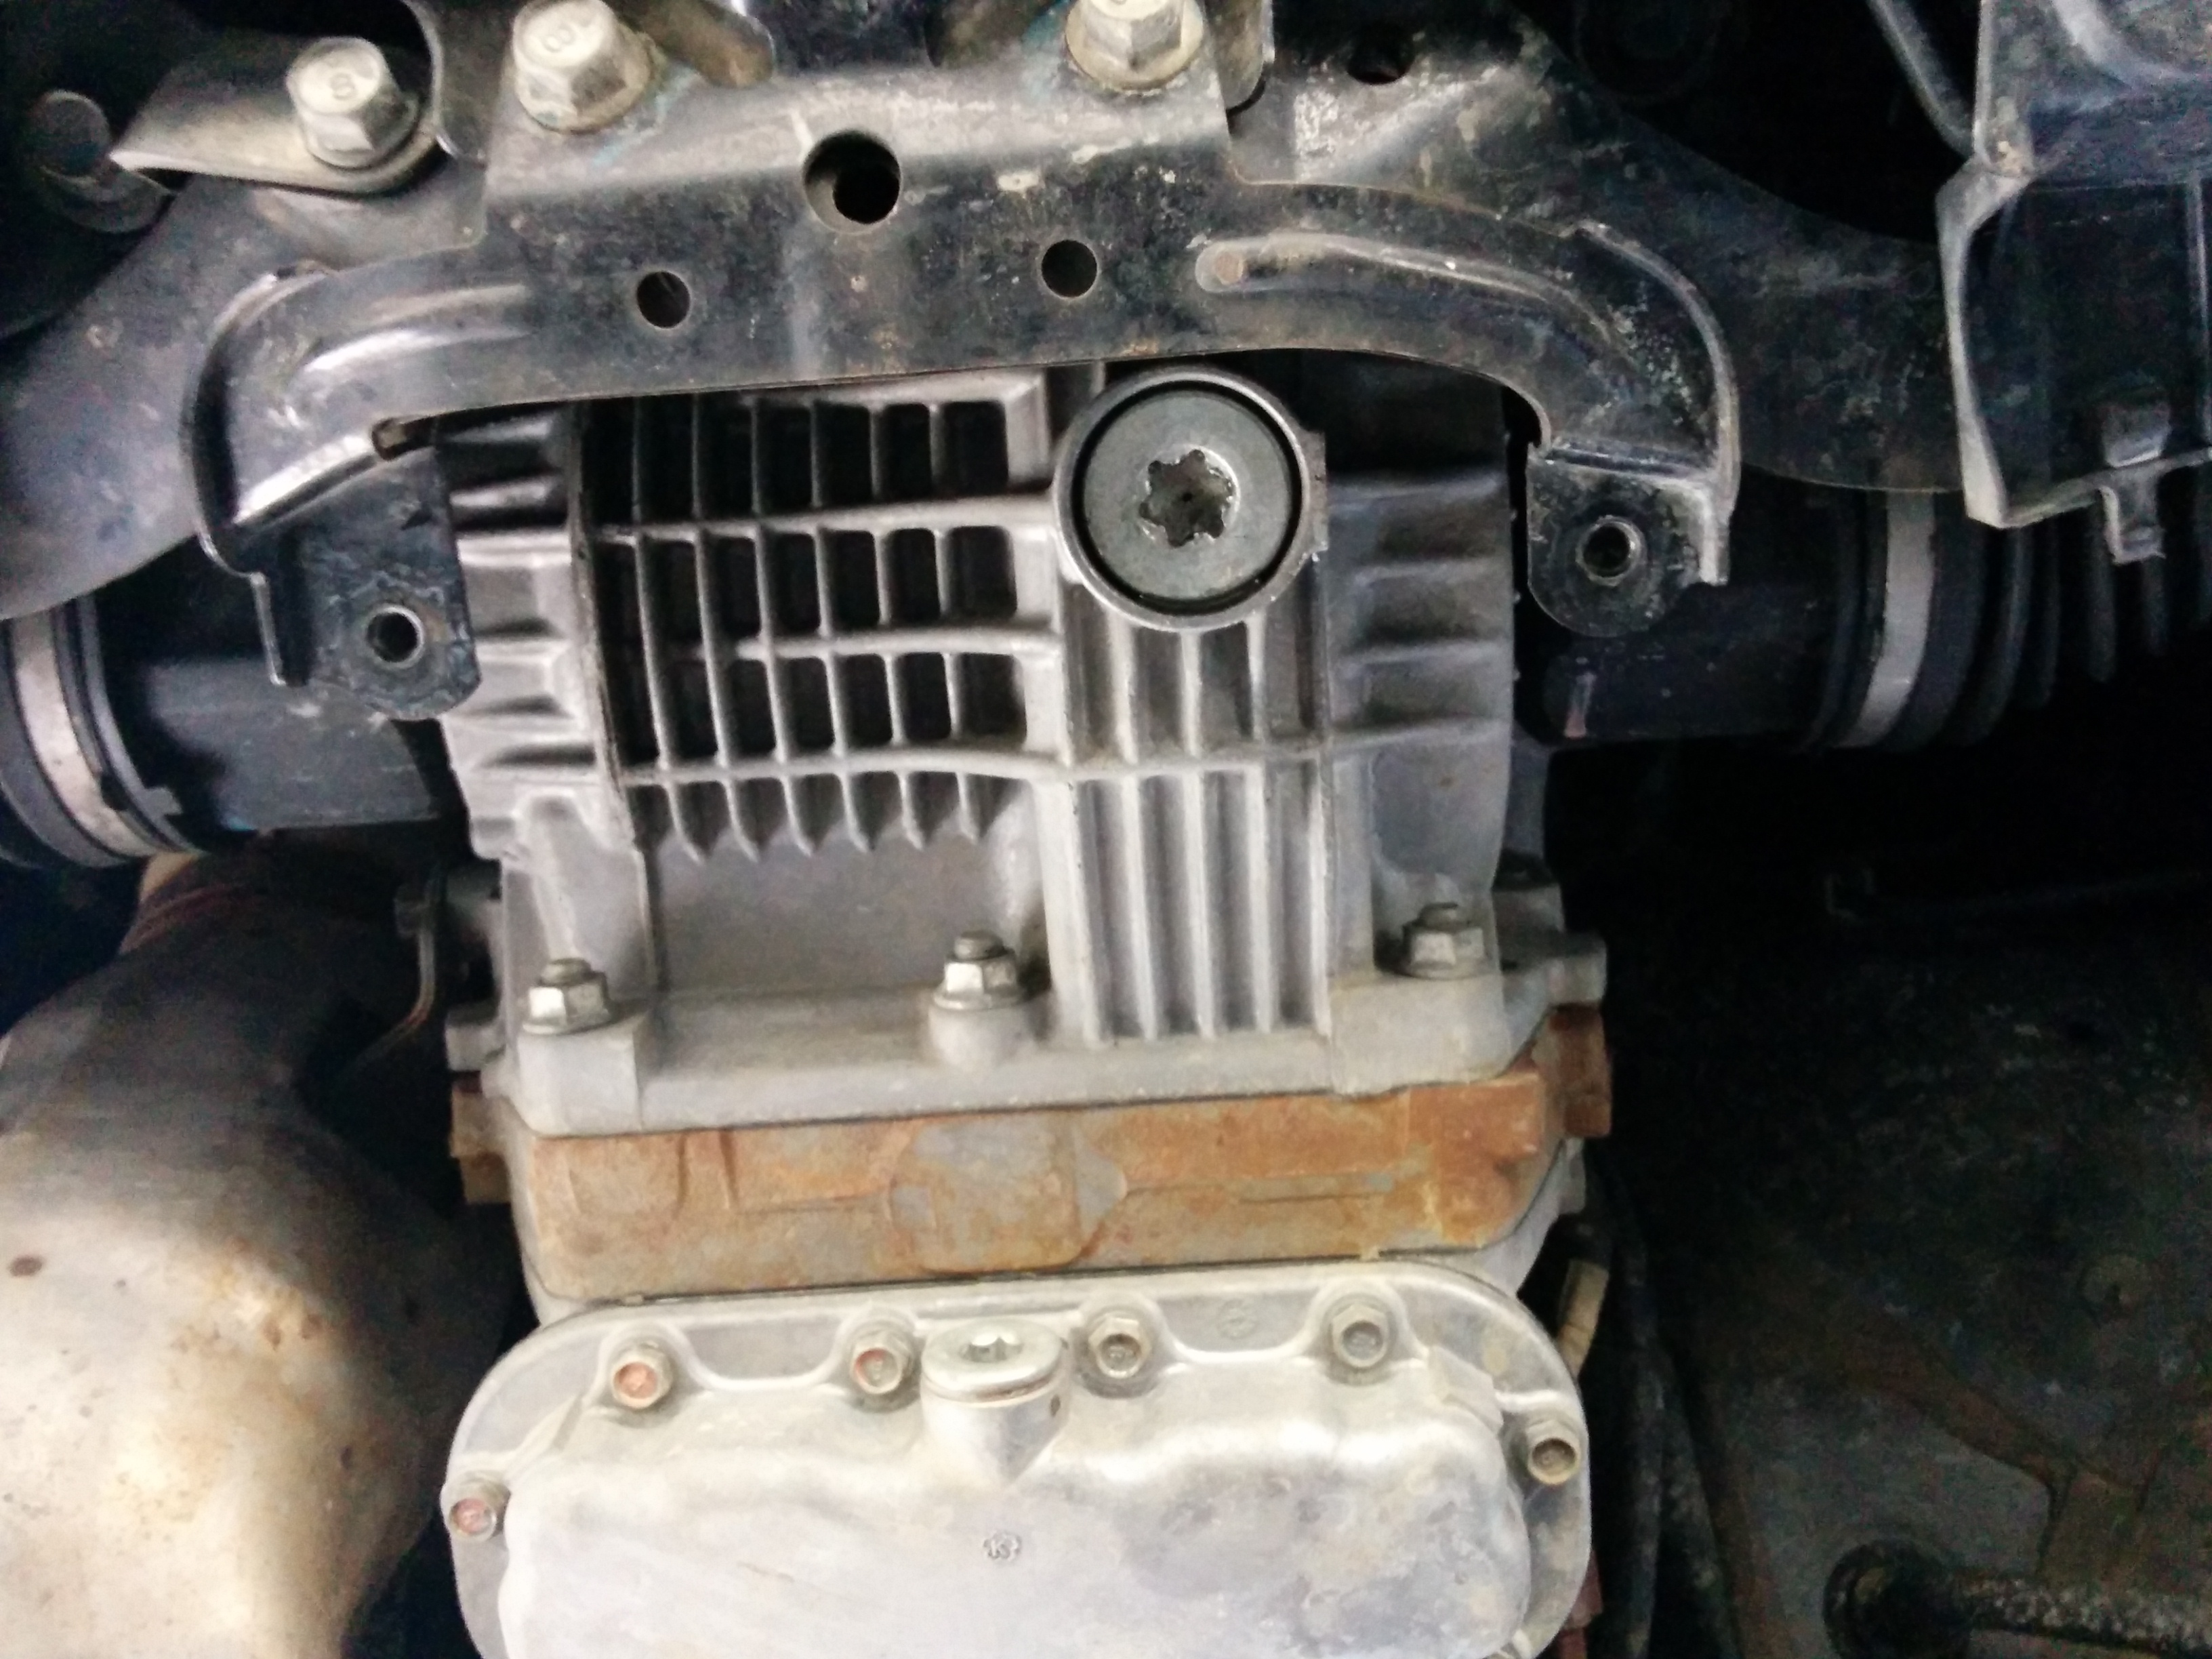
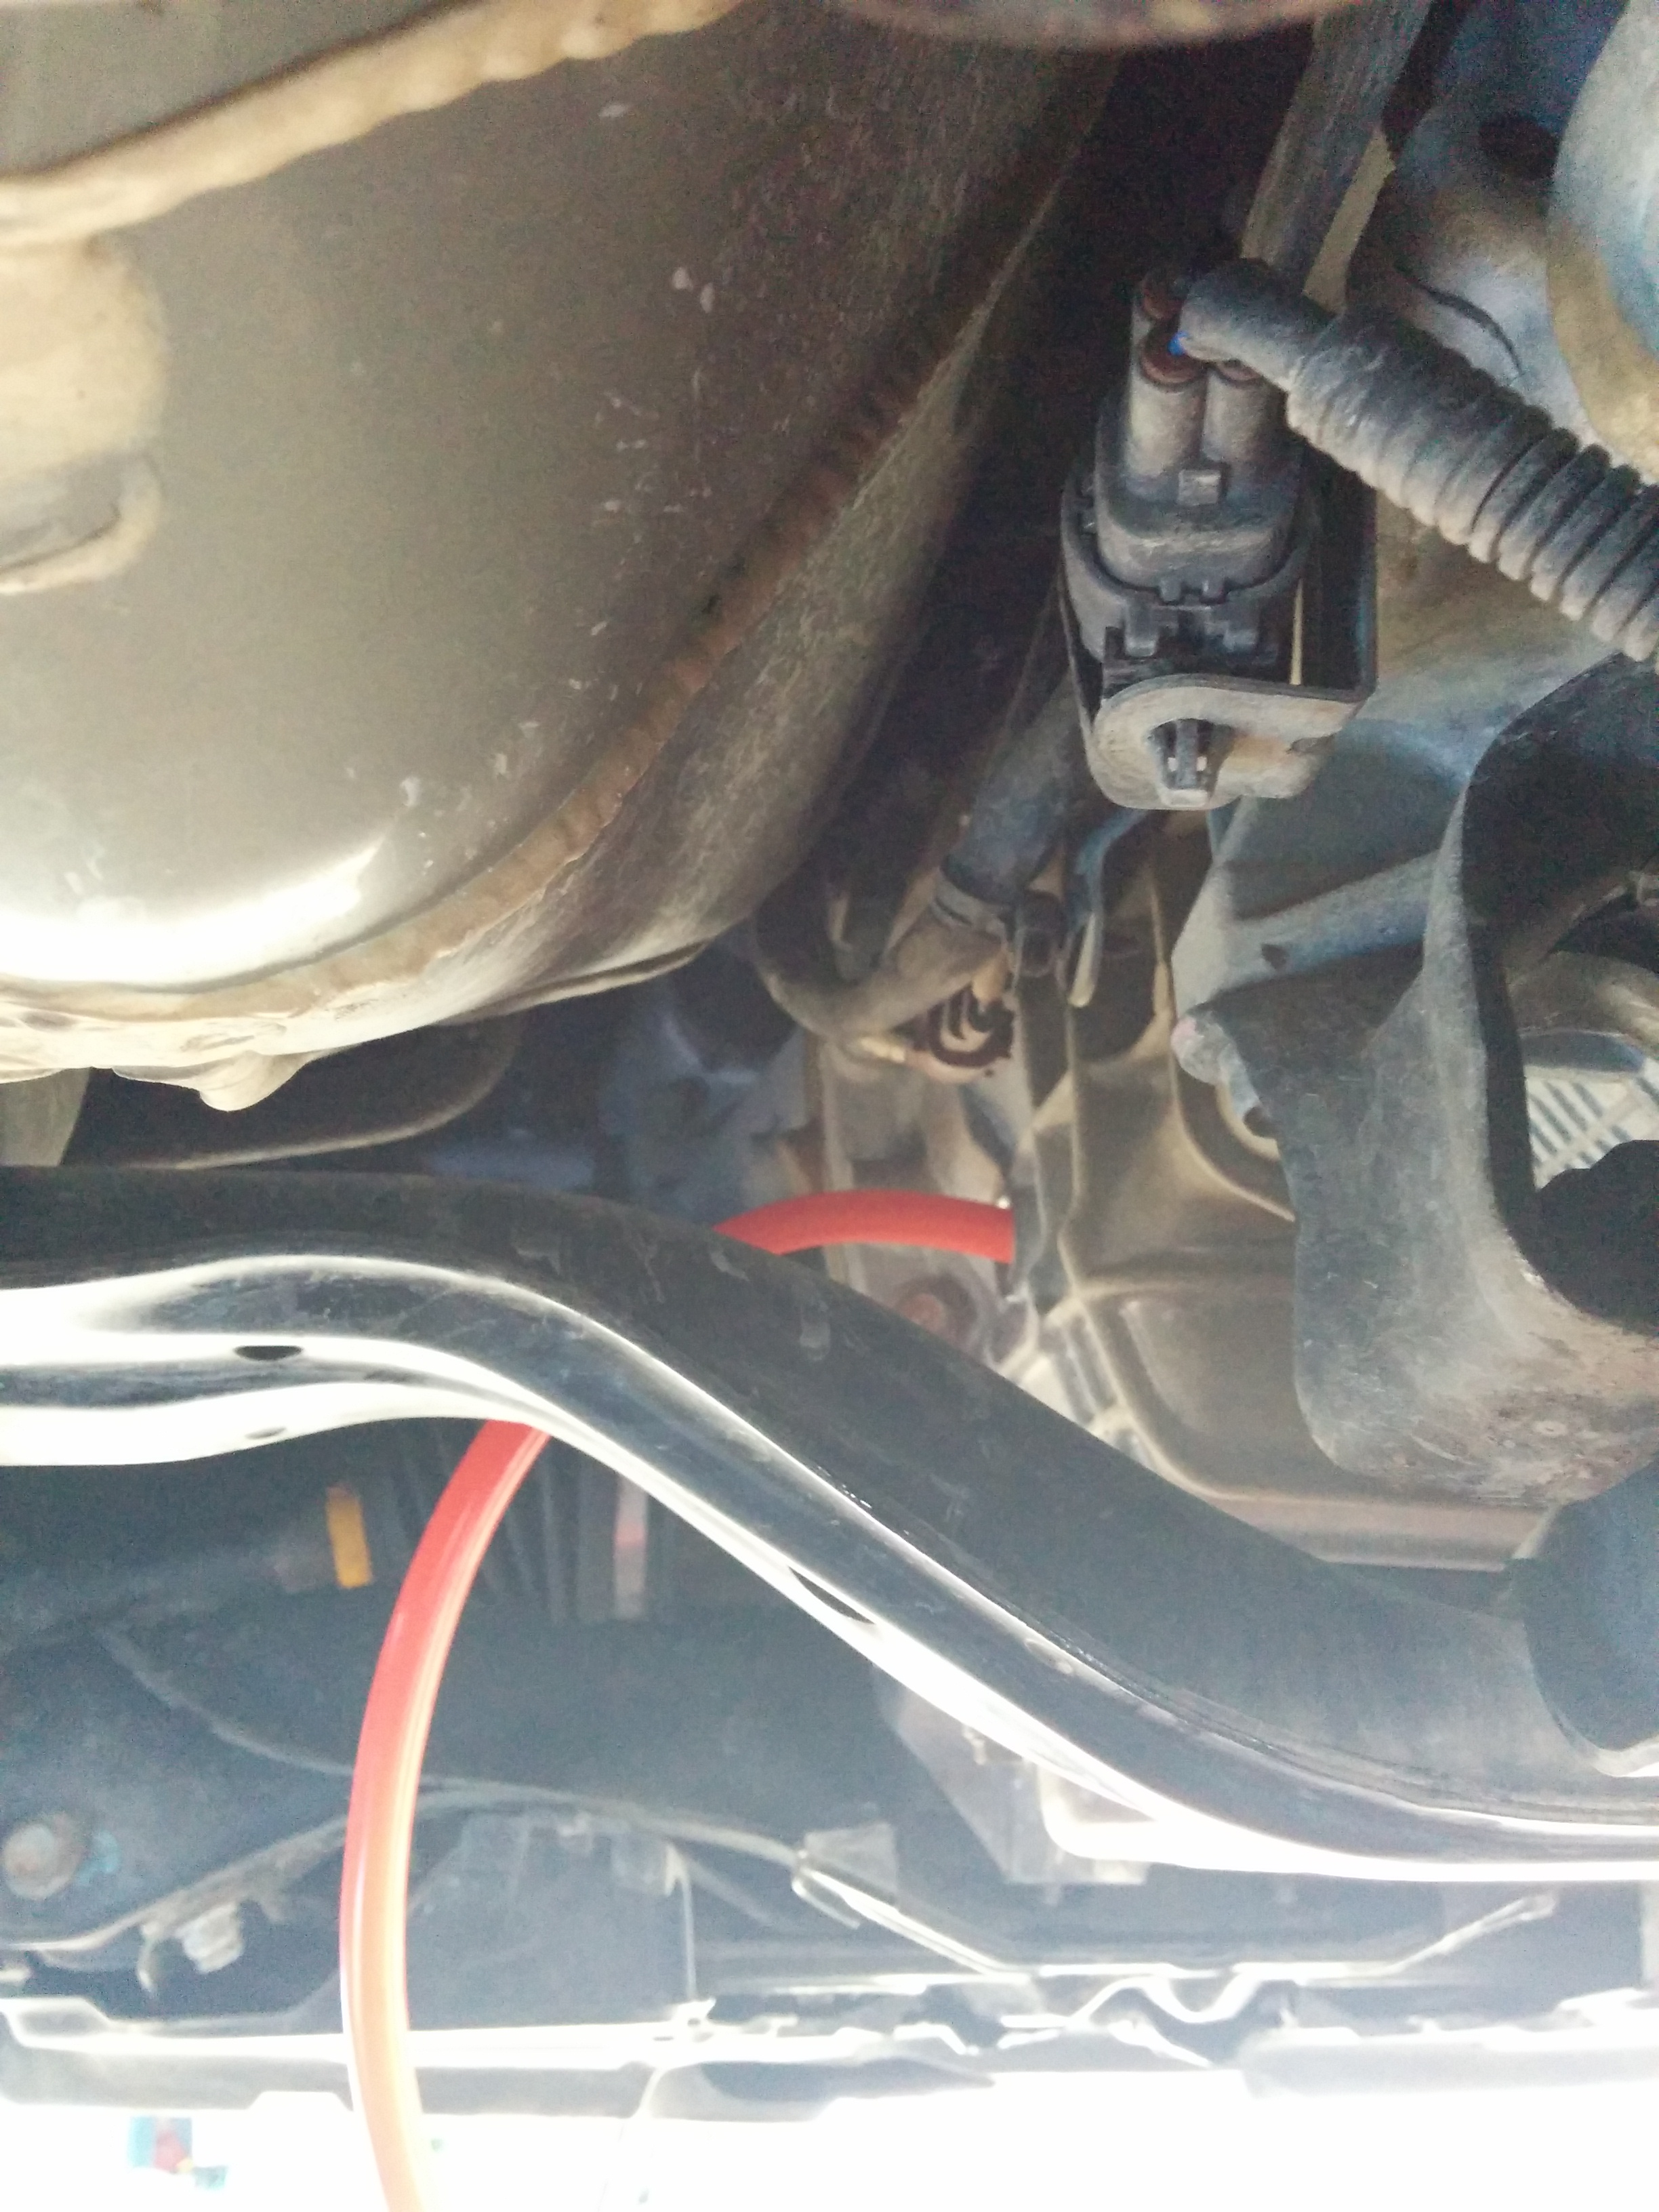
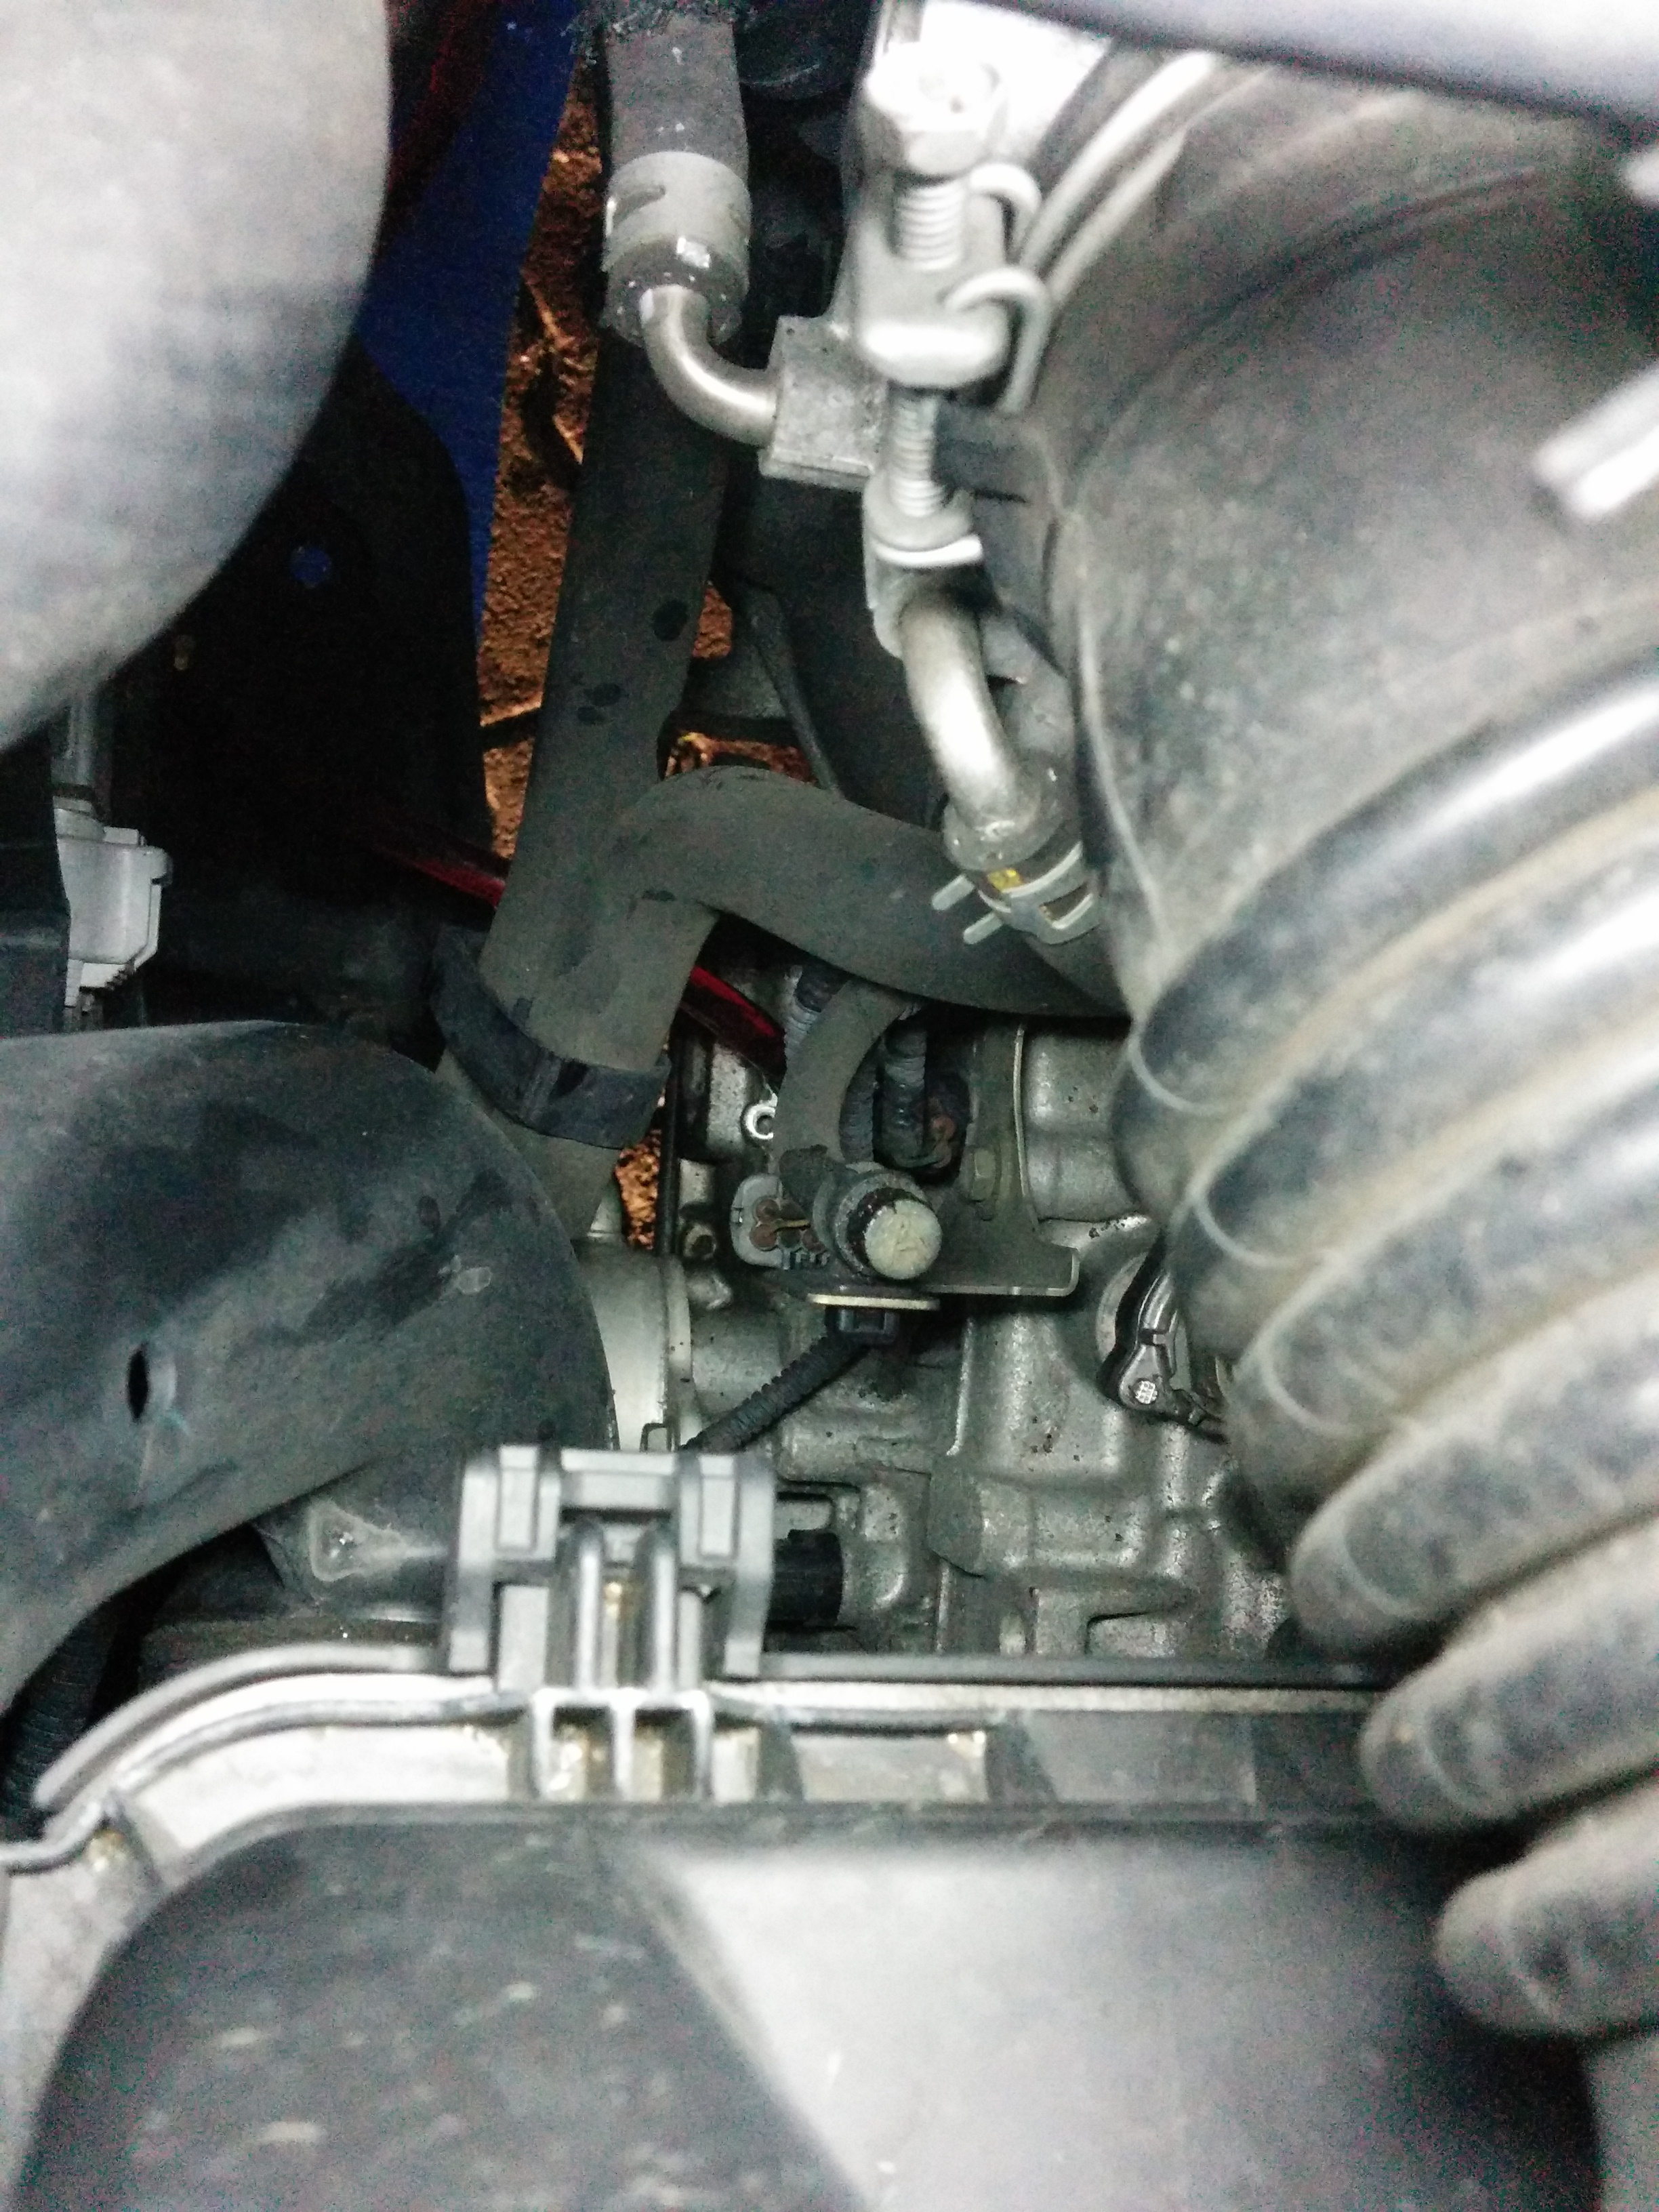
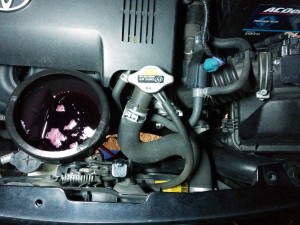
The filler hole (in the centre of the picture, black flat oval plug) is located where the dipstick on normal auto will be, it is blocked by a plug held by a 10mm screw:
IMG_20150725_190136
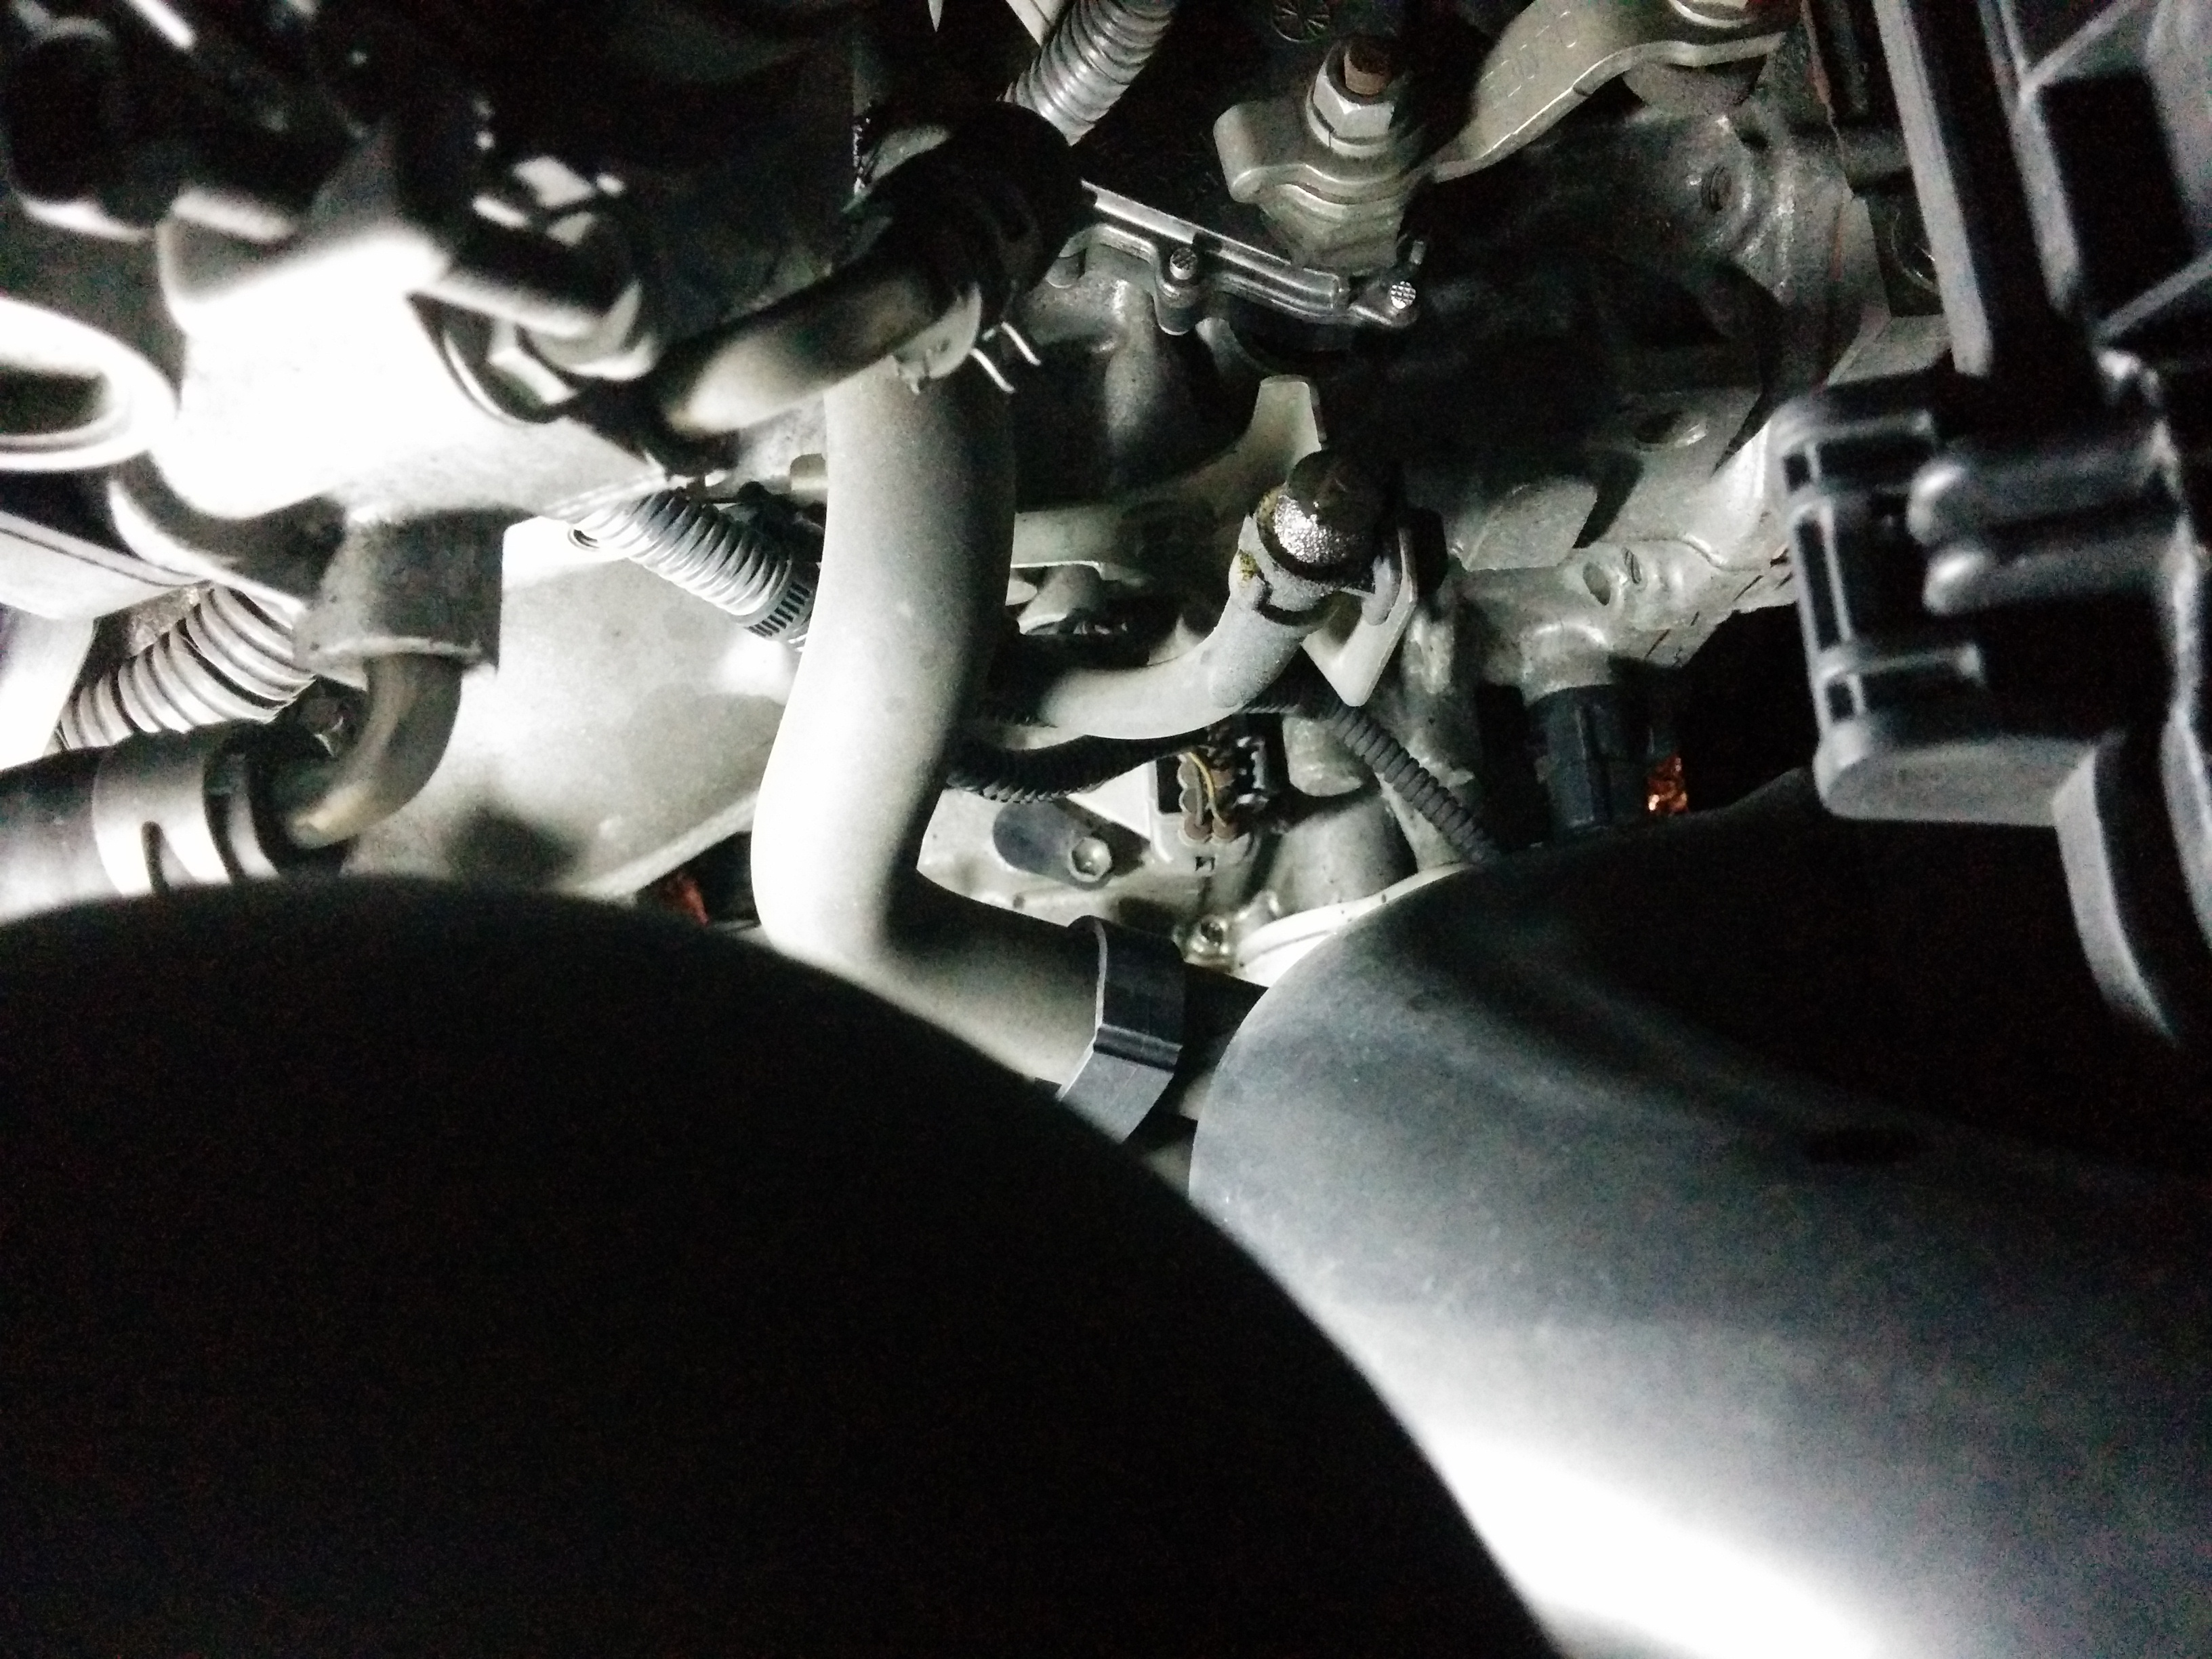
To find it just look down from throttle body, it will be just below the transmission breather, in midst of various plugs a next to oil cooler.

Here is the filler plug up close:
IMG_20150725_194519

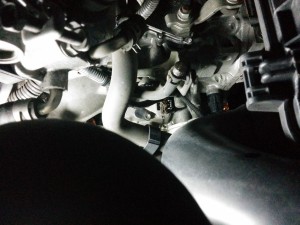
I used a funnel with a plastic hose to fill new oil:
IMG_20150725_194137

Here is another angle of the filler with tube in it:
IMG_20150725_194155

As interesting note to this exercise, one could retrofit dipstick from conventional auto, as well as to weld on a real sump plug, to make these changes easy enough (although they are not frequent enough to warrant such measures).